
Oracle 12c installation on AWS EC2 Instance
In this article we will come to know how to install Oracle Software on AWS cloud.
I have an existing AWS Cloud account.
or
we can create a AWS account using below link
https://portal.aws.amazon.com/gp/aws/developer/registration/index.html
There I going to choose particular Region called N.California.

In order install Oracle software on AWS Cloud we need to create instance on AWS.
How to create Instance ?
After choosing Region
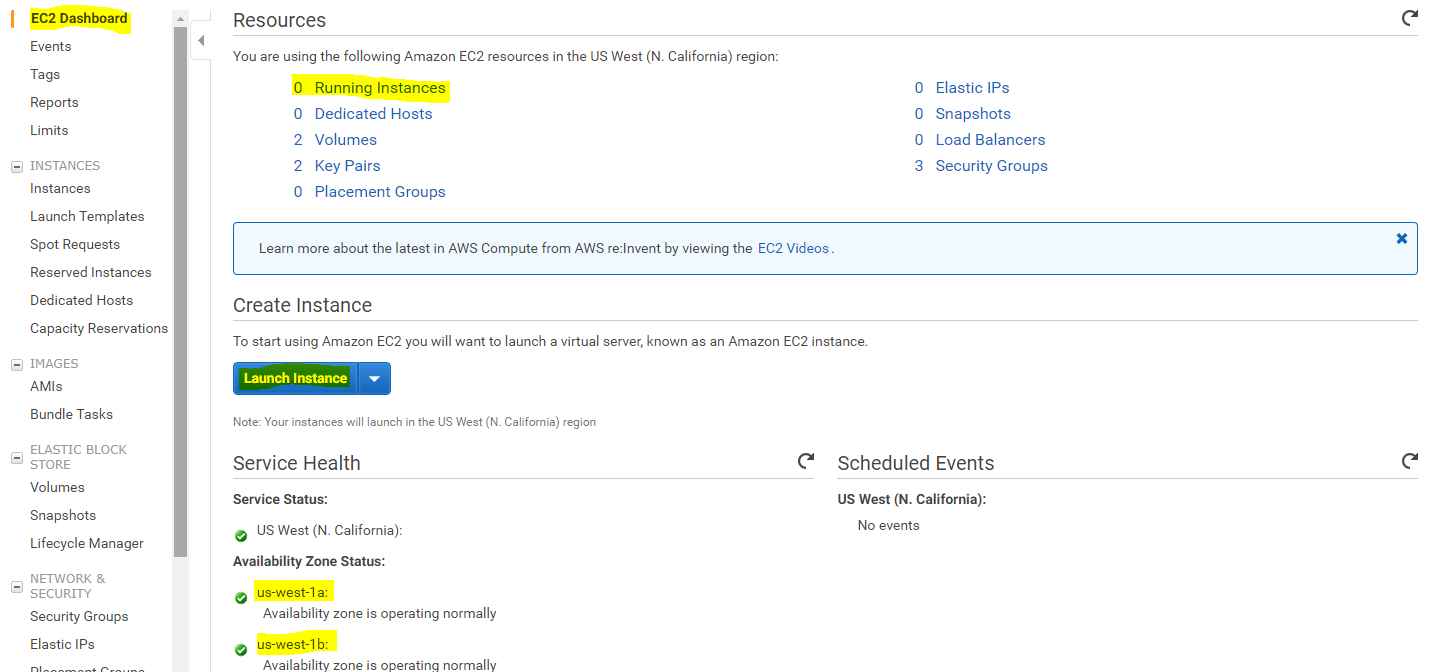
In Ec2 dashboard itself we have Launch Instance Option .
In Ec2 Dashboard we can see how many instances are running .
There are two availability zones N.California Region .They are
1.us-west-a1
2.us-west -1b
Click on Launch Instance
After Clicking on Launch Instance will get totally Seven steps
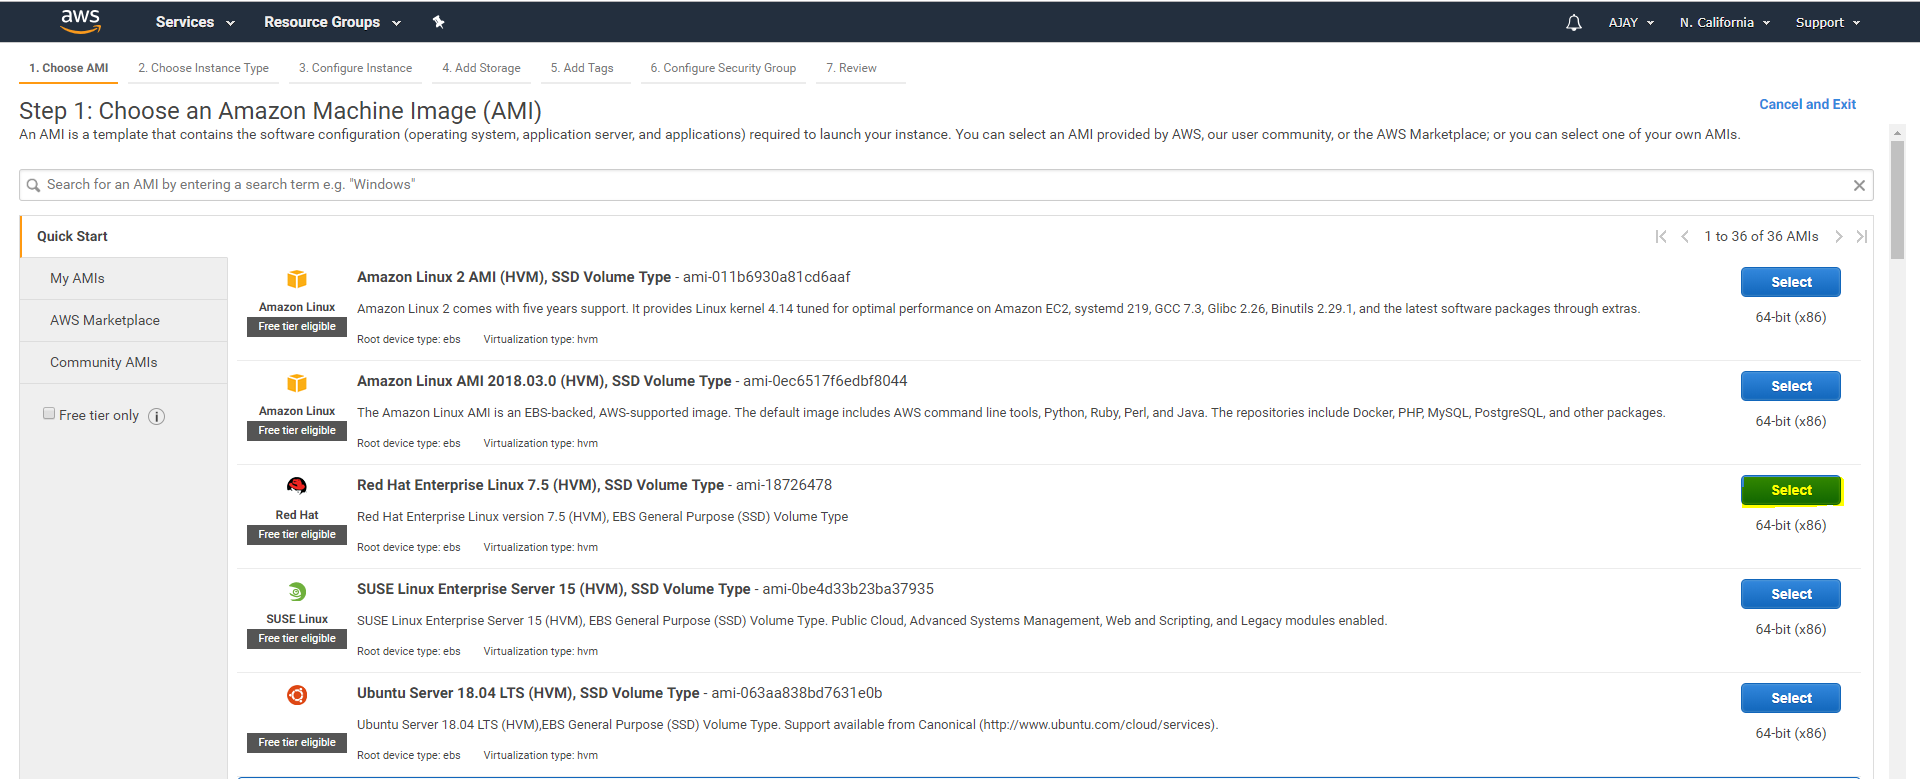
Step :1
Need to choose which operating system need to install.
By default AWS have Amazon machine Images(AMI’s).
AMI are the templates that contains operating system software .
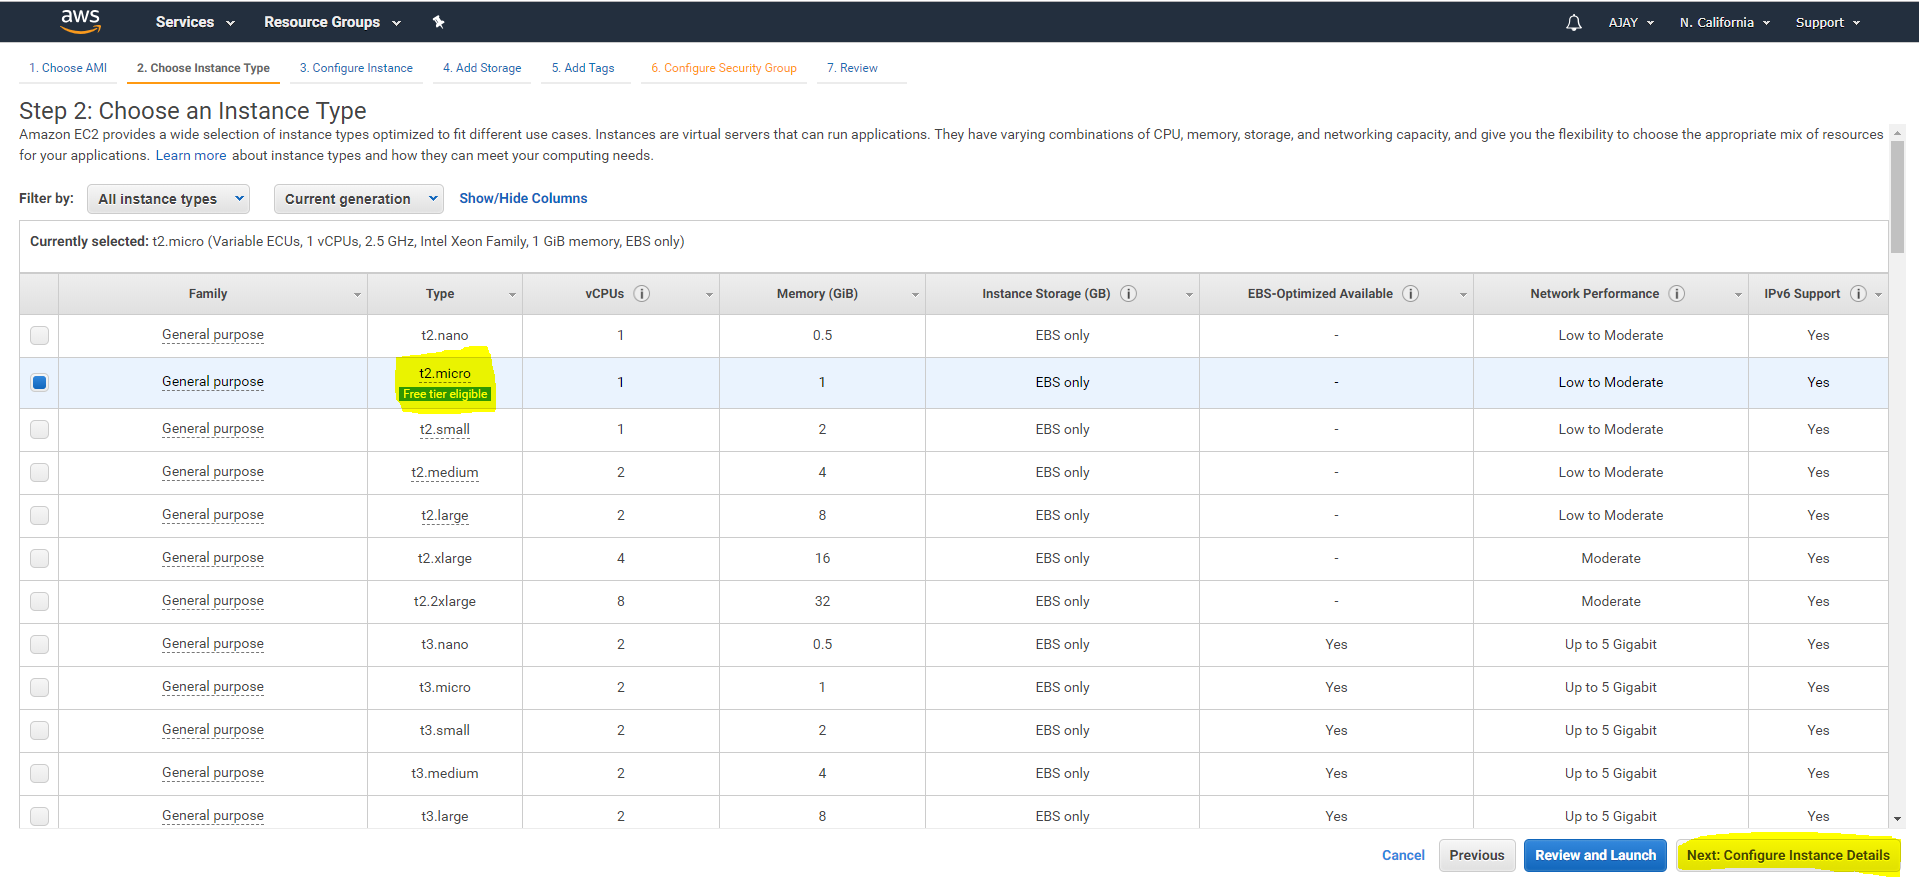
Step 2 :
Choose an Instance type
There are different types of Instances like t2.nano, t2.micro,t2.small,t2.medium etc..,,
need to choose how many CPU’s,Processor,Memory
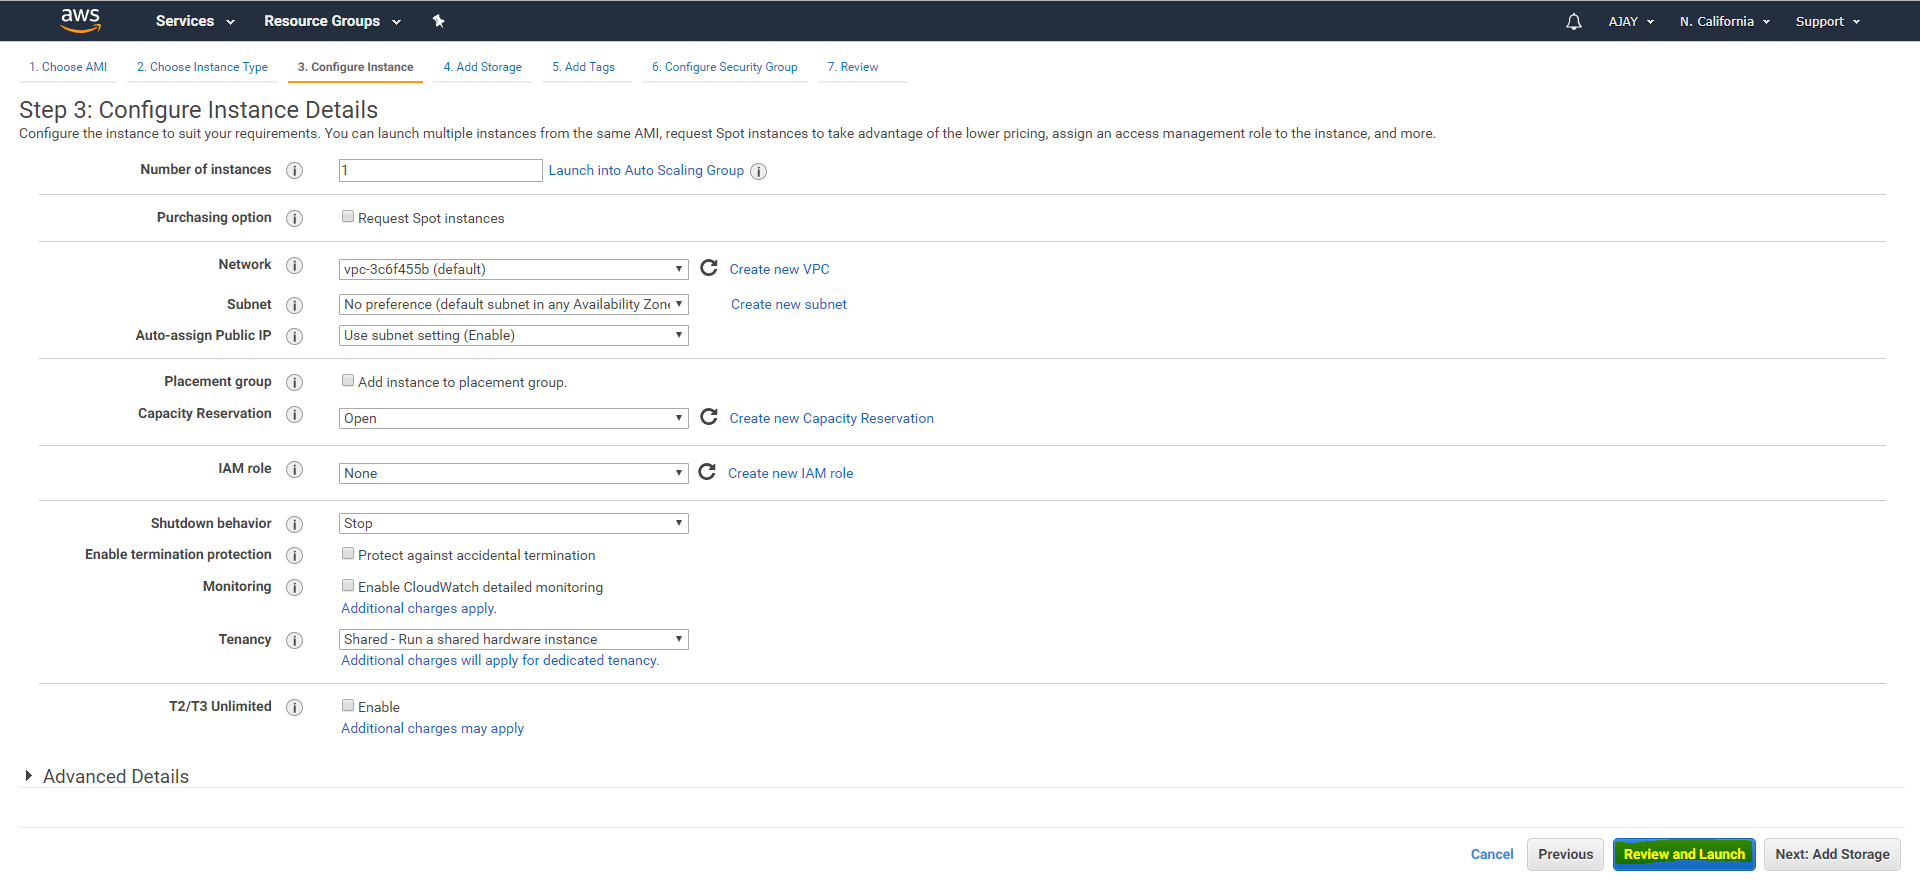
Step 3 :
Configure Instance
Need to choose number of instances to be launched .
We can set in which availability zone instance to be created
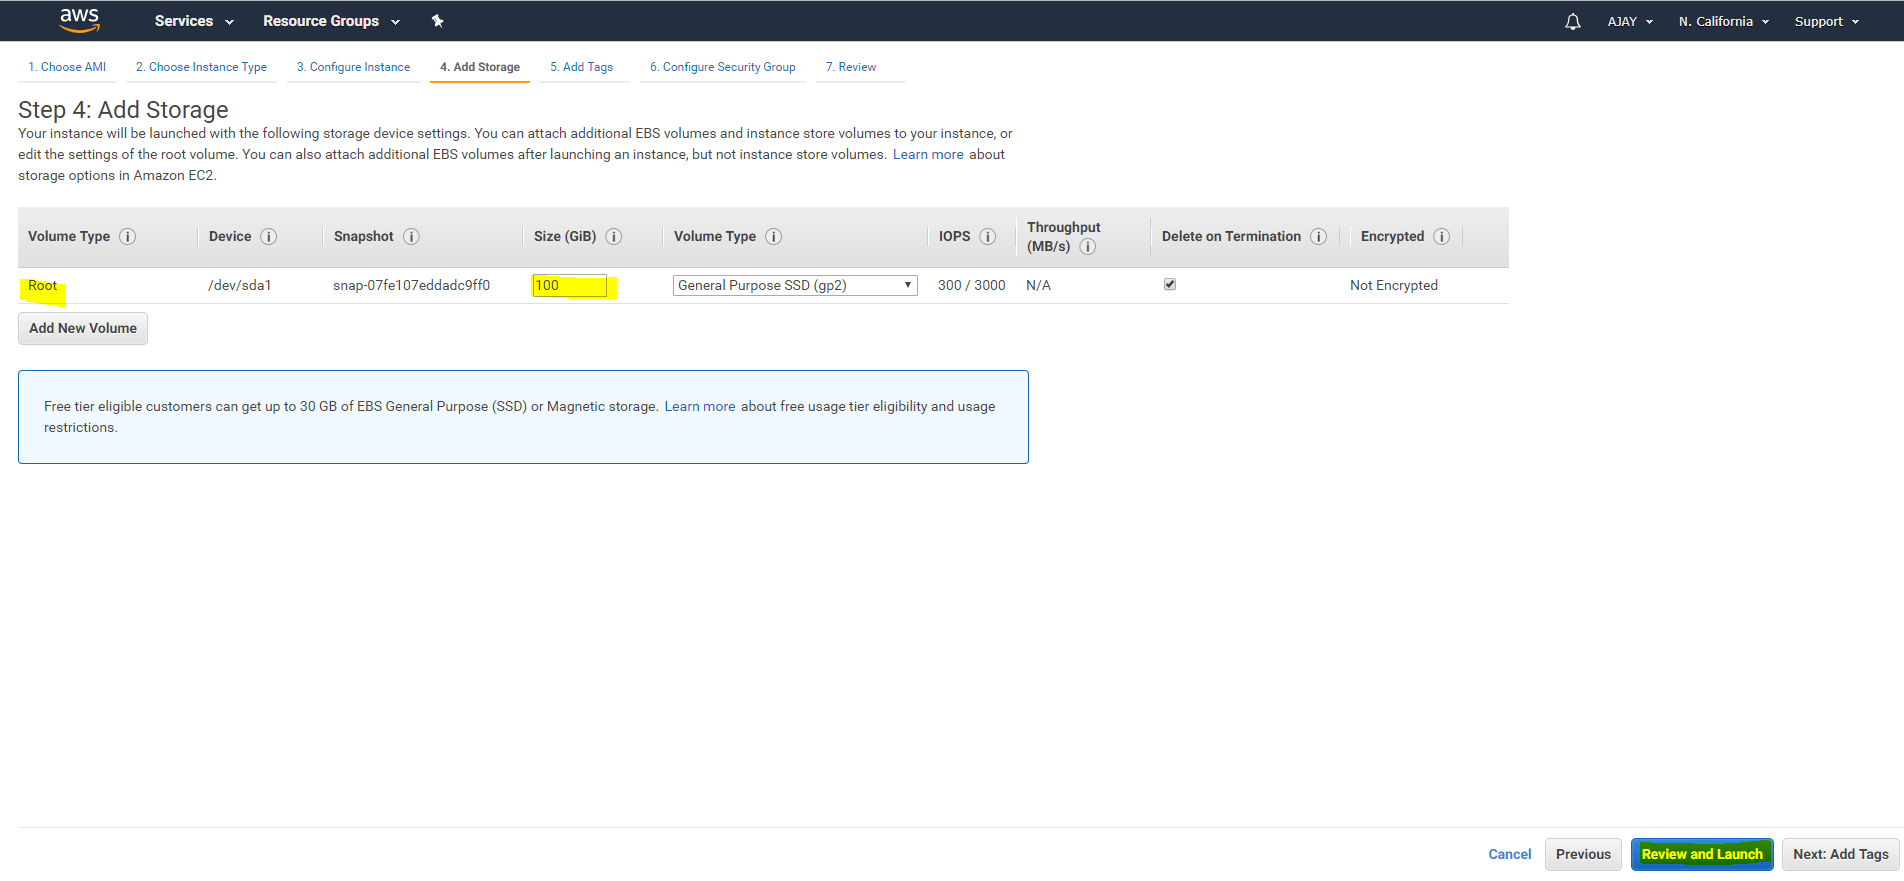
 Step 4:
Add Storage
we can multiple storage’s by adding volumes
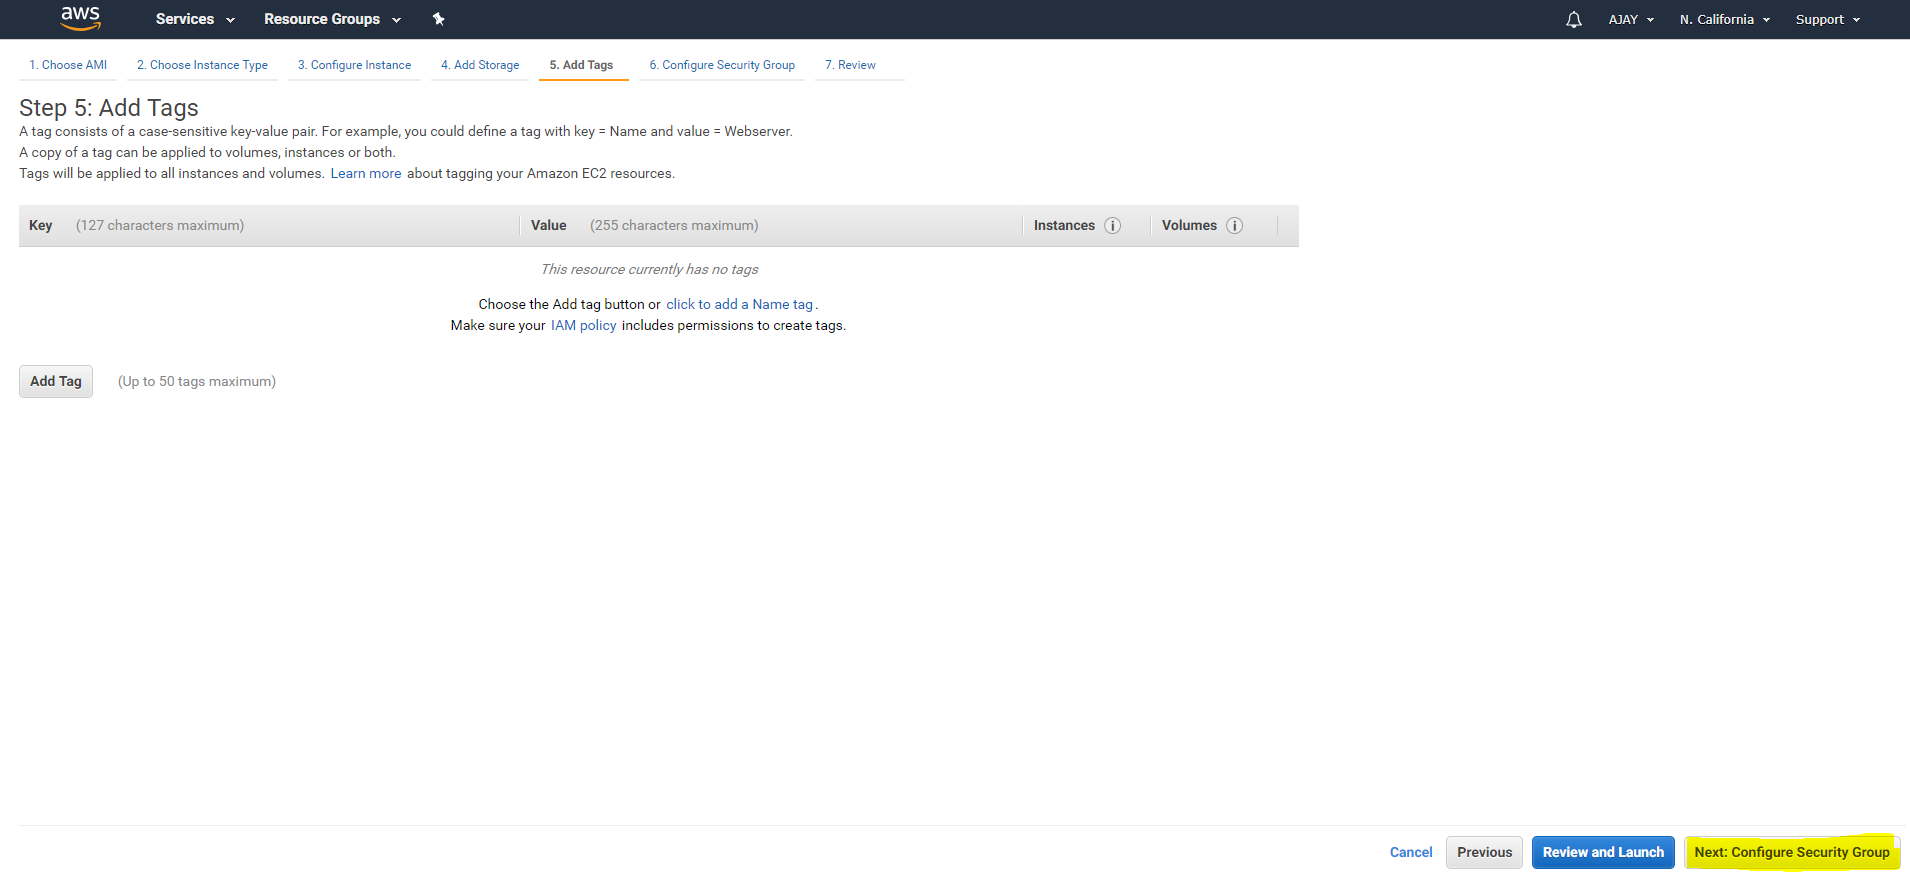
Step 5 :
Add Tags
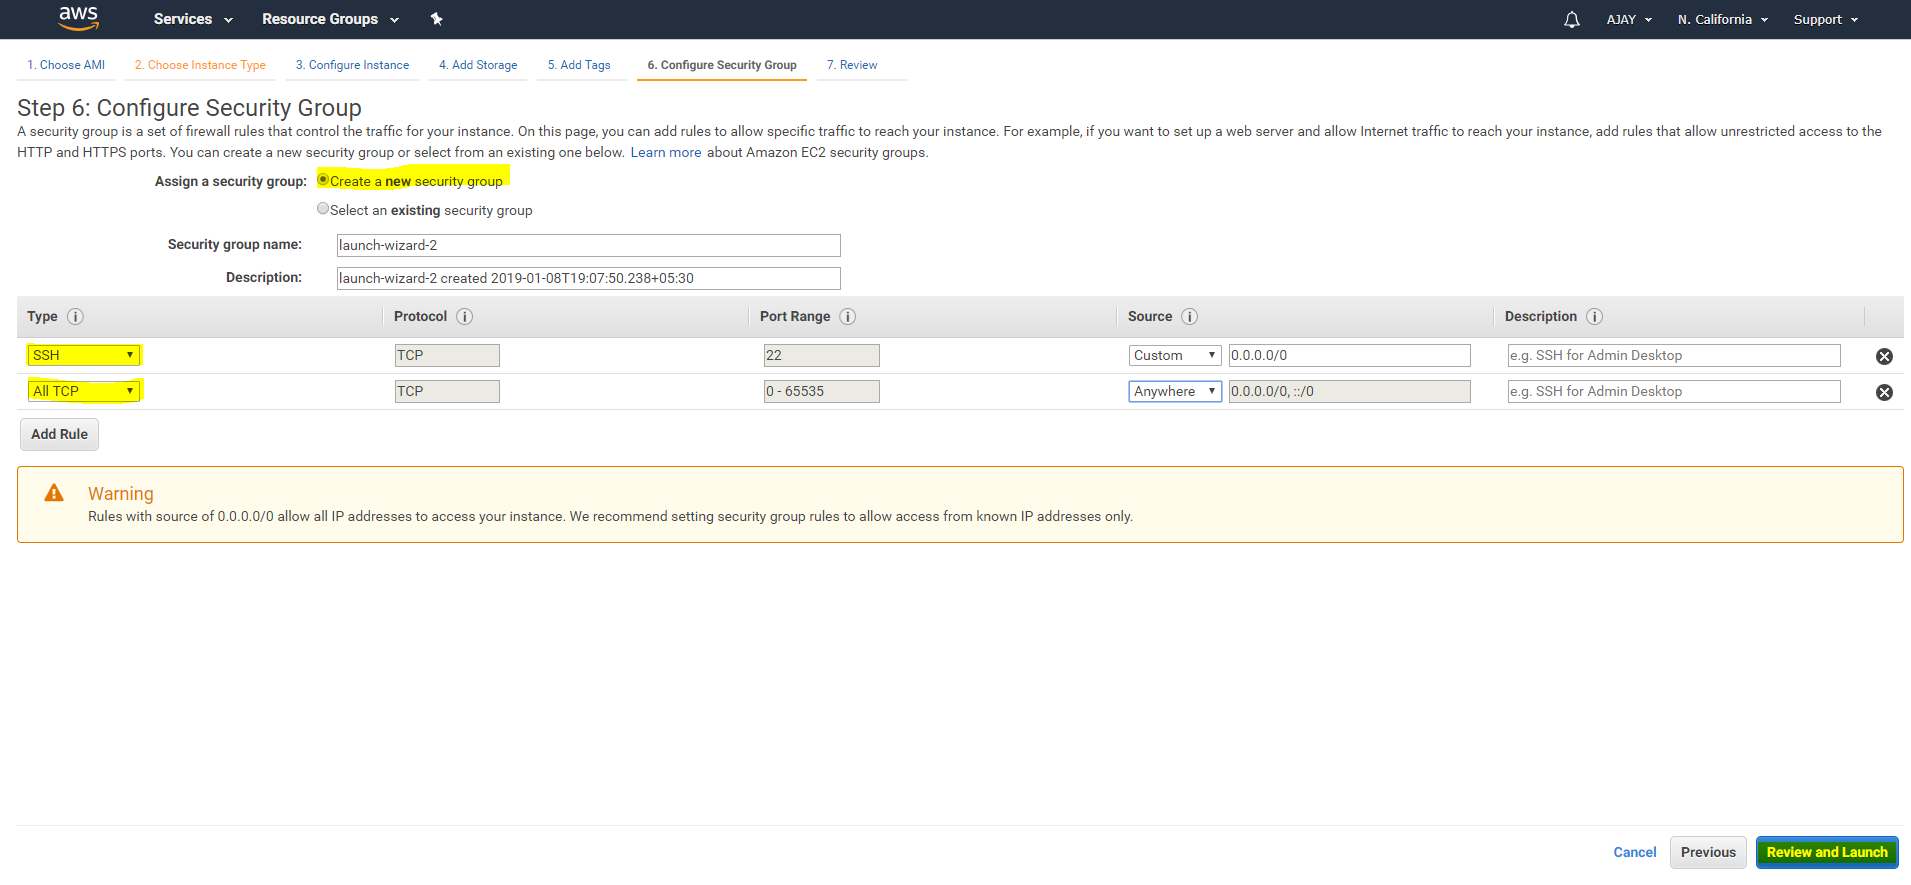
Step 6 :
Configure Security Group
Either we can create new security group with required connections or we can add existing security group to new instance.
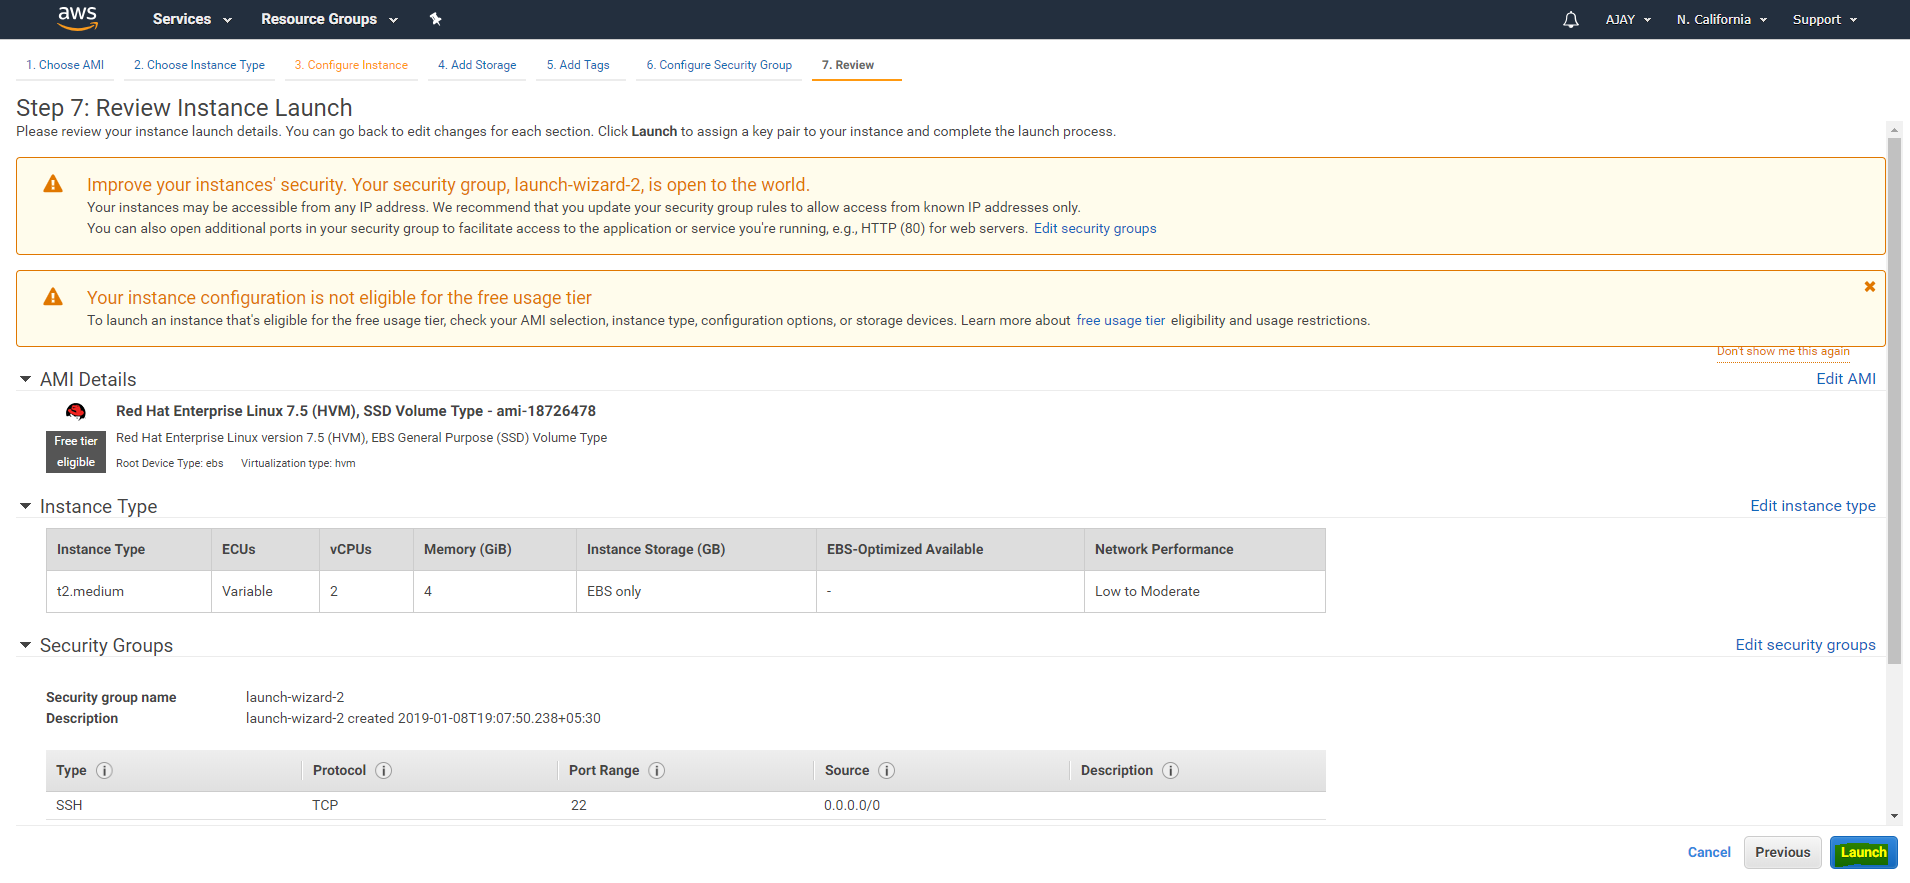
Step 7 :
Review
Review our settings and click on Launch .
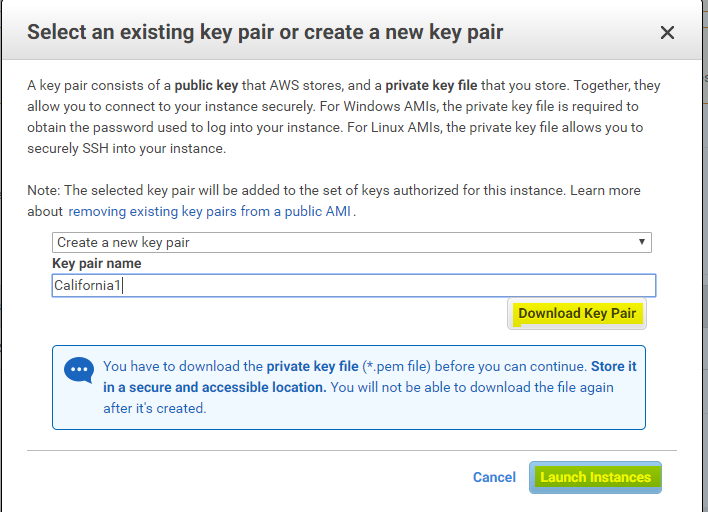
Once we clicked on Launch. It asks to to create New key pair.
we have two options here
If we have existing key pair we can use existing or we can create new key pair.
Click on Create a new key pair and write key pair name and download it.
Once we downloaded then click on Launch Instance.
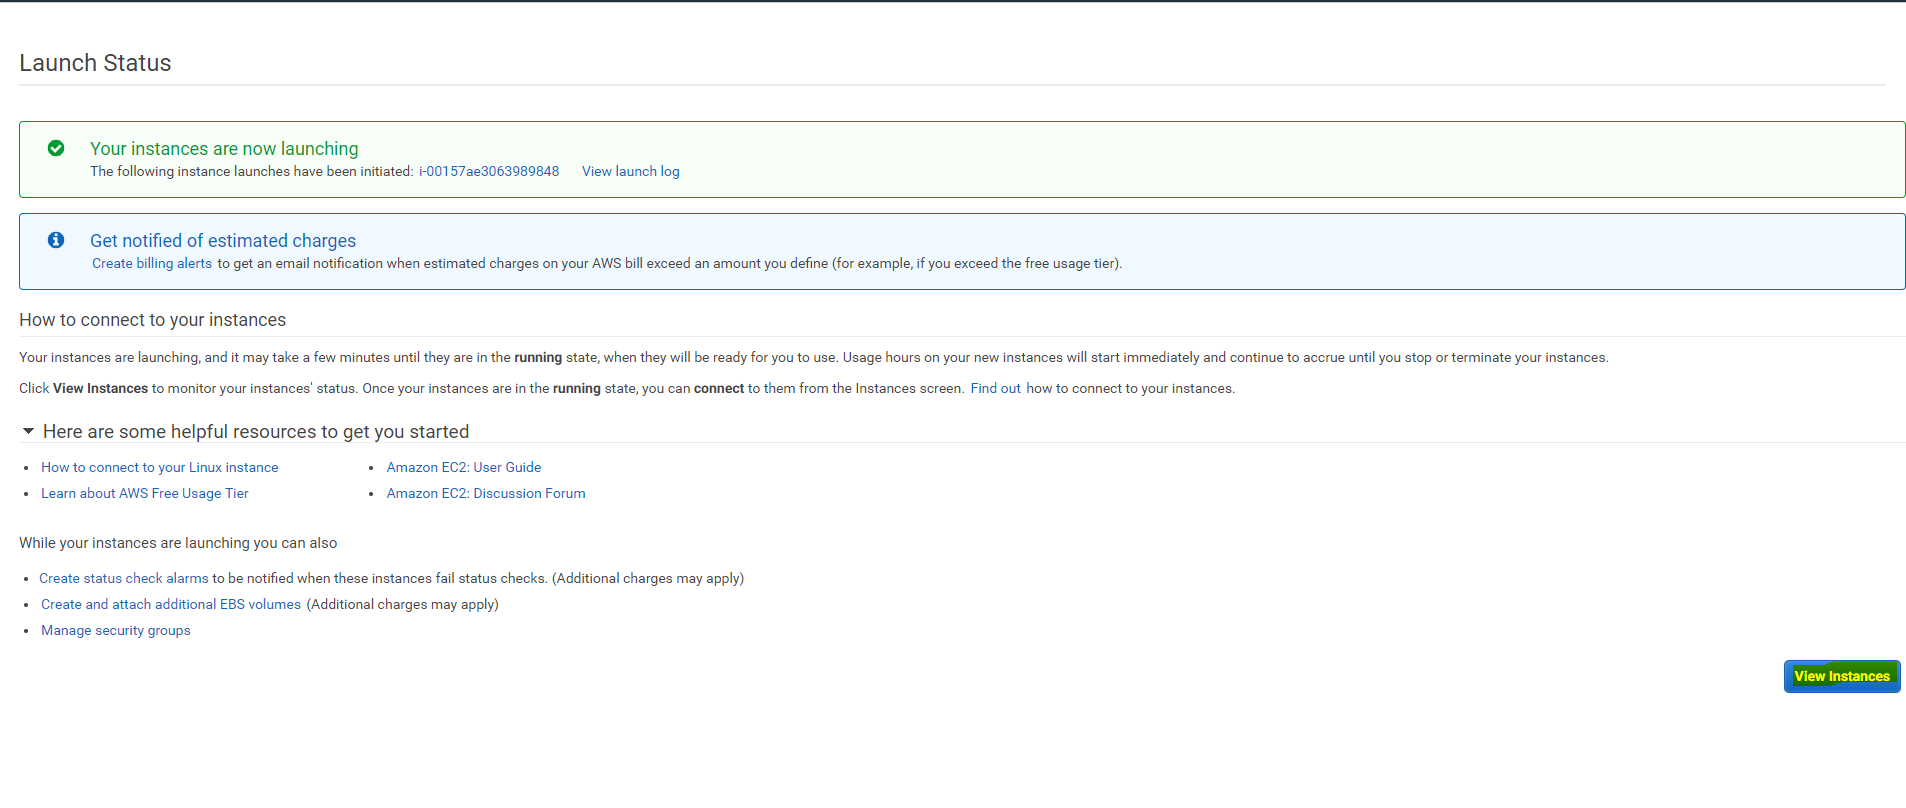
Once Instance launches will get below page .
Click on View Instances
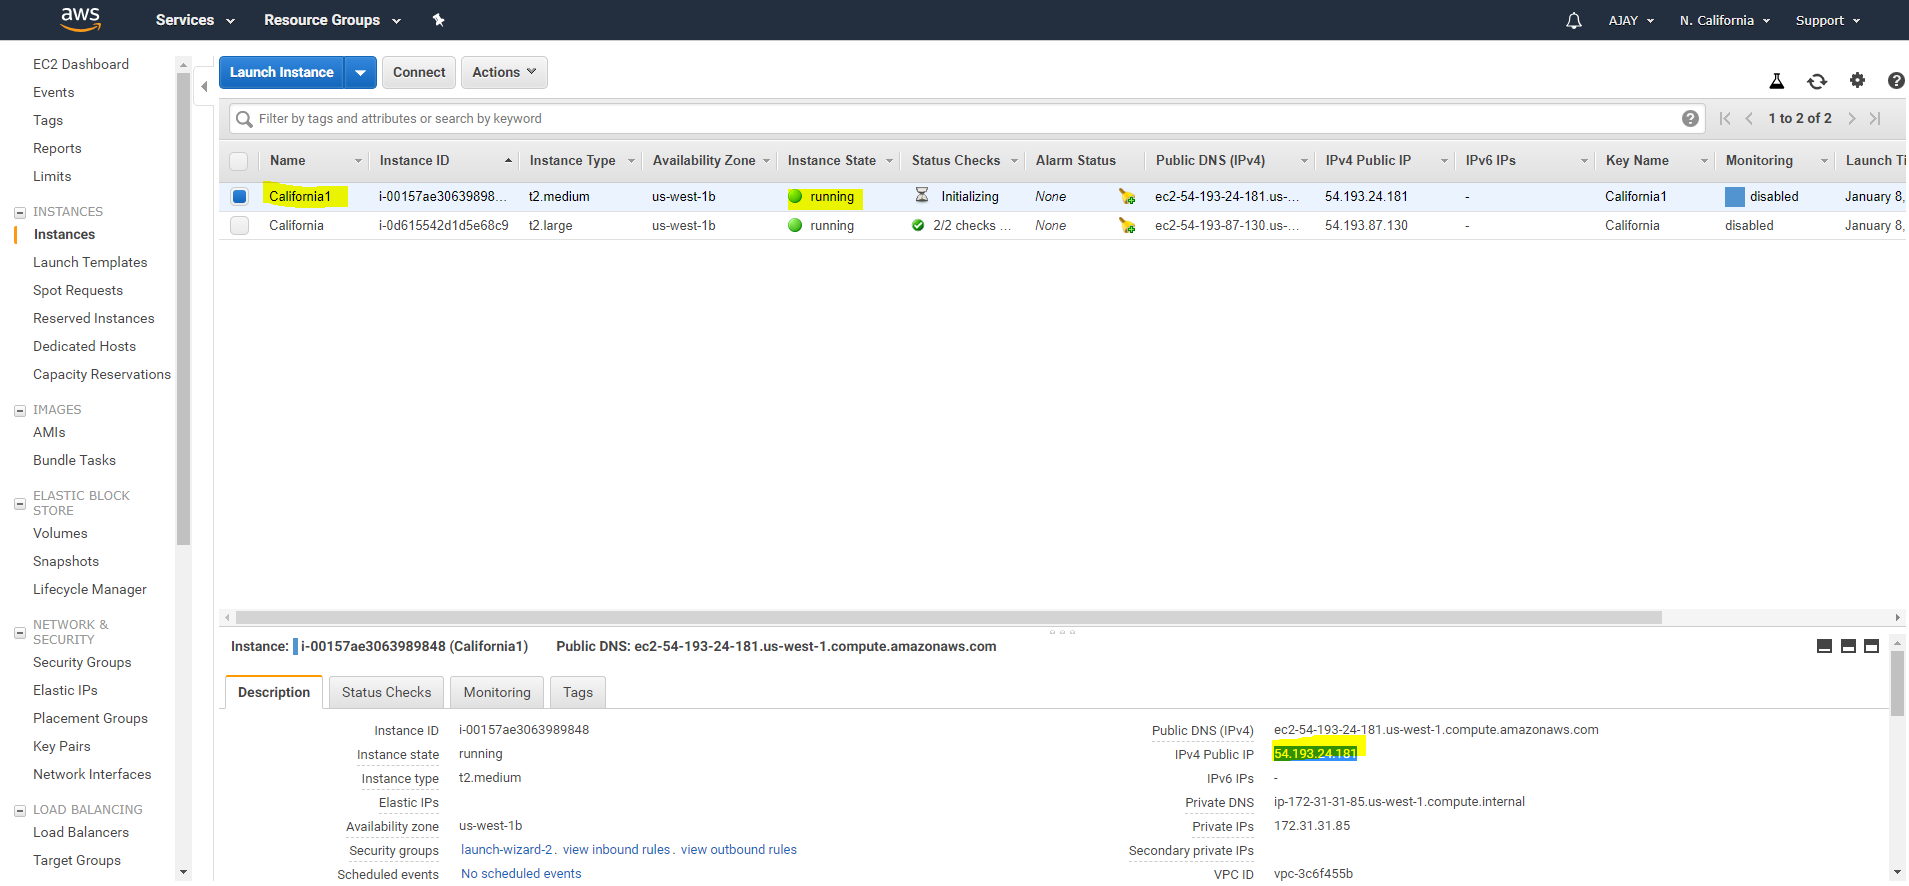
After clicking on View instances Console shows all the instances under N.California Region.
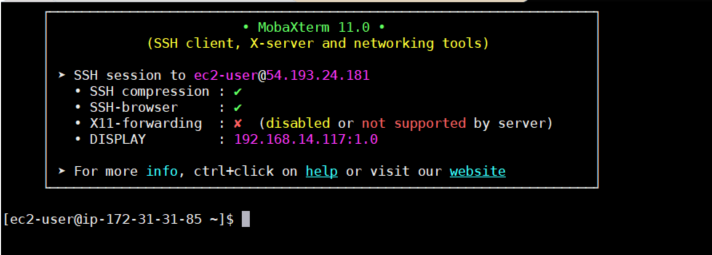
Get the Ip address and connect from Moba Xterm.
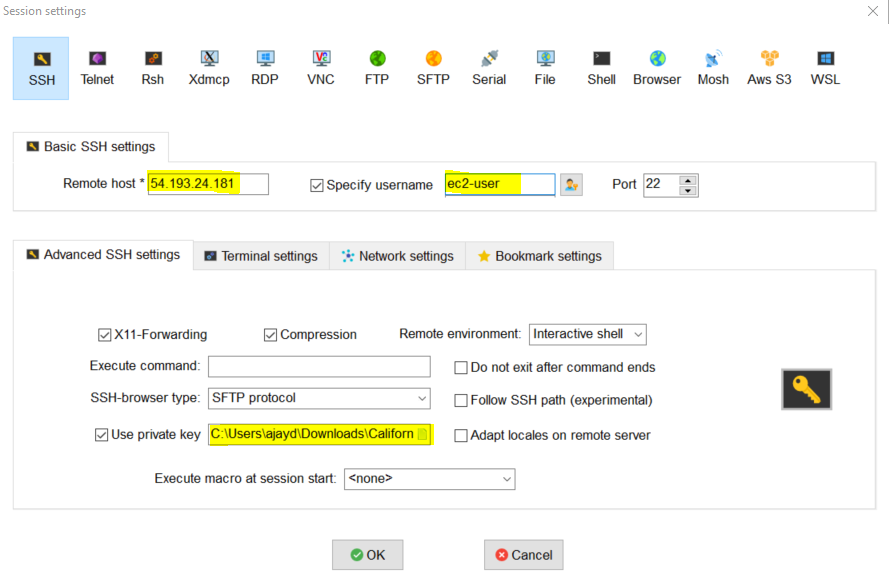
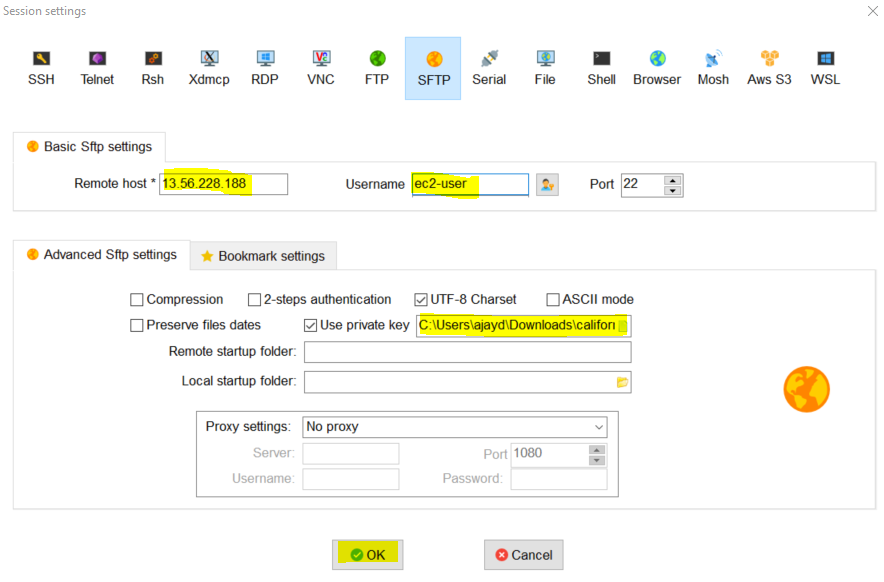
Open Moba Xterm and click on New session .
On SSH we need to write IP address username and should load Private key(PPK) .
Click on OK.
Moba Xterm will open below window.
By default RHEL have one cloud user called ec2-user.
Whenever we launch an instance we should update operating system using yum -y update .

We should create Required Groups and Users to install ORACLE SOFTWARE
|
1 2 3 4 5 |
[root@ip-172-31-1-33 ~]# groupadd dba [root@ip-172-31-1-33 ~]# groupadd oinstall [root@ip-172-31-1-33 ~]# useradd -G oinstall -g dba -d /home/oracle -m oracle [root@ip-172-31-1-33 ~]# mkdir -p /oraeng/app/oracle/product/12.1.0 [root@ip-172-31-1-33 ~]# mkdir -p /u01/oradata |
Permission to Users and Groups.
|
1 2 |
[root@ip-172-31-1-33 ~]# chown -R oracle:oinstall /oraeng/app/oracle/product/12.1.0 /u01/oradata [root@ip-172-31-1-33 ~]# chmod -R 777 /oraeng/app/oracle/product/12.1.0 /u01/oradata |
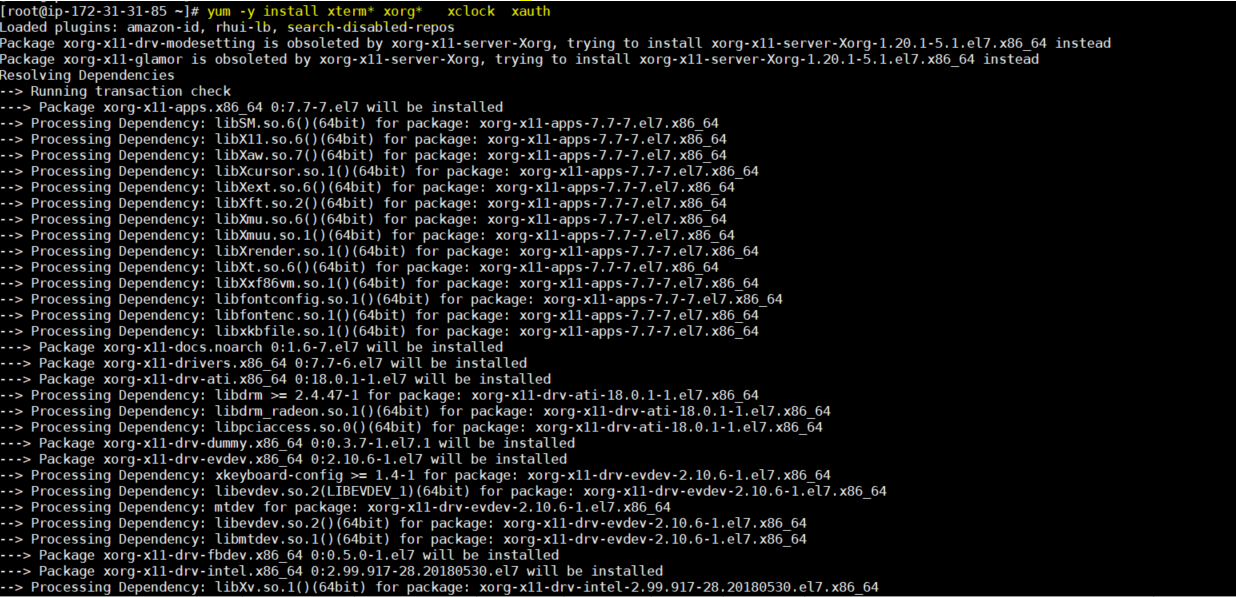
How to Enable XHOST + ?
We should Required packages to open GUI MODE.
|
1 |
yum -y install xterm* xorg* xclock xauth |
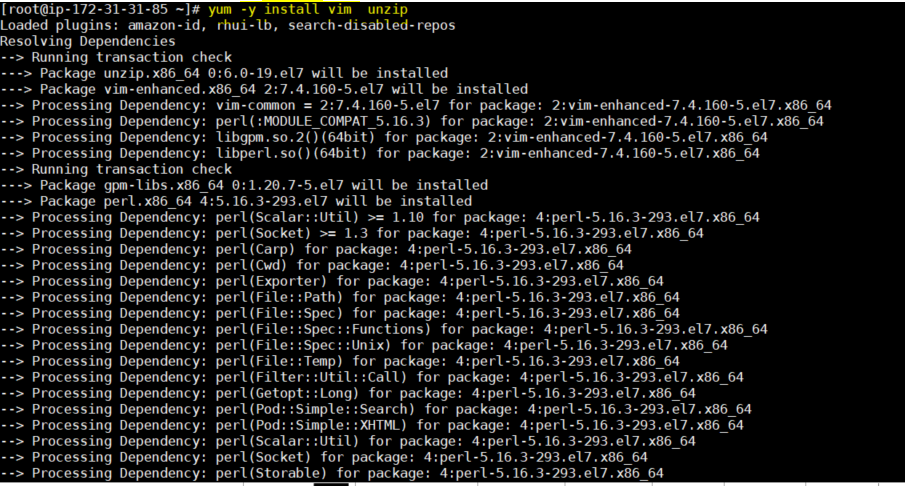
To Open files we are installing vim
To Unzip files we are installing unzip
|
1 |
yum -y install vim unzip |
Need restart the instance and then give xclock .
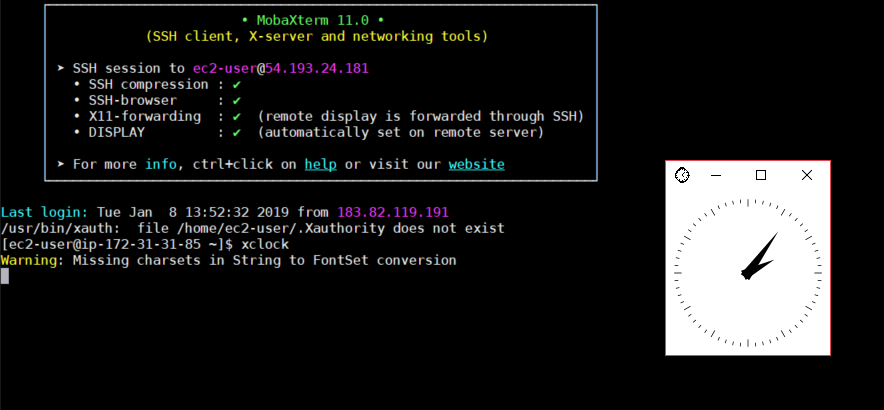
Yes GUI Mode is working.
We need set Swap Memory using following steps
If you don’t have any additional disks, you can create a file somewhere on your filesystem, and use that file for swap space.
The following dd command example creates a swap file with the name “myswapfile” under /root directory with a size of 1024MB (1GB).
|
1 2 3 4 5 6 |
# dd if=/dev/zero of=/root/myswapfile bs=1M count=1024 1024+0 records in 1024+0 records out # ls -l /root/myswapfile -rw-r--r-- 1 root root 1073741824 Aug 14 23:47 /root/myswapfile |
Change the permission of the swap file so that only root can access it.
|
1 |
# chmod 600 /root/myswapfile |
Make this file as a swap file using mkswap command.
|
1 2 |
# mkswap /root/myswapfile Setting up swapspace version 1, size = 1073737 kB |
Enable the newly created swapfile.
|
1 |
# swapon /root/myswapfile |
To make this swap file available as a swap area even after the reboot, add the following line to the /etc/fstab file.
|
1 2 |
# cat /etc/fstab /root/myswapfile swap swap defaults 0 0 |
Verify whether the newly created swap area is available for your use.
|
1 2 3 4 5 6 7 8 9 10 |
# swapon -s Filename Type Size Used Priority /dev/sda2 partition 4192956 0 -1 /root/myswapfile file 1048568 0 -2 # free -k total used free shared buffers cached Mem: 3082356 3022364 59992 0 52056 2646472 -/+ buffers/cache: 323836 2758520 Swap: 5241524 0 5241524 |
Add /tmp
|
1 |
[root@ip-172-31-46-195 ~]# sudo mount -t tmpfs -o size=544857600,mode=1777 overflow /tmp |
Note: In the output of swapon -s command, the Type column will say “file” if the swap space is created from a swap file.
If you don’t want to reboot to verify whether the system takes all the swap space mentioned in the /etc/fstab, you can do the following, which will disable and enable all the swap partition mentioned in the /etc/fstab.
|
1 2 |
[root@ip-172-31-1-33 ~]# vim /etc/fstab /tmp temp temp defaults 0 0 |
Copying Oracle Software files into AWS instance
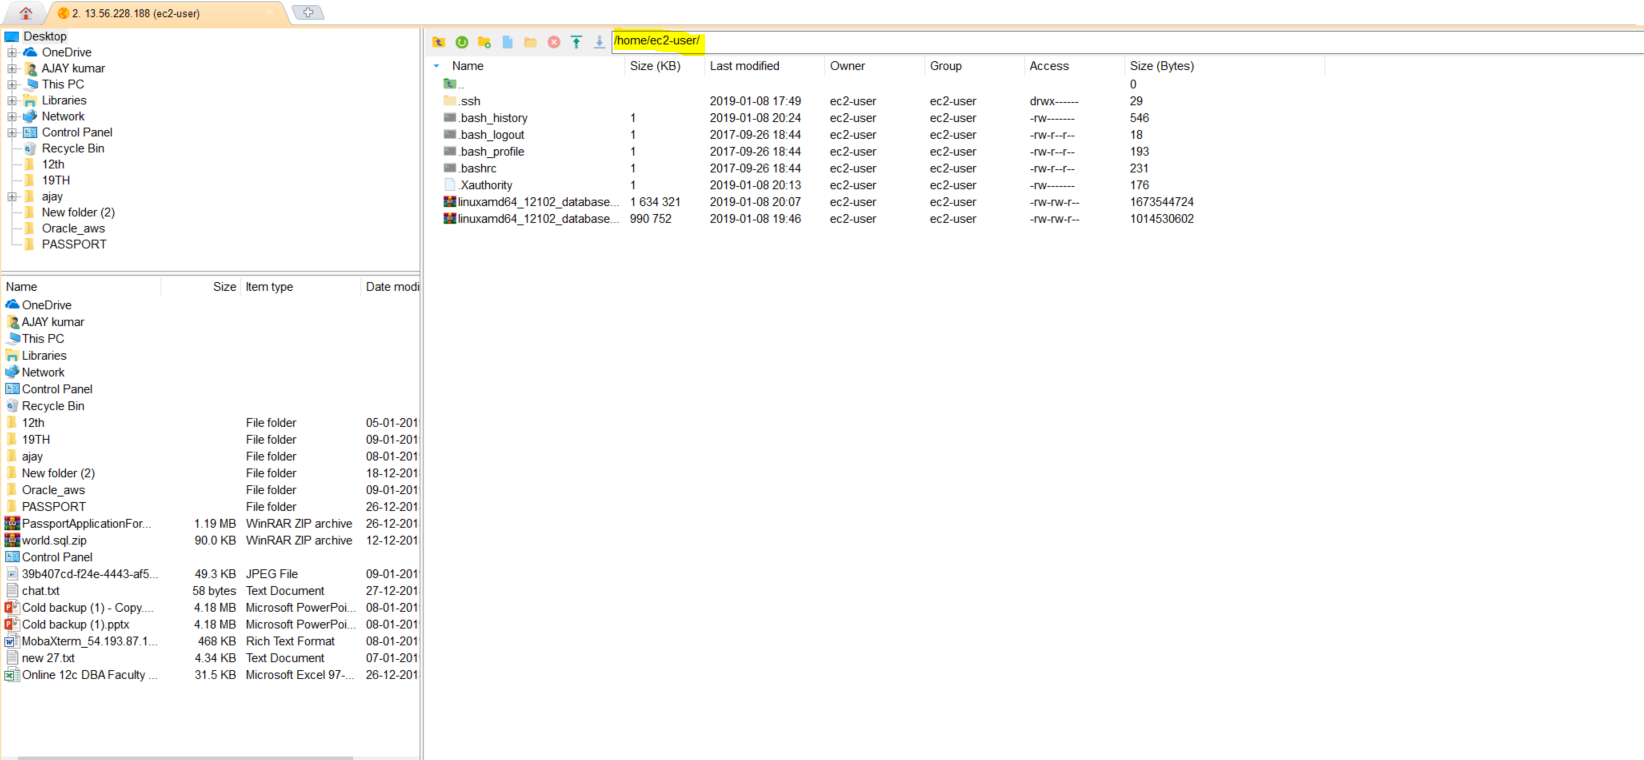
We can use Moba Xterm software to copy the files.
Using SFTP provide required credentials.
Once credentials success then MobaXterm will open following page .
From Below page we need to drag and drop the files.
Later connect to Oracle user and run the file ./runInstaller which is under database directory .
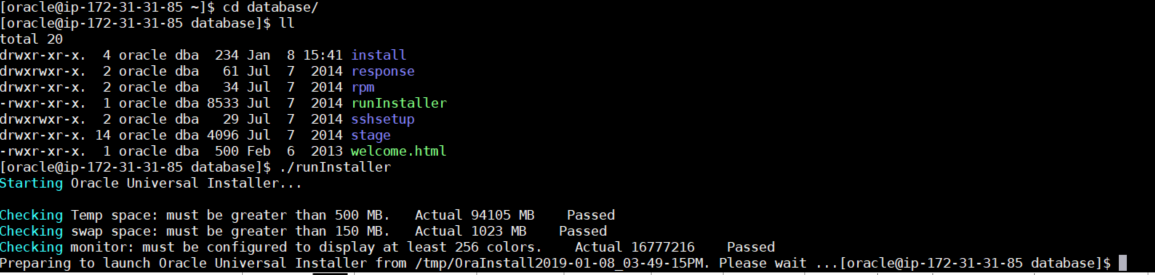
Automatically Oracle software will come up with GUI MODE.
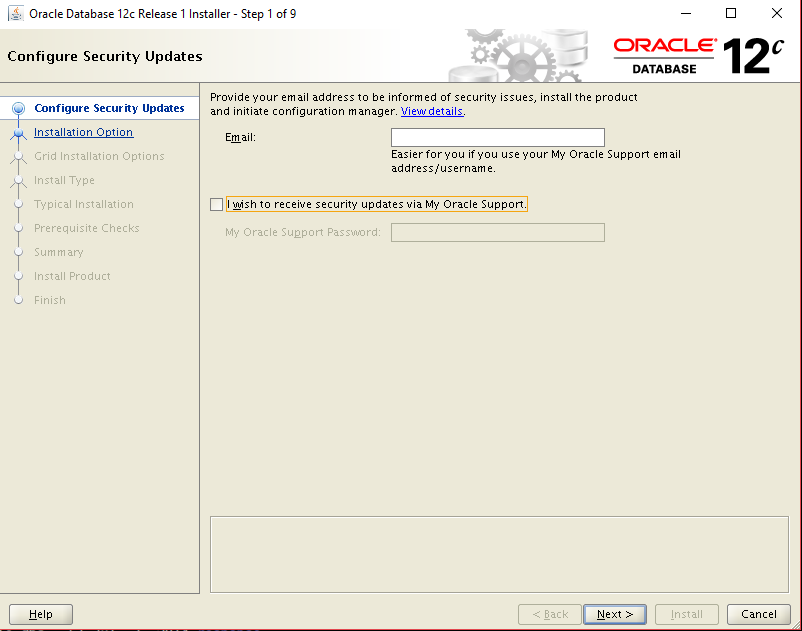
Step 1 :
Unclick on My Oracle Support
Step 2 :
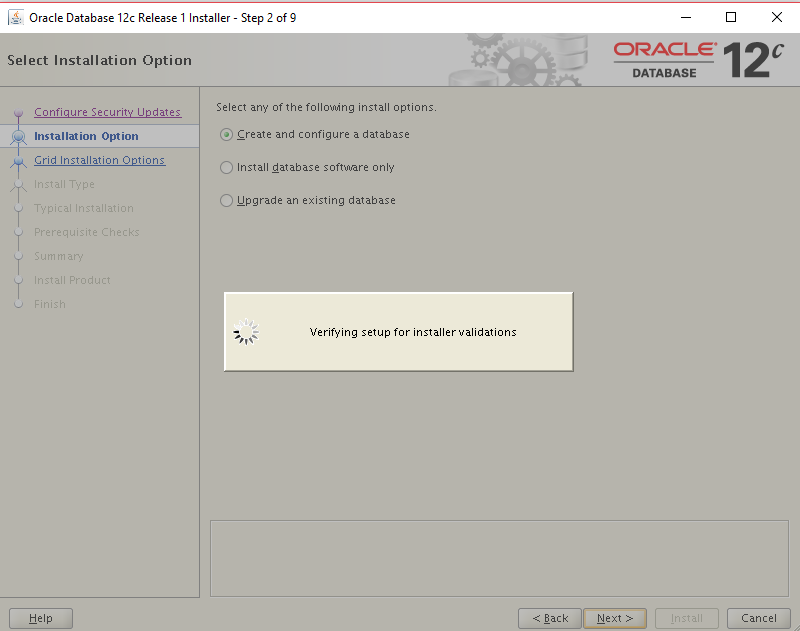
Click on Create and configure database .
Step 3 :
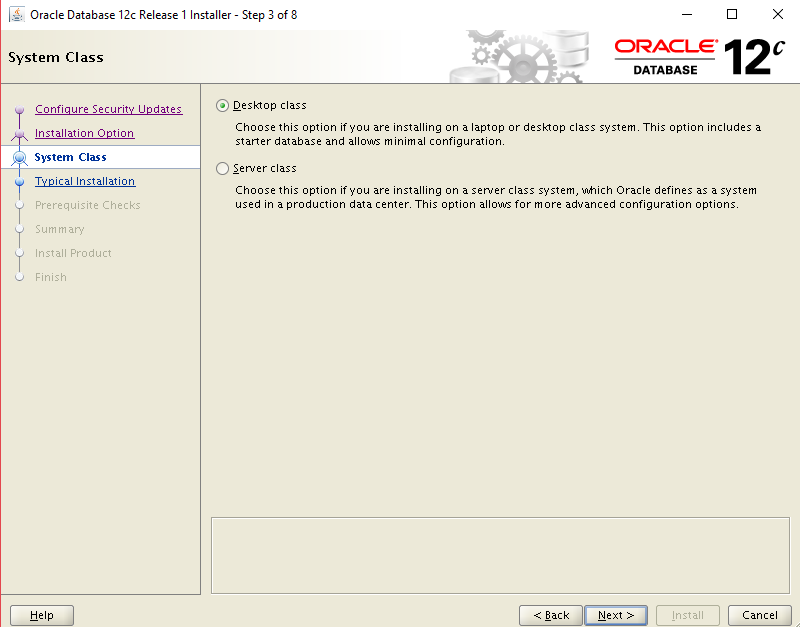
Choose Desktop class
Step 4 :
Fill up required locations to store software binaries.
Provide Administrative privileges.

Step 5 :
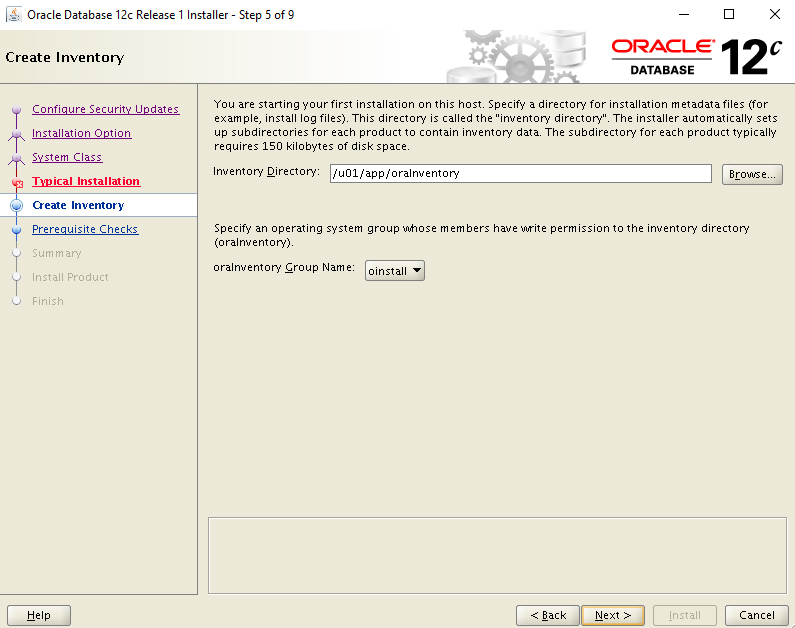
No need to change in Inventory locations.
Step 6 :
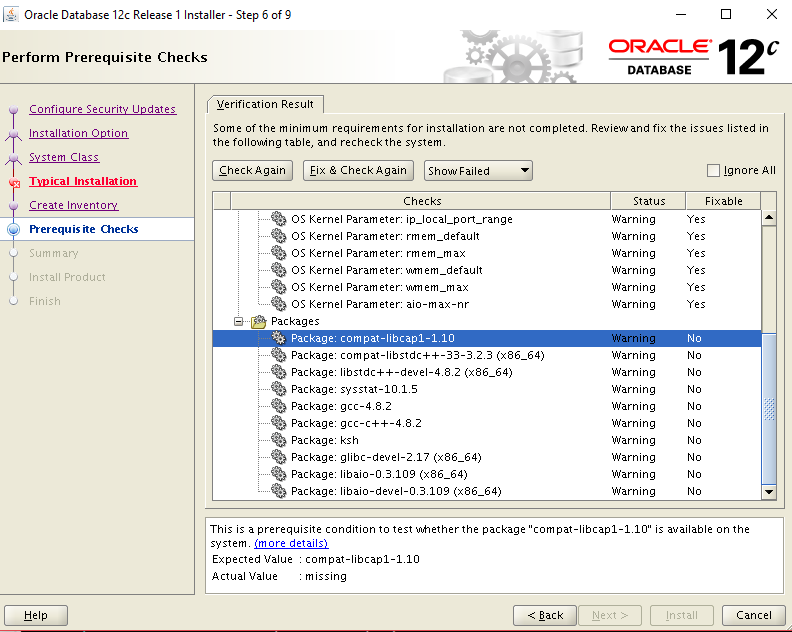
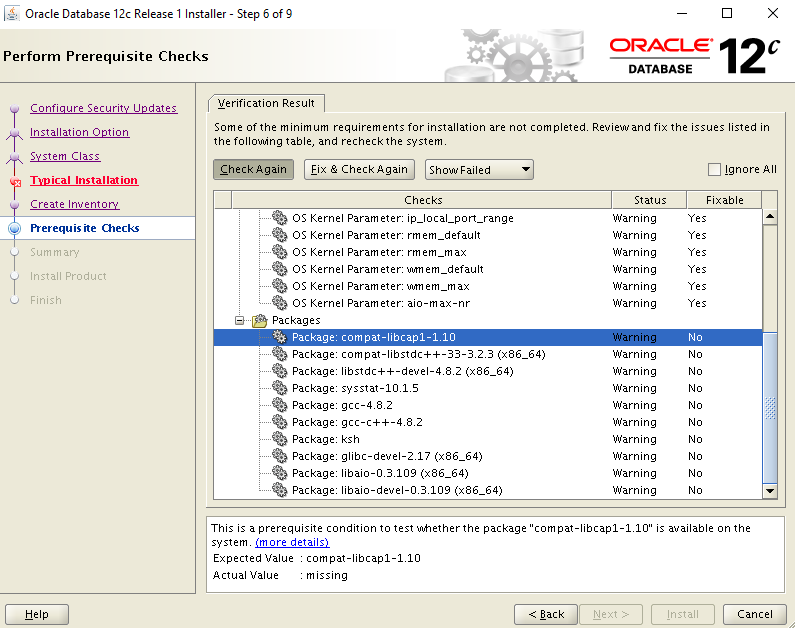
Oracle processes minimum installation and configuration requirements.

Step 7 :
Few packages will show warning and not fixable.
Step 8 :
Install required packages
|
1 2 3 4 5 6 7 |
[root@ip-172-31-27-29 ~]# yum install libstdc++-devel-33-3.2.3* [root@ip-172-31-27-29 ~]# yum install sysstat-10.1.5 [root@ip-172-31-27-29 ~]# yum install gcc* [root@ip-172-31-27-29 ~]# yum install ksh [root@ip-172-31-27-29 ~]# yum install glibc-devel-2.17 [root@ip-172-31-27-29 ~]# yum install libaio-devel* [root@ip-172-31-27-29 ~]# yum install compat-libcap1-1.10 |
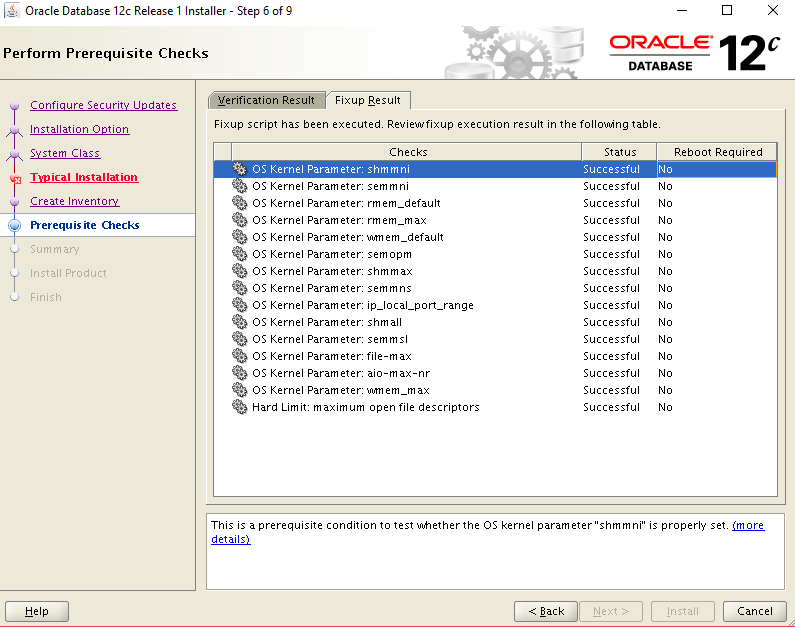
Step 9 :
Fix and check again
Step 10 :
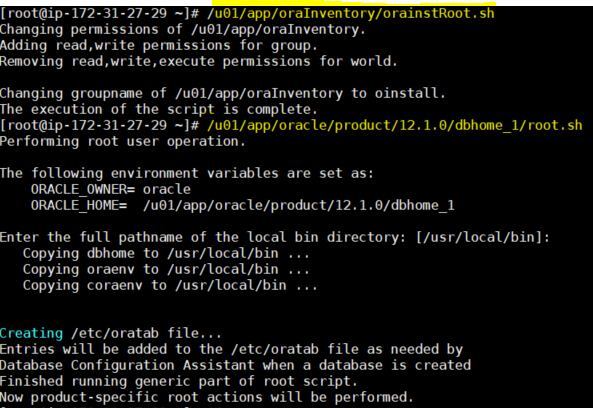
Oracle prompts a script and need to run as ROOT user.

Step 11 :
run as ROOT user

Step 12 :
Once script runs automatically all the warnings will get successful.
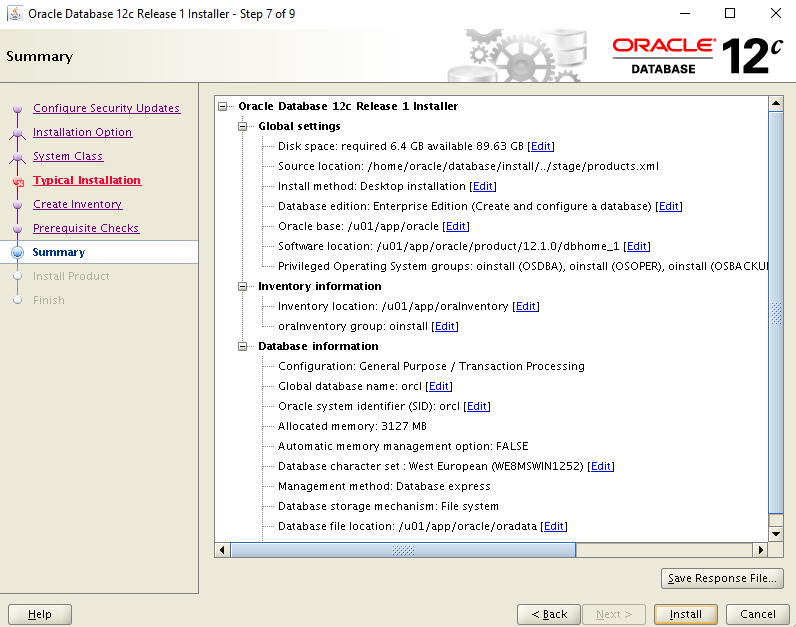
Step 12 :
Summary of installation
Click on install
Step 13 :
Oracle software installation in progress.
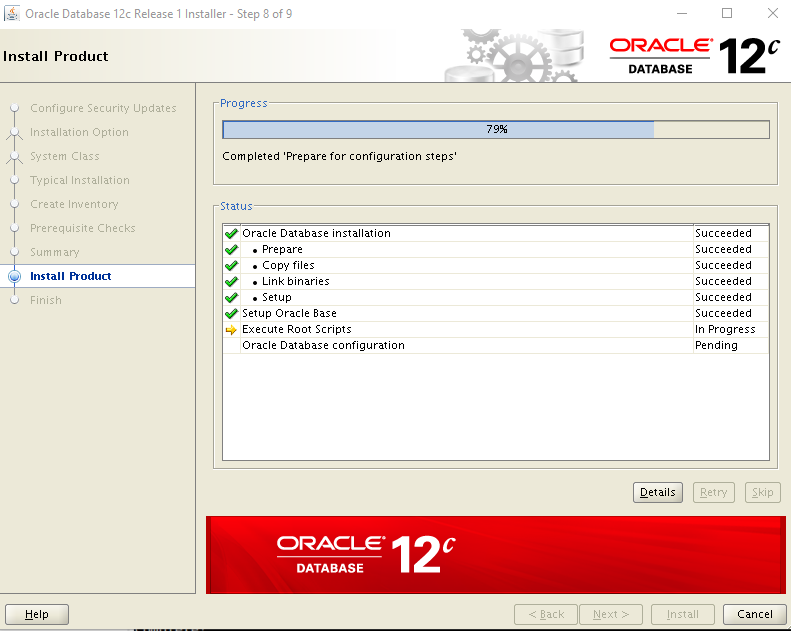
After reaching 79% Oracle prompts two scripts and those scripts need to run as ROOT user .
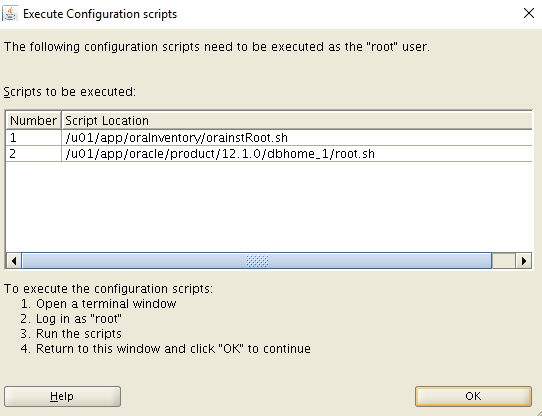
Run as root user
 Then installation will complete .

 (5 votes, average: 4.80 out of 5)


Ajay Kumar
Hello Everyone,
Great response to the session on Oracle Installation on AWS CLOUD
Please check Vimeo video link.:
https://vimeo.com/311167164