Dear Readers,
This article will see the following Create and configure a virtual cloud network(VCN) by using VCN Wizard.

By using this option VCN will create with below-added resources by default
Includes:
➸ VCN
➸ Public subnet
➸ Private subnet
➸ Internet gateway (IG)
➸ NAT gateway (NAT)
➸ Service gateway (SG)
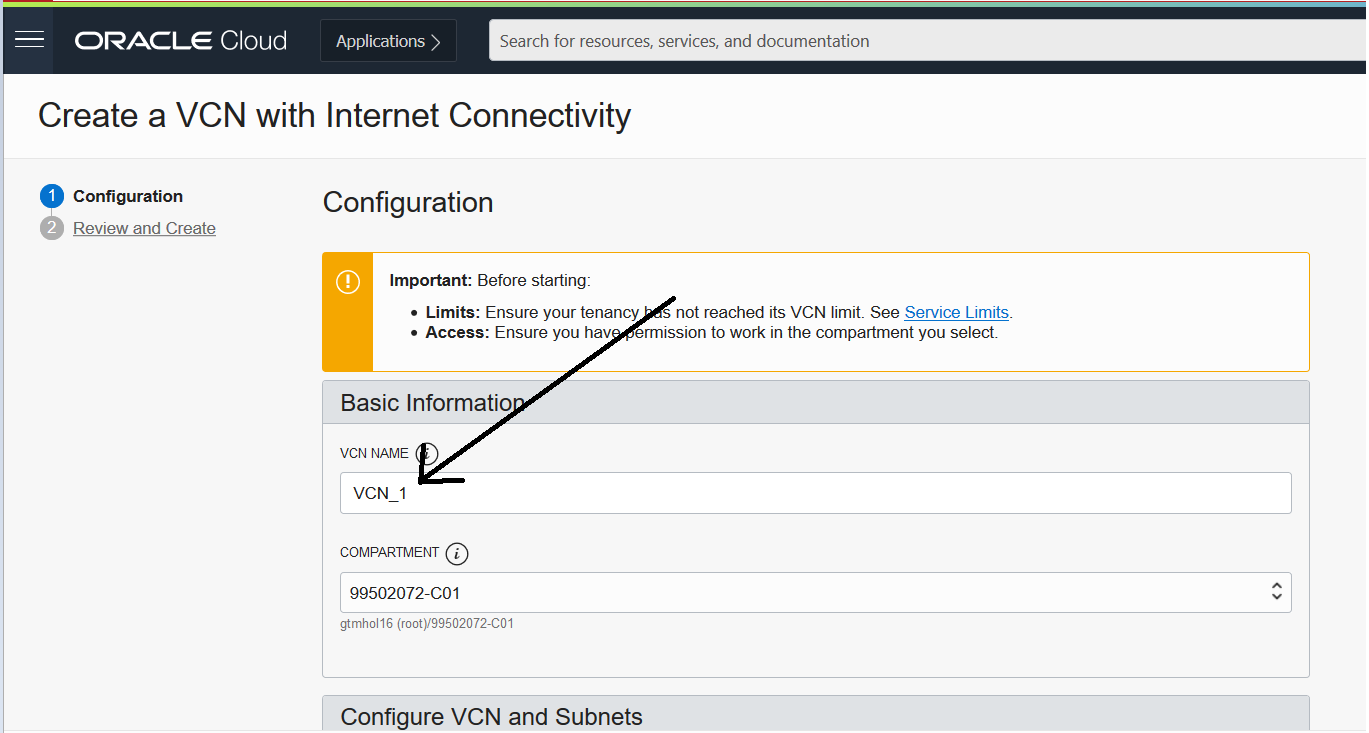
Below are the values that need to be passed while creating VCN. CIDR ranges can vary depends on your requirement.
VCN NAME : VCN_1
COMPARTMENT : Select the appropriate compartment under List Scope in the left navigation pane.
VCN CIDR BLOCK : 10.0.0.0/17 (As per you’re requirement)
USE DNS HOSTNAMES IN THIS VCN : Checked
PUBLIC SUNBET CIDR BLOCK : 10.0.0.0/24 (As per you’re requirement)
PRIVATE SUBNET CIDR BLOCK : 10.0.1.0/24 (As per you’re requirement)
As a Public subnet we can have access to the internet, a Private subnet we can have an inbound connection for preferred IPs but not outbound connections.
As a 2nd step review the resources that are creating.
Subnets, Internet gateway (IG), NAT gateway (NAT), Service gateway (SG)
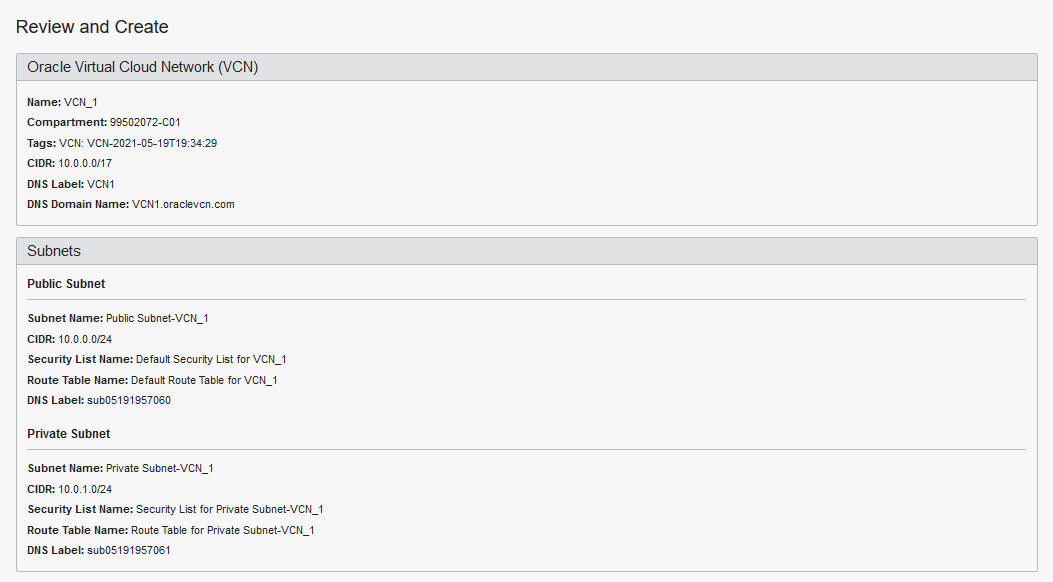
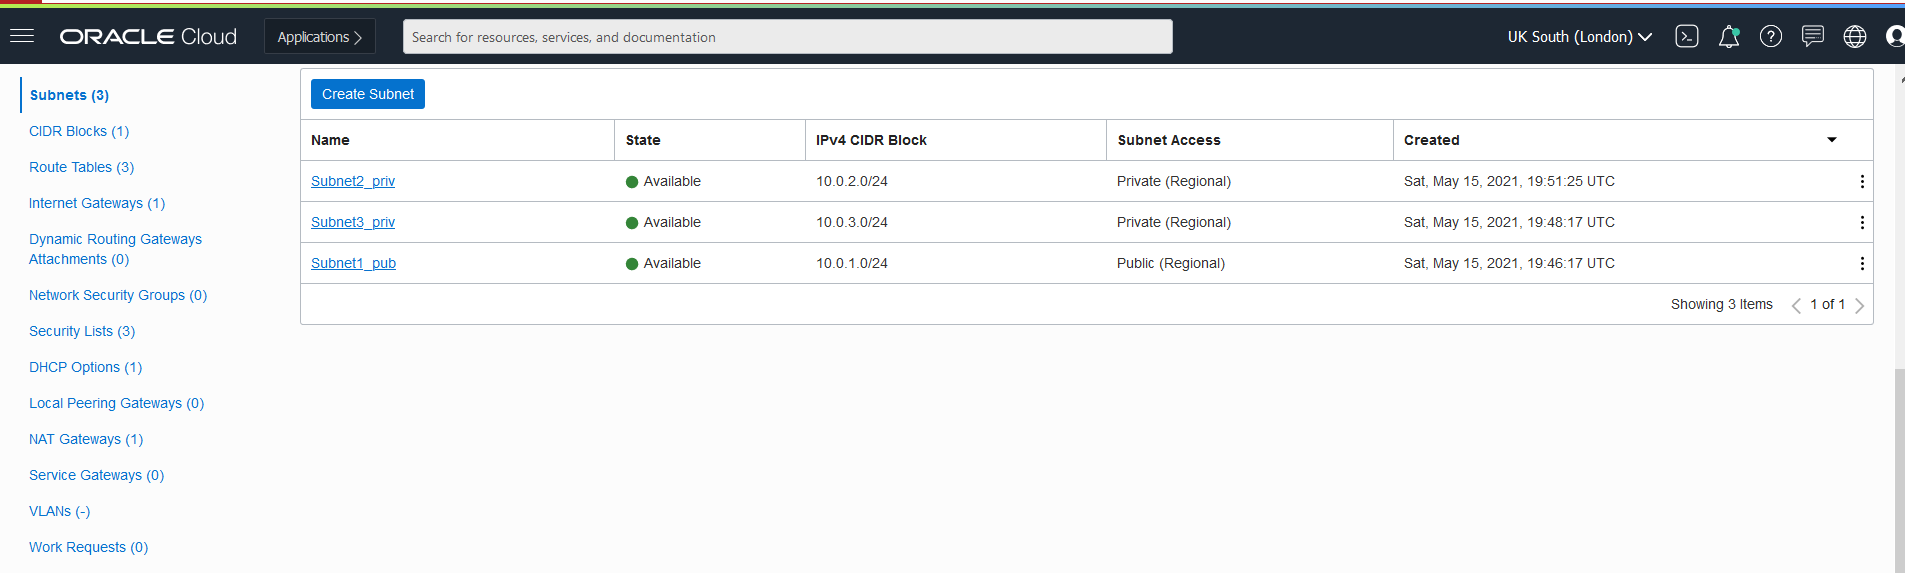
Once the review is done Click on create it will re-direct to the VCN page which will display resources that are created through the wizard
Default resources are attached to subnets like security lists and routables. As per the requirement edit it if required.
Thank you for giving your valuable time to read the above information. Please click here to subscribe for further updates
KTEXPERTS is always active on below social media platforms.
Facebook : https://www.facebook.com/ktexperts/
LinkedIn : https://www.linkedin.com/company/ktexperts/
Twitter : https://twitter.com/ktexpertsadmin
YouTube : https://www.youtube.com/c/ktexperts