

Guide to Installing VirtualBox on Windows for Running Linux Virtual Machines:
If you’re a Windows user, who wants to learn PostgreSQL on a Linux Platform, one of the best solutions is to use Linux virtual machines in VirtualBox.
In this article, we’ll guide you through the process of installing VirtualBox on your Windows computer and setting up a Linux virtual machine.
Download The VM VirtualBox:
Firstly, Download the Oracle VirtualBox in your current Windows operating system. Through the following link https://www.virtualbox.org/wiki/Downloads and follow the steps.
Select the operating system that you want to install Linux virtual box (windows host)
Executable file of 105 MB will be downloaded.
Open the file (VirtualBox-7.0.6-155176-Win.exe) to start the installation process.
Installation of VM VirtualBox:
The VirtualBox installation wizard will be opened and guide you through the installation process.
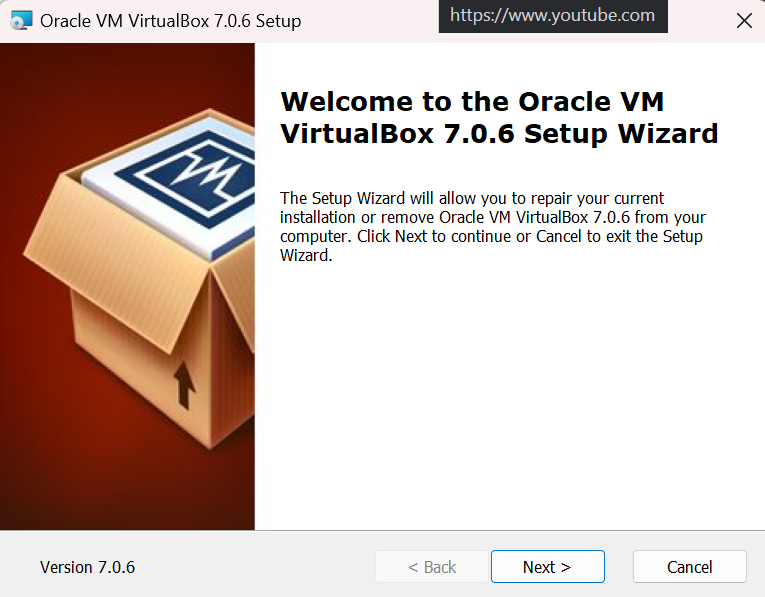
Click the “Next” button to begin.
Accept the license agreement >> click “Next”
Choose installation directory (default) >> click “Next.”
Choose components you want to install (default) >> click “Next.”
click “Install” to begin the installation process. Once it’s finished, you can verify that VirtualBox has been installed on your computer.
Download Oracle Linux ISO file:
This ISO file contains all the necessary files for installing and running the Linux distribution, including the operating system kernel, system utilities and applications.
Direct link to download Linux 6.8 https://yum.oracle.com/ISOS/OracleLinux/OL6/u9/x86_64/OracleLinux-R6-U9-Server-x86_64-dvd.iso
Creation of Virtual Machine:
Now you are ready to create virtual machine for Linux in Oracle VM VirtualBox
Follow below steps to create Linux virtual Machine:
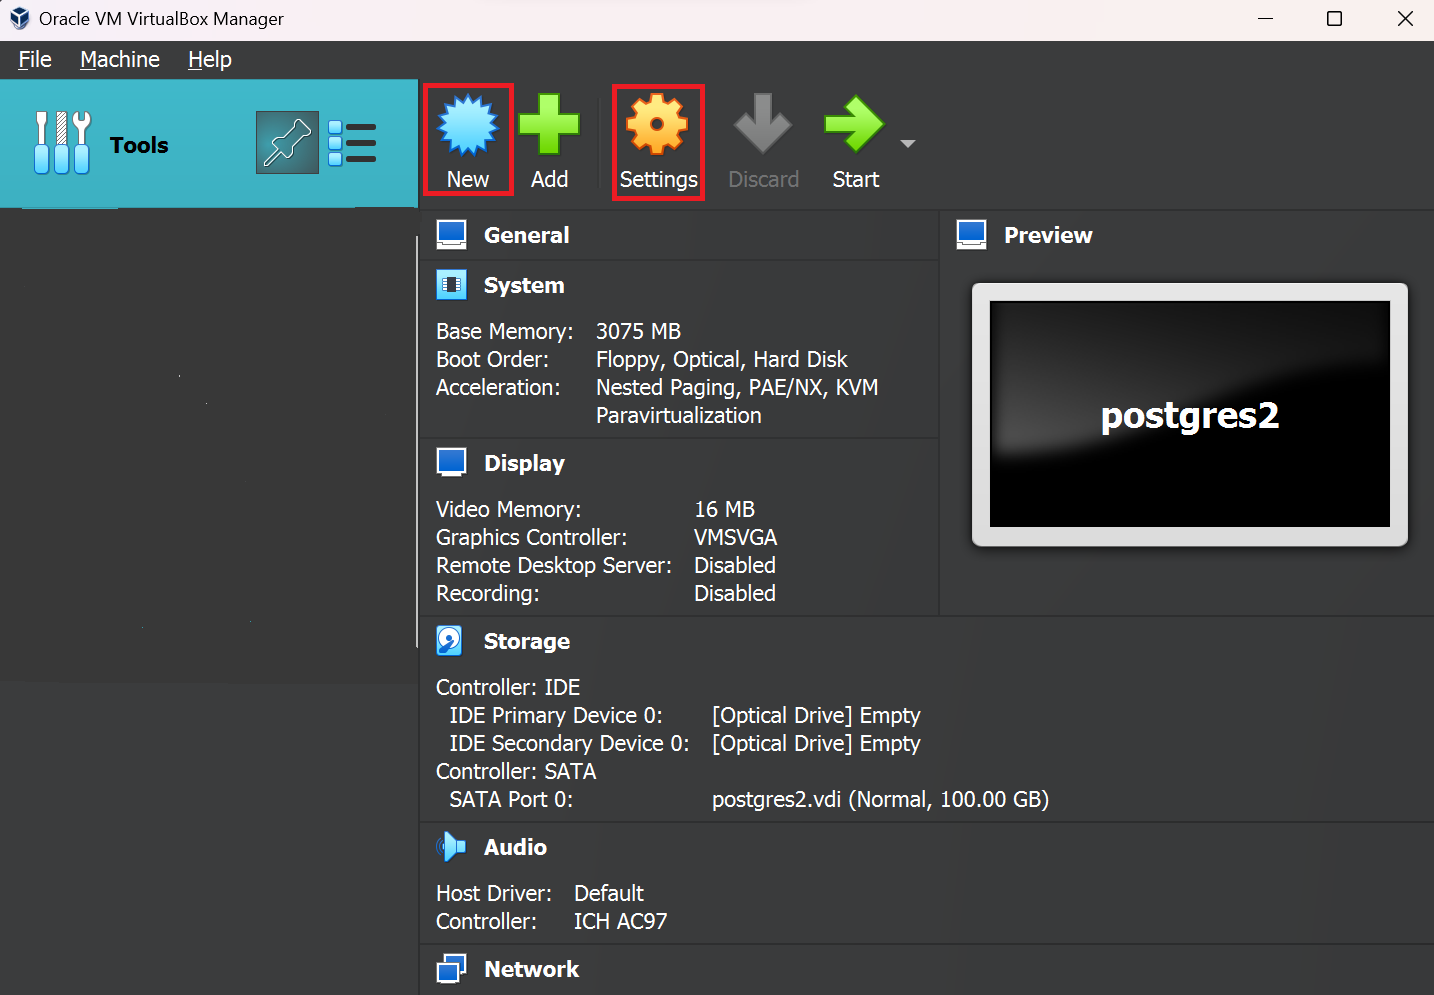
- In Oracle VM VirtualBox Manager, click on “New” this will launch the virtual machine creation wizard.
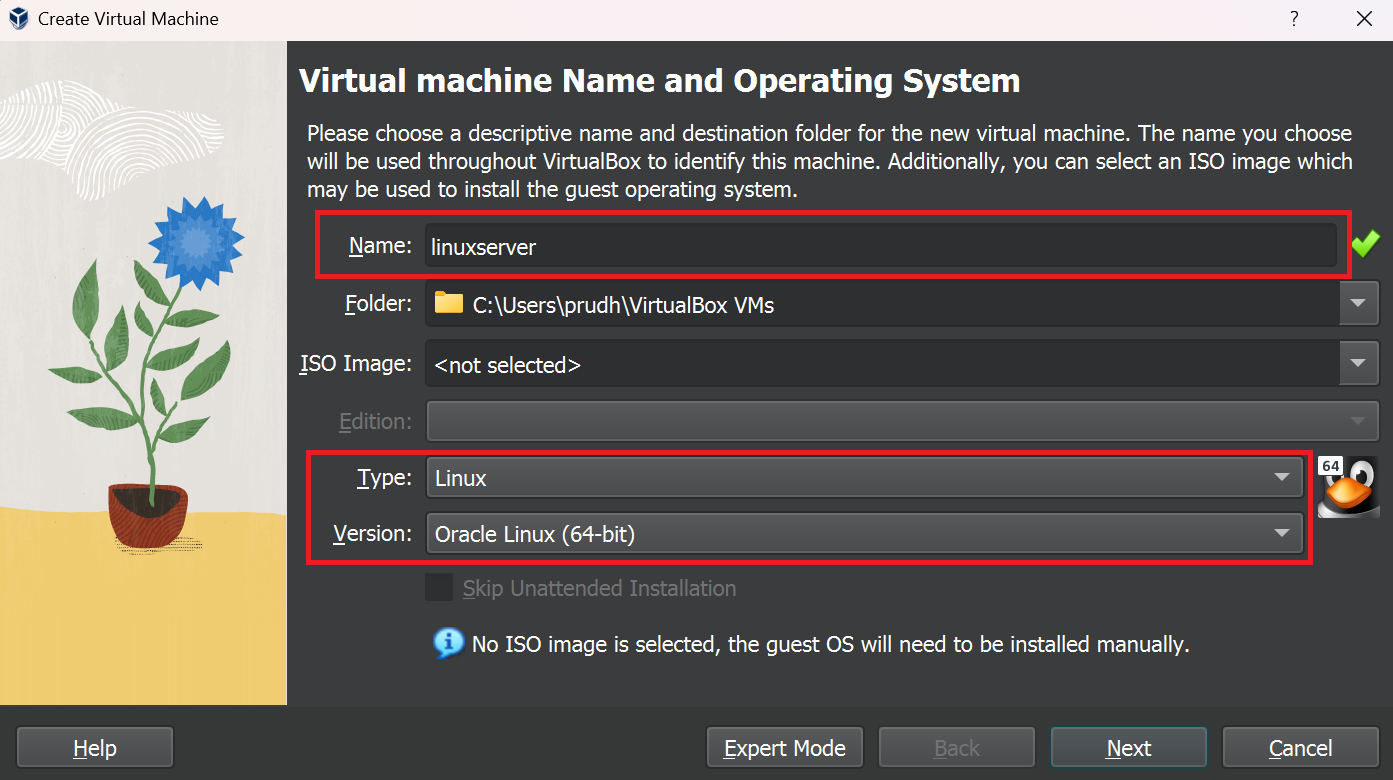
- In the wizard, you should provide Name of virtual machine, choose operating system Type and Version. Click “Next”.
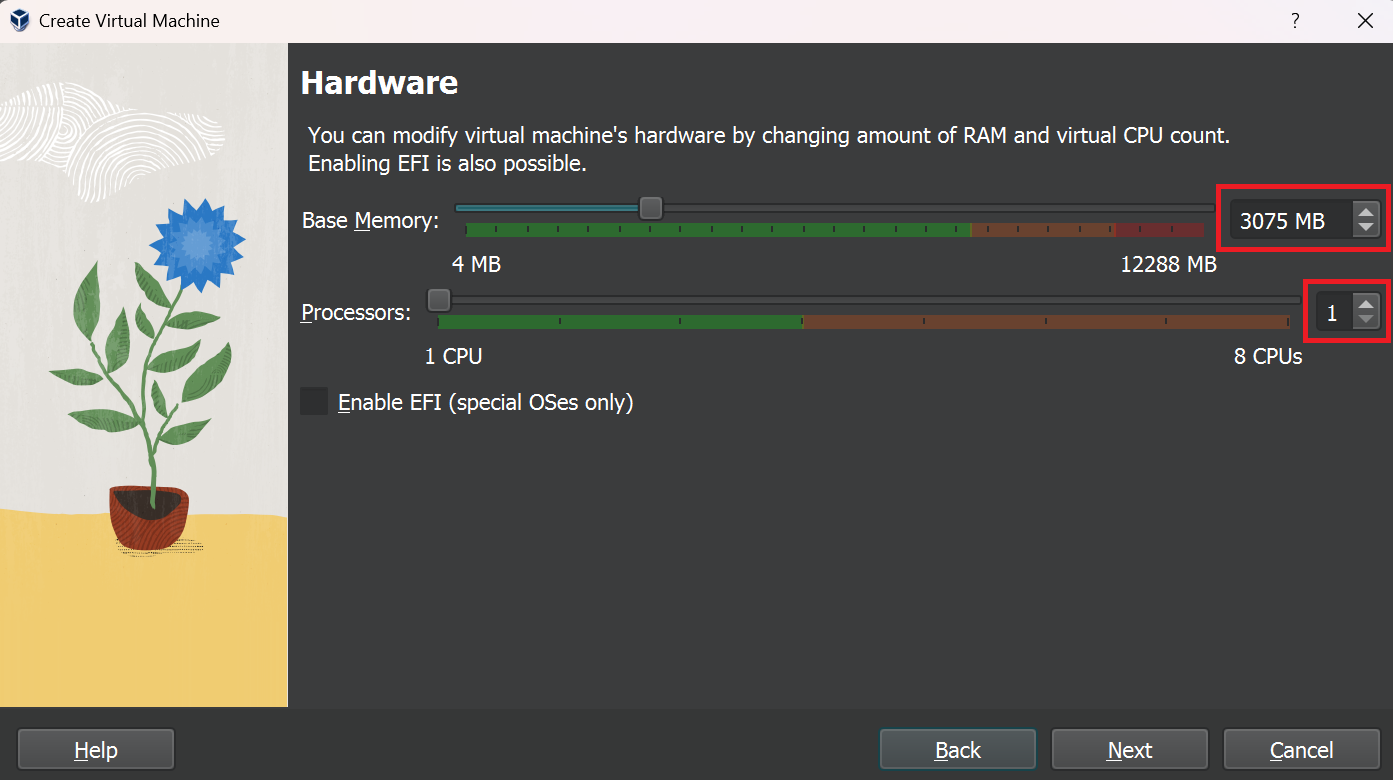
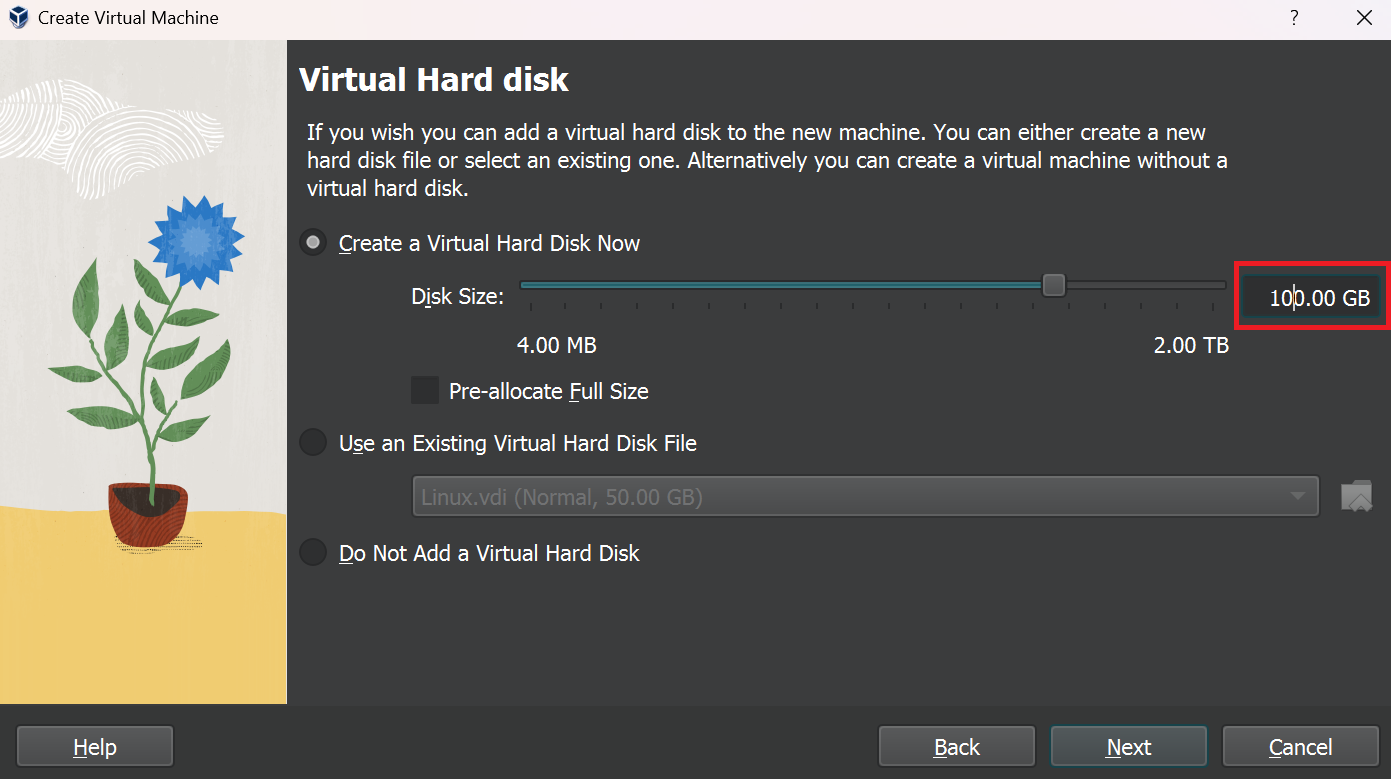
- You need to configure the virtual machine by setting the amount of RAM(3gb) , processers (1cycle) and hard disk space (100gb). Click “Next”.
- Check the Summary and click on “Finish”, then your virtual machine is created.
- Before installing the Linux, we should do some additional configurations in settings such as network connectivity and USB support.
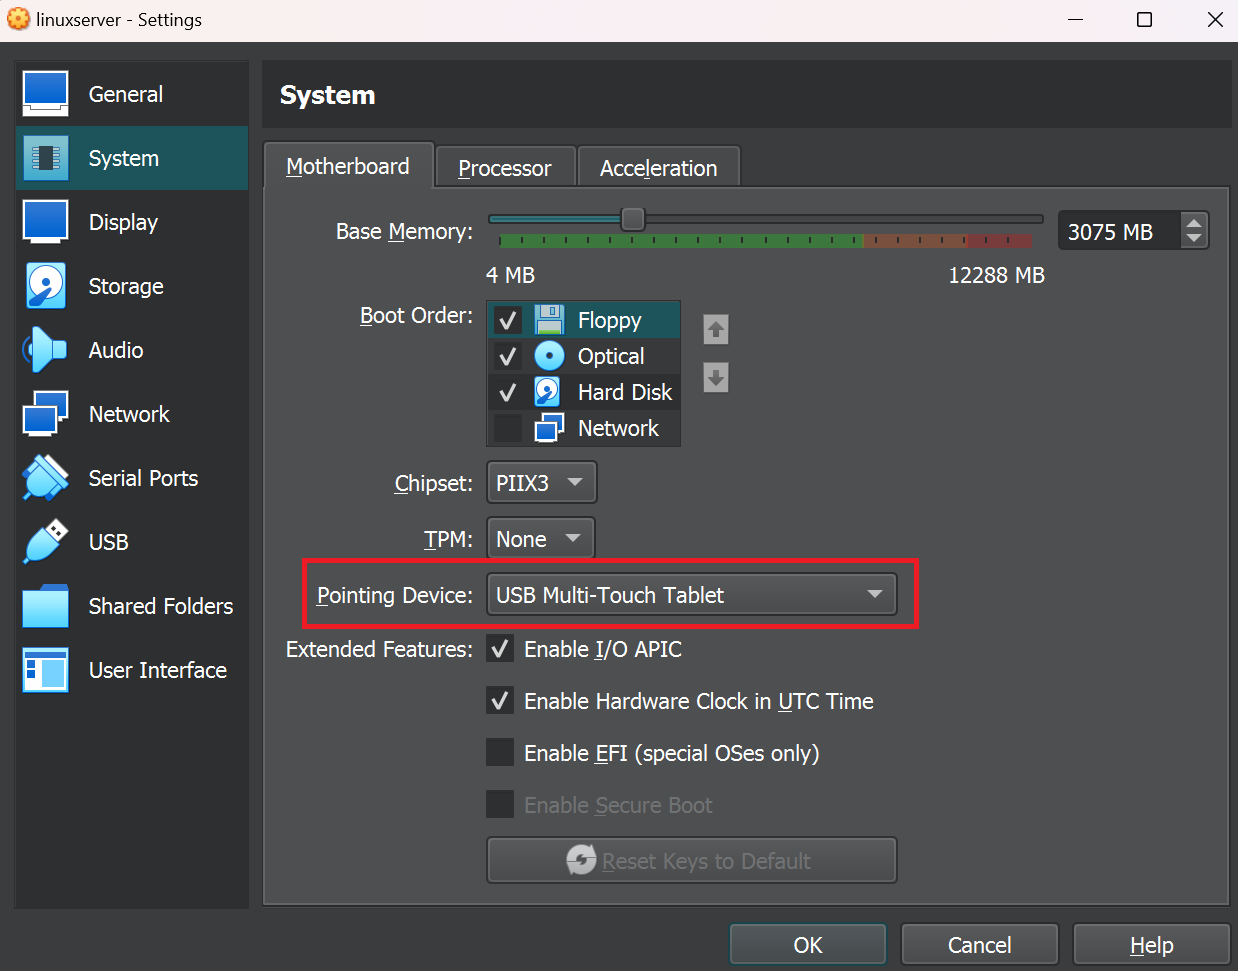
a. Go to Settings >> System >> Pointing Device: “USB Multi-Touch Tablet”.
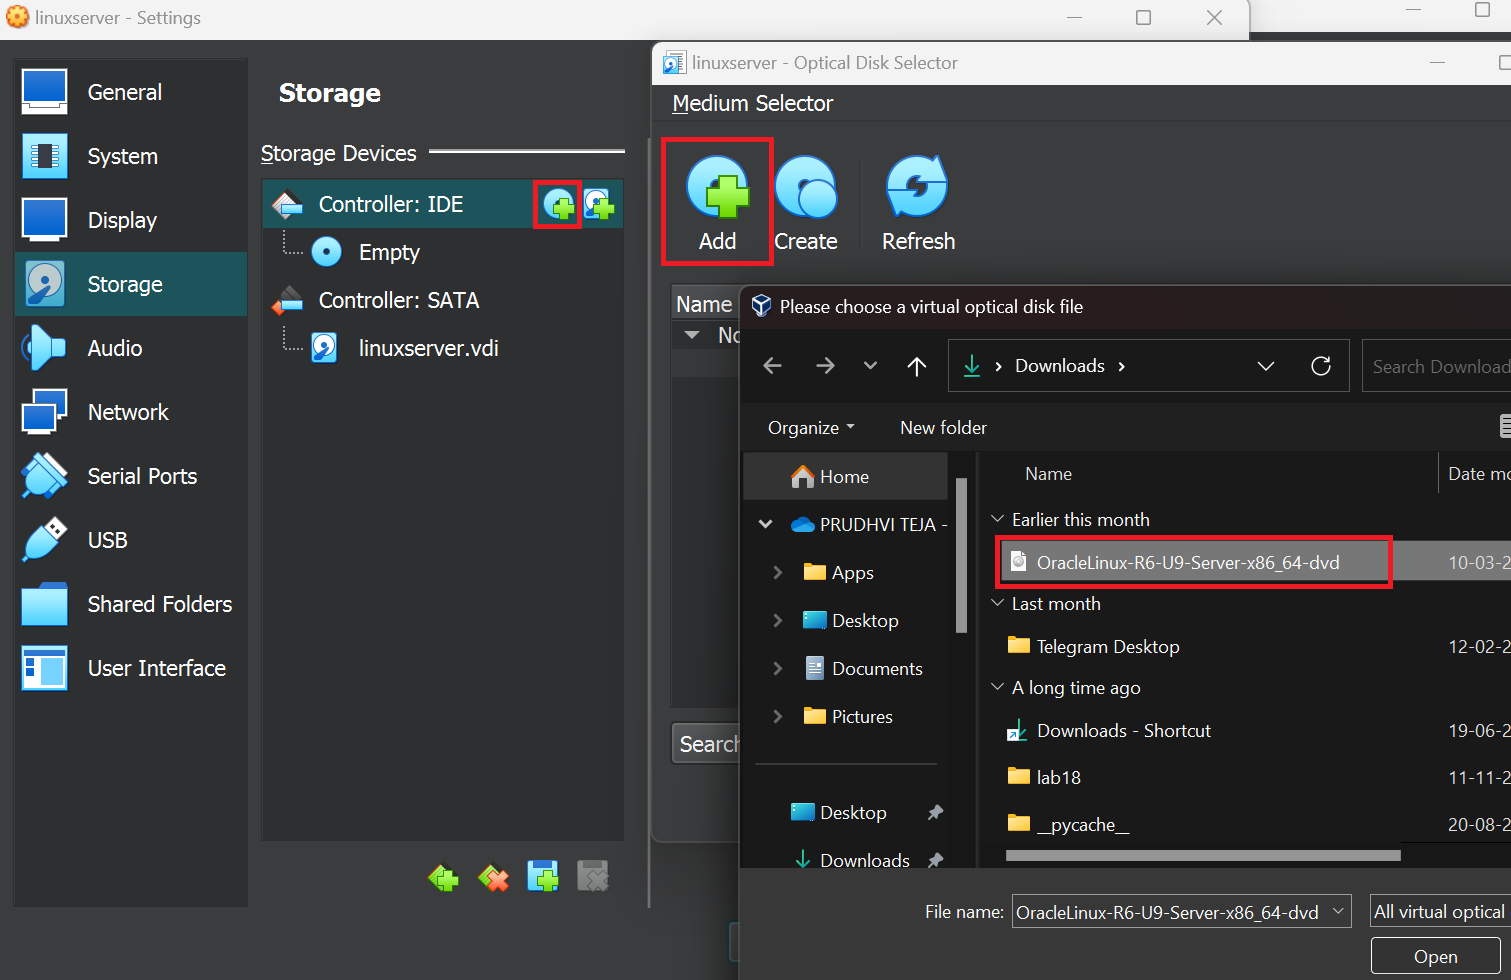
b. Go to Settings >> Storage >> Controller: IDE – “add Linux iso file”.
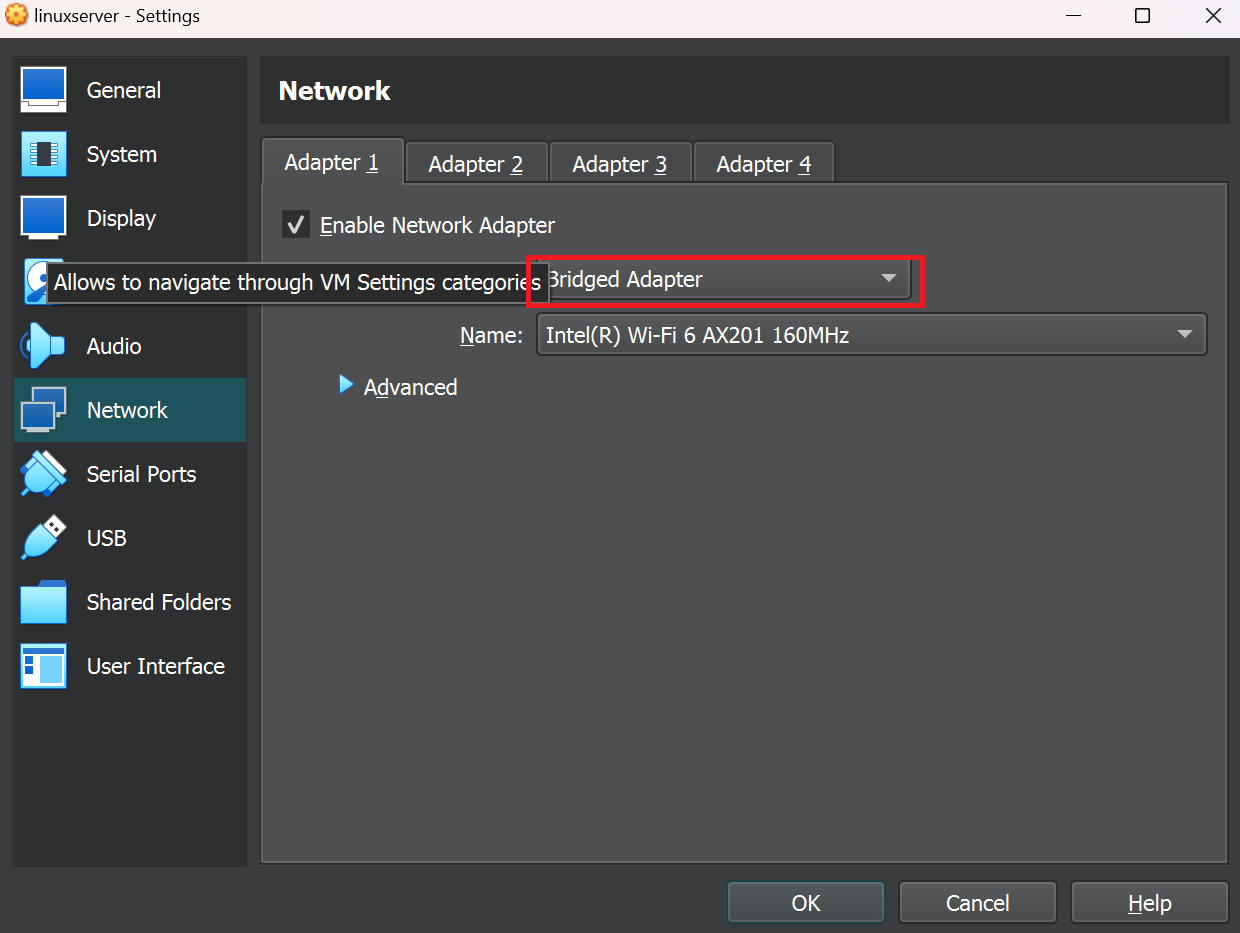
c. Go to Settings >> Network >> Adapter 1>> Attached to: “Bridged Adapter.”
Installing the Linux operating system:
After configuring the virtual machine, click on the “Start” and begin installation process for the Linux operating system. Follow the Step by Step process.
- Choose the “Install or upgrade an existing system” and hit “enter”.
- To skip the testing, press tab to move focus to “Skip” key then press Enter.
- A window of Oracle Linux 6 appears >> Click “Next”.
- Choose language “English” >> Click “Next.”
- Choose keyboard setting “U.S. English” >> Click “Next.”
- Choose appropriate storage device (default basic) >> Click “Next.”
- A storage warning prompt will appear >> click on “yes, discard ant data.”
- Later you should provide Hostname to identify the network. Here we use “linuxserver.oracle.com”
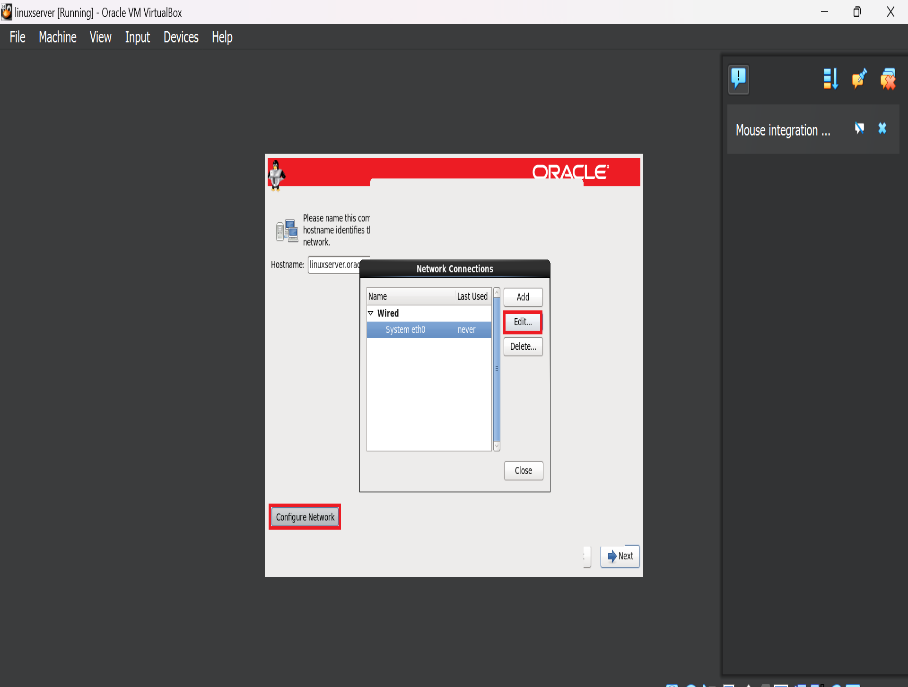
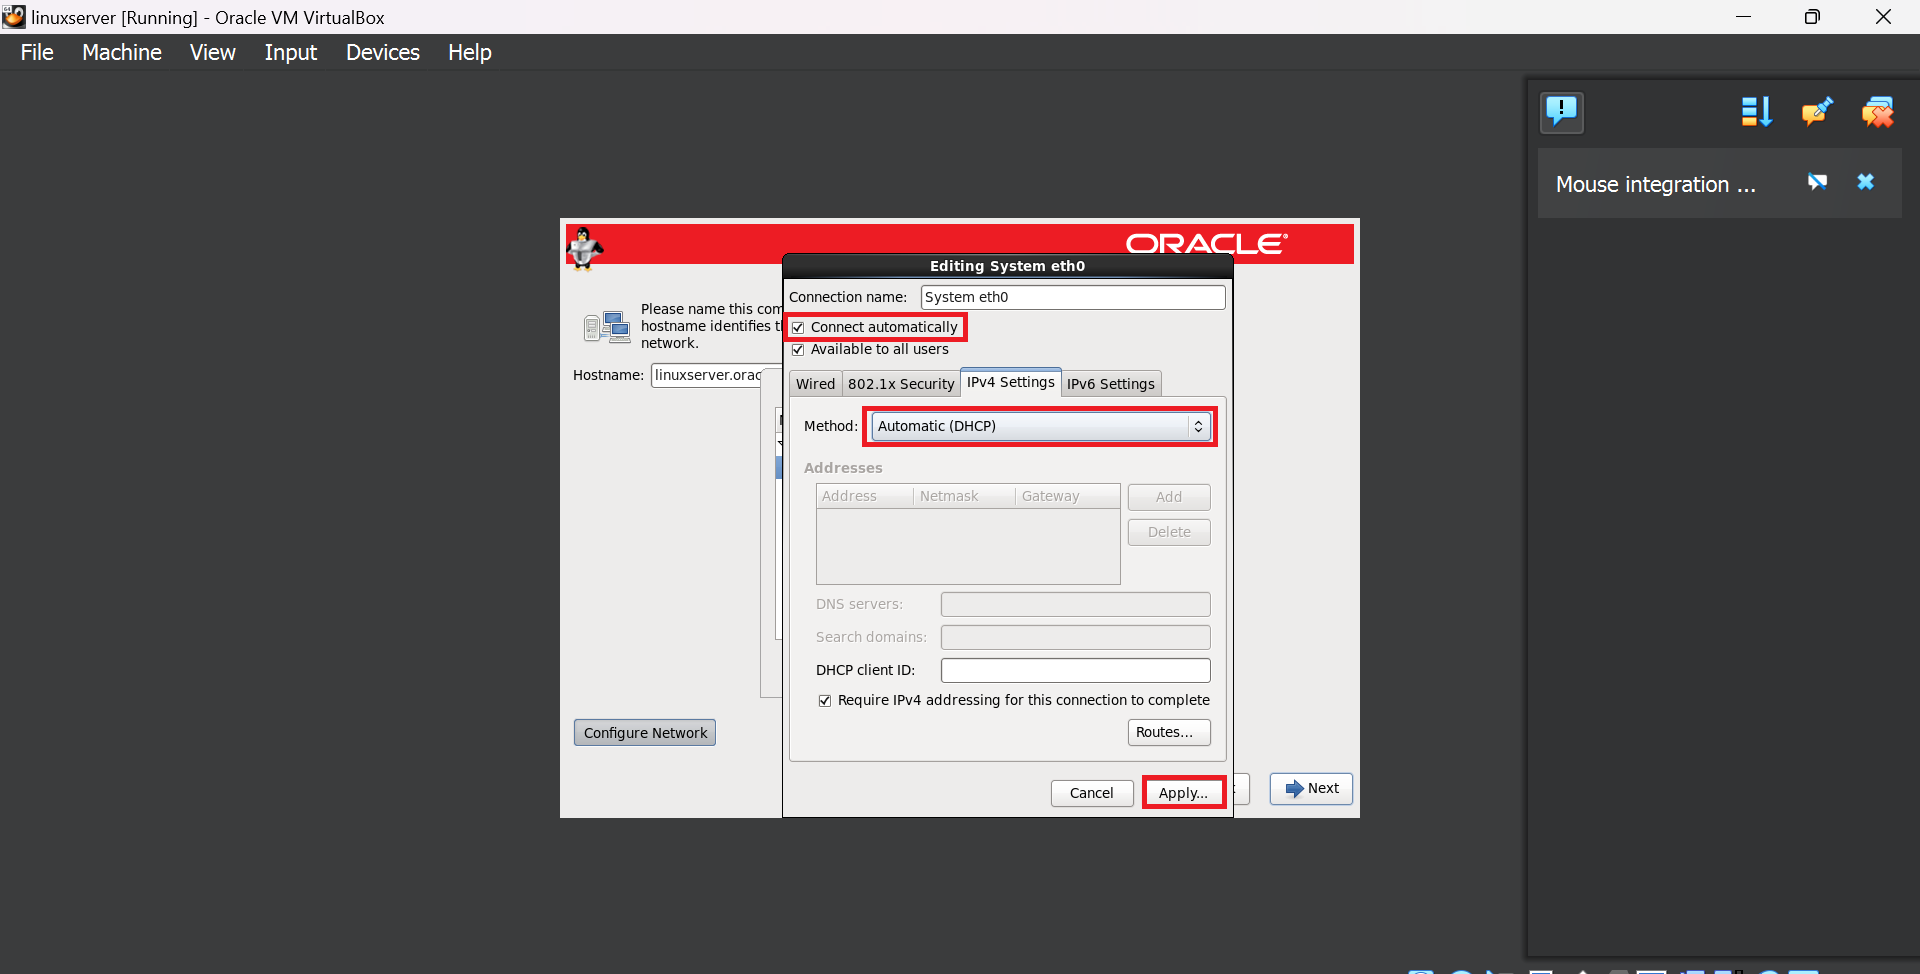
- Before proceeding with Next, click on Configure Network >> select System eth0 >> click on “Edit” >> checkbox “Connect Automatically” and method: “Automatic (DHCP)” default >> click “Apply.
- Select a city: “Asia/Kolkata” >> Click “Next.”
- By default, the user will be “root” user. So, setup a password to root user >> Click “Next”
- Select “Create custom layout” >> Click “Next”
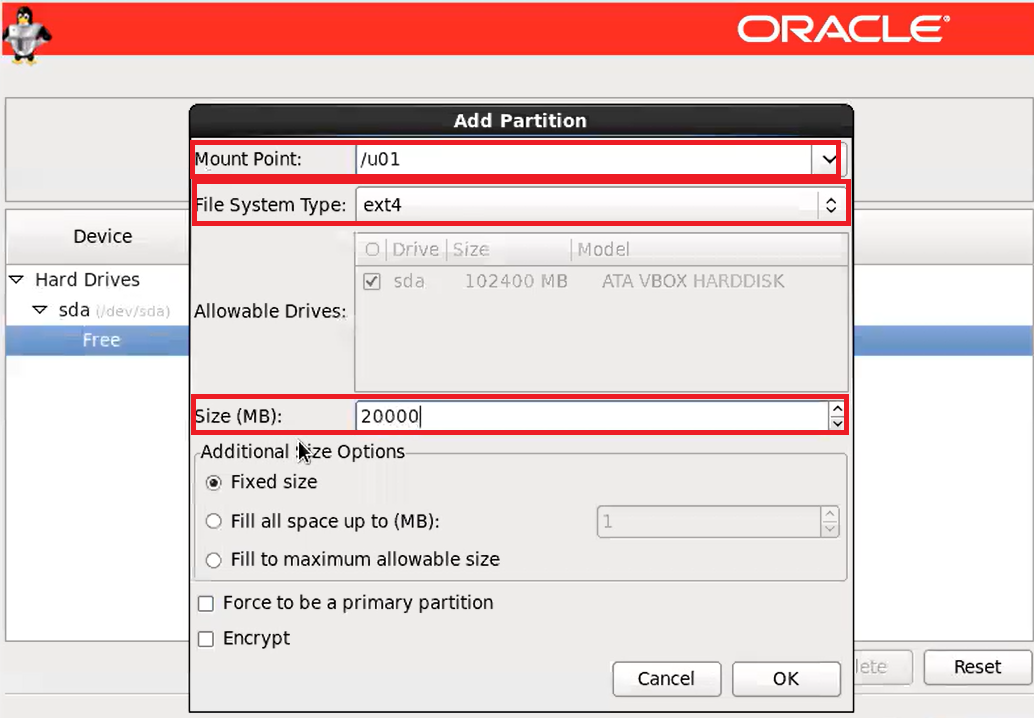
- In the next step, you should partition the memory allocated to the virtual machine (3gb) among the mount points in following manner:
Mount point File Type Size (MB)
/u01 ext4 30000 MB
/boot ext4 10000 MB
/ ext4 30000 MB
Swap 10000 MB
/backup ext4 10000 MB
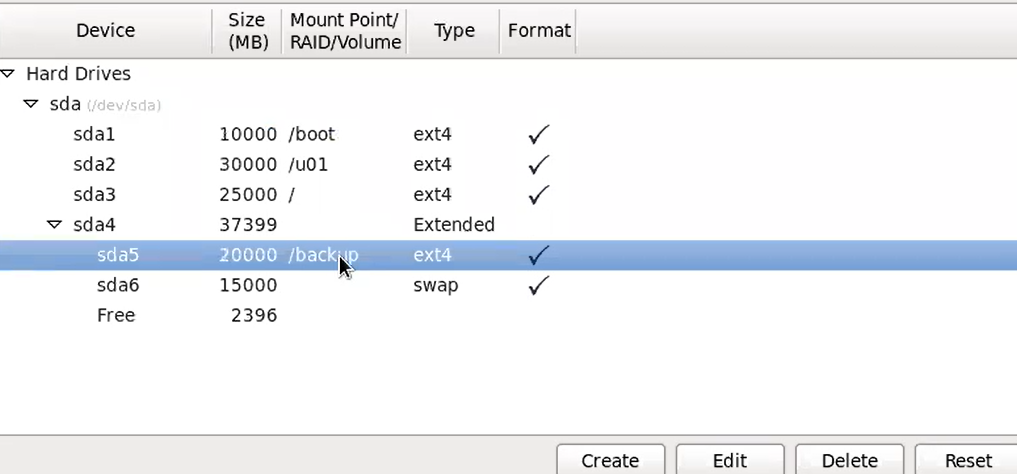
- Click on “Create” >> select “standard partition” >> Click on “Create” >> Fill Mount Point, File System Type, Size (MB)
- After completion of partition >> Click “Next”
- In the prompt select “Write changes to disk”.
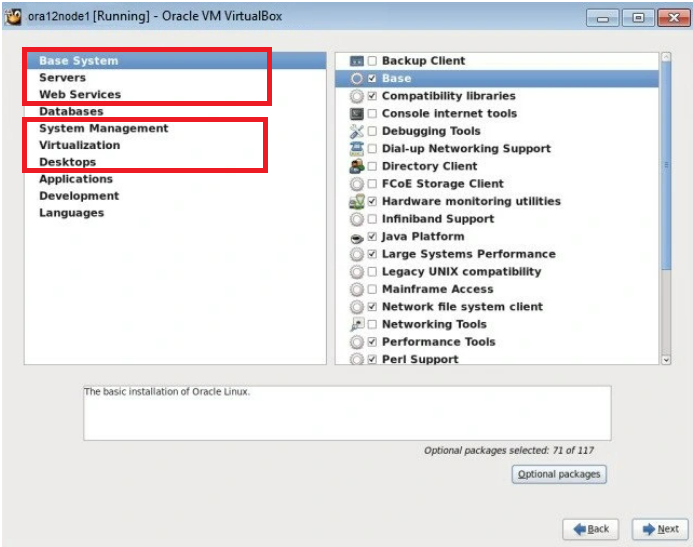
- Select “Customize now” >> Click “Next.”
- Select all the check boxes in Base Systems, Servers, Web Services, System Management, Virtualization, Desktops. >> Click “Next.”
- Wait for a while to complete installation, after completion.
- Click on “Reboot”.
- Welcome wizard appears >> click “Forward.”
- Accept License Agreement >> click “Forward.”
- Select “No, I prefer to register at a later time” >> click “Forward.”
- Select “No thanks, I’ll connect later”.
- Finish Updates Setup >> click “Forward.”
- Create User >> click “Forward.”
- Adjust Date and Time >> click “Forward.”
- Kdump >> click “Finish.”
Now you are Ready to use Linux platform on windows and the login credentials will be user: root password: “owner defined.”
| Author : Prudhvi Teja |
LinkedIn : http://linkedin.com/in/prudhvi-teja-nagabhyru-715052224
Thank you for giving your valuable time to read the above information. Please click here to subscribe for further updates
KTExperts is always active on social media platforms.
Facebook : https://www.facebook.com/ktexperts/
LinkedIn : https://www.linkedin.com/company/ktexperts/
Twitter : https://twitter.com/ktexpertsadmin
YouTube : https://www.youtube.com/c/ktexperts
Instagram : https://www.instagram.com/knowledgesharingplatform


Krishna
Thanks Team for such a great article.