
Automating SQL Caching for Amazon ElastiCache and RDS
Many have used Amazon ElastiCache to improve responsiveness. However, developers are still challenged to know what to cache, what to invalidate and ensure data is up to date. This requires manual application code changes. We can now automate caching and invalidation for Amazon ElastiCache with Heimdall Data.
Heimdall Data is an intelligent query routing and caching data access layer that is installed in one or more EC2 instances. Heimdall Data software packaging includes:For deployment, one only needs to modify the host/port or JDBC URL to route the application through Heimdall.
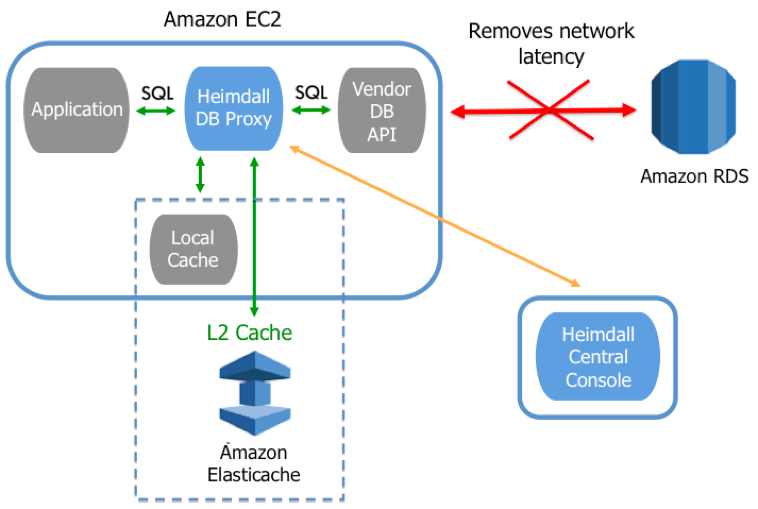
Figure 1: Heimdall Data Distributed Architecture
In proxy mode, there are two types of deployment:
· Distributed mode: A proxy residing on each EC2 application instance, for optimal performance (Figure 1 above)· Centralized mode: One EC2 database proxy servicing many application servers (Figure 2 below)
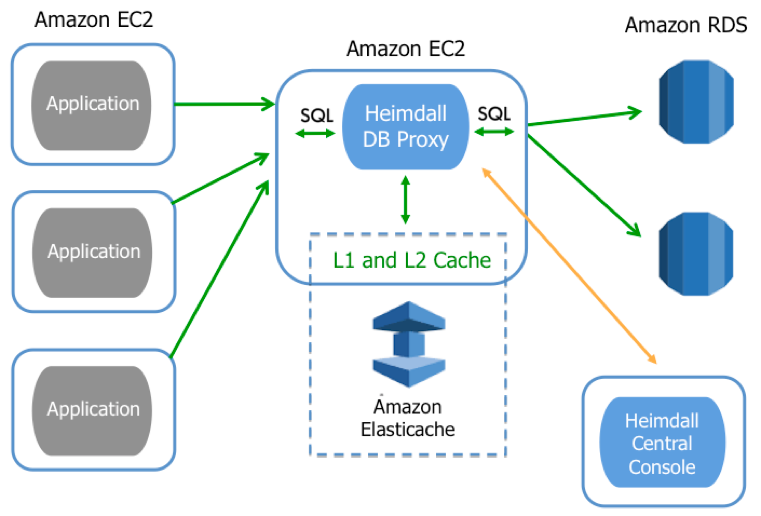
Figure 2: Heimdall Data Centralized Architecture
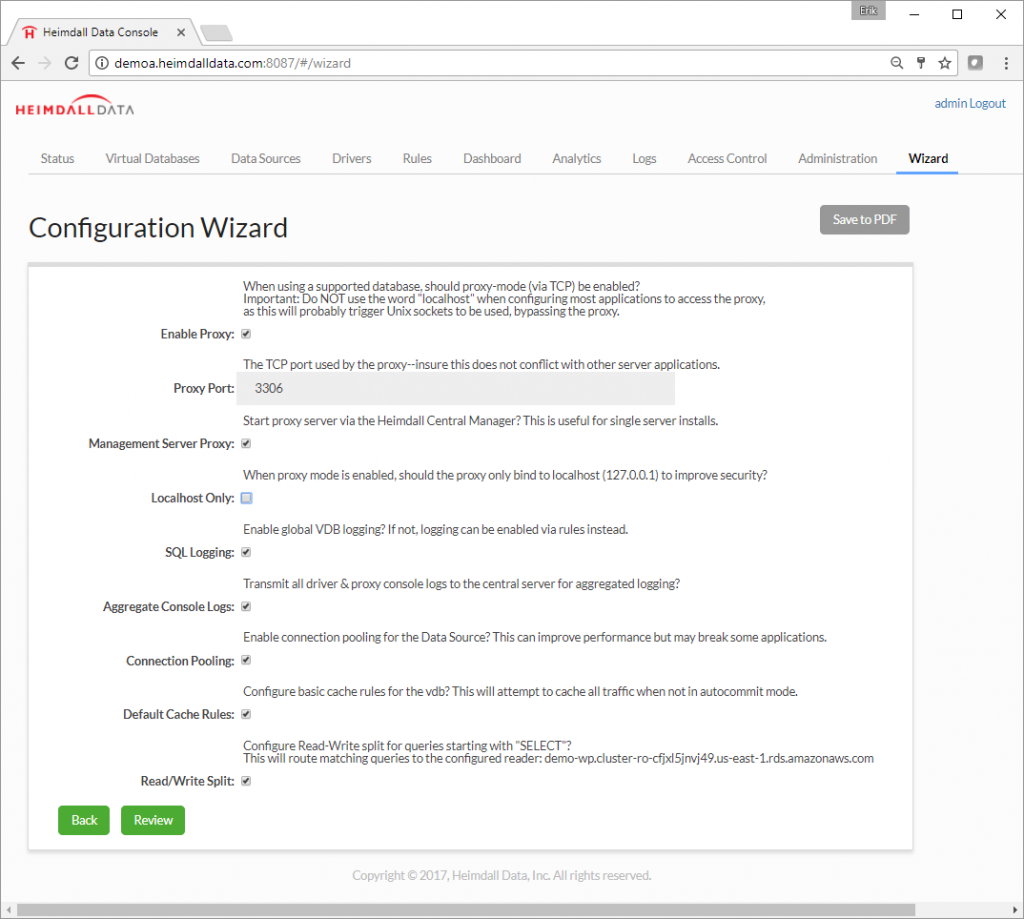
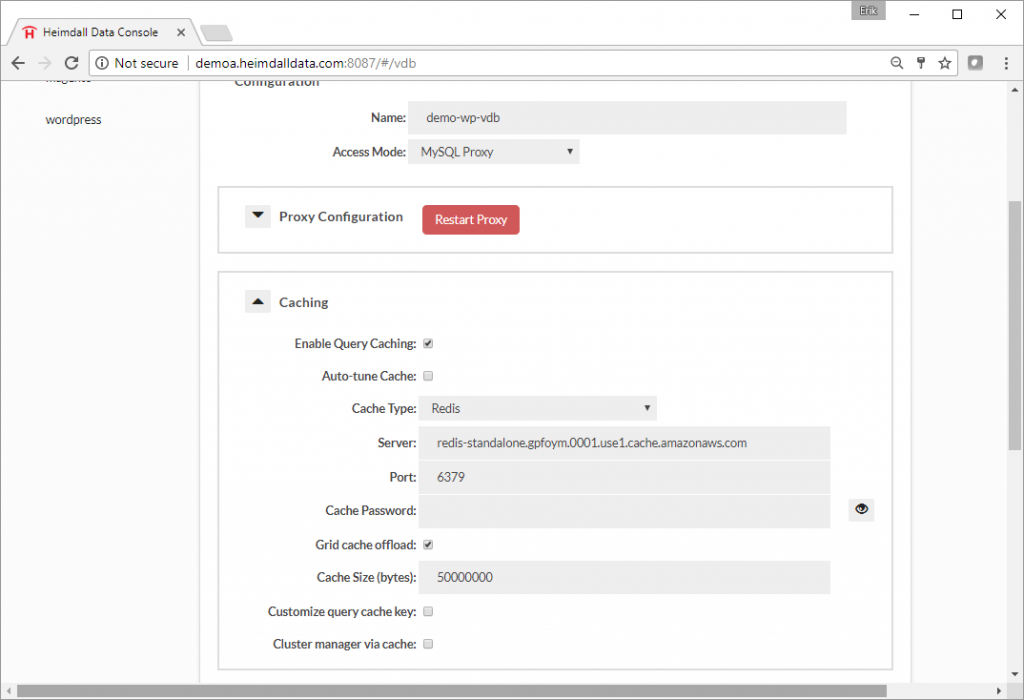
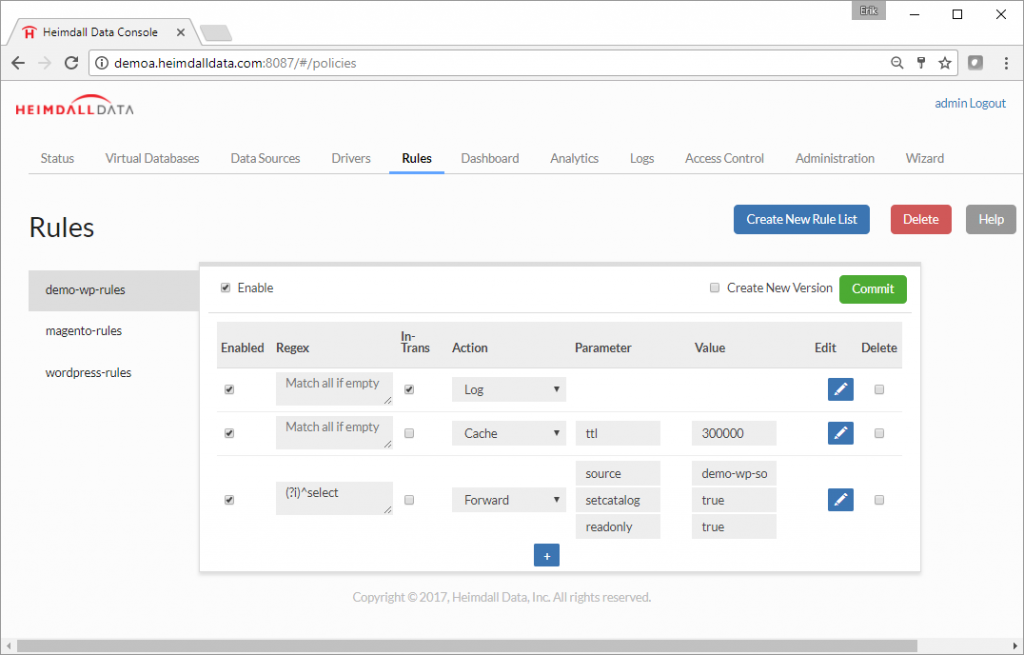
The proxy provides two levels caching: 1) locally on the application server and 2) on ElastiCache (akin to an L1/L2 cache). As SQL is sent from the application to the database, the proxy responds from the cache, and routes requests to different servers (for use in load-balancing and read/write split). All this functionality requires zero code changes.
Pre-Requisites
This article covers how the Heimdall system with Amazon ElastiCache and RDS can be deployed with an existing application. Users testing with their own infrastructure require:
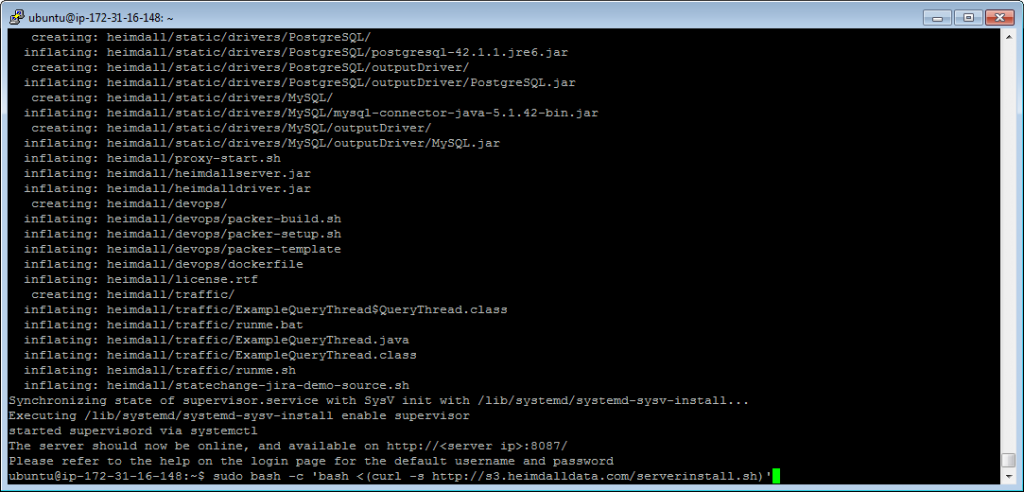
· Heimdall Data instance available at the Heimdall Data website or AWS Marketplace
For users installing Heimdall via the one-line installation process, it will download and install the Heimdall Central Manager and proxy. The default user id is “admin”. If an Amazon instance is successfully detected, the password will be the instance id, otherwise the default password is “heimdall”.
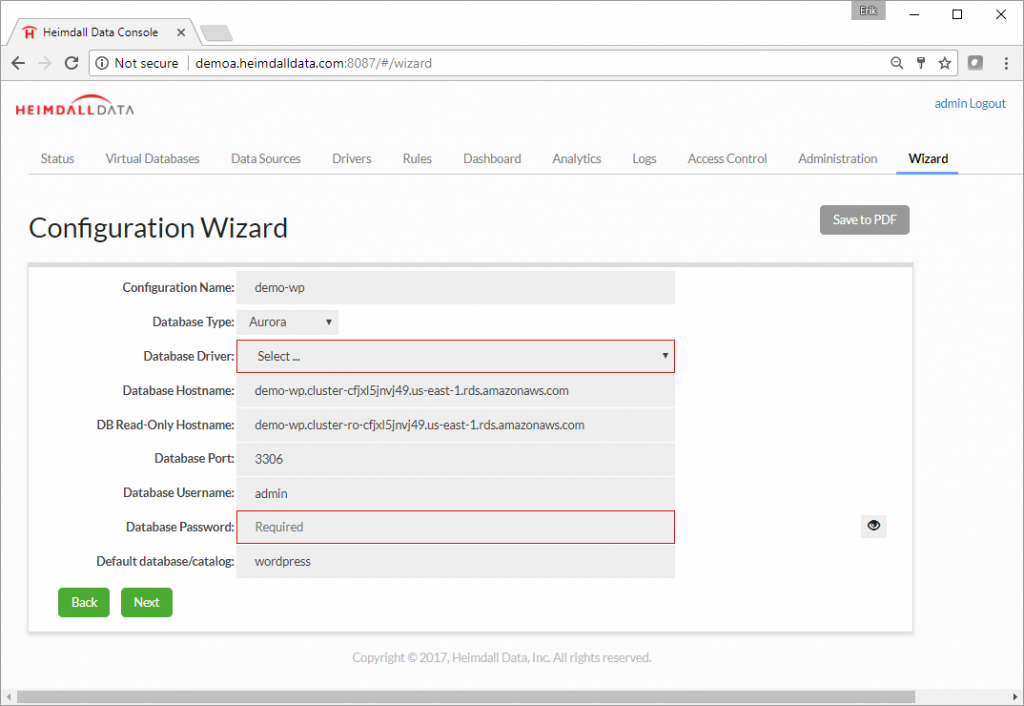
This blog uses an Amazon Aurora with a WordPress application.
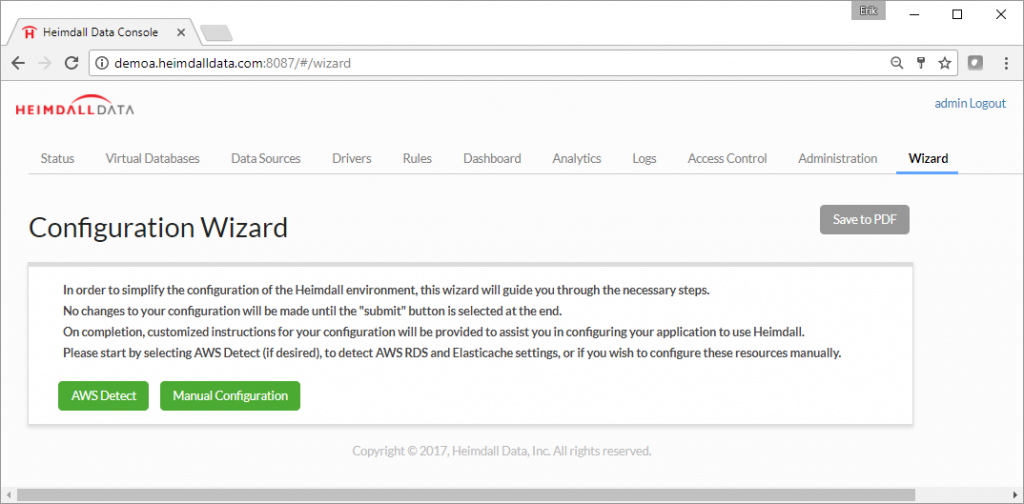
Once the Heimdall Central Console is running, access with the server URL and port 8087. For an already configured server, the default tab is the Status tab which displays current server and system status. For a new installation, users are directed to the Wizard tab.
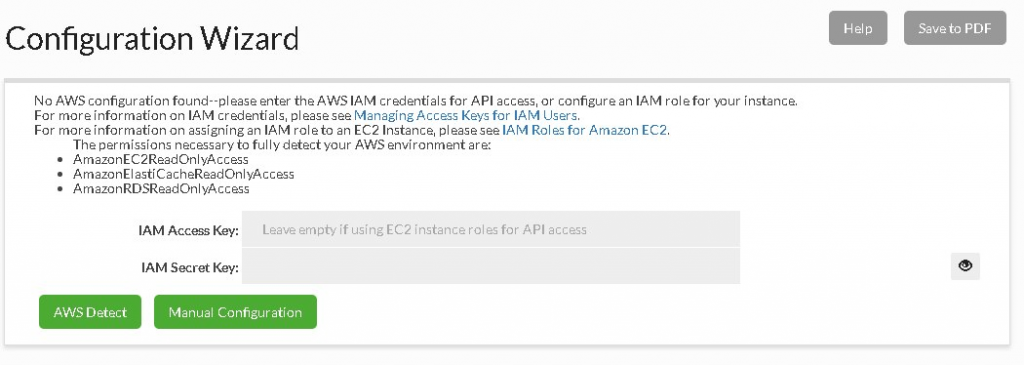
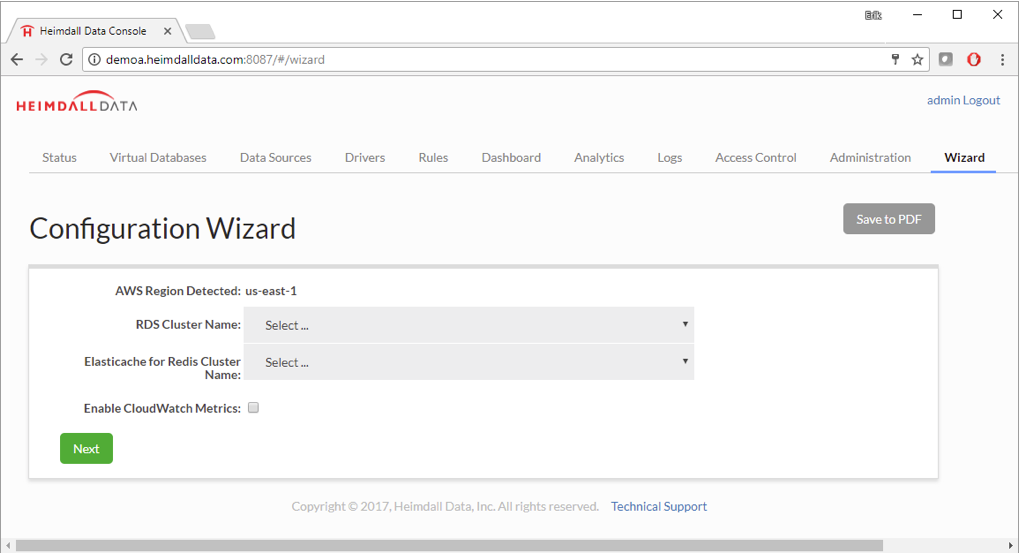
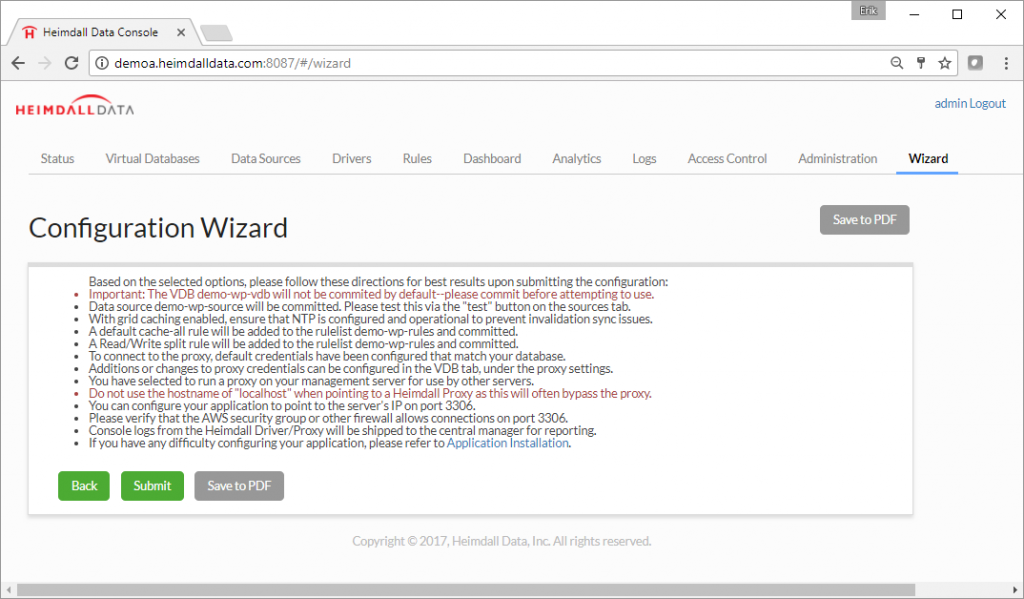
Heimdall has a wizard designed for Amazon. Select AWS Detect, otherwise perform Manual Configuration. The goal is to connect the database system and caching infrastructure.

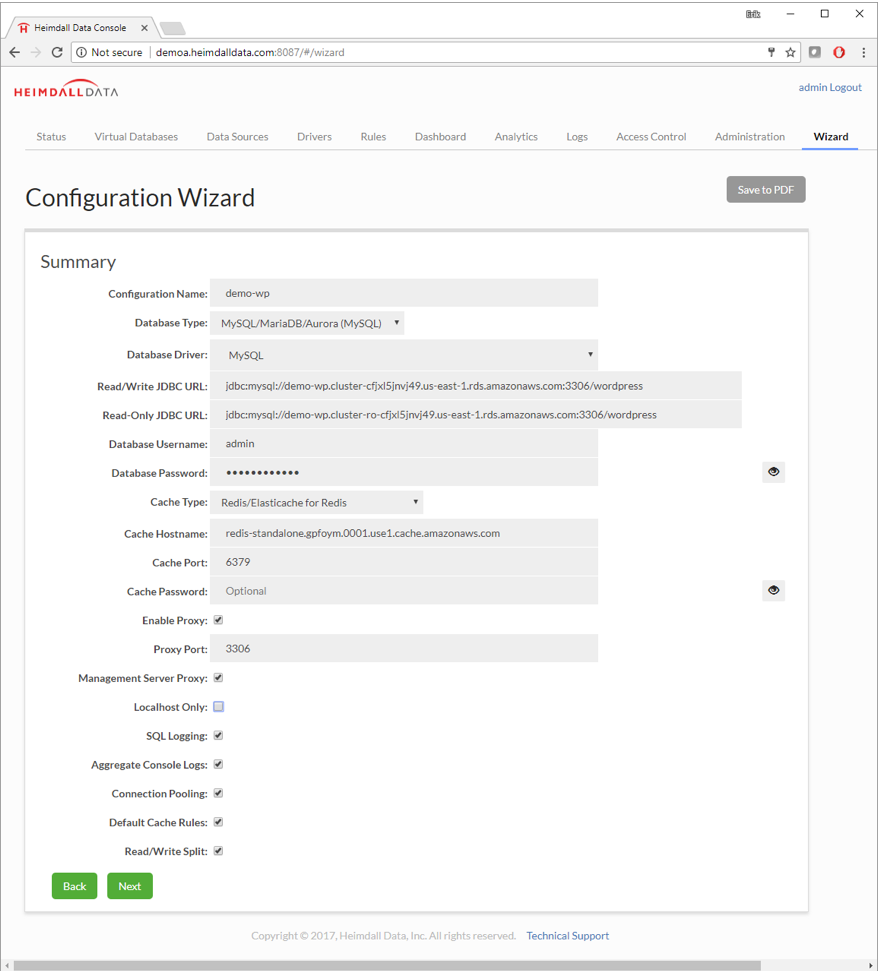
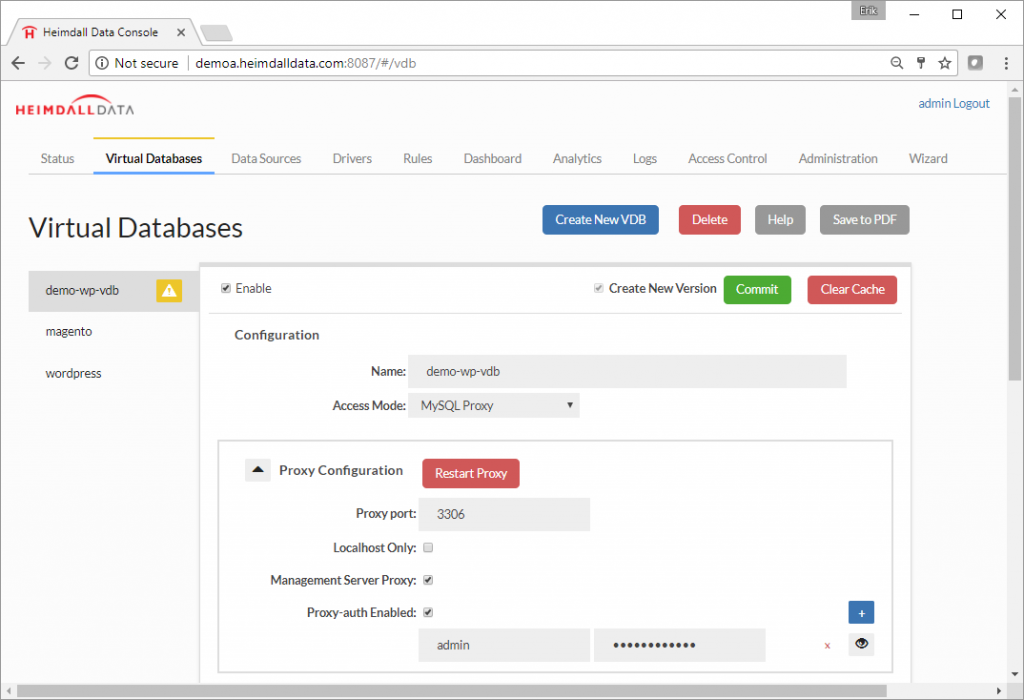
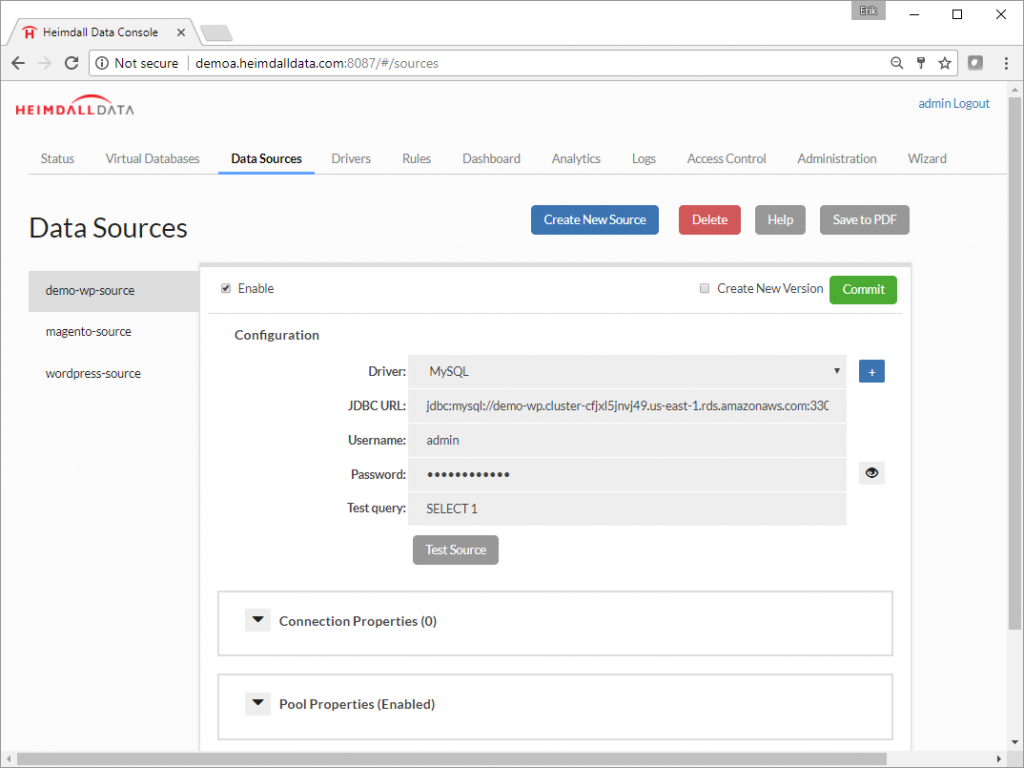
Step 10. To connect the application to the Heimdall Database Proxy, just change the database configuration to match the Heimdall database proxy. The existing MySQL configuration in WordPress was changed to 127.0.0.1:3306. This change is usually straightforward, but is specific to your application. Details on the URL to use for the Heimdall JDBC Driver are in the JDBC section of the Virtual Database, or for the proxy, in the Proxy Configuration section.
Step 11. The dashboard provides information on query traffic and server performance for a WordPress application. Notice:
- Average query time from cache is 50 microseconds compared to 1000 microseconds from the database.
- Performance boost of over 20 times!
- 90% cache hit rate: The load on the database is reduced significantly allowing for more users to be supported on the same database infrastructure.

Heimdall Data automates caching for Amazon Elasticache. Configuration is simple requiring zero disruption to the application or Amazon RDS. Users will experience up to 5x improvement in performance and scale. Heimdall is available as a free trial on the Amazon Marketplace or downloaded at the Heimdall Data website.


Roland Lee
Very informative. Thanks for posting.
Manikanta Perumalla
Good Artical
Kavya
Quality Data in this article
Nihitha
Quality Data