Dear Readers,
In this article we will see how to clone a virtual machine and will add shared storage for both the machines.

Please check previous article
Node Preparation for 19c RAC Installation (Installing Vmbox tools,Configuring Network,Installing ASMLIBs & Packages)
How to clone a virtual machine
Note : In order to clone a machine it need to be in shutdown state.
Step 1:
Right click on RAC Node-1 machine and choose option clone

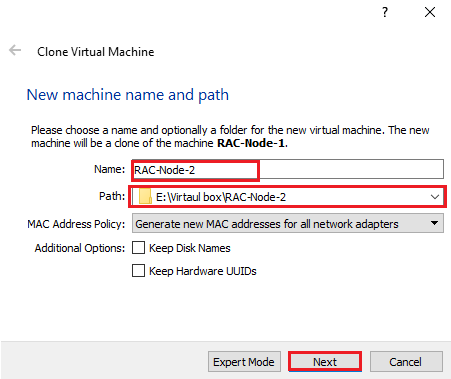
Step 2:
Specify the Machine Name and Path
Click on Next
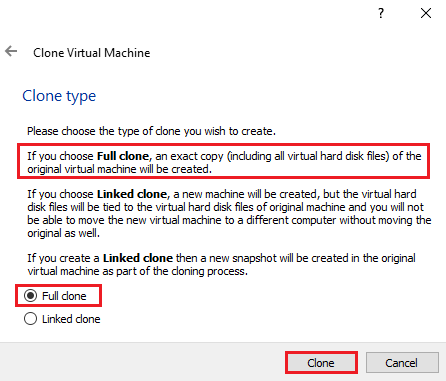
Step 3 :
Choose full clone
It will be exact copy of virtual machine including hard disks.
Step 4 :
Cloning takes time

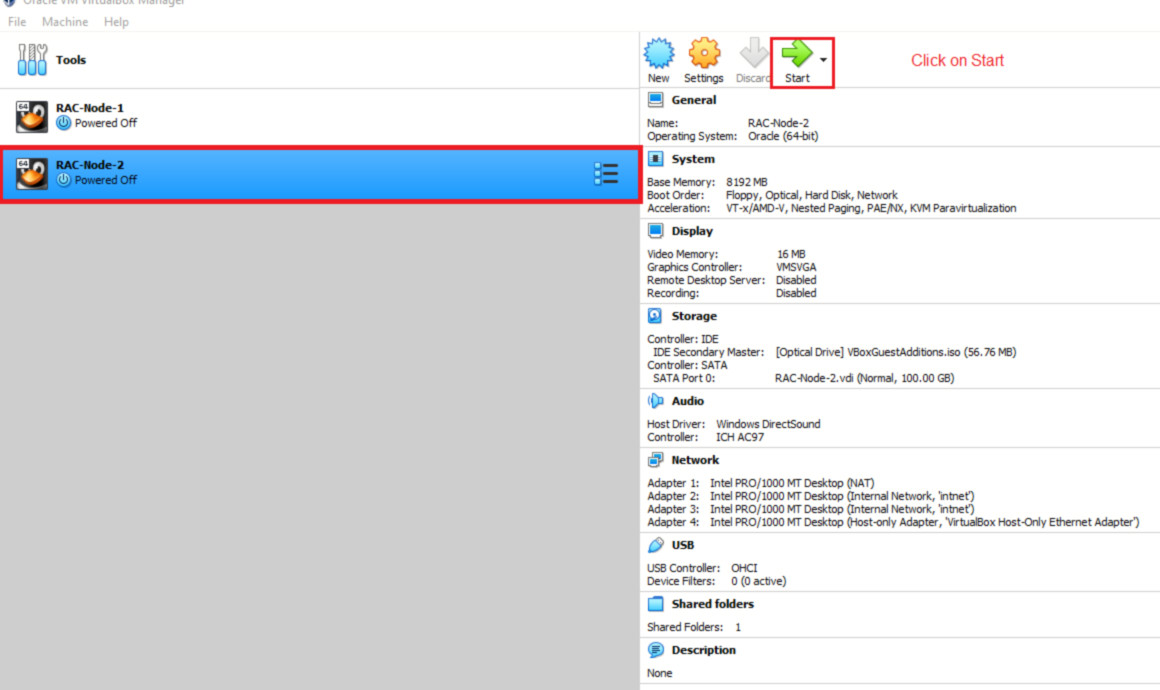
Step 5 :
After clone we can see RAC Node -2 machine
Click on start
Login with root authentication
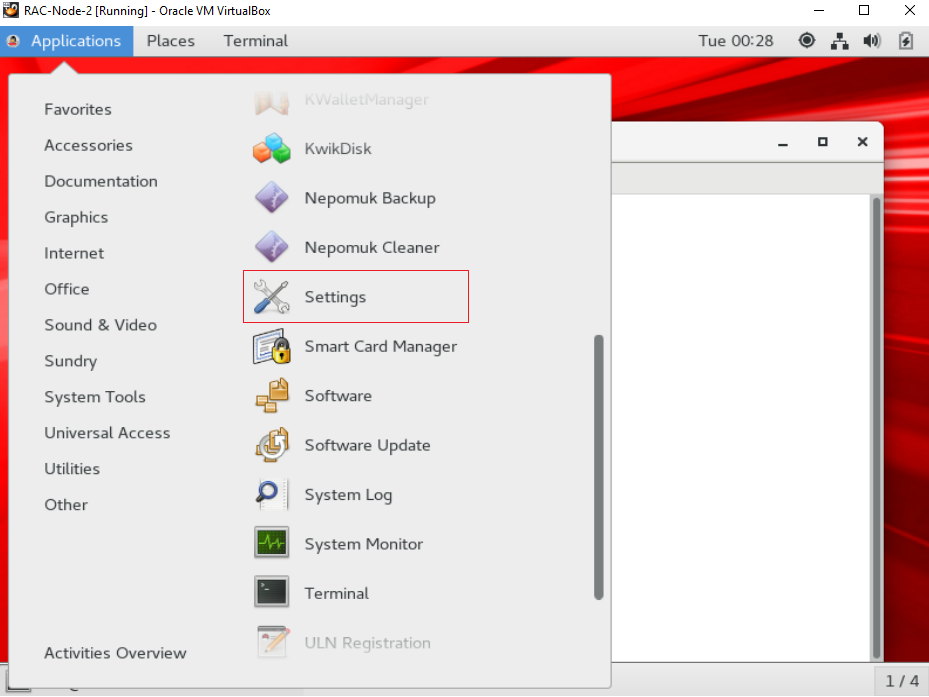
Step 6:
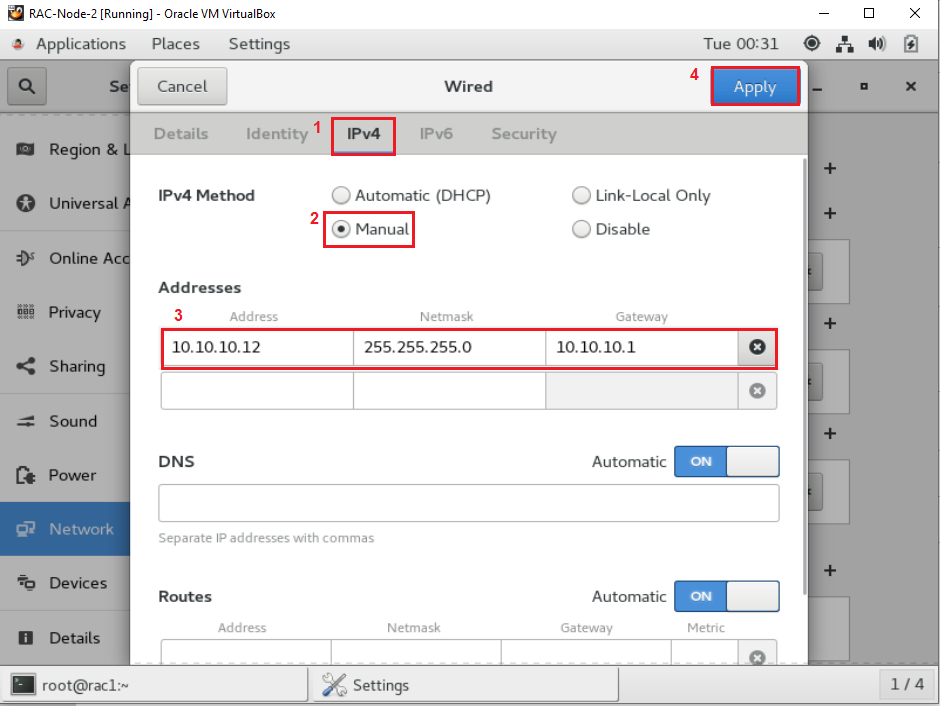
Goto settings and change IP address accordingly
Goto Network –> Choose enp0s8 and click on Settings

Goto Ipv4–> Manual –> Give IP address–> apply
Same settings in enp0s9, Goto Ipv4–> Manual –> Give IP address–> apply
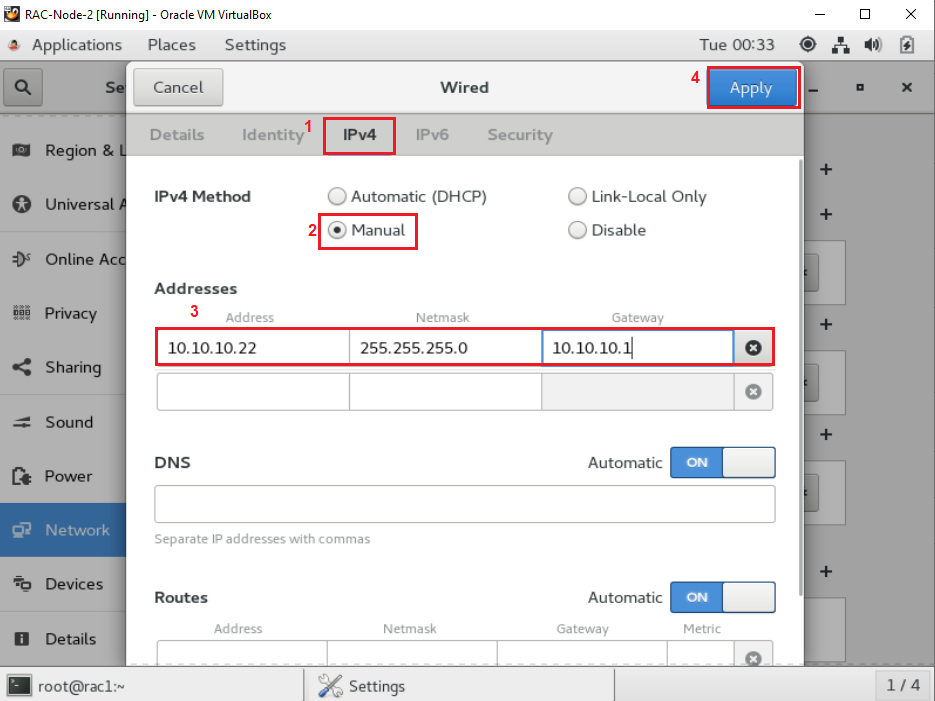
Same settings in enp0s10, Goto Ipv4–> Manual –> Give IP address–> apply

Step 7 :
Open terminal and change hostname of RAC Node-2
|
1 2 3 4 5 6 7 8 |
[root@rac1 ~]# hostname rac1.ajay.com [root@rac1 ~]# vi /etc/hostname rac2.ajay.com [root@rac1 ~]# systemctl restart systemd-hostnamed |
Check Hostname (Some times it needs restart)
|
1 2 |
[root@rac2 ~]# hostname rac2.ajay.com |
How to add Shared Storage
We can add Storage on any of the machines and later need to share with other machine
So now will add storage on RAC Node-1
Step 1 :
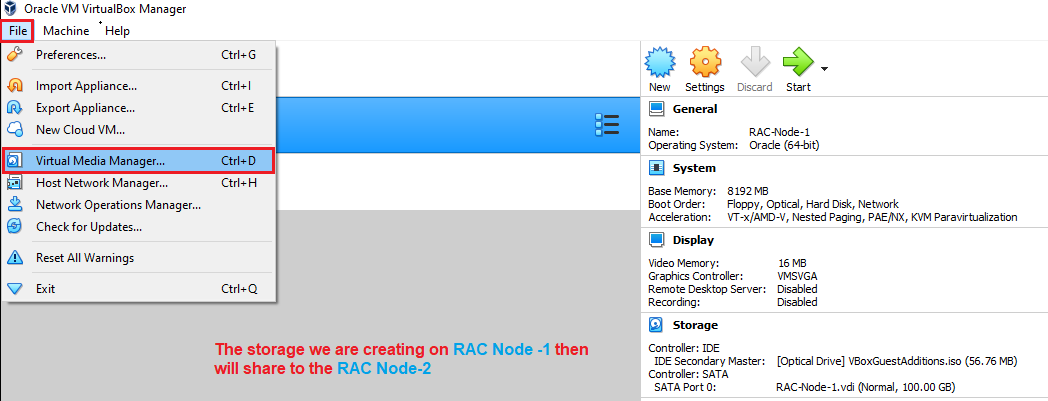
Choose RAC Node-1
Click on File –> Virtual Media Manager
Step 2 :
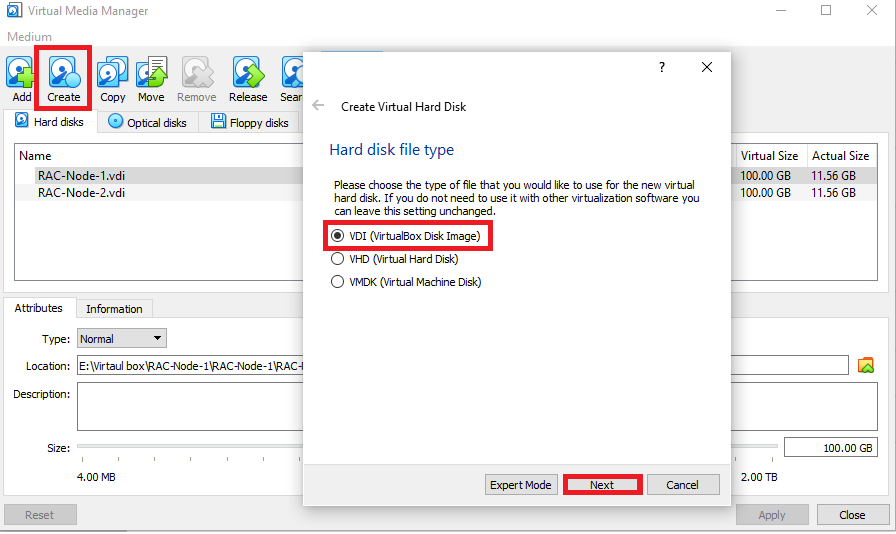
Click on Create and choose disk type as Virtual Disk Image(VDI)
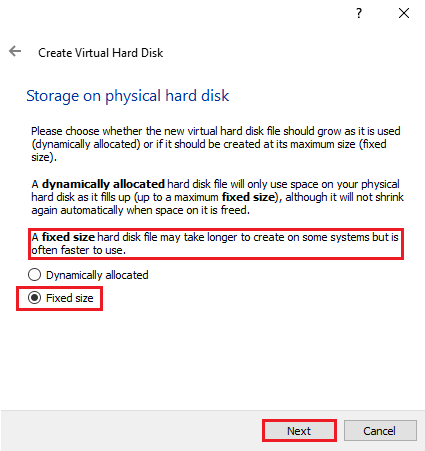
Step 3 :
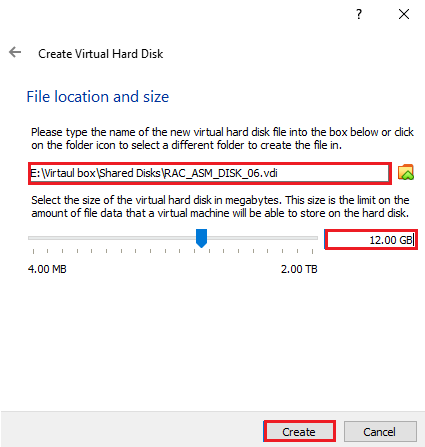
Choose fixed size
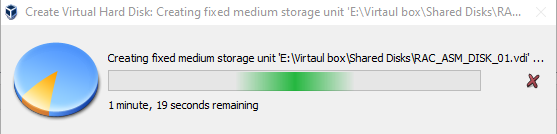
Step 4 :
Provide location and size to create RAC_ASM_DISK_01
Click on Create

Creating Shared Disk-1
In the same way create Six Hard disks
RAC_ASM_DISK_02 , RAC_ASM_DISK_03,RAC_ASM_DISK_04, RAC_ASM_DISK_05, RAC_ASM_DISK_06
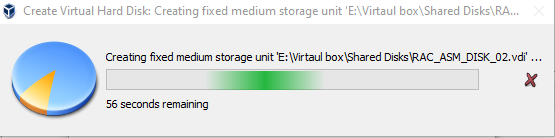
Provide location and size to create RAC_ASM_DISK_02
Click on Create

Creating Shared Disk-2
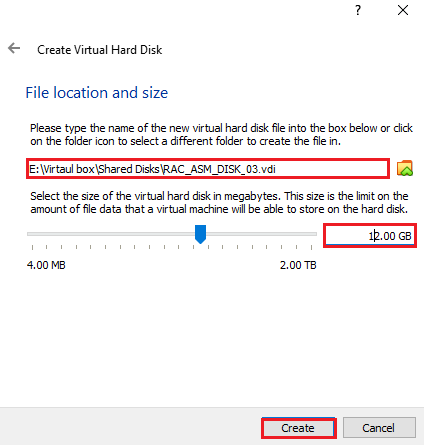
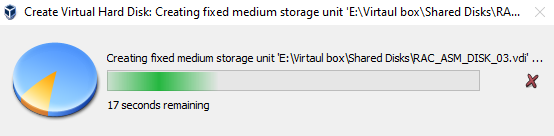
Provide location and size to create RAC_ASM_DISK_03
Click on Create
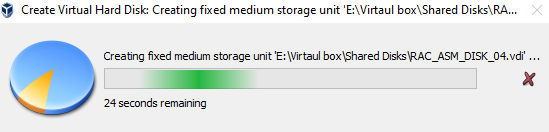
Provide location and size to create RAC_ASM_DISK_04
Click on Create

Provide location and size to create RAC_ASM_DISK_05
Click on Create


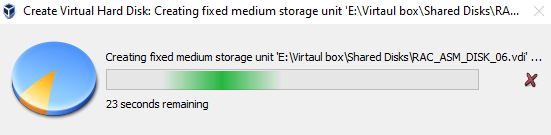
Provide location and size to create RAC_ASM_DISK_06
Click on Create
Step 5 :
After creating hard disks ,Choose properties to check list of HDD
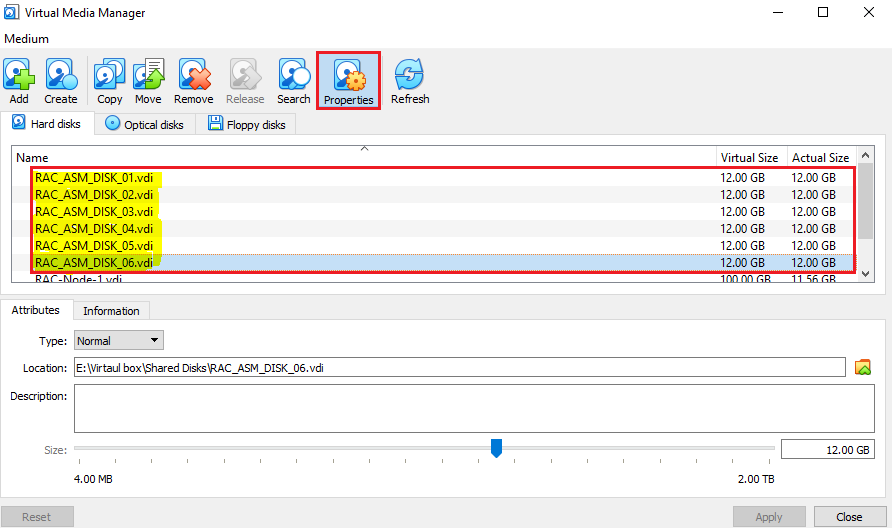
These disks has been created on RAC Node-1 and to share with RAC Node -2
Choose disk-1 and change disk type as Shareable.
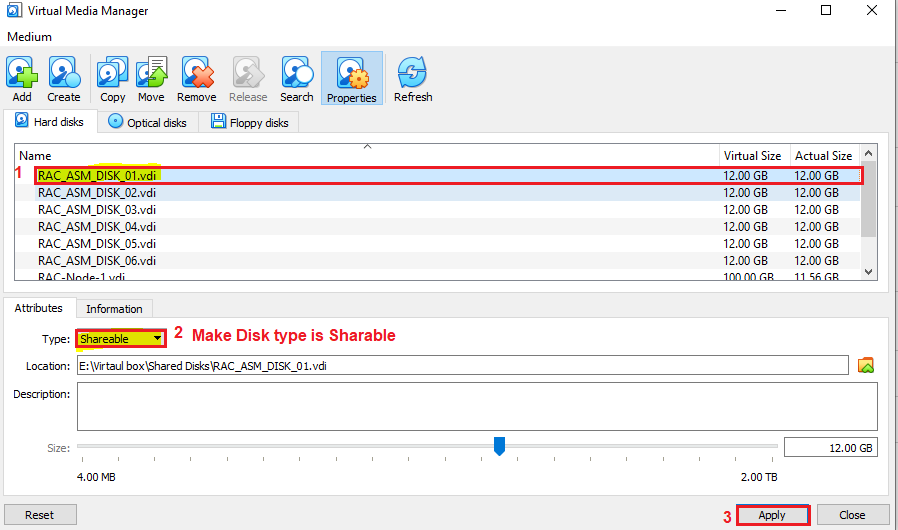
Do same for all the six disks
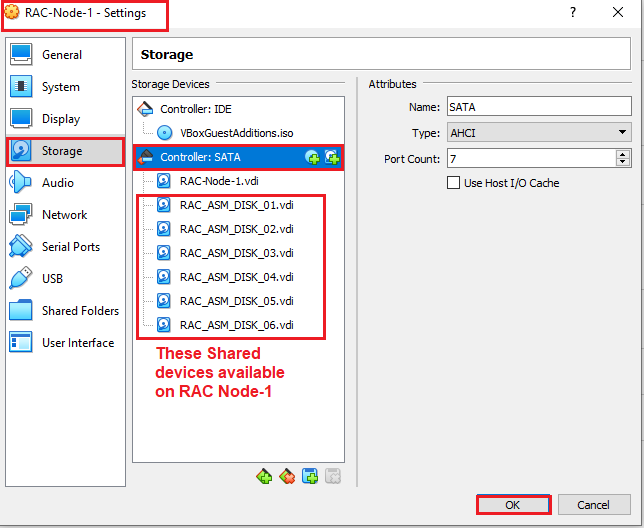
Once done, check whether disks are available on both Nodes
RAC Node-1
RAC Node-2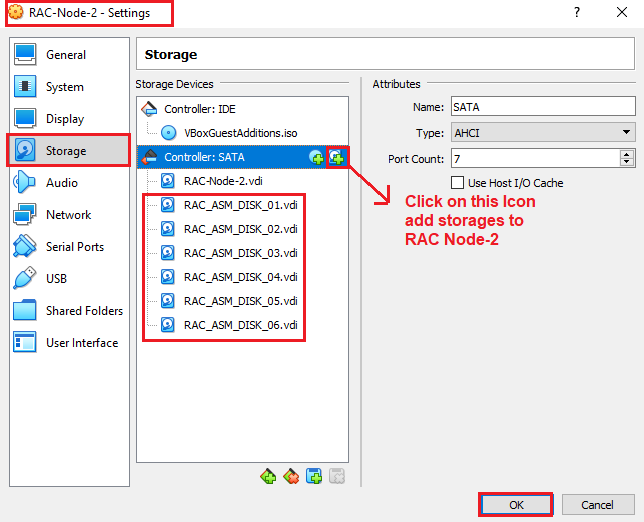
Start RAC Node -1 and RAC Node -2 and Check Partitions
|
1 2 3 4 5 6 7 8 9 10 11 12 13 14 15 16 17 18 19 20 21 22 23 24 25 26 27 28 29 30 31 32 33 34 35 36 37 38 39 40 41 42 43 44 45 46 47 48 49 50 51 52 53 54 55 56 57 58 59 60 61 62 63 64 65 66 67 68 69 70 71 72 |
[root@rac1 ~]# fdisk -l Disk /dev/sda: 107.4 GB, 107374182400 bytes, 209715200 sectors Units = sectors of 1 * 512 = 512 bytes Sector size (logical/physical): 512 bytes / 512 bytes I/O size (minimum/optimal): 512 bytes / 512 bytes Disk label type: dos Disk identifier: 0x0003c9a9 Device Boot Start End Blocks Id System /dev/sda1 * 2048 3907583 1952768 83 Linux /dev/sda2 3907584 168927231 82509824 8e Linux LVM Disk /dev/sdb: 12.9 GB, 12884901888 bytes, 25165824 sectors Units = sectors of 1 * 512 = 512 bytes Sector size (logical/physical): 512 bytes / 512 bytes I/O size (minimum/optimal): 512 bytes / 512 bytes Disk /dev/sdc: 12.9 GB, 12884901888 bytes, 25165824 sectors Units = sectors of 1 * 512 = 512 bytes Sector size (logical/physical): 512 bytes / 512 bytes I/O size (minimum/optimal): 512 bytes / 512 bytes Disk /dev/sdd: 12.9 GB, 12884901888 bytes, 25165824 sectors Units = sectors of 1 * 512 = 512 bytes Sector size (logical/physical): 512 bytes / 512 bytes I/O size (minimum/optimal): 512 bytes / 512 bytes Disk /dev/sde: 12.9 GB, 12884901888 bytes, 25165824 sectors Units = sectors of 1 * 512 = 512 bytes Sector size (logical/physical): 512 bytes / 512 bytes I/O size (minimum/optimal): 512 bytes / 512 bytes Disk /dev/sdf: 12.9 GB, 12884901888 bytes, 25165824 sectors Units = sectors of 1 * 512 = 512 bytes Sector size (logical/physical): 512 bytes / 512 bytes I/O size (minimum/optimal): 512 bytes / 512 bytes Disk /dev/sdg: 12.9 GB, 12884901888 bytes, 25165824 sectors Units = sectors of 1 * 512 = 512 bytes Sector size (logical/physical): 512 bytes / 512 bytes I/O size (minimum/optimal): 512 bytes / 512 bytes Disk /dev/mapper/ol-root: 21.5 GB, 21474836480 bytes, 41943040 sectors Units = sectors of 1 * 512 = 512 bytes Sector size (logical/physical): 512 bytes / 512 bytes I/O size (minimum/optimal): 512 bytes / 512 bytes Disk /dev/mapper/ol-swap: 8002 MB, 8002732032 bytes, 15630336 sectors Units = sectors of 1 * 512 = 512 bytes Sector size (logical/physical): 512 bytes / 512 bytes I/O size (minimum/optimal): 512 bytes / 512 bytes Disk /dev/mapper/ol-u01: 50.0 GB, 50000297984 bytes, 97656832 sectors Units = sectors of 1 * 512 = 512 bytes Sector size (logical/physical): 512 bytes / 512 bytes I/O size (minimum/optimal): 512 bytes / 512 bytes Disk /dev/mapper/ol-home: 4999 MB, 4999610368 bytes, 9764864 sectors Units = sectors of 1 * 512 = 512 bytes Sector size (logical/physical): 512 bytes / 512 bytes I/O size (minimum/optimal): 512 bytes / 512 bytes |
Create partitions for all six disks
sdb,sdc,sdd,sde,sdf,sdg
|
1 2 3 4 5 6 7 8 9 10 11 12 13 14 15 16 17 18 19 20 21 22 23 24 25 26 |
[root@rac1 ~]# fdisk /dev/sdb Welcome to fdisk (util-linux 2.23.2). Changes will remain in memory only, until you decide to write them. Be careful before using the write command. Device does not contain a recognized partition table Building a new DOS disklabel with disk identifier 0x87830bb4. Command (m for help): n Partition type: p primary (0 primary, 0 extended, 4 free) e extended Select (default p): p Partition number (1-4, default 1): First sector (2048-25165823, default 2048): Using default value 2048 Last sector, +sectors or +size{K,M,G} (2048-25165823, default 25165823): Using default value 25165823 Partition 1 of type Linux and of size 12 GiB is set Command (m for help): w The partition table has been altered! Calling ioctl() to re-read partition table. Syncing disks. |
Do same for remaining all disks sdc,sdd,sde,sdf,sdg
Check partitions again using fdsik-l
|
1 2 3 4 5 6 7 8 9 10 11 12 13 14 15 16 17 18 19 20 21 22 23 24 25 26 27 28 29 30 31 32 33 34 35 36 37 38 39 40 41 42 43 44 45 46 47 48 49 50 51 52 53 54 55 56 57 58 59 60 61 62 63 64 65 66 67 68 69 70 71 72 73 74 75 76 77 78 79 80 81 82 83 84 85 86 87 88 89 90 91 92 93 94 95 |
[root@rac1 ~]# fdisk -l Disk /dev/sda: 107.4 GB, 107374182400 bytes, 209715200 sectors Units = sectors of 1 * 512 = 512 bytes Sector size (logical/physical): 512 bytes / 512 bytes I/O size (minimum/optimal): 512 bytes / 512 bytes Disk label type: dos Disk identifier: 0x0003c9a9 Device Boot Start End Blocks Id System /dev/sda1 * 2048 3907583 1952768 83 Linux /dev/sda2 3907584 168927231 82509824 8e Linux LVM Disk /dev/sdb: 12.9 GB, 12884901888 bytes, 25165824 sectors Units = sectors of 1 * 512 = 512 bytes Sector size (logical/physical): 512 bytes / 512 bytes I/O size (minimum/optimal): 512 bytes / 512 bytes Disk label type: dos Disk identifier: 0x87830bb4 Device Boot Start End Blocks Id System /dev/sdb1 2048 25165823 12581888 83 Linux Disk /dev/sdc: 12.9 GB, 12884901888 bytes, 25165824 sectors Units = sectors of 1 * 512 = 512 bytes Sector size (logical/physical): 512 bytes / 512 bytes I/O size (minimum/optimal): 512 bytes / 512 bytes Disk label type: dos Disk identifier: 0x4b5b3e09 Device Boot Start End Blocks Id System /dev/sdc1 2048 25165823 12581888 83 Linux Disk /dev/sdd: 12.9 GB, 12884901888 bytes, 25165824 sectors Units = sectors of 1 * 512 = 512 bytes Sector size (logical/physical): 512 bytes / 512 bytes I/O size (minimum/optimal): 512 bytes / 512 bytes Disk label type: dos Disk identifier: 0x9446bcae Device Boot Start End Blocks Id System /dev/sdd1 2048 25165823 12581888 83 Linux Disk /dev/sde: 12.9 GB, 12884901888 bytes, 25165824 sectors Units = sectors of 1 * 512 = 512 bytes Sector size (logical/physical): 512 bytes / 512 bytes I/O size (minimum/optimal): 512 bytes / 512 bytes Disk label type: dos Disk identifier: 0xdf24740a Device Boot Start End Blocks Id System /dev/sde1 2048 25165823 12581888 83 Linux Disk /dev/sdf: 12.9 GB, 12884901888 bytes, 25165824 sectors Units = sectors of 1 * 512 = 512 bytes Sector size (logical/physical): 512 bytes / 512 bytes I/O size (minimum/optimal): 512 bytes / 512 bytes Disk label type: dos Disk identifier: 0x8a880671 Device Boot Start End Blocks Id System /dev/sdf1 2048 25165823 12581888 83 Linux Disk /dev/sdg: 12.9 GB, 12884901888 bytes, 25165824 sectors Units = sectors of 1 * 512 = 512 bytes Sector size (logical/physical): 512 bytes / 512 bytes I/O size (minimum/optimal): 512 bytes / 512 bytes Disk label type: dos Disk identifier: 0x7ca67c09 Device Boot Start End Blocks Id System /dev/sdg1 2048 25165823 12581888 83 Linux Disk /dev/mapper/ol-root: 21.5 GB, 21474836480 bytes, 41943040 sectors Units = sectors of 1 * 512 = 512 bytes Sector size (logical/physical): 512 bytes / 512 bytes I/O size (minimum/optimal): 512 bytes / 512 bytes Disk /dev/mapper/ol-swap: 8002 MB, 8002732032 bytes, 15630336 sectors Units = sectors of 1 * 512 = 512 bytes Sector size (logical/physical): 512 bytes / 512 bytes I/O size (minimum/optimal): 512 bytes / 512 bytes Disk /dev/mapper/ol-u01: 50.0 GB, 50000297984 bytes, 97656832 sectors Units = sectors of 1 * 512 = 512 bytes Sector size (logical/physical): 512 bytes / 512 bytes I/O size (minimum/optimal): 512 bytes / 512 bytes Disk /dev/mapper/ol-home: 4999 MB, 4999610368 bytes, 9764864 sectors Units = sectors of 1 * 512 = 512 bytes Sector size (logical/physical): 512 bytes / 512 bytes I/O size (minimum/optimal): 512 bytes / 512 bytes |
Create ASM disks
Goto /dev/oracleasm/disks
|
1 2 3 4 5 6 7 8 9 10 11 12 13 14 15 16 17 18 19 20 21 |
[root@rac1 ~]# cd /dev/oracleasm/disks [root@rac1 disks]# ls -ltr total 0 [root@rac1 disks]# oracleasm createdisk ASM_DATA_01 /dev/sdb1 Writing disk header: done Instantiating disk: done [root@rac1 disks]# oracleasm createdisk ASM_DATA_02 /dev/sdc1 Writing disk header: done Instantiating disk: done [root@rac1 disks]# oracleasm createdisk ASM_DATA_03 /dev/sdd1 Writing disk header: done Instantiating disk: done [root@rac1 disks]# oracleasm createdisk ASM_DATA_04 /dev/sde1 Writing disk header: done Instantiating disk: donecheck rac [root@rac1 disks]# oracleasm createdisk ASM_FRA_01 /dev/sdf1 Writing disk header: done Instantiating disk: done [root@rac1 disks]# oracleasm createdisk ASM_FRA_02 /dev/sdg1 Writing disk header: done Instantiating disk: done |
Once created ,use oracleasm scandisks commands to scan available disks
|
1 2 3 4 |
[root@rac1 disks]# oracleasm scandisks Reloading disk partitions: done Cleaning any stale ASM disks... Scanning system for ASM disks... |
After scan, to list out all available disks use command oracleasm listdisks
|
1 2 3 4 5 6 7 |
[root@rac1 disks]# oracleasm listdisks ASM_DATA_01 ASM_DATA_02 ASM_DATA_03 ASM_DATA_04 ASM_FRA_01 ASM_FRA_02 |
The above disks should be available at RAC Node -2
Check using below commands
|
1 2 3 4 5 6 7 8 9 10 11 12 13 14 15 16 17 18 |
[root@rac2 ~]# oracleasm listdisks [root@rac2 ~]# oracleasm scandisks Reloading disk partitions: done Cleaning any stale ASM disks... Scanning system for ASM disks... Instantiating disk "ASM_DATA_01" Instantiating disk "ASM_DATA_02" Instantiating disk "ASM_DATA_03" Instantiating disk "ASM_DATA_04" Instantiating disk "ASM_FRA_01" Instantiating disk "ASM_FRA_02" [root@rac2 ~]# oracleasm listdisks ASM_DATA_01 ASM_DATA_02 ASM_DATA_03 ASM_DATA_04 ASM_FRA_01 ASM_FRA_02 |
Disks has been shared for both the nodes ,we ready start Installation of 19c GRID INFRASTRUCTURE SOFTWARE .
Check below link for Installation of 19c GRID INFRASTRUCTURE SERVICES.
I hope above information was very helpful.
Thank you for giving your valuable time to read the above information. Please click here to subscribe for further updates
KTEXPERTS is always active on below social media platforms.
Facebook : https://www.facebook.com/ktexperts/
LinkedIn : https://www.linkedin.com/company/ktexperts/
Twitter : https://twitter.com/ktexpertsadmin
YouTube : https://www.youtube.com/c/ktexperts