Dear Readers,
In this article we will see Node Preparation for 19c RAC Installation (Installing Vmbox tools,Configuring Network,Installing ASMLIBs & Packages)

Please check previous article
Installing Linux 7.5 on Virtual Box Machine (RAC Node 1)
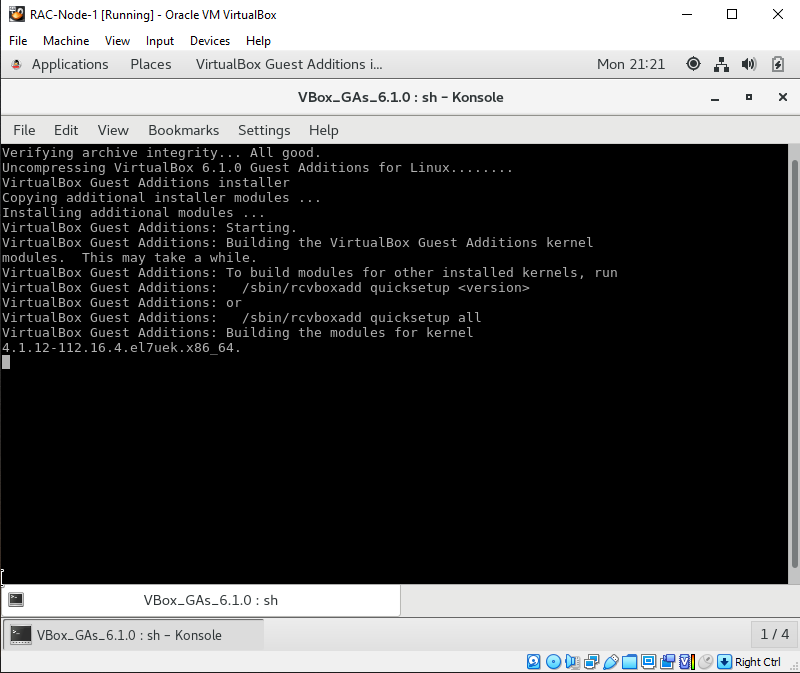
Installing Vmbox tool
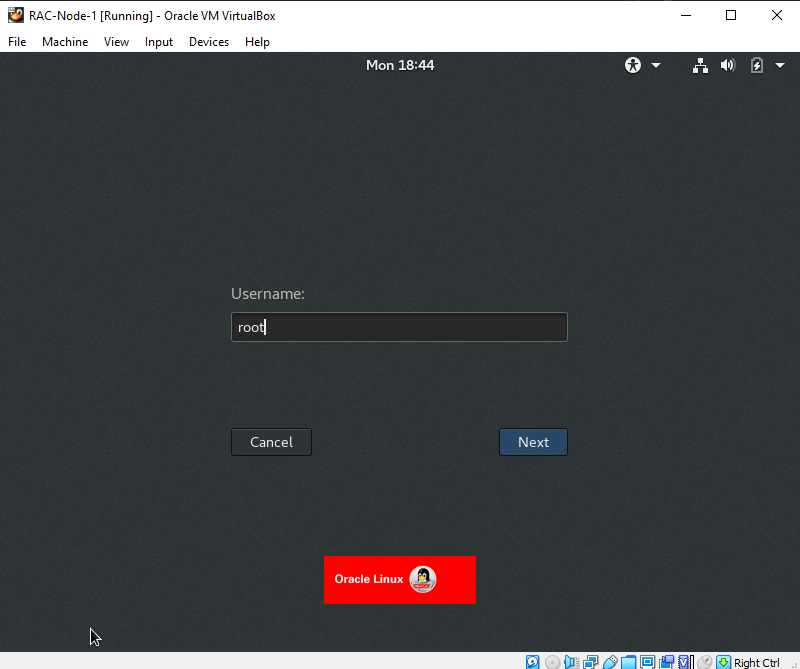
Login as root user.
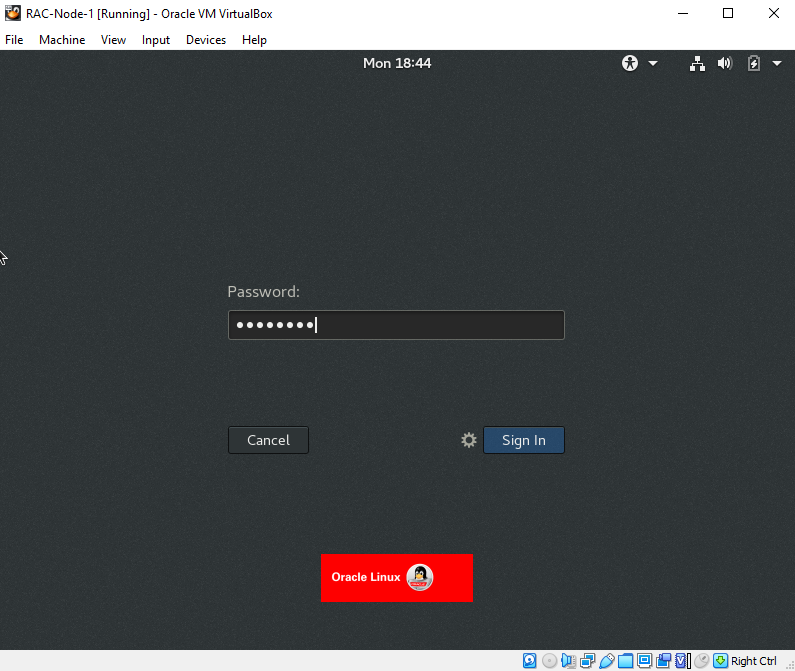
Provide Authentication details.
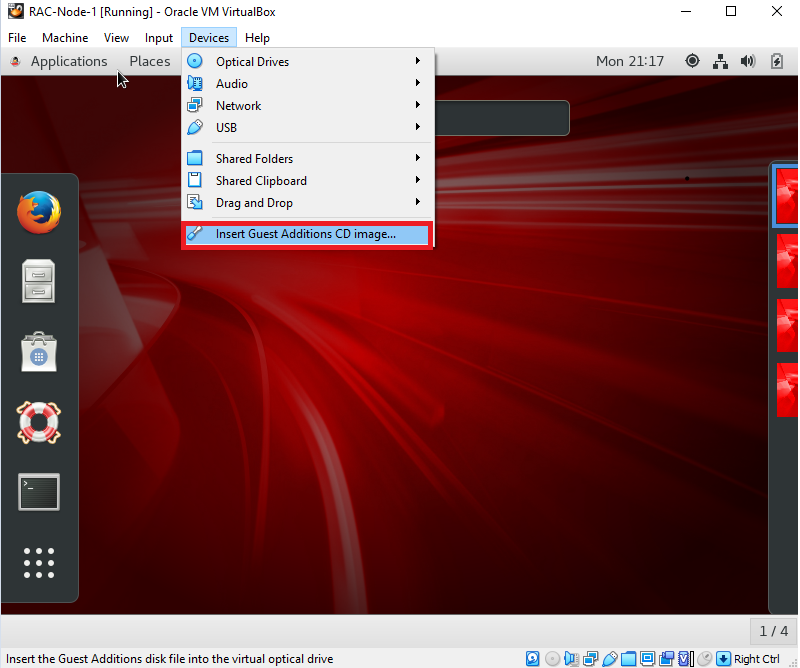
Goto Devices and Choose Insert Guest addition CD image
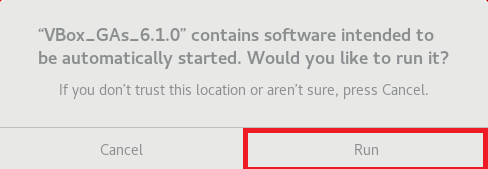
It asks to run a file , SO click on RUN
It will open another terminal box to install Vmbox tools.
Network Configuration.
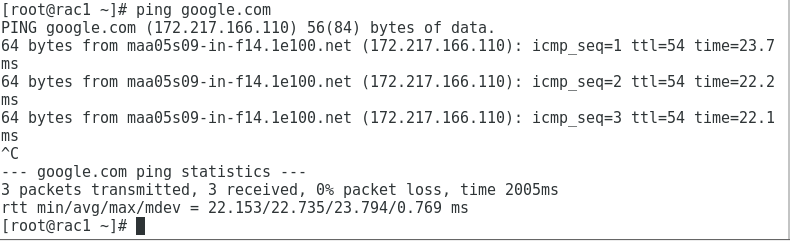
Check Node-1 is pinging to Google or not.
Configure /etc/hosts file.
|
1 2 3 4 5 6 7 8 9 10 11 12 13 14 |
root@rac1 ~]# vi /etc/hosts #PUBLIC IP 10.10.10.11 rac1.ajay.com rac1 10.10.10.12 rac2.ajay.com rac2 #VIP 10.10.10.21 rac1-vip.ajay.com rac1-vip 10.10.10.22 rac2-vip.ajay.com rac2-vip #PRIVATE IP 192.168.56.101 rac1-priv.ajay.com rac1-priv 192.168.56.102 rac2-priv.ajay.com rac2-priv #SCAN-IP 10.10.10.10 rac-scan.ajay.com rac-scan 10.10.10.20 rac-scan.ajay.com rac-scan 10.10.10.30 rac-scan.ajay.com rac-scan |
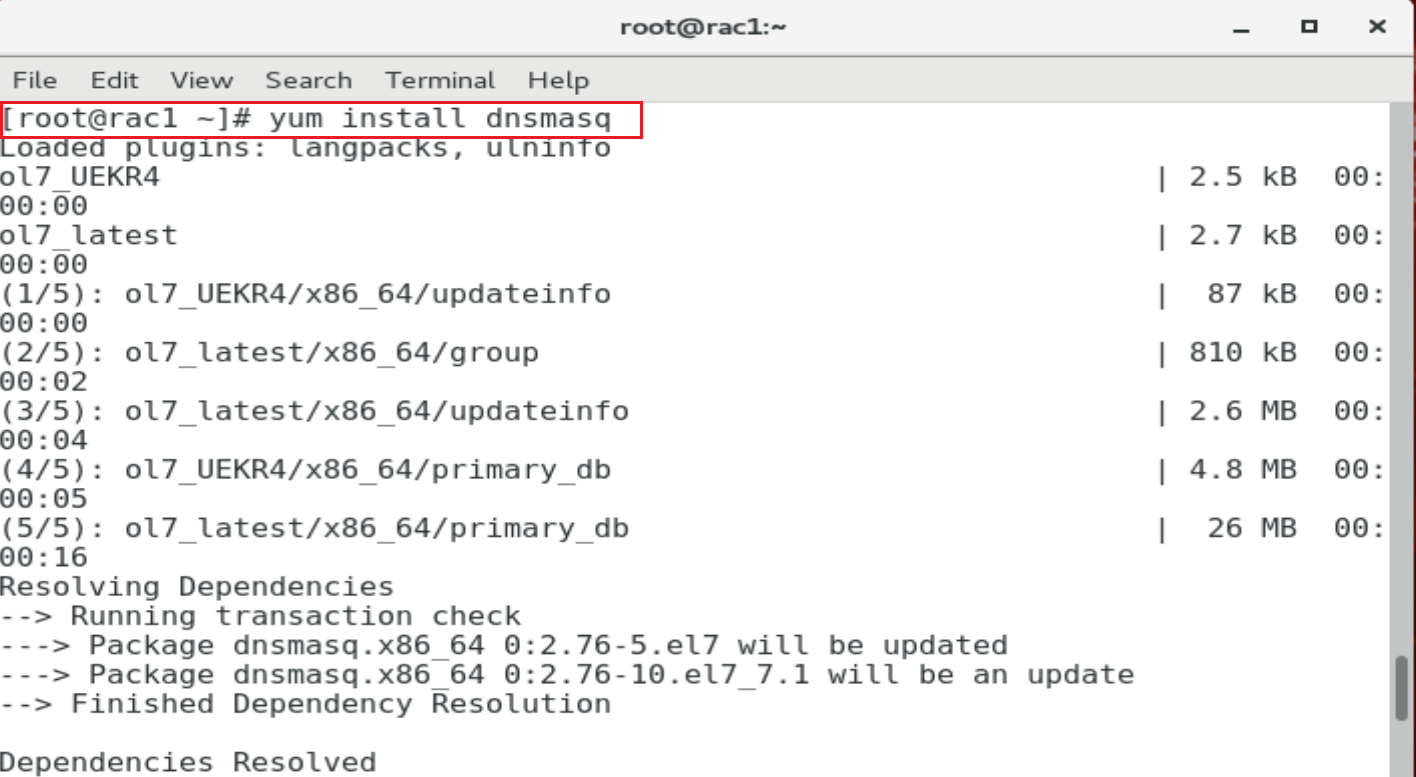
Install “dnsmasq” package for local DNS: Its mandatory SCAN-NAME should be registered in DNS.
check rpm is available or not
|
1 |
rpm -q | dnsmasq |
Install “dnsmasq” package using yum

Create a text file which can store scan names
|
1 2 3 4 5 |
[root@rac1 ~]# vi /etc/racdns #SCAN-IP 10.10.10.10 rac-scan.ajay.com rac-scan 10.10.10.20 rac-scan.ajay.com rac-scan 10.10.10.30 rac-scan.ajay.com rac-scan |
Edit /etc/dnsmasq.conf file
|
1 2 |
[root@rac1 ~]# vi /etc/dnsmasq.conf addn-hosts=/etc/racdns |
Start the dnsmasq
|
1 2 |
[root@rac1 ~]# service dnsmasq start Redirecting to /bin/systemctl start dnsmasq.service |
Enable the dnsmasq service

Edit /etc/resolv.conf
add the line nameserver 127.0.0.1
|
1 2 |
[root@rac1 ~]# vi /etc/resolv.conf nameserver 127.0.0.1 |
Restarted named services and host
|
1 2 |
[root@rac1 ~]# chattr +i /etc/resolv.conf [root@rac1 ~]# shutdown -r now |
Check NSLOOKUP for Scan IP’s
|
1 2 3 4 5 6 7 8 9 10 11 12 13 14 15 16 17 18 |
[root@rac1 ~]# nslookup 10.10.10.10 Server: 127.0.0.1 Address: 127.0.0.1#53 10.10.10.10.in-addr.arpa name = rac-scan.ajay.com. [root@rac1 ~]# nslookup 10.10.10.20 Server: 127.0.0.1 Address: 127.0.0.1#53 20.10.10.10.in-addr.arpa name = rac-scan.ajay.com. [root@rac1 ~]# nslookup 10.10.10.30 Server: 127.0.0.1 Address: 127.0.0.1#53 30.10.10.10.in-addr.arpa name = rac-scan.ajay.com. |
Installing and Configuring Oracle ASMLIB Libraries
1.Install the ASMLib kernel module package as root using the following command:

2.Install the ASMLib library package and utility packages

3.Install ASMLIB using yum command
https://download.oracle.com/otn_software/asmlib/oracleasmlib-2.0.12-1.el7.x86_64.rpm

Installing Oracle database 19c Preinstall package .
|
1 2 3 4 5 6 7 8 9 10 11 12 13 14 15 16 17 18 19 20 21 22 23 24 25 26 27 28 29 30 31 32 33 34 35 36 37 38 39 40 41 42 43 44 45 46 47 48 49 50 51 52 53 54 55 |
[root@rac1 ~]# yum install oracle-database-preinstall-19c.x86_64 Loaded plugins: langpacks, ulninfo Resolving Dependencies --> Running transaction check ---> Package oracle-database-preinstall-19c.x86_64 0:1.0-1.el7 will be installed --> Processing Dependency: ksh for package: oracle-database-preinstall-19c-1.0-1.el7.x86_64 --> Processing Dependency: libaio-devel for package: oracle-database-preinstall-19c-1.0-1.el7.x86_64 --> Running transaction check ---> Package ksh.x86_64 0:20120801-139.0.1.el7 will be installed ---> Package libaio-devel.x86_64 0:0.3.109-13.el7 will be installed --> Finished Dependency Resolution Dependencies Resolved ======================================================================================= Package Arch Version Repository Size ======================================================================================= Installing: oracle-database-preinstall-19c x86_64 1.0-1.el7 ol7_latest 18 k Installing for dependencies: ksh x86_64 20120801-139.0.1.el7 ol7_latest 883 k libaio-devel x86_64 0.3.109-13.el7 ol7_latest 12 k Transaction Summary ======================================================================================= Install 1 Package (+2 Dependent packages) Total download size: 913 k Installed size: 3.2 M Is this ok [y/d/N]: y Downloading packages: (1/3): libaio-devel-0.3.109-13.el7.x86_64.rpm | 12 kB 00:00:00 (2/3): ksh-20120801-139.0.1.el7.x86_64.rpm | 883 kB 00:00:00 (3/3): oracle-database-preinstall-19c-1.0-1.el7.x86_64.rpm | 18 kB 00:00:00 --------------------------------------------------------------------------------------- Total 1.4 MB/s | 913 kB 00:00 Running transaction check Running transaction test Transaction test succeeded Running transaction Installing : ksh-20120801-139.0.1.el7.x86_64 1/3 Installing : libaio-devel-0.3.109-13.el7.x86_64 2/3 Installing : oracle-database-preinstall-19c-1.0-1.el7.x86_64 3/3 Verifying : libaio-devel-0.3.109-13.el7.x86_64 1/3 Verifying : ksh-20120801-139.0.1.el7.x86_64 2/3 Verifying : oracle-database-preinstall-19c-1.0-1.el7.x86_64 3/3 Installed: oracle-database-preinstall-19c.x86_64 0:1.0-1.el7 Dependency Installed: ksh.x86_64 0:20120801-139.0.1.el7 libaio-devel.x86_64 0:0.3.109-13.el7 Complete! |
Oracle User has been created with above package install .Check using below command
|
1 2 |
[root@rac1 u01]# id oracle uid=54321(oracle) gid=54321(oinstall) groups=54321(oinstall),54322(dba),54323(oper),54324(backupdba),54325(dgdba),54326(kmdba),54330(racdba) |
SET ORACLE PASSWORD
|
1 2 3 4 5 6 |
[root@rac1 ~]# passwd oracle Changing password for user oracle. New password: BAD PASSWORD: The password is shorter than 8 characters Retype new password: passwd: all authentication tokens updated successfully. |
Create required groups and change the permissions
|
1 2 3 4 5 |
[root@rac1 ~]# groupadd -g 54327 asmdba [root@rac1 ~]# groupadd -g 54328 asmoper [root@rac1 ~]# groupadd -g 54329 asmadmin [root@rac1 ~] usermod -G asmdba,asmoper,asmadmin oracle |
Create directory to install Oracle grid and Oracle database software
|
1 2 3 4 5 |
[root@rac1 ~]# mkdir -p /u01/app/grid [root@rac1 ~]# mkdir -p /u01/app/oracle/product/19.3.0 [root@rac1 ~]# chown -R oracle:oinstall /u01 [root@rac1 ~]# chmod -R 755 /u01/ |
STOP Firewalld
|
1 2 3 4 |
[root@rac1 ~]# systemctl stop firewalld [root@rac1 ~]# systemctl disable firewalld Removed symlink /etc/systemd/system/multi-user.target.wants/firewalld.service. Removed symlink /etc/systemd/system/dbus-org.fedoraproject.FirewallD1.service. |
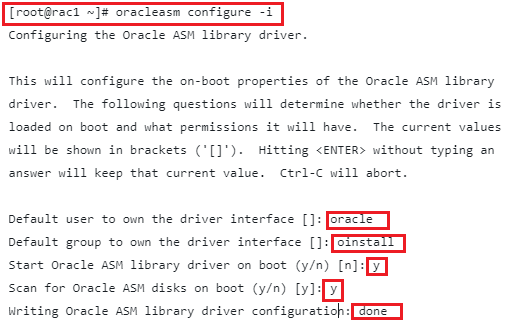
Perform ASM Configuration
[root@rac1 ~]# oracleasm configure -i
Initialize ASMLib
|
1 2 3 4 5 6 7 |
Enter the following command to load the oracleasm kernel module: {root@rac1 ~] # /usr/sbin/oracleasm init Creating /dev/oracleasm mount point: /dev/oracleasm Loading module "oracleasm": oracleasm Configuring "oracleasm" to use device physical block size Mounting ASMlib driver filesystem:/dev/oracleasm |
Node Preparation has been done for Oracle 19c installation , Now we need to Clone the machine and add the Shared Storage
Check below link for Clone the machine and add the Shared Storage.
Cloning a virtual machine and How to add shared storage.
Thank you for giving your valuable time to read the above information. Please click here to subscribe for further updates
KTEXPERTS is always active on below social media platforms.
Facebook : https://www.facebook.com/ktexperts/
LinkedIn : https://www.linkedin.com/company/ktexperts/
Twitter : https://twitter.com/ktexpertsadmin
YouTube : https://www.youtube.com/c/ktexperts