
Dear Readers,
In this article, we will see the Create Elastic Load Balancer for WebServers in AWS.
We are going to do…
- Create 2 Web Servers
- Create Load Balancer
what is Elastic Load Balancing?
Elastic Load Balancing automatically distributes incoming application traffic across multiple Amazon EC2 instances. It enables you to achieve greater levels of fault tolerance in your applications, seamlessly providing the required amount of load balancing capacity needed to distribute application traffic. Elastic Load Balancing detects unhealthy instances and automatically reroutes traffic to healthy instances until the unhealthy instances have been restored. Customers can enable Elastic Load Balancing within a single or multiple Availability Zones for more consistent application performance.
Features of Elastic Load Balancing
High availability
Elastic Load Balancing automatically distributes traffic across multiple targets – Amazon EC2 instances, containers and IP addresses – in a single Availability Zone or multiple Availability Zones.
Health checks
Elastic Load Balancing can detect unhealthy targets, stop sending traffic to them, and then spread the load across the remaining healthy targets.
Security features
Use Amazon Virtual Private Cloud (Amazon VPC) to create and manage security groups associated with load balancers to provide additional networking and security options. You can also create an internal (non-internet-facing) load balancer.
TLS termination
Elastic Load Balancing provides integrated certificate management and SSL/TLS decryption, allowing you the flexibility to centrally manage the SSL settings of the load balancer and offload CPU intensive work from your application.
Layer 4 or Layer 7 load balancing
You can load balance HTTP/HTTPS applications for layer 7-specific features, or use strict layer 4 load balancing for applications that rely on the TCP and UDP protocols.
Operational monitoring
Elastic Load Balancing provides integration with Amazon CloudWatch metrics and request tracing in order to monitor performance of your applications in real time.
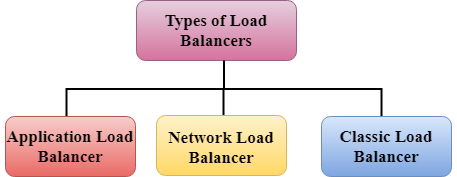
Types of Load Balancers
Elastic Load Balancing supports the following types of load balancers
- Application Load Balancer.
- Network Load Balancer.
- Classic Load Balancer.
Application Load Balancer
An Application Load Balancer makes routing decisions at the application layer (HTTP/HTTPS), supports path-based routing, and can route requests to one or more ports on each container instance in your cluster. Application Load Balancers support dynamic host port mapping.
Key Features
- HTTPS Support
- Server Name Indication
- IP Address as Target
- Security Features
- High Availability
- Content-Based Routing
- Web Sockets support
- Native IPv6 support
- Sticky Sessions
- Logging
- Delete Protection
- Request Tracing
- Web Application Firewall
Network Load Balancer
A Network Load Balancer makes routing decisions at the transport layer (TCP/SSL). It can handle millions of requests per second. After the load balancer receives a connection, it selects a target from the target group for the default rule using a flow hash routing algorithm. It attempts to open a TCP connection to the selected target on the port specified in the listener configuration. It forwards the request without modifying the headers. Network Load Balancers support dynamic host port mapping.
Key Features
- Connection Based Load Balancing
- High Availability
- High Throughput
- Low Latency
- Static IP Support
- Health Checks
- DNS Failover
- Central API Support
- Enhanced Logging
Classic Load Balancer
A Classic Load Balancer makes routing decisions at either the transport layer (TCP/SSL) or the application layer (HTTP/HTTPS). Classic Load Balancers currently require a fixed relationship between the load balancer port and the container instance port.
Key Features
- High Availability
- Health Checks
- Security Features
- SSL Offloading
- Sticky Sessions
- IPv6 support
- Layer 4 and Layer 7 Load Balancing
- Operational Monitoring
- Logging
For Creating Classic Elastic Load Balancers we need to follow below steps.
- Create 2 Web Servers
- Create Load Balancer
- STEP 1
Create WebServer – 1
To Create Web Server refer the following link.
STEP 2
Create WebServer – 2
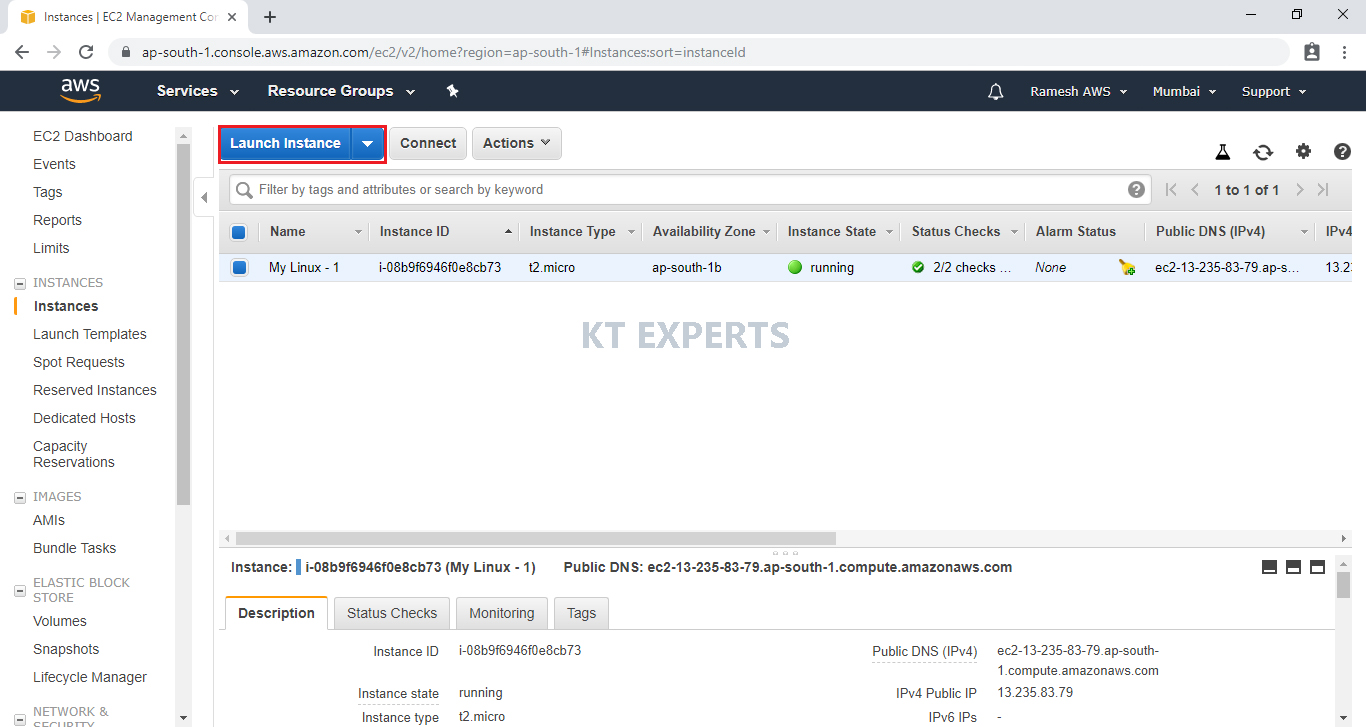
Launch Instance
Go to Instances and click on Launch Instance.
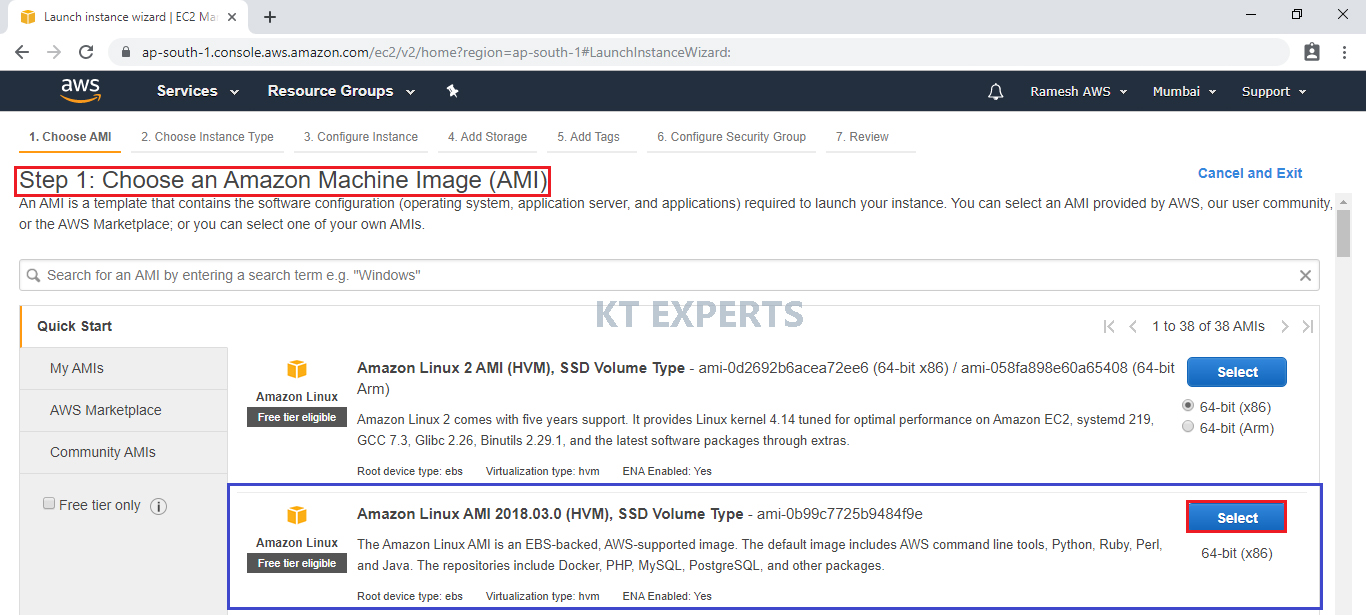
Choose an Amazon Machine Image (AMI)
Select the Operating system of the EC2 instance by choosing any of the Amazon Machine Images (AMI). Select the Microsoft Amazon Linux AMI.
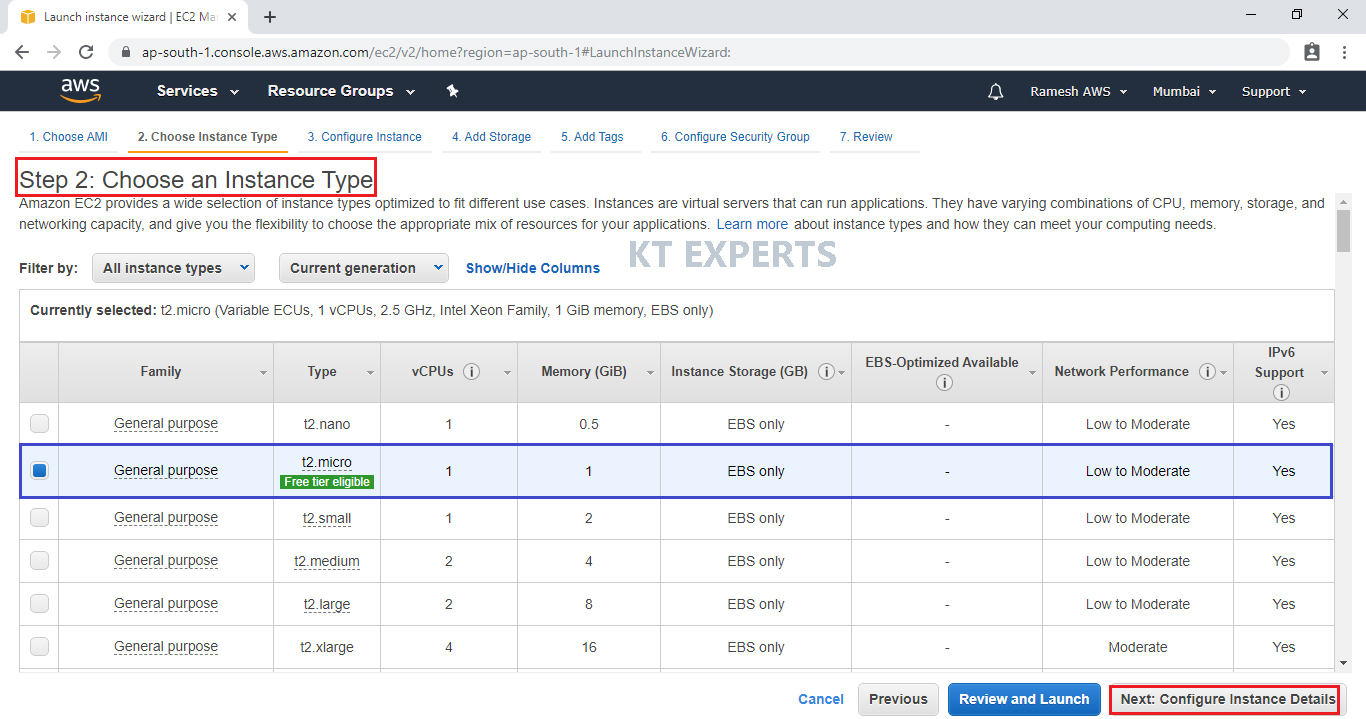
Choose an Instance type
Choose the Type of instance depending on your requirements.
Instance types comprise of varying combinations of CPU, memory, storage, and networking capacity.
select the default option of t2. micro – this instance type is covered within the free tier. Then click on Configure Instance Details.
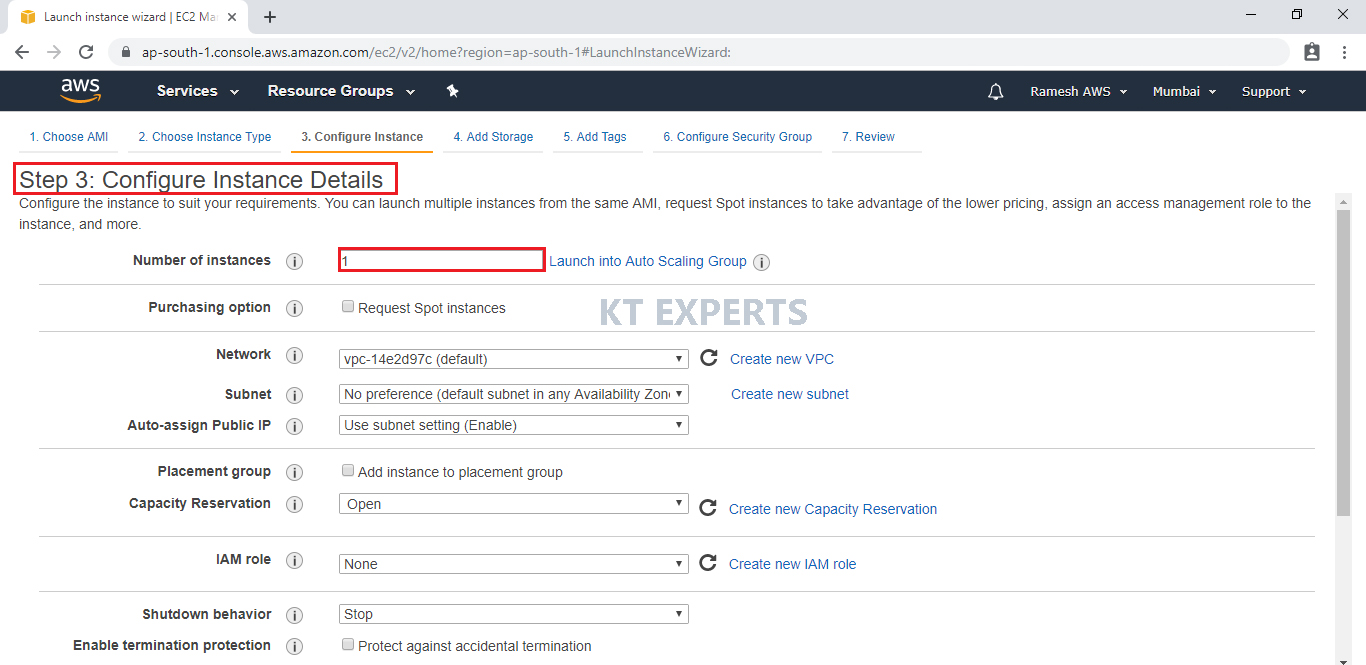
Configure Instance Details
Configure EC2 instance details as per requirements of your environment and click on Add Storage.
Choose the Type of instance depending on your requirements.
Instance types comprise of varying combinations of CPU, memory, storage, and networking capacity so you can choose the appropriate mix for your applications.
select the default option of t2.micro – this instance type is covered within the free tier. Then click on Configure Instance Details.
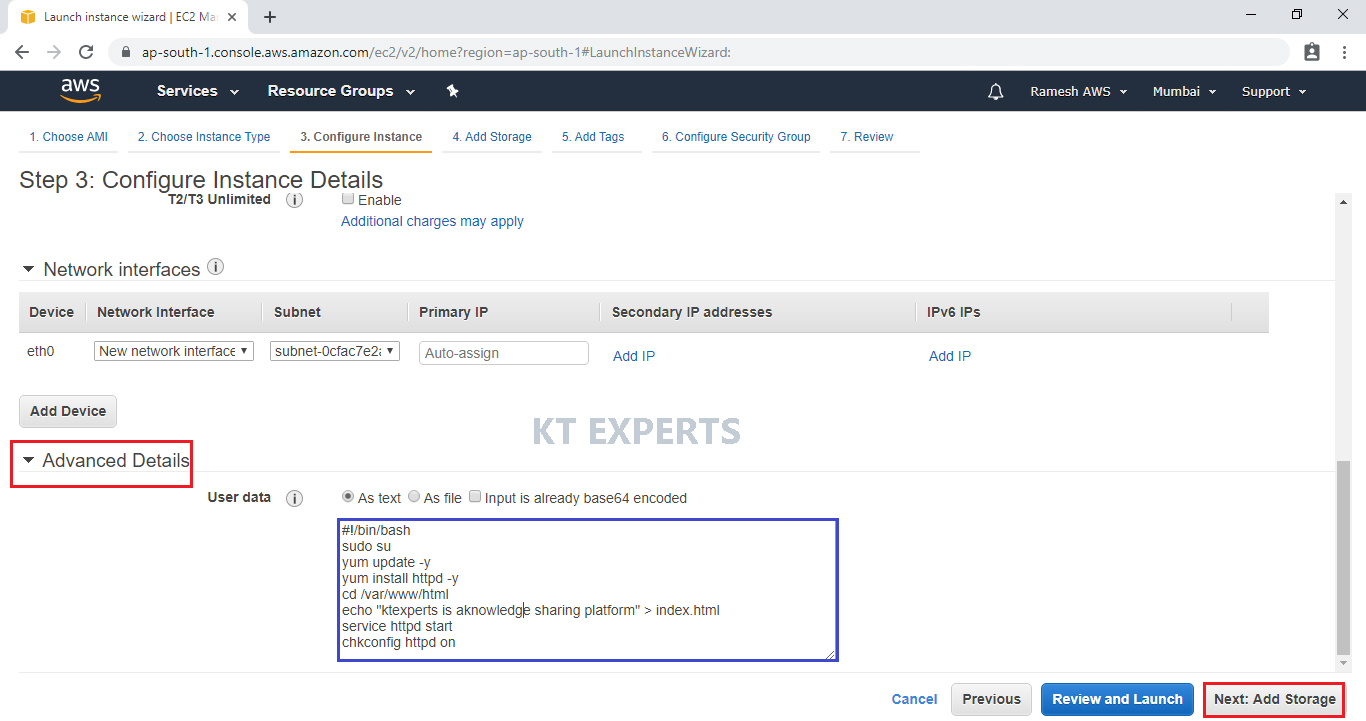
Go to Advanced Details and add required commands in user data.
The commands are
#!/bin/bash
sudo su
yum update -y
yum install httpd -y
cd /var/www/html
echo “ktexperts will help us to get knowledge” > index.html
service httpd start
chkconfig httpd on
Click on Add Storage.
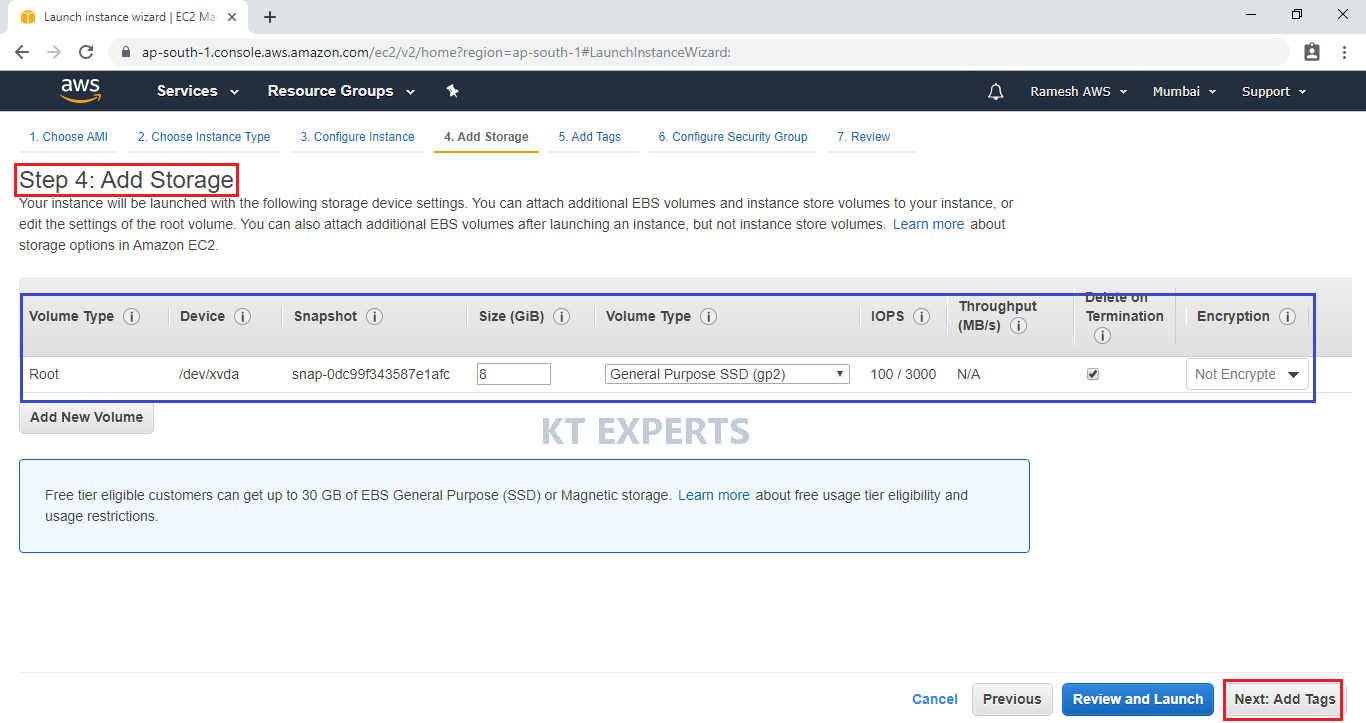
Add Storage
Here, we can see root volume by default and size of 8GB
Add a new volume if required
Click on Add Tags.
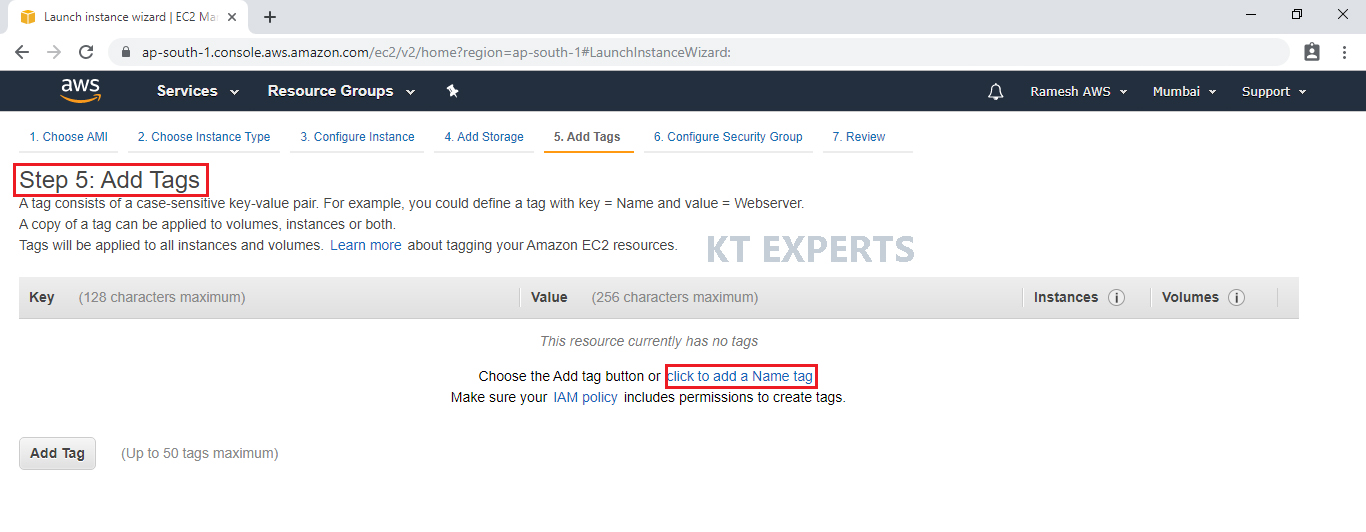
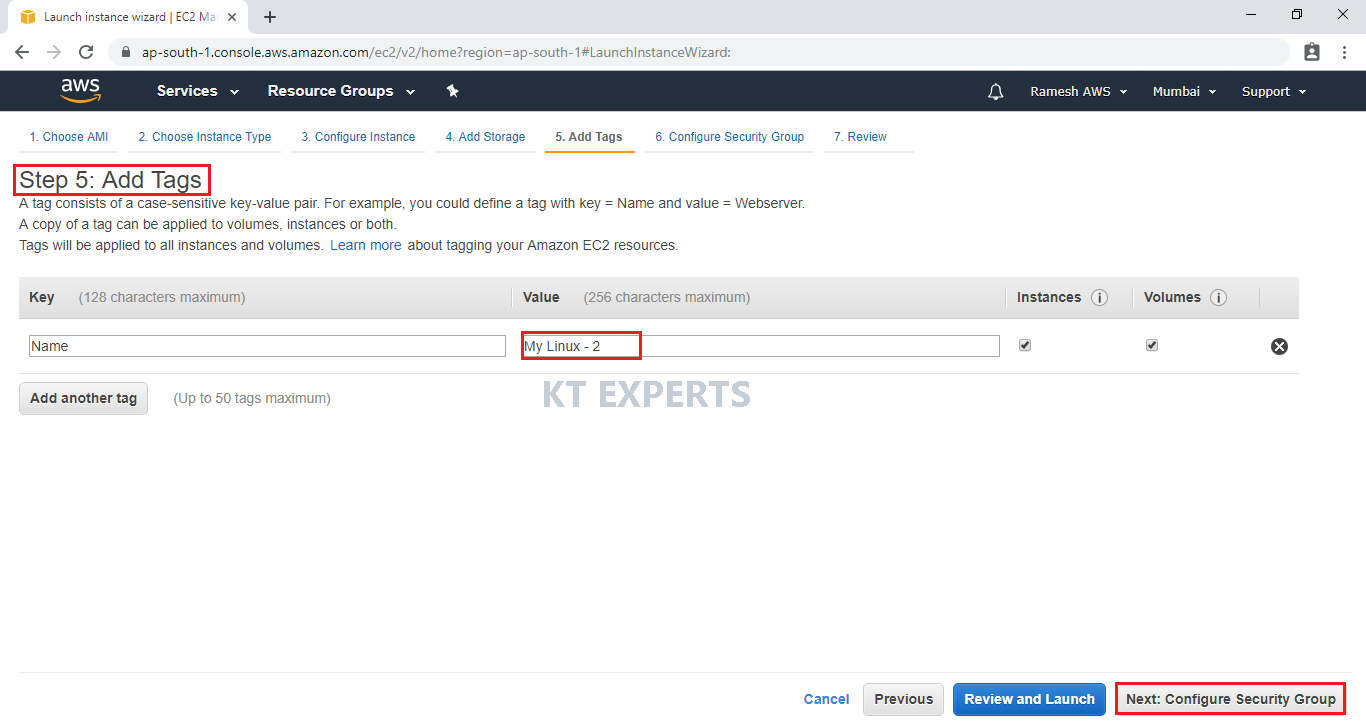
Add Tags
Tags assist in easier identification and classification of the various instances in your AWS environment.
Click on click to add a Name tag to provide name for our server.
Provide the name for the Linux virtual machine for easier understanding and click on Configure Security Groups.
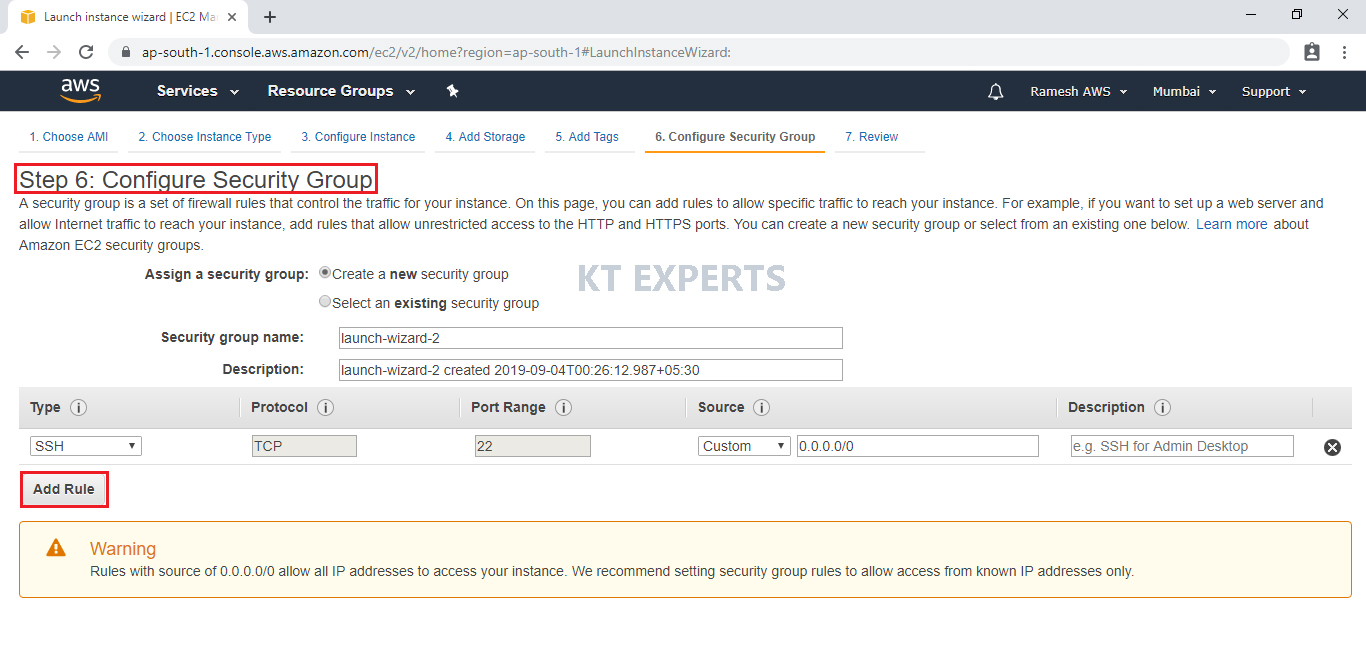
Configure Security Group
A security group allows configuring firewall rules to allow traffic as needed. Only one rule has been added to allow remote connection.
SSH Is enough to connect to our Linux virtual server and click on Review and Launch.
SSH – Secure Shell.
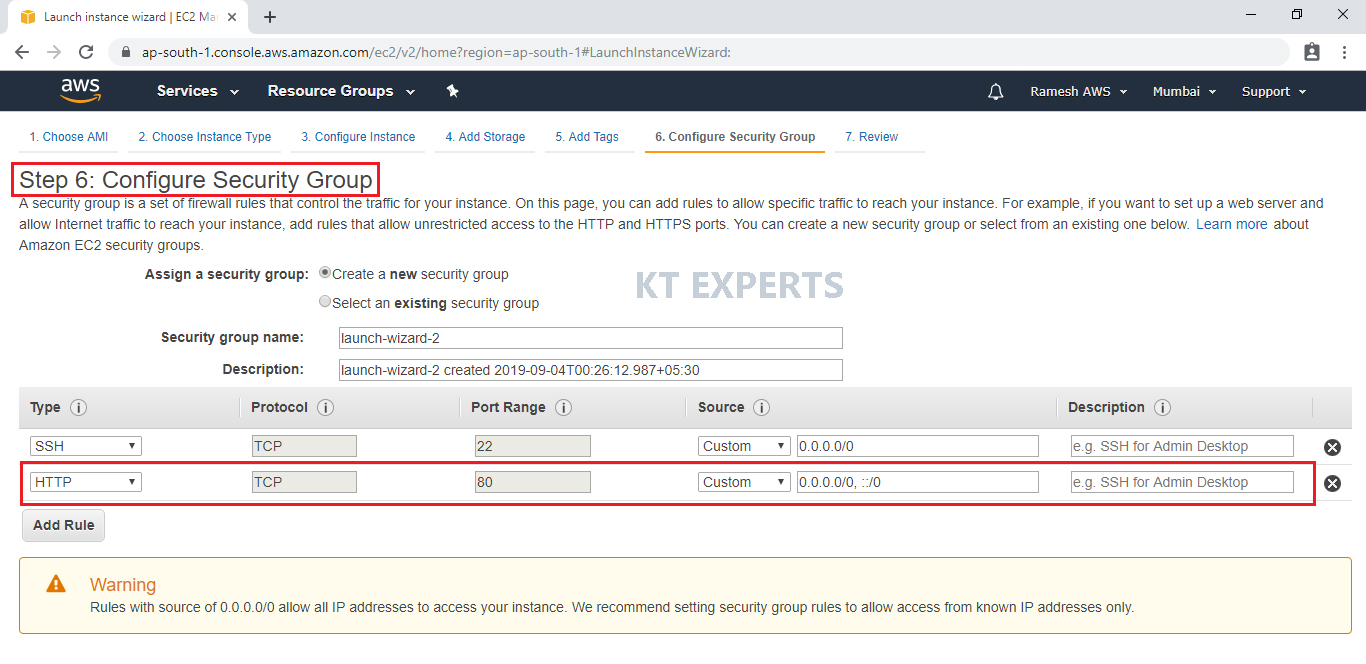
Select HTTP port
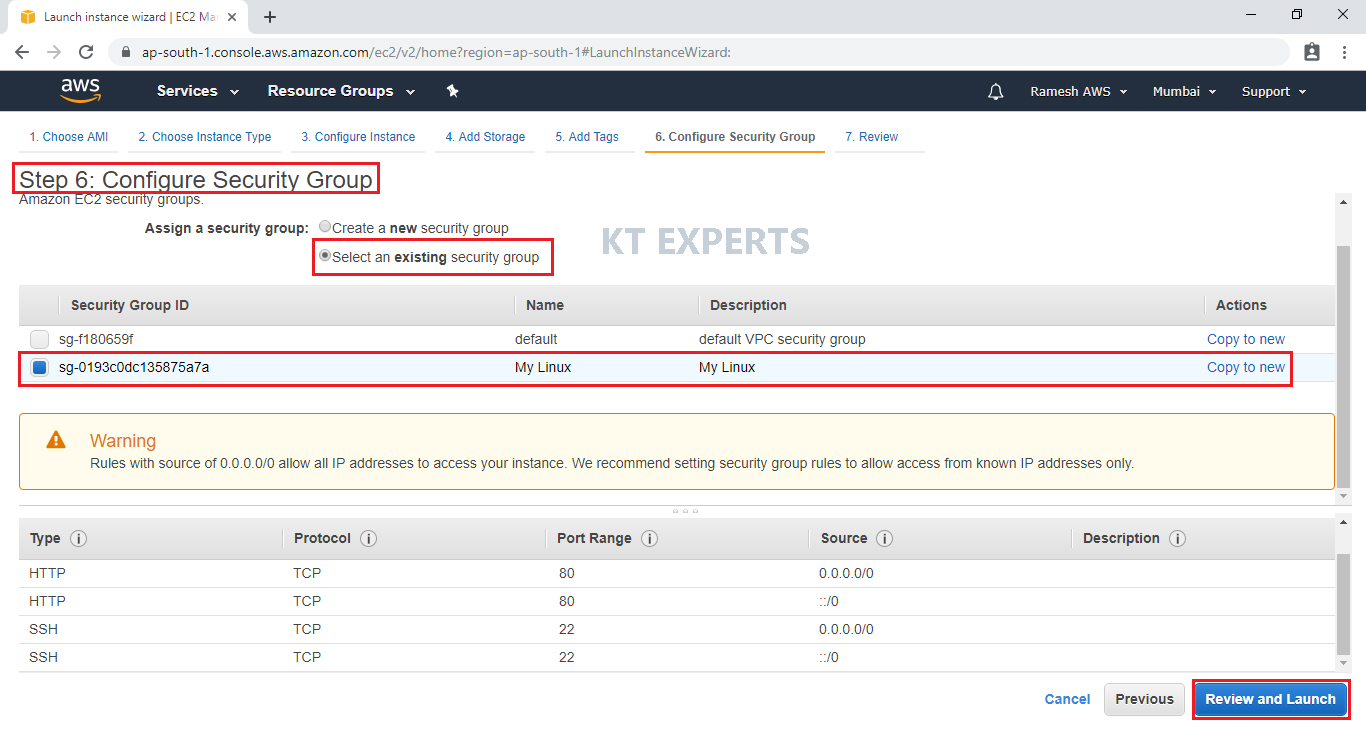
Select an existing security group and click on Review and Launch.
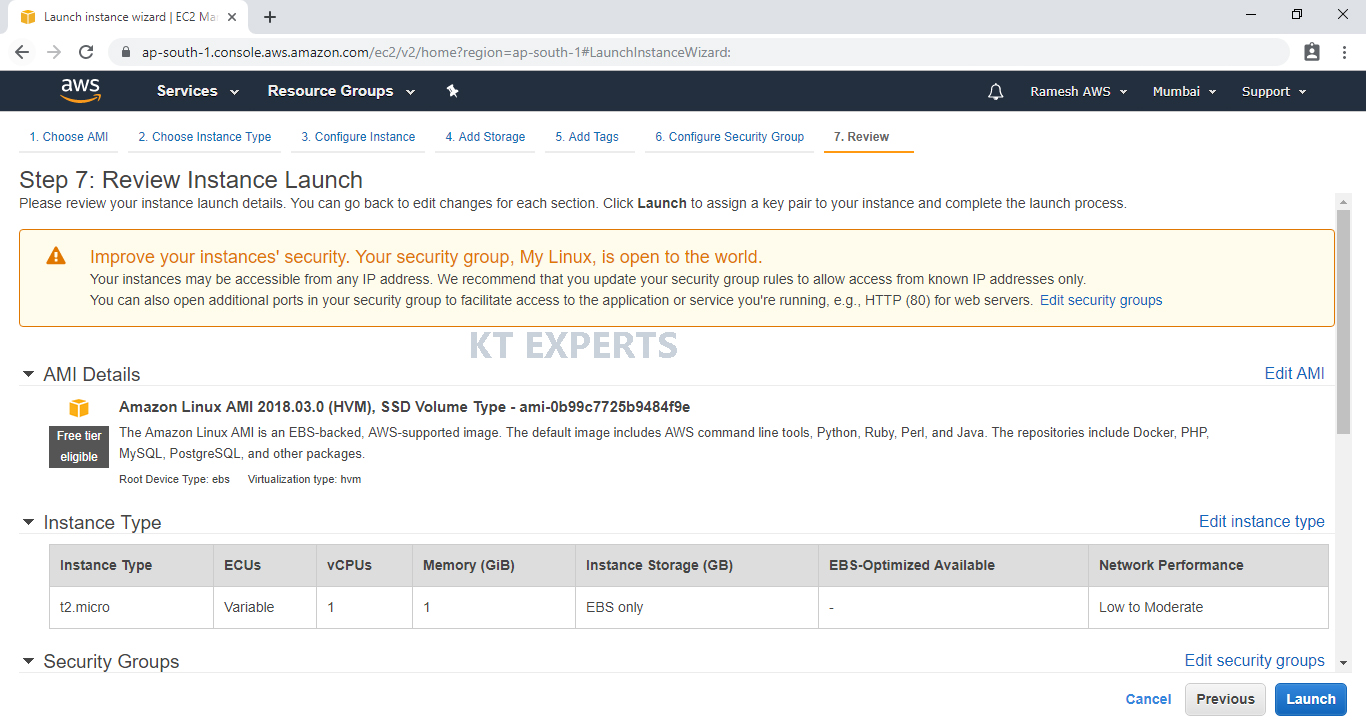
Review Instance Launch
Review and confirm the configuration of the instance. Click on the Edit button on each configuration item to make changes and click on Launch.
Choose existing Key Pair and Launch Your Instance
To connect to your virtual machine, you need a key pair. A key pair is used to log into your instance and select existing key pair.

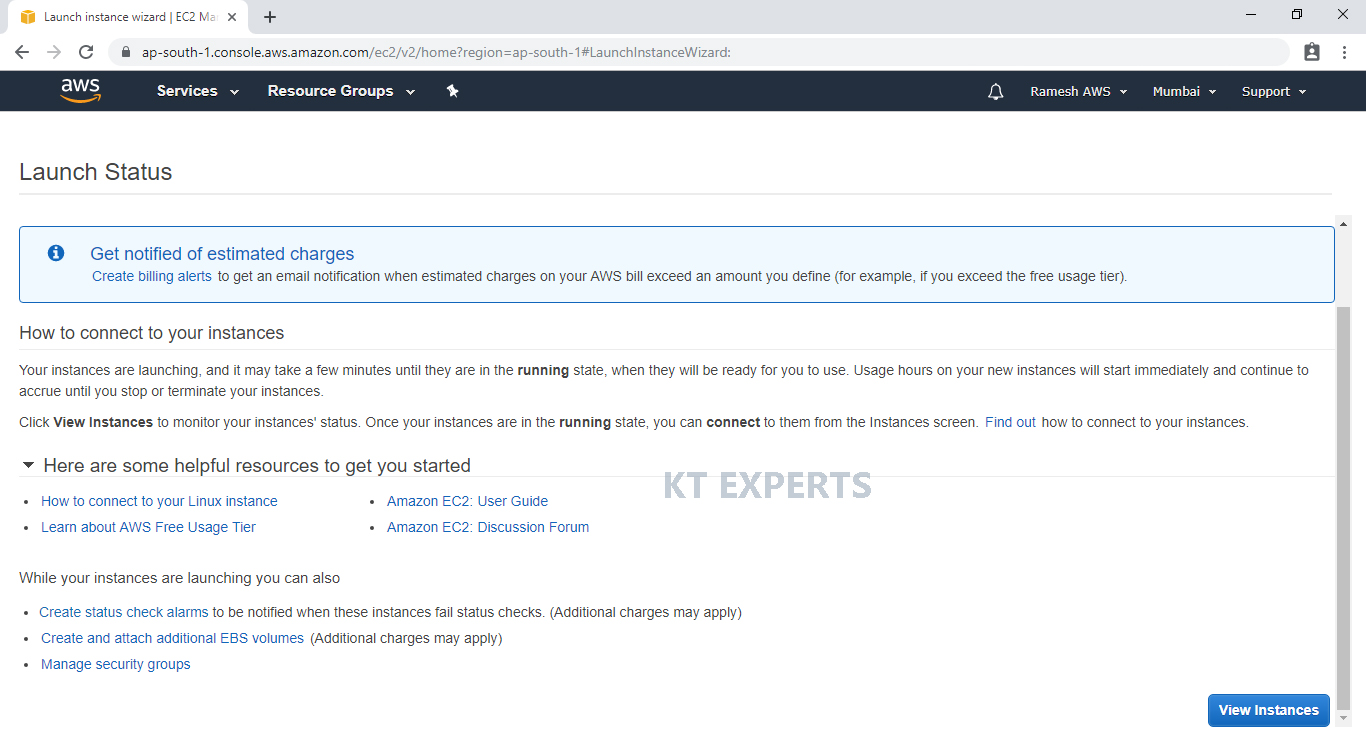
click View Instances to view the instance you have just created and see its status.
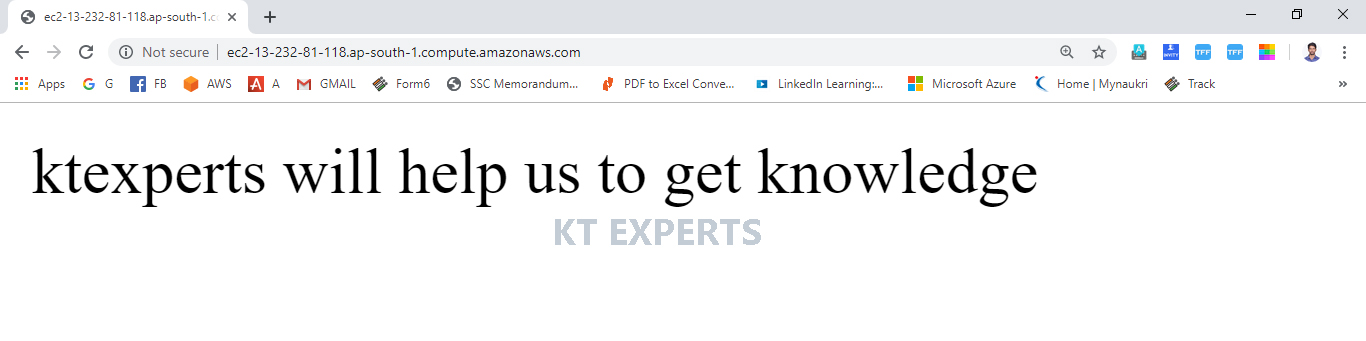
Select My Linux – 2 Copy the DNS and check in browser
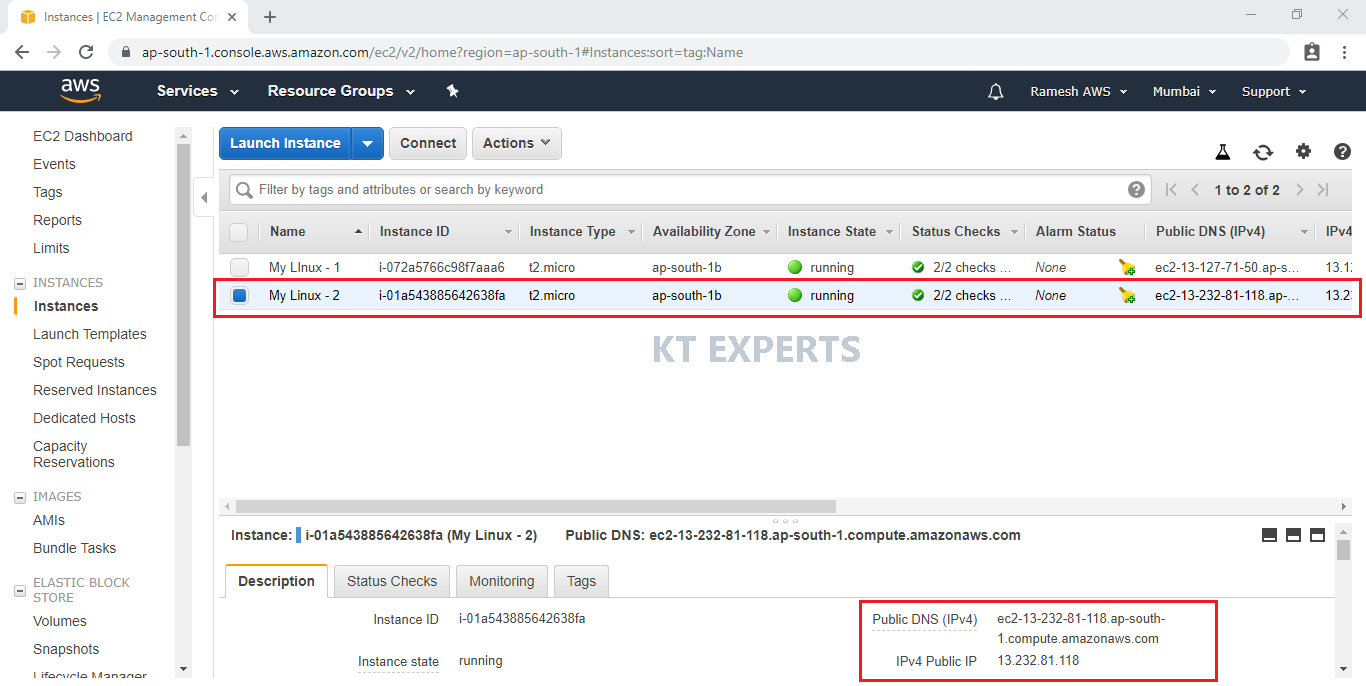
We can see the content of webserver 2 “Linux – 2”
STEP 3
Creating and configuring the Classic Load Balancer
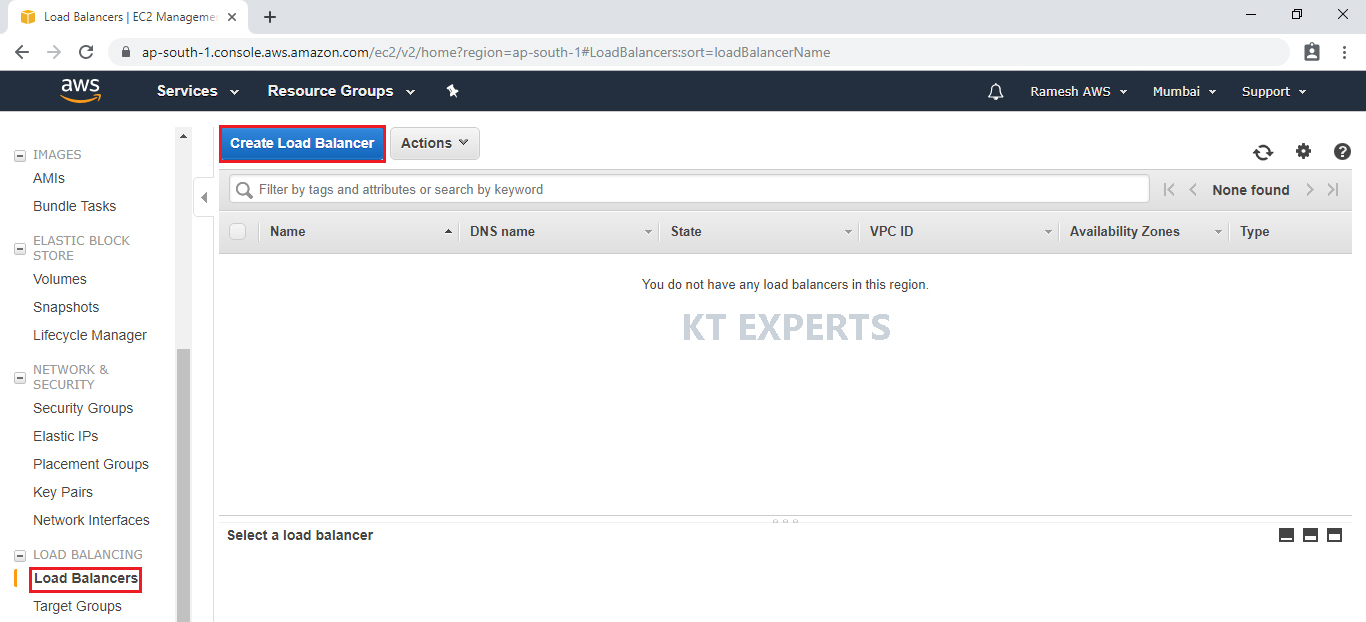
Now, in the left navigation scroll down and click on Load Balancers.
Click on the Create Load Balancer button at the top.
Click on Create Load Balancer.
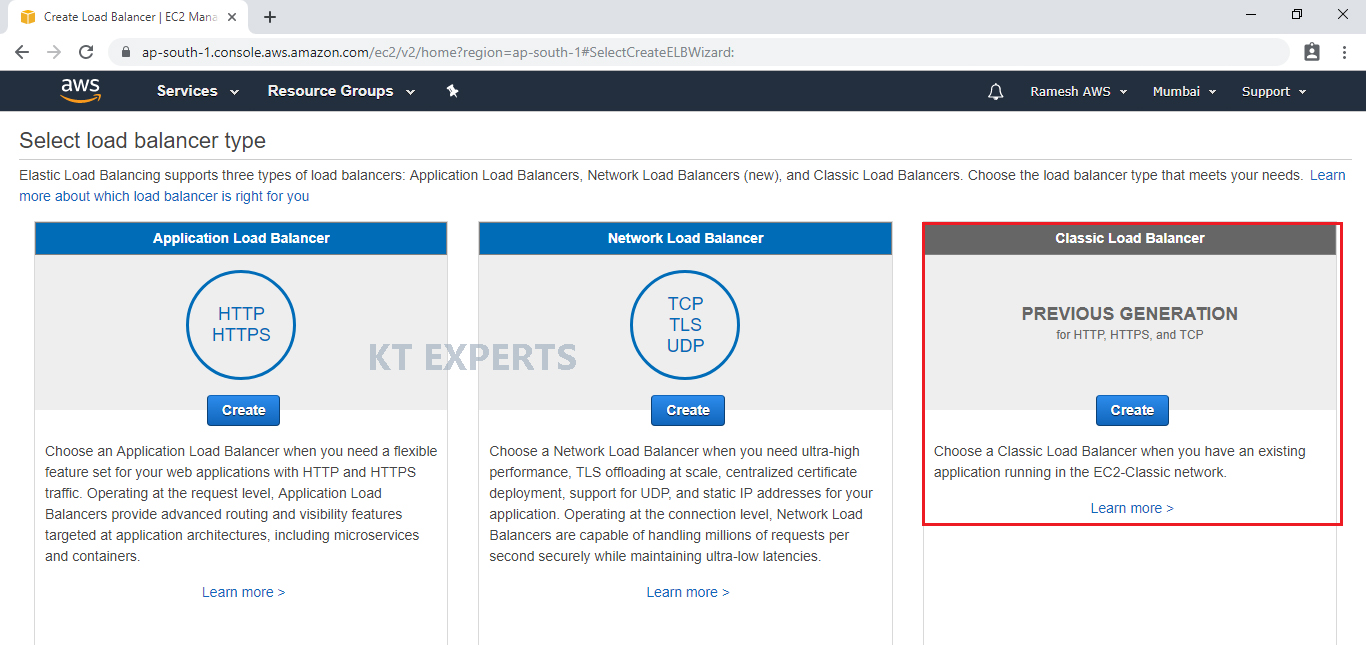
Choose the Classic Load Balancer.
Go to Classic Load Balancer and click on create.
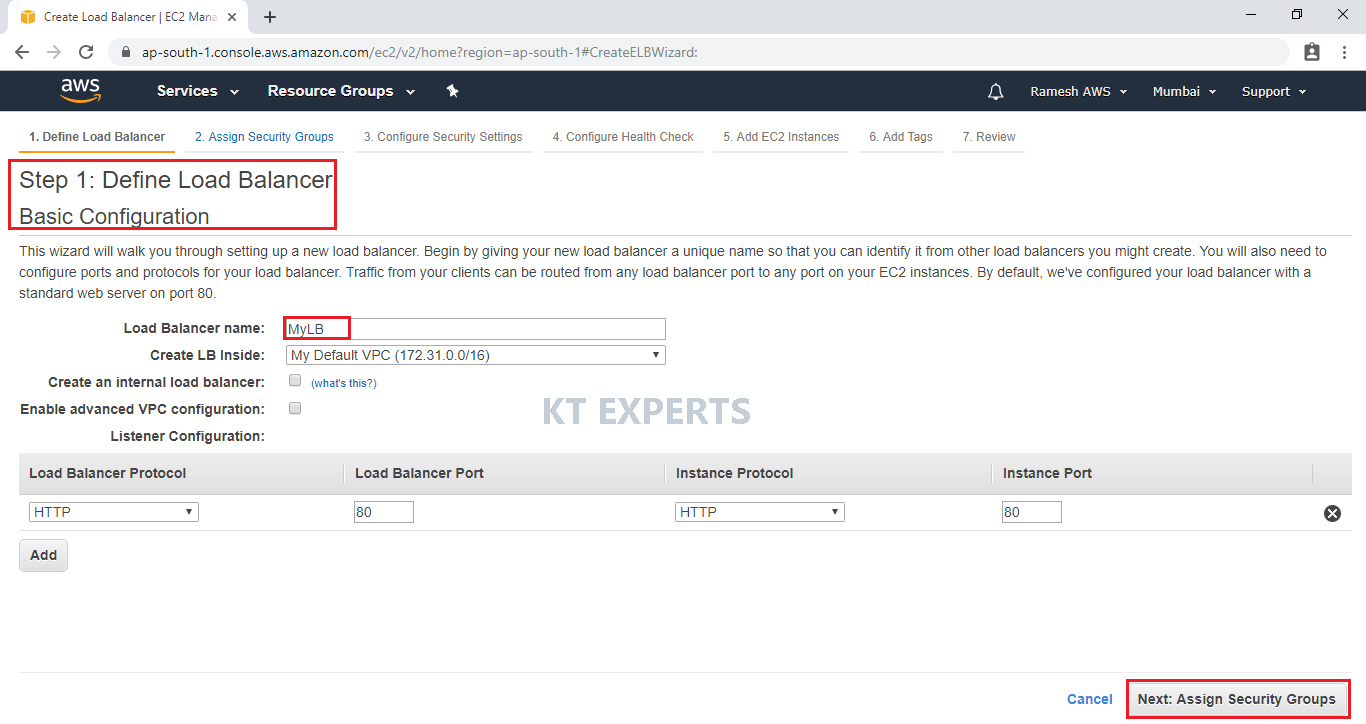
Define Load Balancer Basic Configuration
Give a name to your load balancer and select at least two availability zones for high availability and click on the Configure Security Settings button.
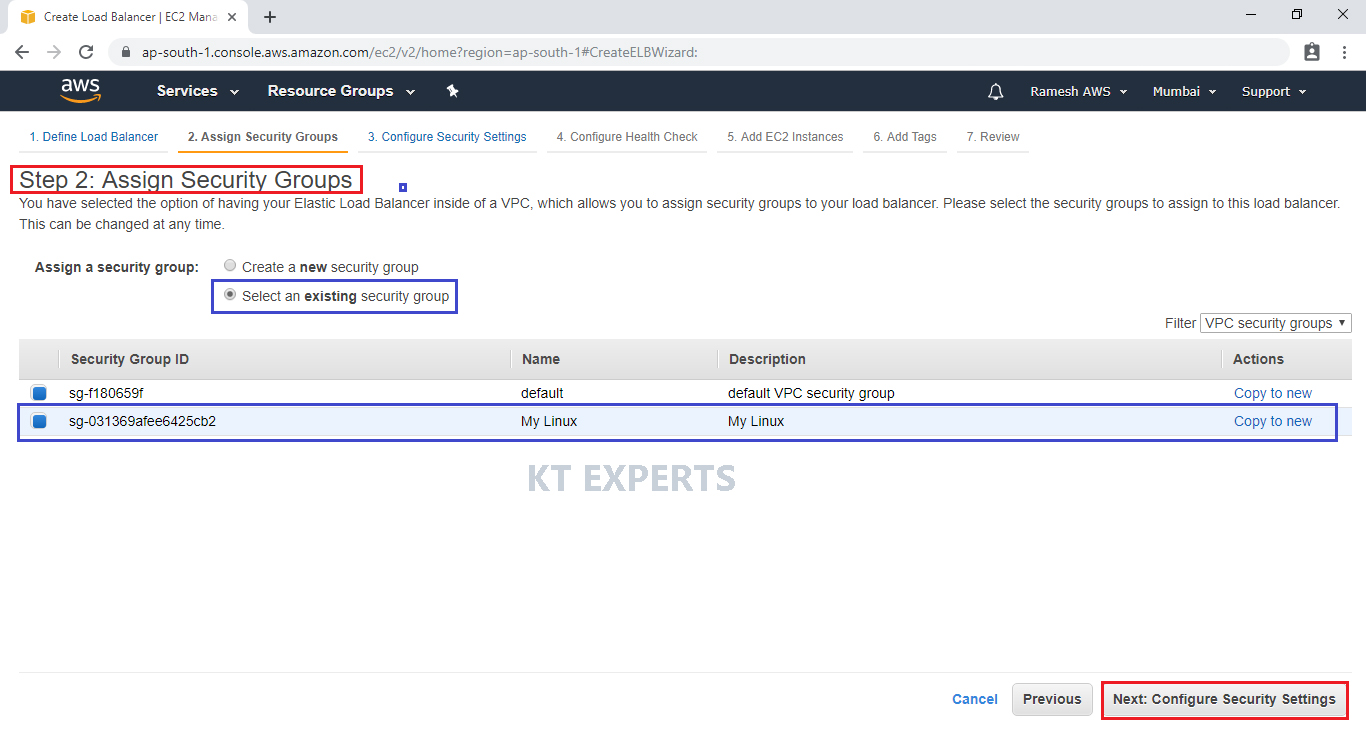
Assign Security Groups
Here select the existing group option and select the same security group that you assigned to the instances you launched then click on Configure Security Settings.
Configure Security Settings
You may see a warning message just ignore and click on Configure Health Check.
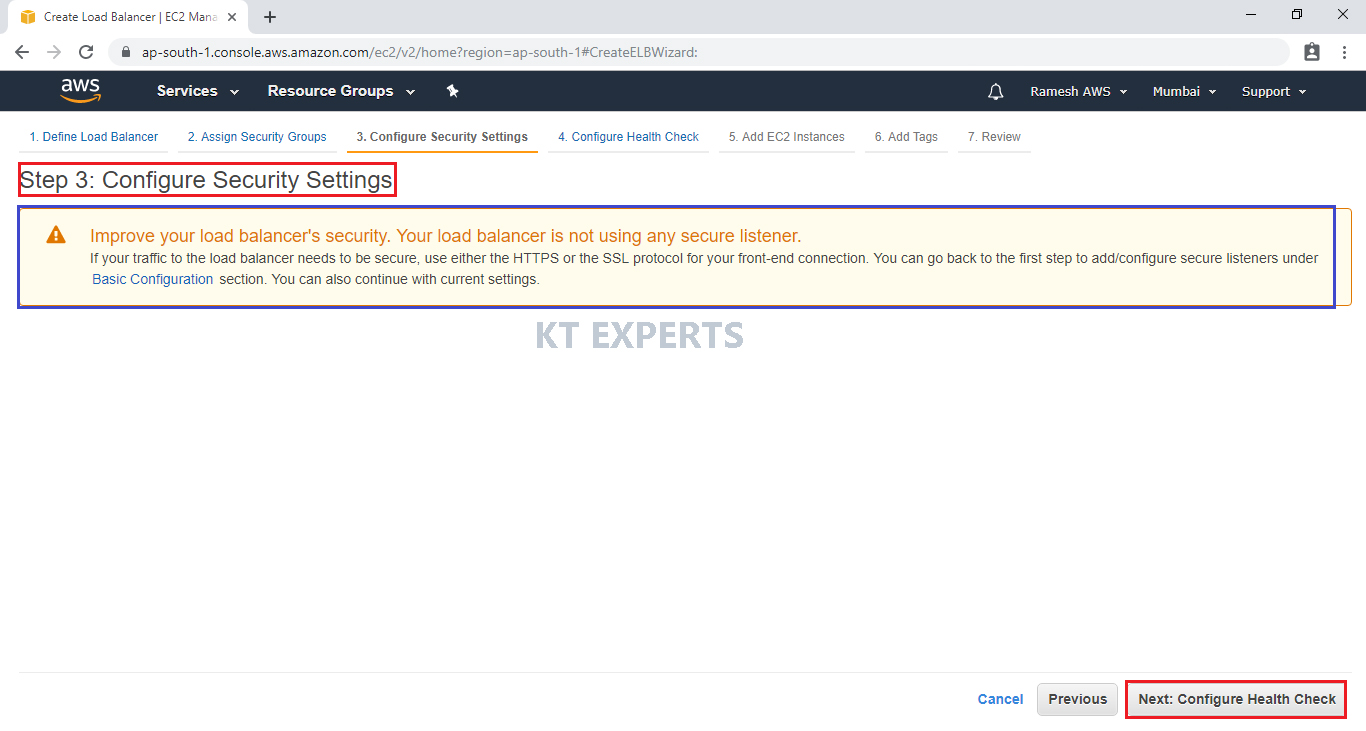
Configure Health Check
On the Configure Health Check page, leave Ping Protocol set to HTTP and Ping Port set to 80.
For Ping Path, replace the default value with a single forward slash (“/”). This tells Elastic Load Balancing to send health check queries to the default home page for your web server, such as index.html.
For Advanced Details, leave the default values.
Click on Add EC2 Instances.

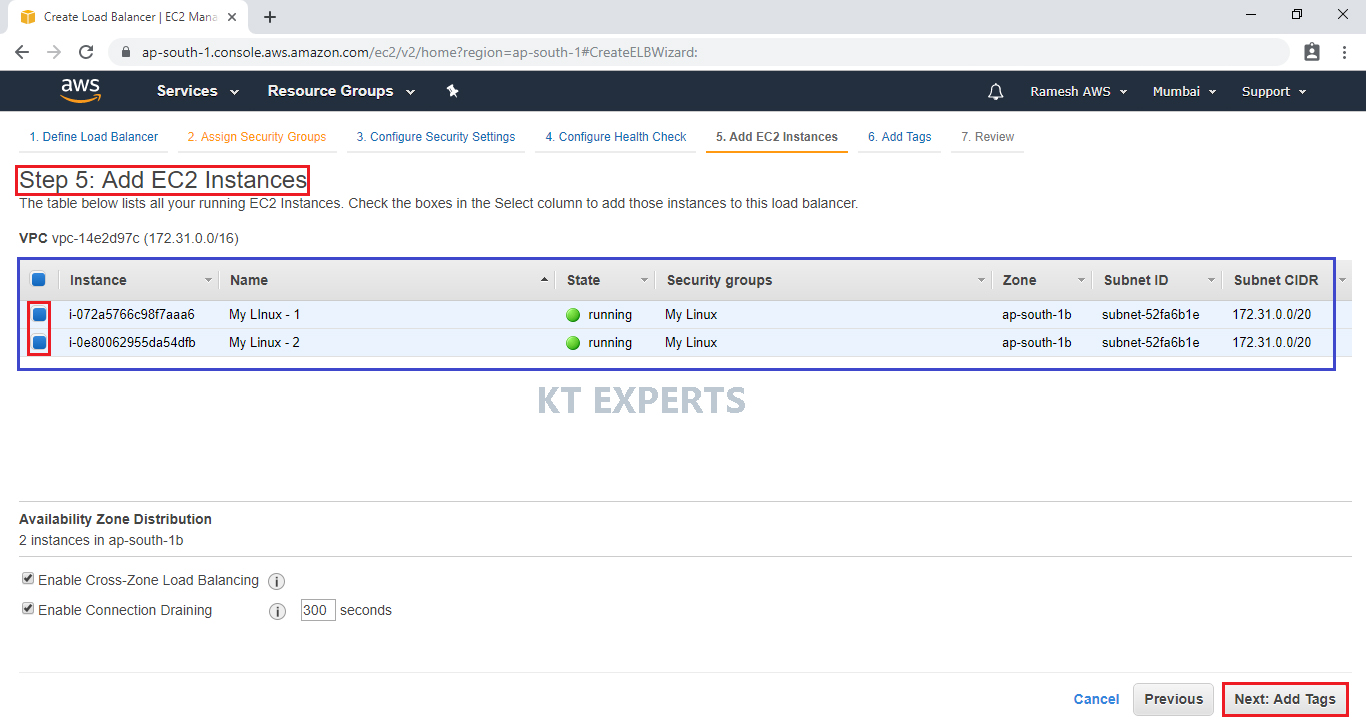
Add EC2 Instances
To register EC2 instances with your load balancer
On the Add EC2 Instances page, select the instances to register with your load balancer.
Leave cross-zone load balancing and connection draining enabled.
Click on Add Tags.
Add Tags
You can tag your load balancer, or continue to the next step then click on Review and Create.

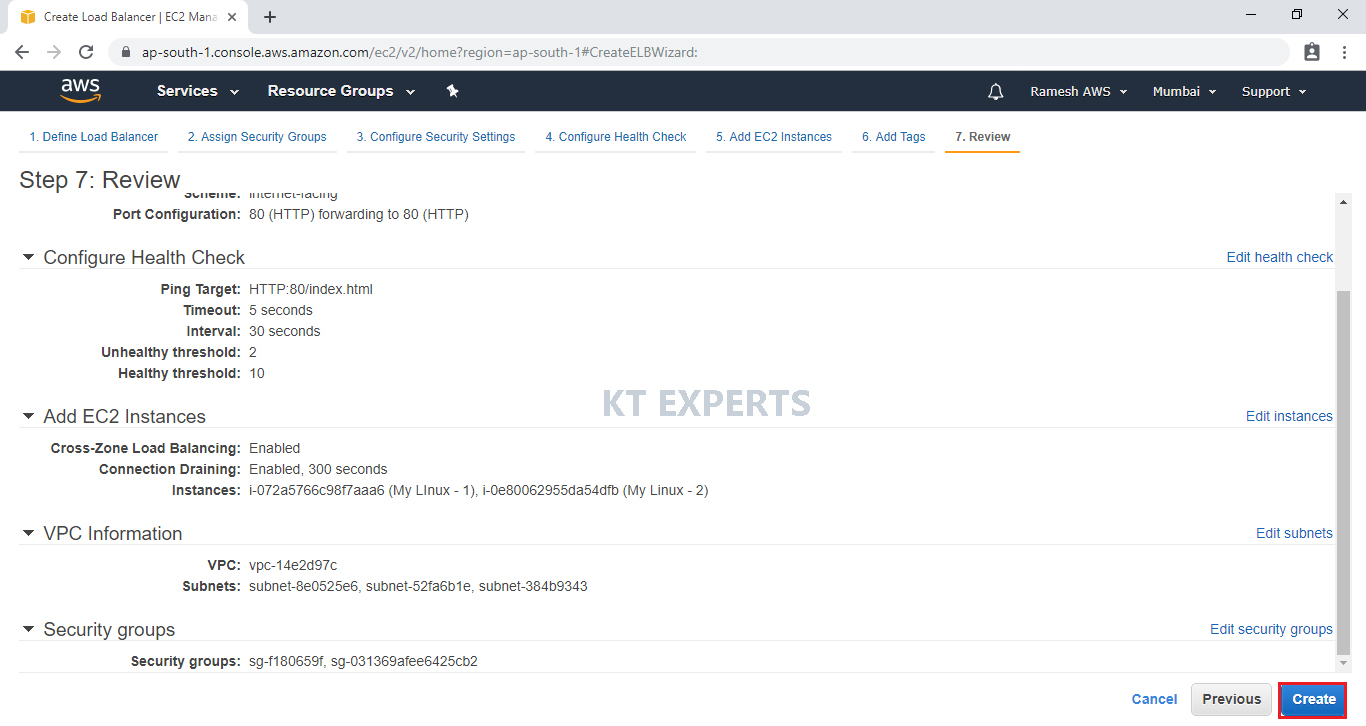
Review
Verify all the details and click on create.
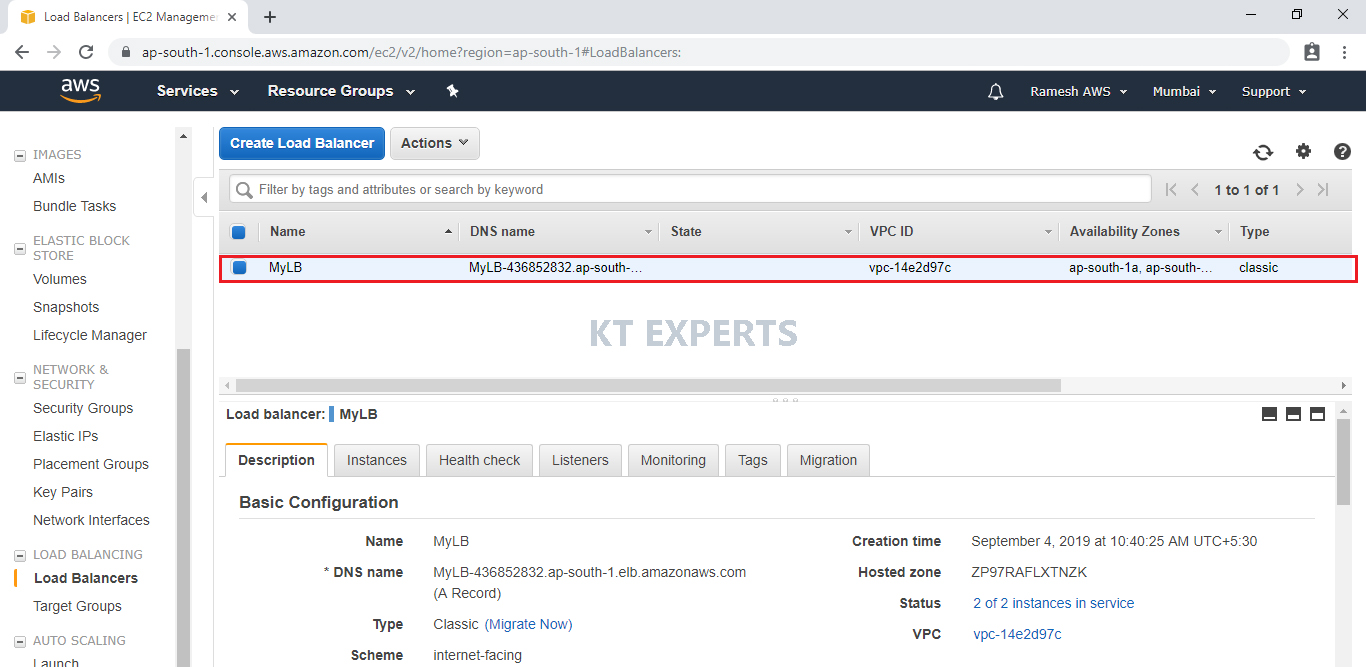
The load balancer has been successfully created then click on close.
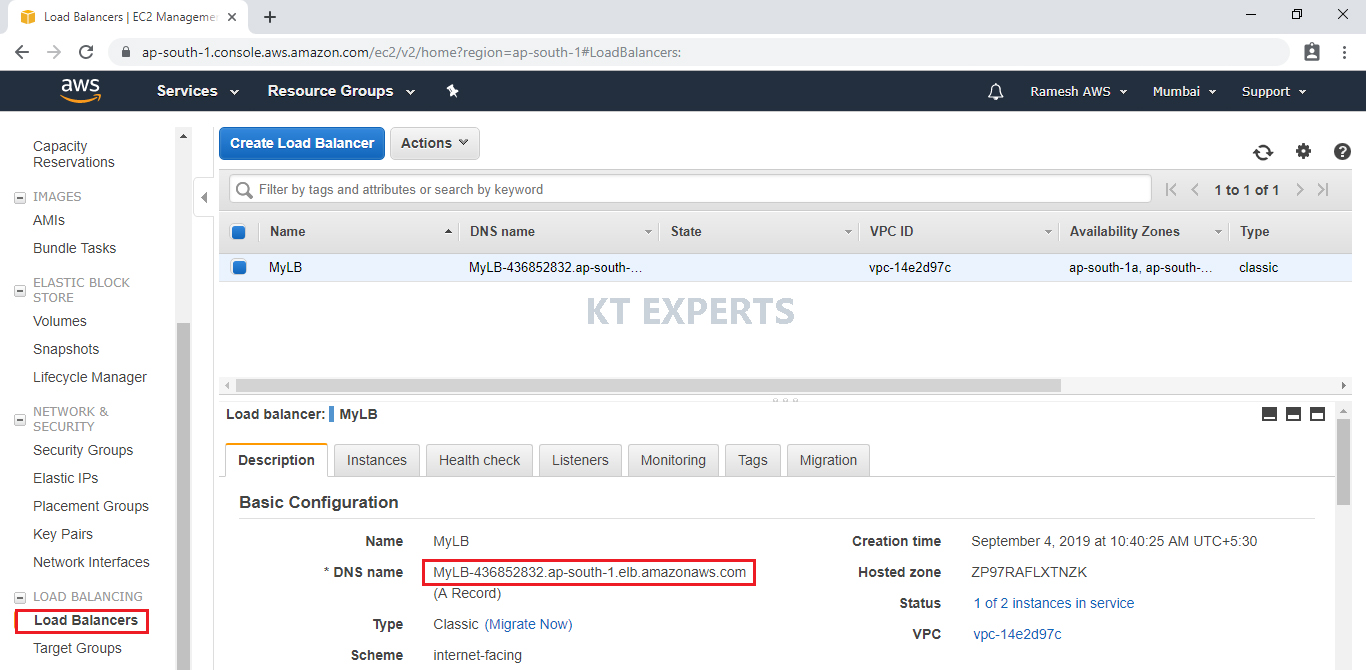
We can see the load balancer, select the load balancer then it will show all the details regarding to the load balancer
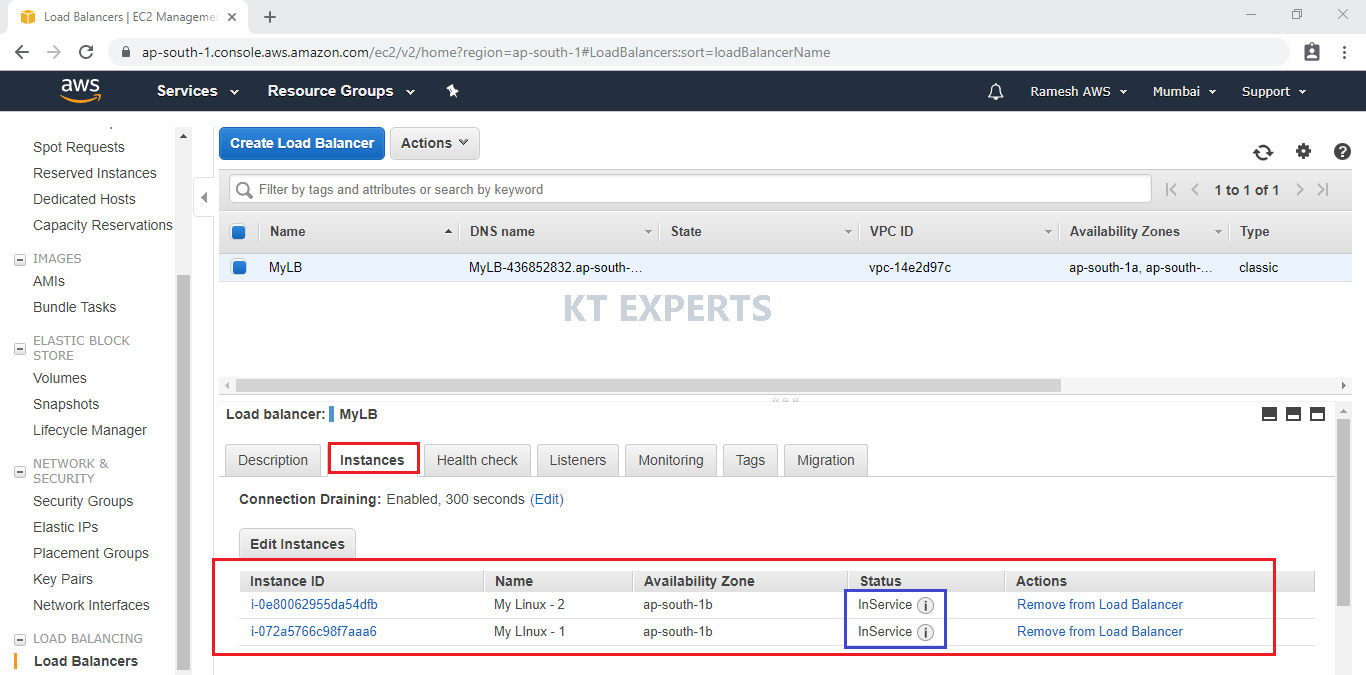
Go to instances and check the status of instances.
The status of 2 instances are unknown.

After completion of 300 sec it will be state as “inservice”.
Go to Description and copy the DNS name.
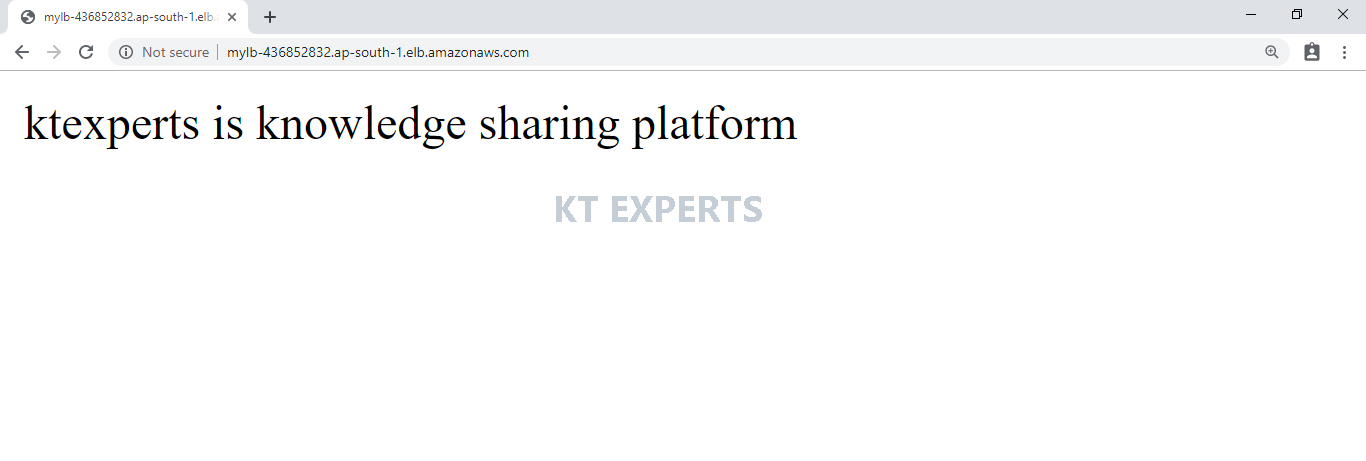
Webserver – 1 “Linux-1”
Search Load Balancer DNS name in browser.
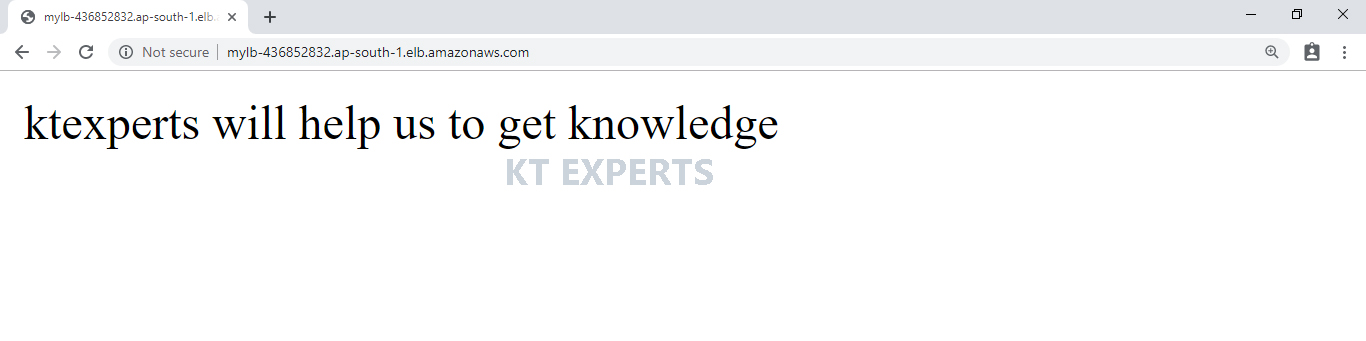
Webserver – 2 “Linux2”
Refresh Load Balancer DNS name in browser it will show second webserver content means it balancing the load parallely.
Thank you for giving your valuable time to read the above information. Please click here to subscribe for further updates
KTEXPERTS is always active on below social media platforms.
Facebook : https://www.facebook.com/ktexperts/
LinkedIn : https://www.linkedin.com/company/ktexperts/
Twitter : https://twitter.com/ktexpertsadmin
YouTube : https://www.youtube.com/c/ktexperts
Instagram : https://www.instagram.com/knowledgesharingplatform


Elledgemo
On Line Drugs India Pharmacy viagra prescription Propecia Experiences C Diff Infection Caused By Amoxicillin
shahbaaz
this article is so helpful for me as i got stuck to find the dns name name.
Surya
Great job broo