Dear Readers,
In this article, we will see Installation of Virtual Box Guest additions on Oracle Enterprise Linux 8.1
Today we will understand the step by step Installation of Virtual Box Guest additions on Oracle Enterprise Linux 8.1. To complete this configuration we need to follow below steps.
- Installation of Oracle Virtual Box.
- Installation of Oracle Enterprise Linux 8.1.
- Installation of Virtual Box Guest additions.
- Issues while Installing Virtual Box Guest additions.
So now let’s start the step by step configuration.
Installation of Oracle Virtual Box: –
Please use below link to see the step by step installation of Oracle Virtual Box: –
Link: – https://theoraclejobsite.com/oracle-enterprise-linux-8-1-installation/
Installation of Oracle Enterprise Linux 8.1: –
Please use below link to see the step by step installation of Oracle Enterprise Linux 8.1: –
Link: – https://theoraclejobsite.com/oracle-enterprise-linux-8-1-installation/
Installation of Virtual Box Guest additions: –
After configuration of OEL 8.1 we need to install the Virtual Box Guest additions so that workstation will work properly.
After Installation below things will work properly.
- Screen will open in full mode.
- You can share the folder between Physical and Virtual Machine.
- Time zone will automatically set after guest box configuration.
- You can easily move cursor from your Physical and Virtual Machine.
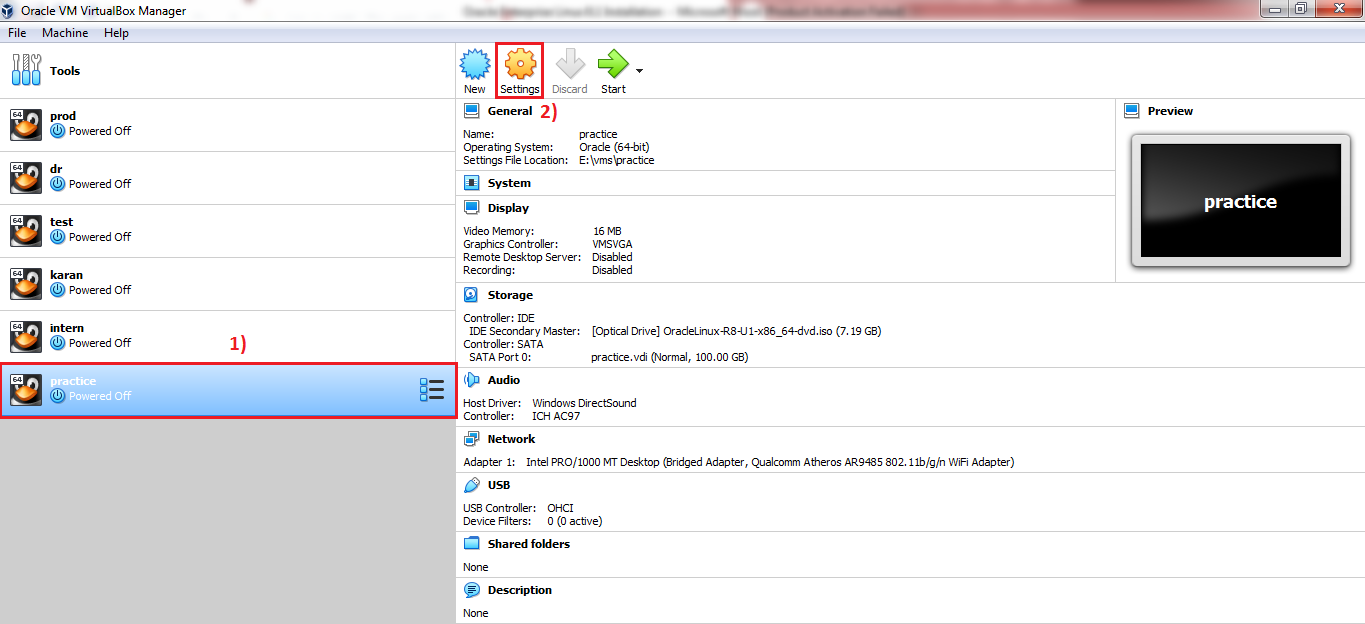
Step 1) Open the “machine” and go to “Setting” section.
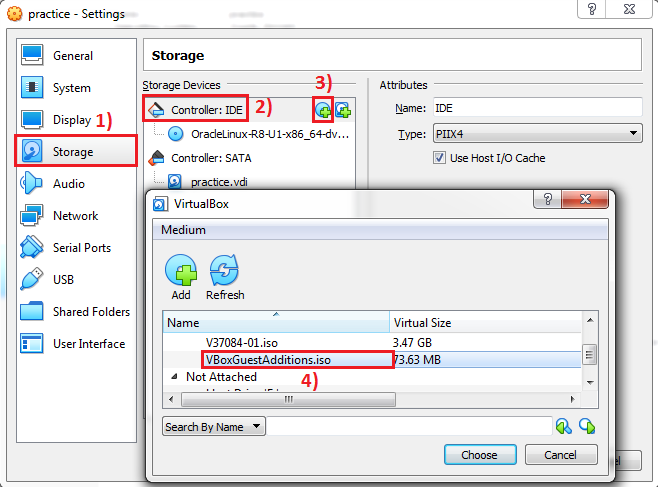
Step 2) Go to the below options to add VBoxGuestAdditions.iso
Storage—> Controller: IDE—> Adds optical drive —> Add VBoxGuestAdditions.iso
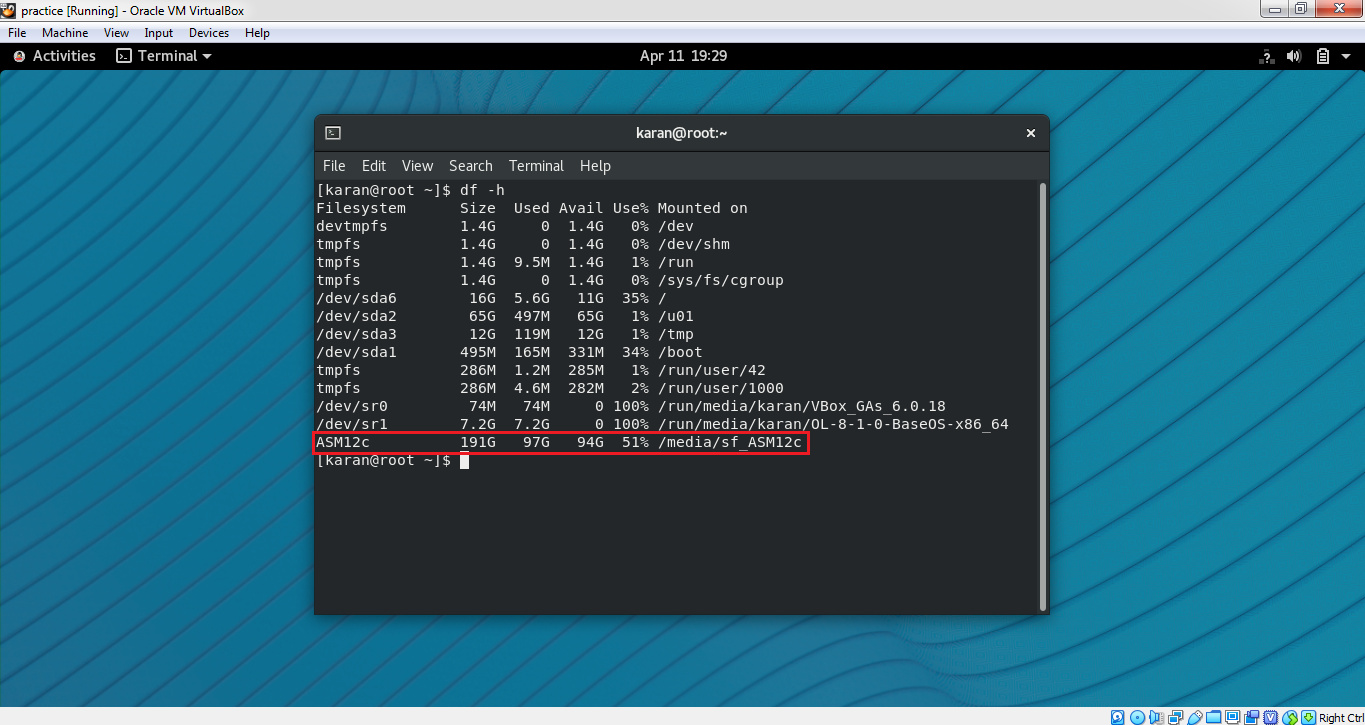
Step 3) Start the Virtual Machine to do the configuration and run command “df –h” to check whether mount point has been added or not.
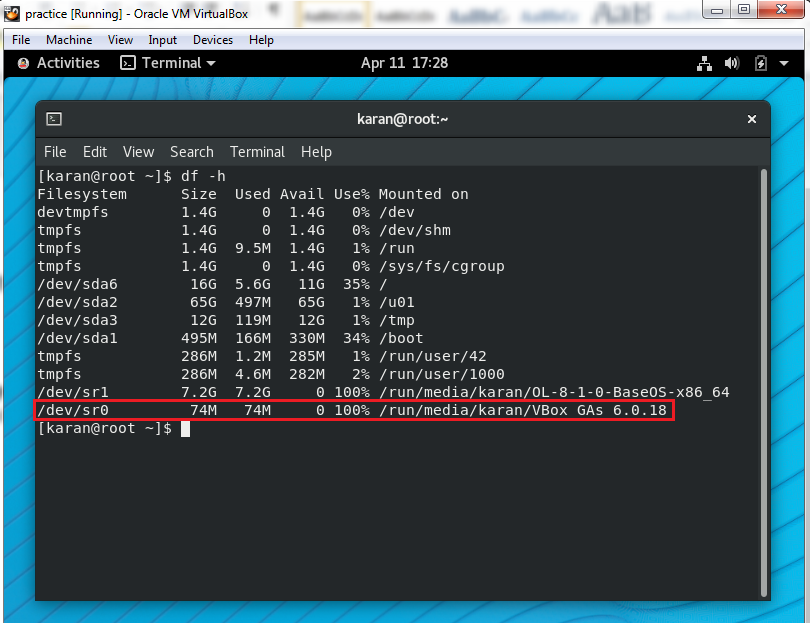
We can see from above output that mount point has been added successfully.
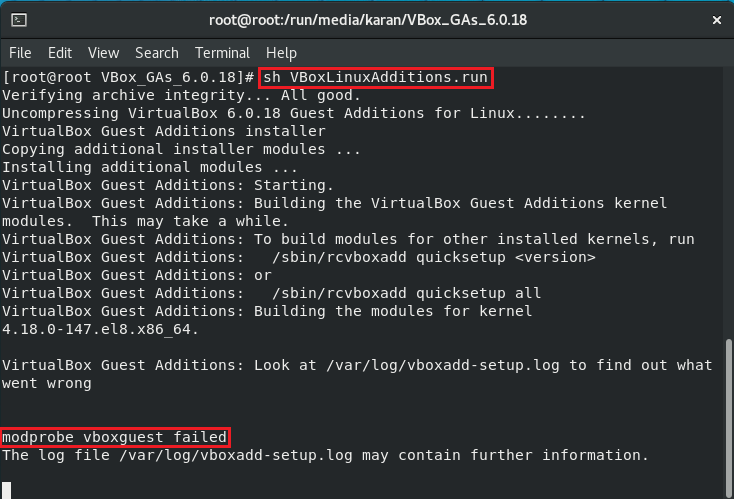
Step 4) Login as root user and go inside the VBoxGuestAdditions directory to execute the below command.
Command: – sh VBoxLinuxAdditions.run
Issues while Installing Virtual Box Guest additions: –
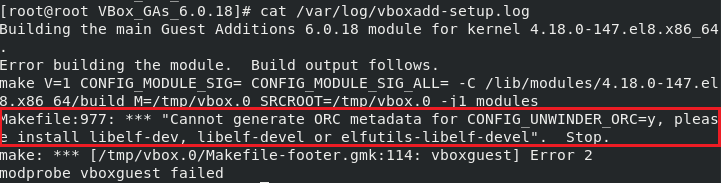
When I ran above command to install the VBoxGuestAdditions then I am getting below error, to know the exact error we need to check the logfile.
Now we need to check this file /var/log/vboxadd-setup.log file to check the exact error.
After checking the logfile I found that one of the below RPM is not installed due to which we got modprobe error.
RPMS’s: – libelf-dev, libelf-devel, elfutils-libelf-devel
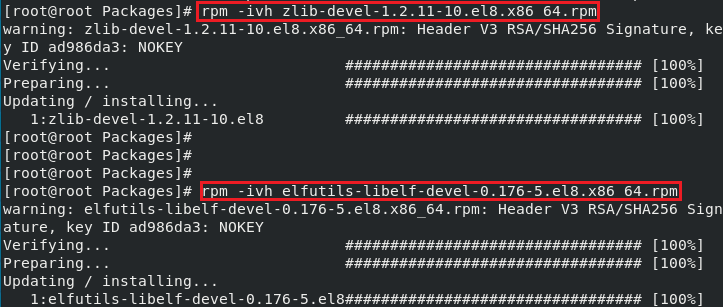
Step 5) Now I am going to install only this elfutils-libelf-devel because all are not mandatory.
For Installation, We need to go the RPM location first.
Location of RPM’s: – /run/media/karan/OL-8-1-0-BaseOS-x86_64/BaseOS/Packages
Run command to install the RPM: – rpm-ivh elfutils-libelf-devel-0.176-5.el8.x86_64.rpm
When I ran above command then I got another issue, first we need to install zlib package after that we can install elfutils-libelf-devel package.

To install zlib RPM we need to run below command.
Command: – rpm –ivh zlib-devel-1.2.11-10.el8.x86 64.rpm
Both RPM has been installed successfully.
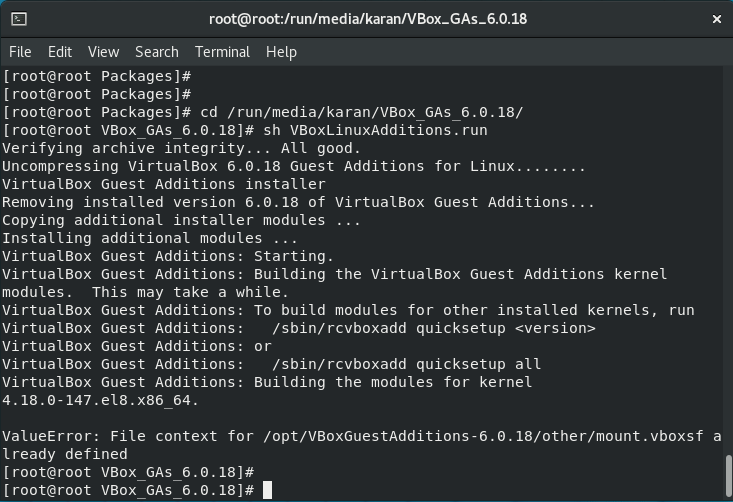
Step 6) Now again need to run the command to install the VBoxGuestAdditions.
We can see from the below output that VBoxGuest Additions has been successfully Installed.
Now reboot the server so that all settings can take place.
Step 7) Now we are able to see the full screen and share folder mount point as well.
Thank you for giving your valuable time to read the above information.
Follow us on
Website : www.ktexperts.com
Facebook Page : KTExperts Facebook
Linkedin Page : KT EXPERTS Linkedin