
Dear Readers,
In this article, we will see the Launch Linux EC2 Instance in AWS.
Amazon Elastic Compute Cloud (Amazon EC2)
Amazon Elastic Compute (Amazon EC2) is a web service that provides scalable compute capacity in the cloud.
It allows organizations to obtain and configure virtual servers in Amazon’s data centers.
We can launch as many or as few virtual servers as you need, configure security and networking, and manage storage.
EC2 Instances can be launched in one or more Regions and Availability Zones
AWS supports multiple operating systems like Red Hat Enterprise, SUSE Enterprise and Oracle Enterprise Linux, UNIX, Windows Server, etc.
Amazon EC2 Features
Reliable − Amazon EC2 offers a highly reliable environment where replacement of instances is rapidly possible. Service Level Agreement commitment is 99.9% availability for each Amazon EC2 region.
Integration: EC2 can integrate with other AWS services, such as RDS, Simple DB, and SQS.
Precise control: Users get administrative access to their instances, can stop and start instances while retaining boot partition data, and can access console output for the instance.
Security: Users can control which instances remain private and which have internet exposure. EC2 leverages Amazon Virtual Private Cloud (VPC) for security, and businesses can connect their secure IT infrastructure to resources in VPC.
Cost: Among a number of pricing options, EC2 offers affordable hourly rates.
Designed for Amazon Web Services − Amazon EC2 works fine with Amazon services like Amazon S3, Amazon RDS, Amazon DynamoDB, and Amazon SQS. It provides a complete solution for computing, query processing, and storage across a wide range of applications.
Secure − Amazon EC2 works in Amazon Virtual Private Cloud to provide a secure and robust network to resources.
Flexible Tools − Amazon EC2 provides the tools for developers and system administrators to build failure applications and isolate themselves from common failure situations.
Inexpensive − Amazon EC2 wants us to pay only for the resources that we use. It includes multiple purchase plans such as On-Demand Instances, Reserved Instances, Spot Instances, etc. which we can choose as per our requirement
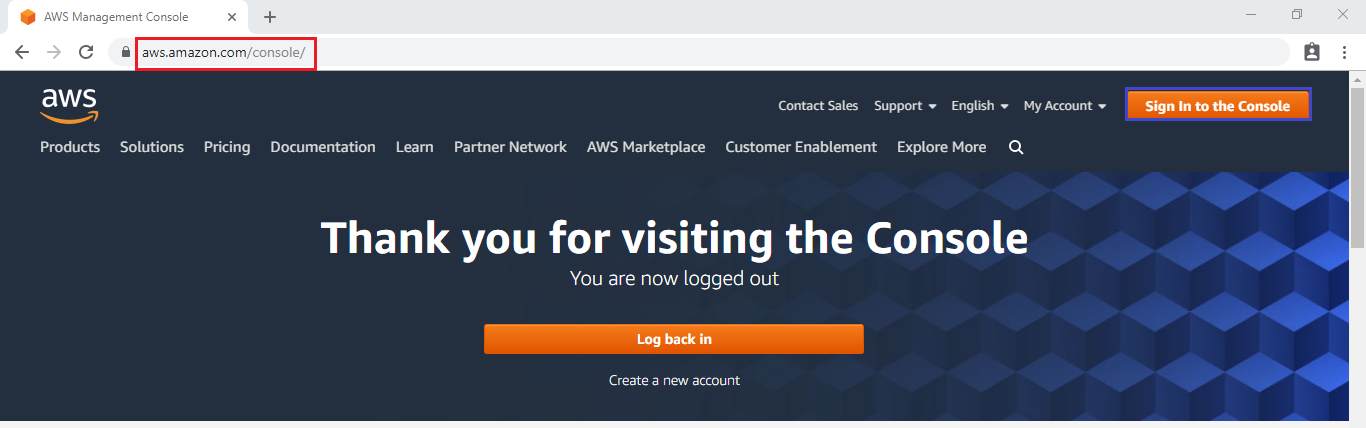
STEP 1:
First, we need to AWS Console page by using below link.
https://aws.amazon.com/console/
Click on sign in to Console button.
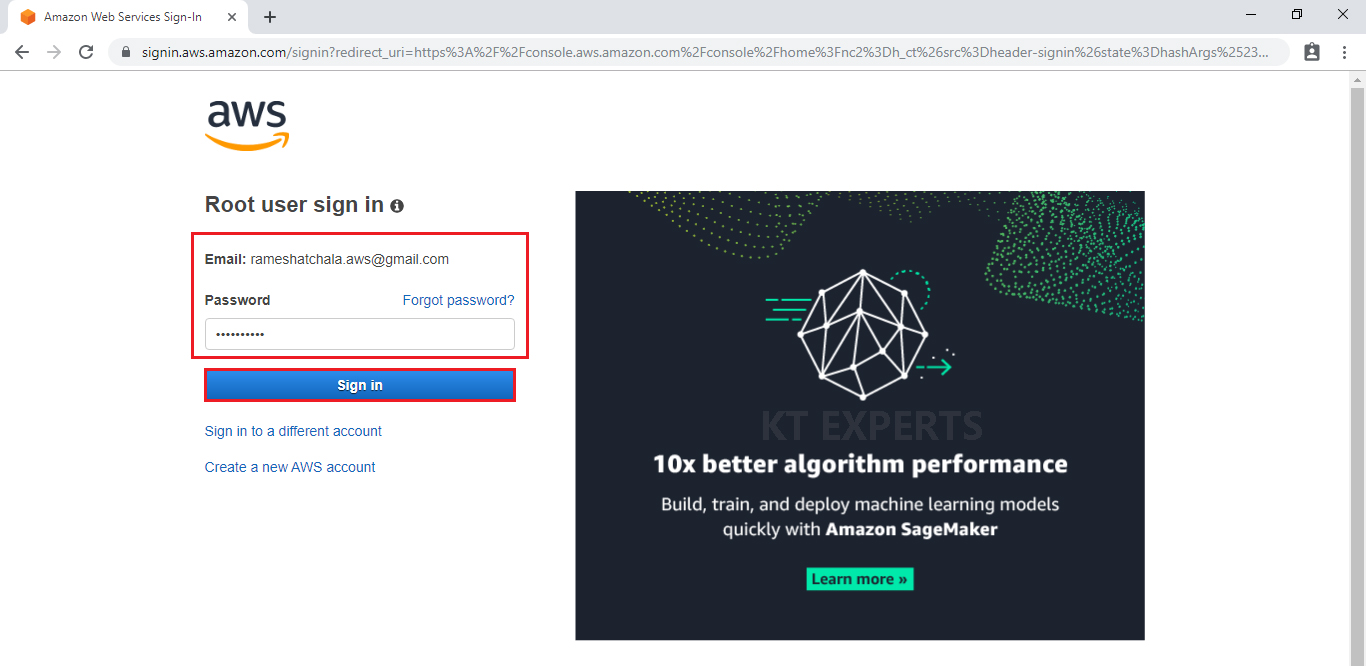
STEP 2:
Logging to aws account
Login using username & password and click on sign in.
STEP 3:
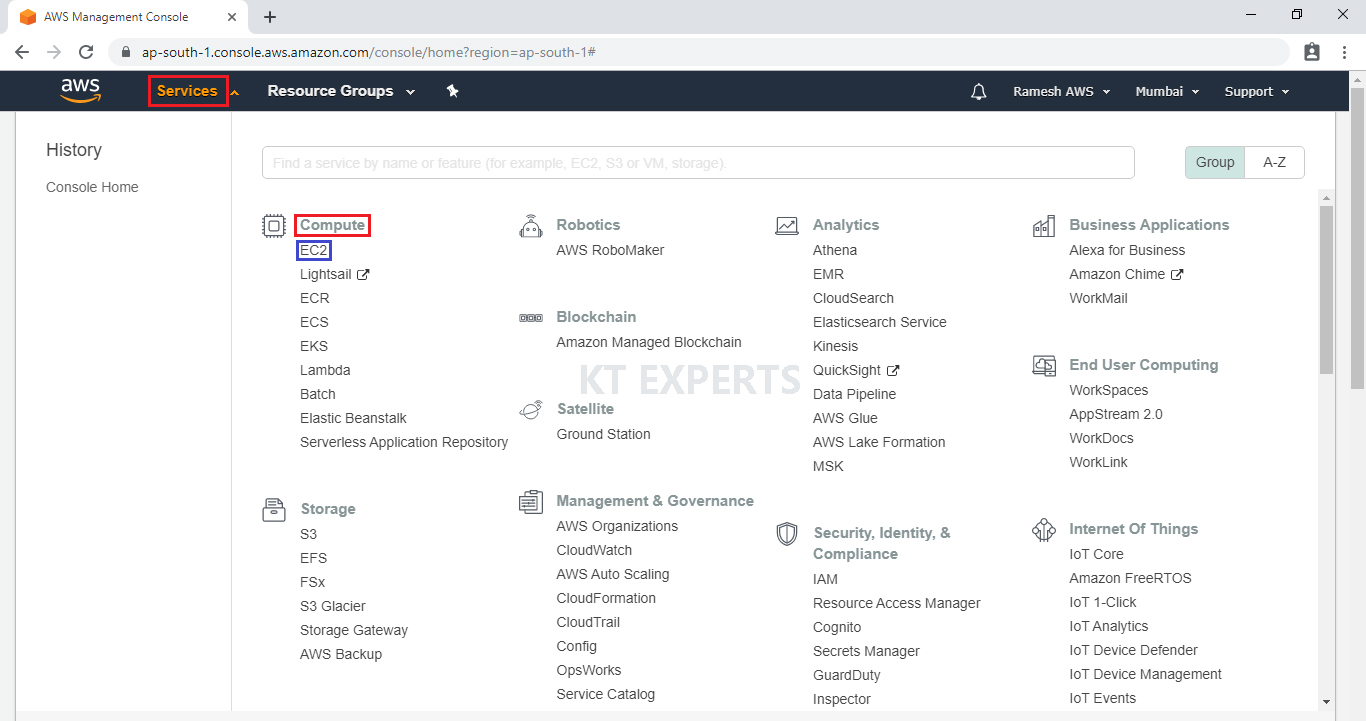
Enter to AWS Management Console
We can see the AWS Management Console Dashboard.
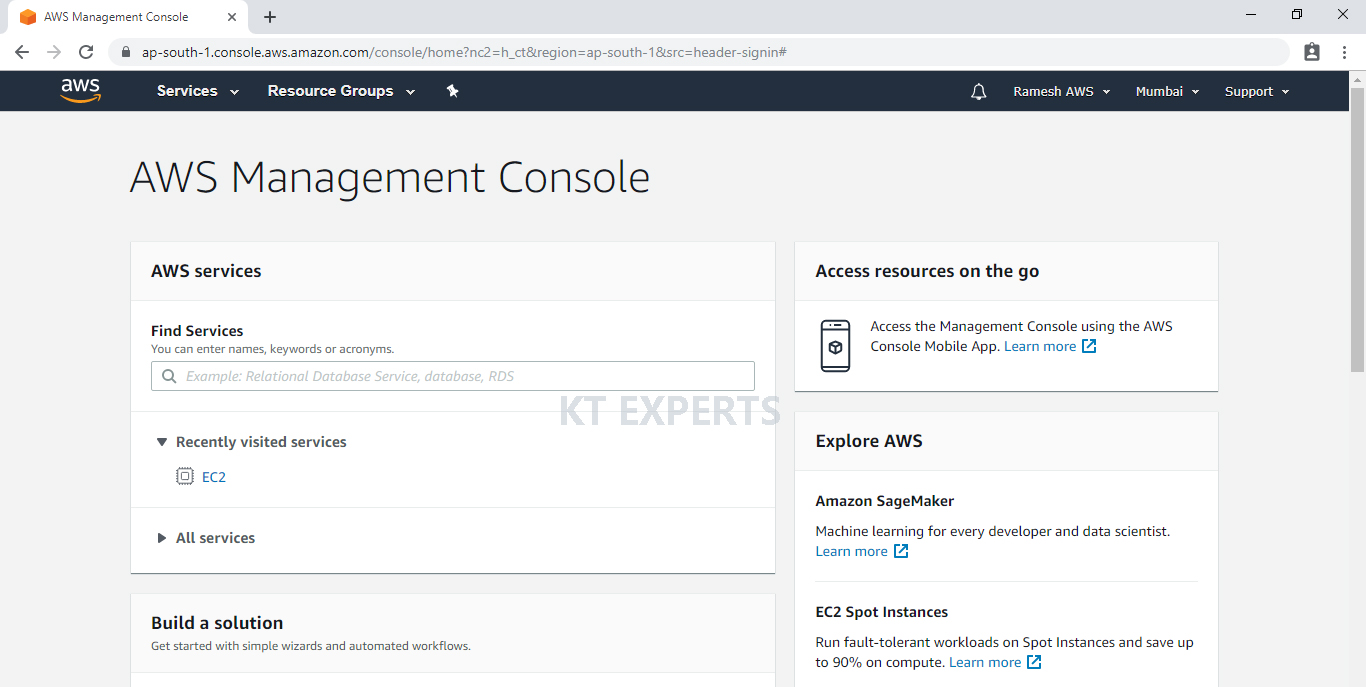
Go to Services, under the compute module click EC2 service to open.
STEP 4:
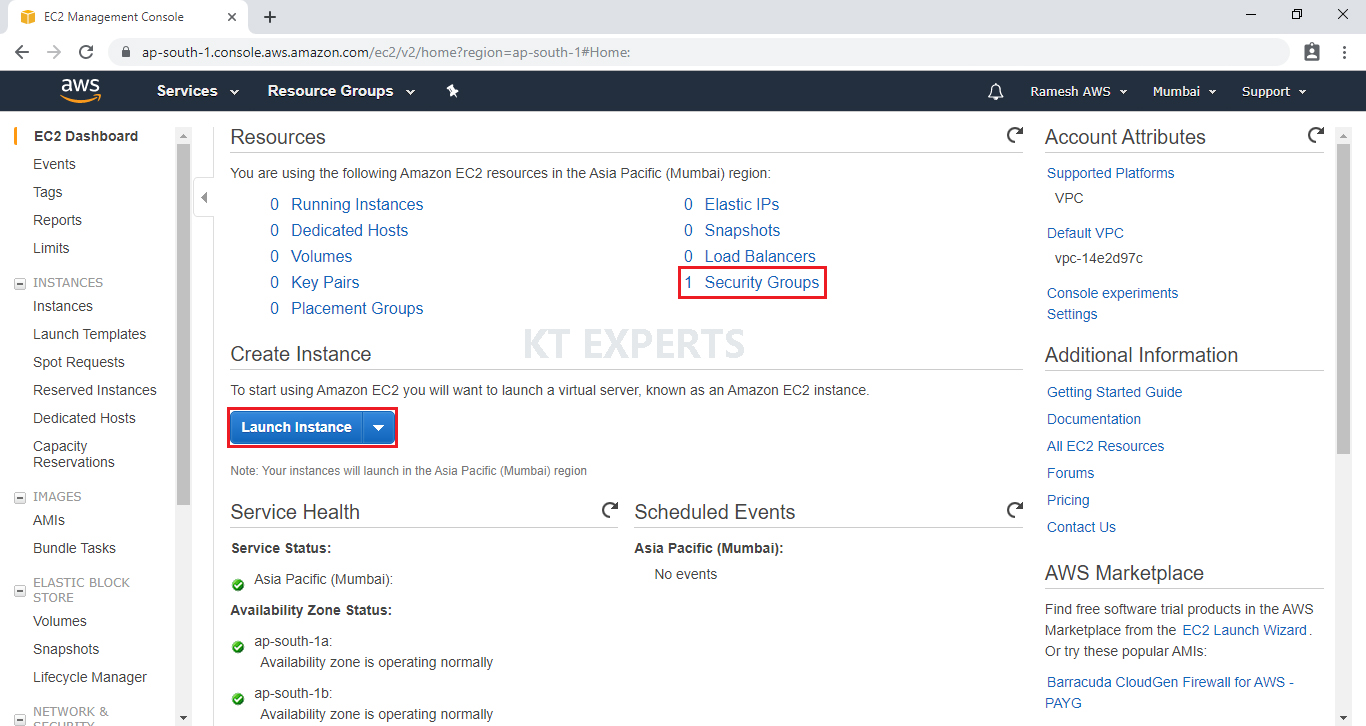
Create and Configure a Virtual Machine
In the EC2 Dashboard we can one security group is available by default and click on Launch Instance.
STEP 5:
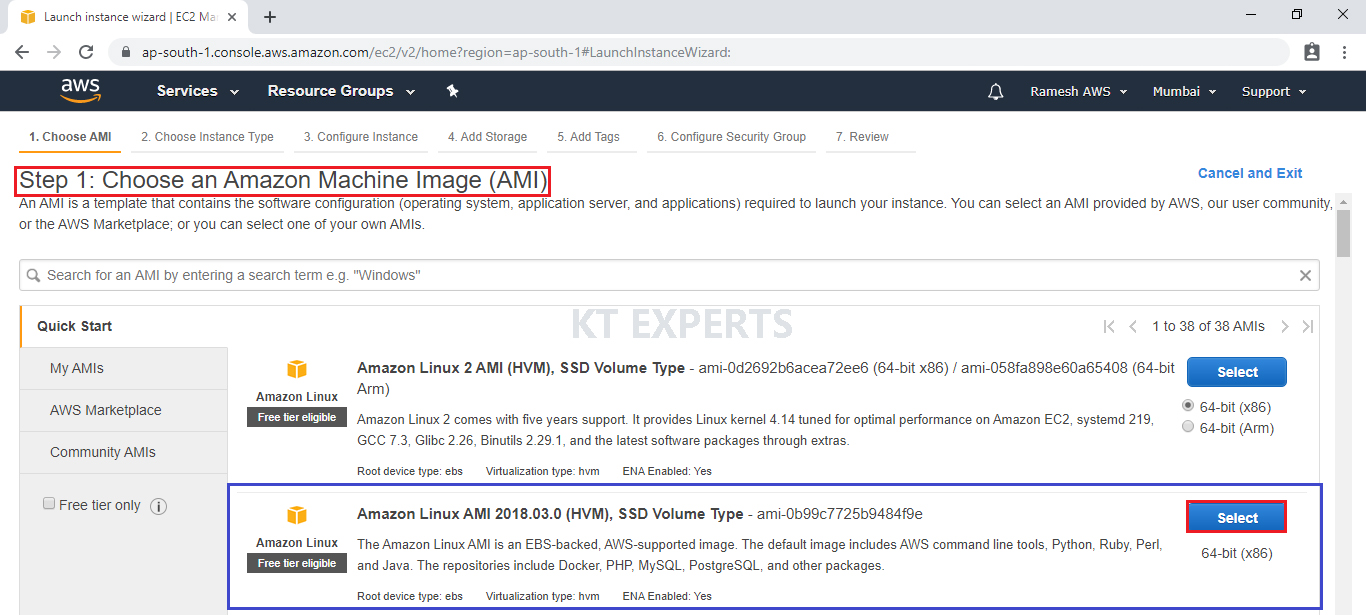
Choose an Amazon Machine Image (AMI)
Select the Operating system of the EC2 instance by choosing any of the Amazon Machine Images (AMI). Select the Microsoft Amazon Linux AMI.
STEP 6:
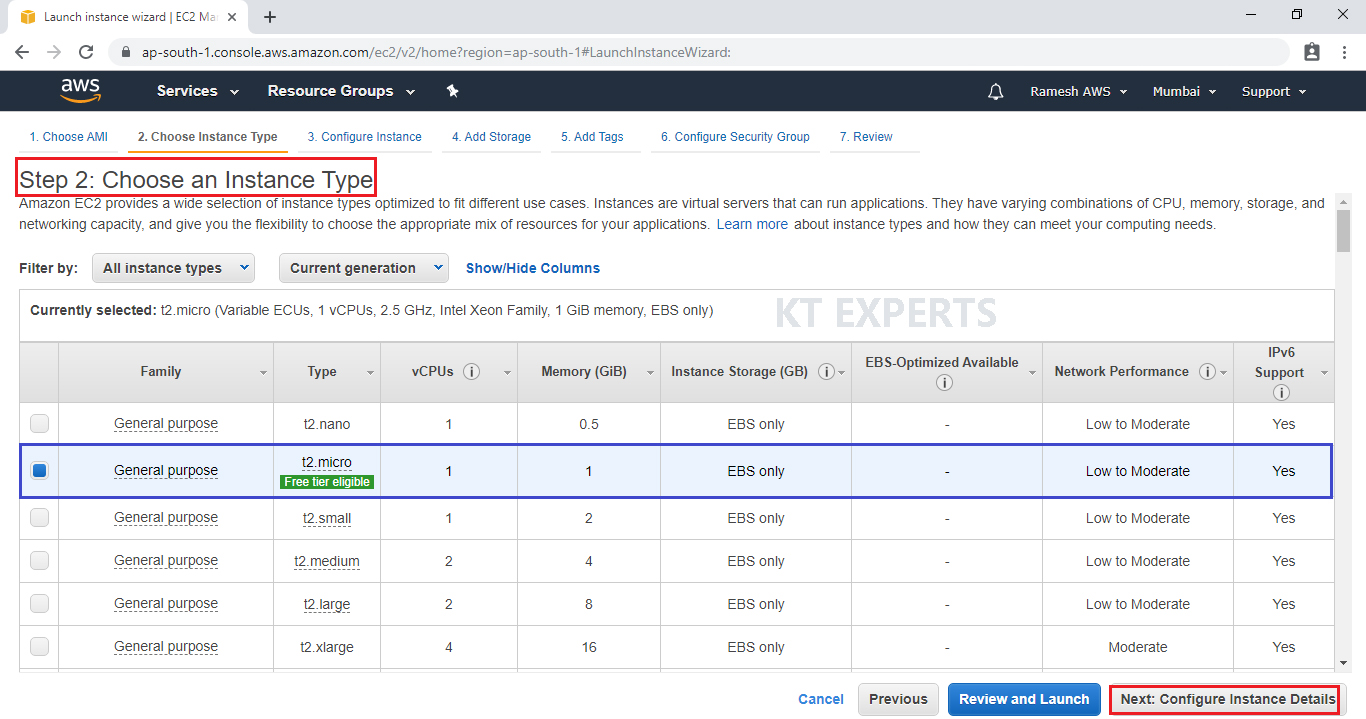
Choose an Instance type
Choose the Type of instance depending on your requirements.
Instance types comprise of varying combinations of CPU, memory, storage, and networking capacity.
select the default option of t2.micro – this instance type is covered within the free tier. Then click on Configure Instance Details.
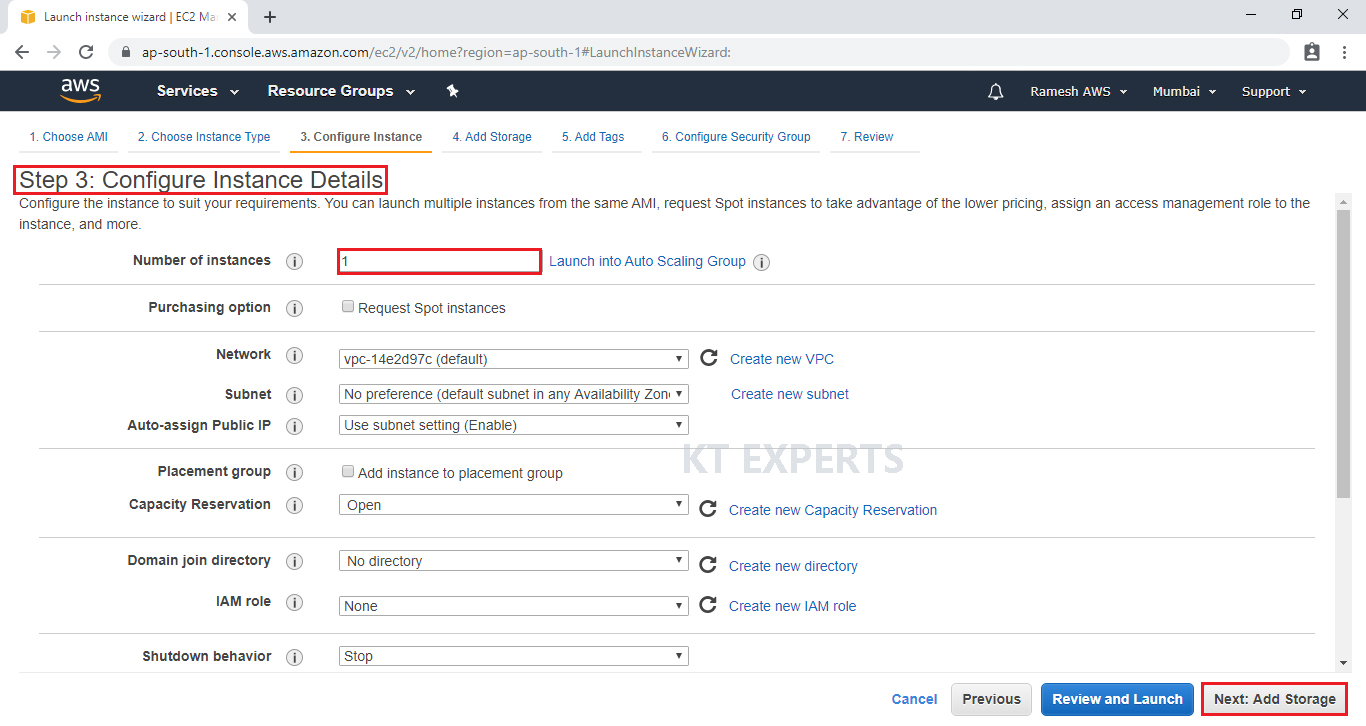
STEP 7:
Configure Instance Details
Configure EC2 instance details as per requirements of your environment and click on Add Storage.
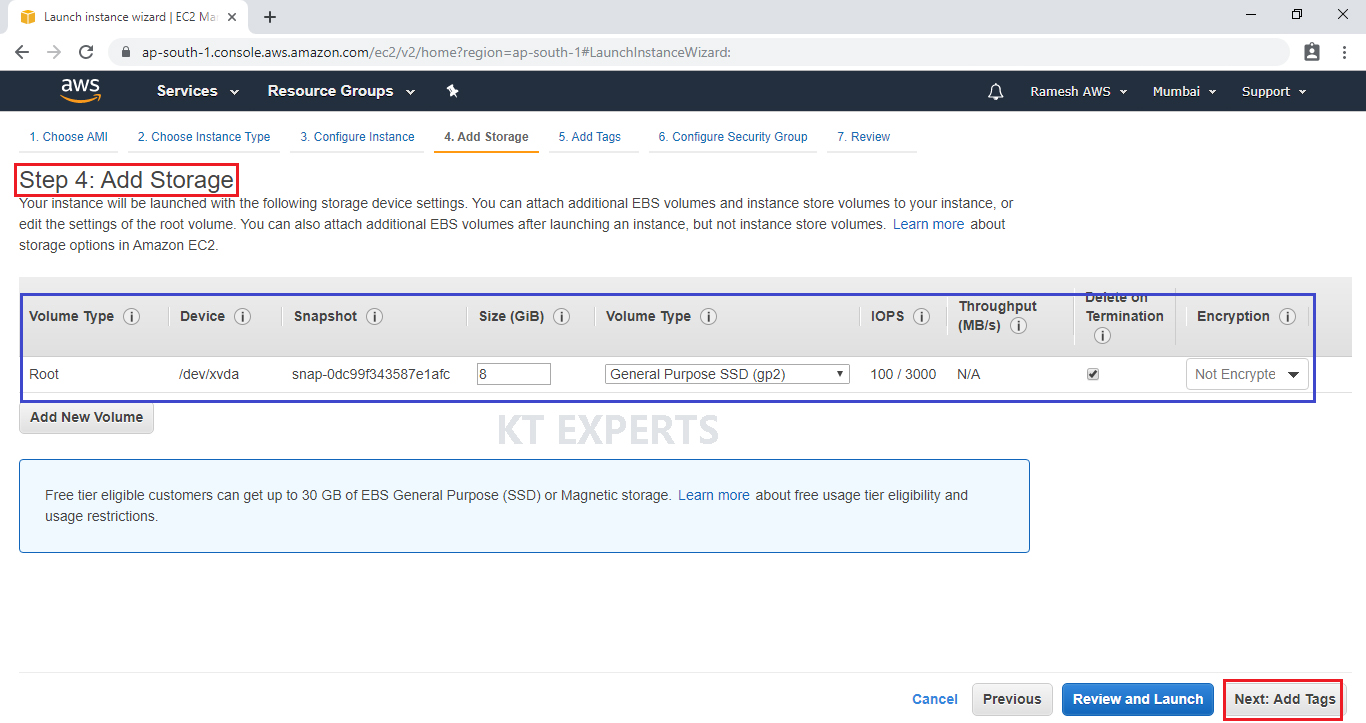
STEP 8:
Add Storage
Here, we can see root volume by default and size of 8GB.
Add a new volume if required.
Click on Add Tags.
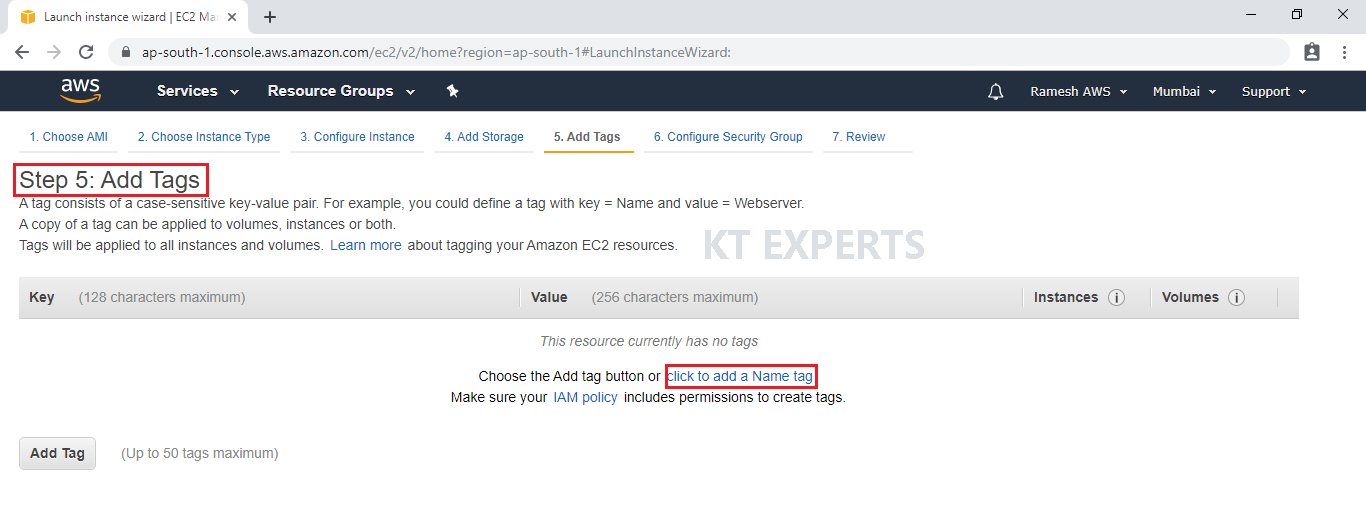
STEP 9:
Add Tags
Tags assist in easier identification and classification of the various instances in your AWS environment.
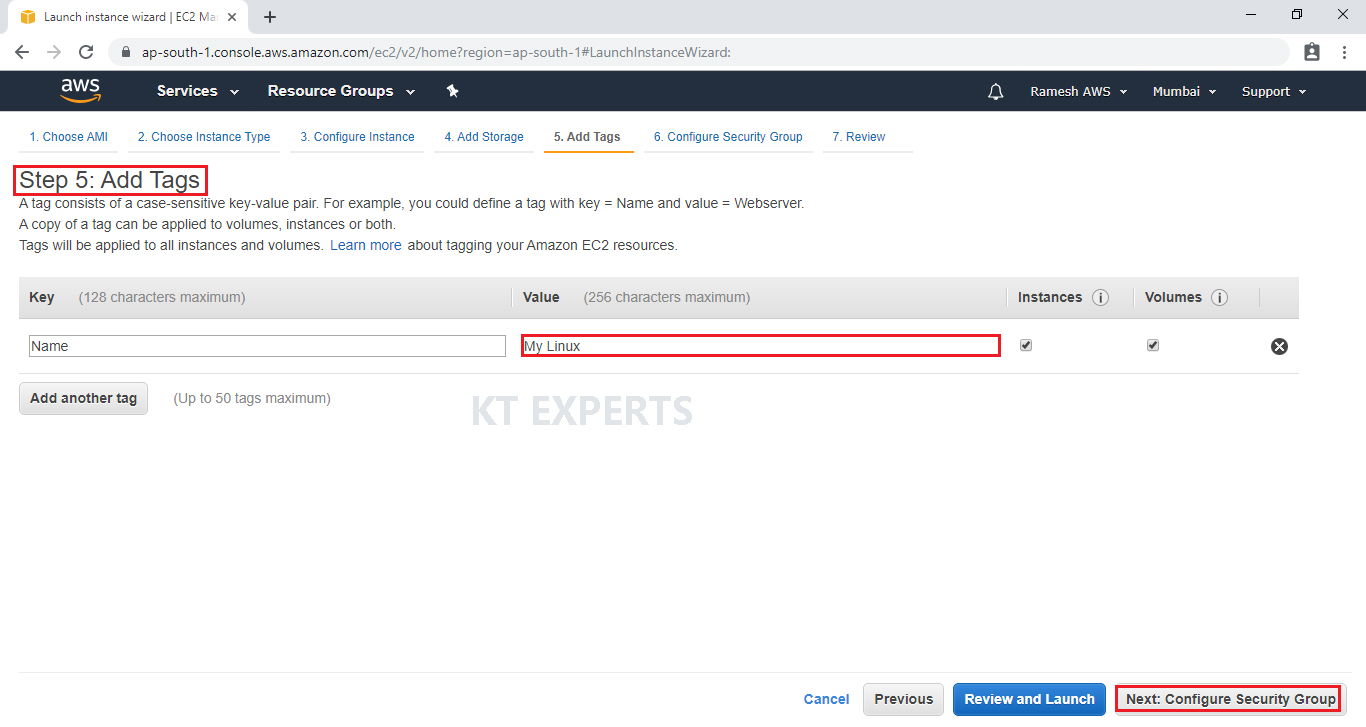
Click on click to add a Name tag to provide name for our server.
Provide the name for the Linux virtual machine for easier understanding and click on Configure Security Groups.
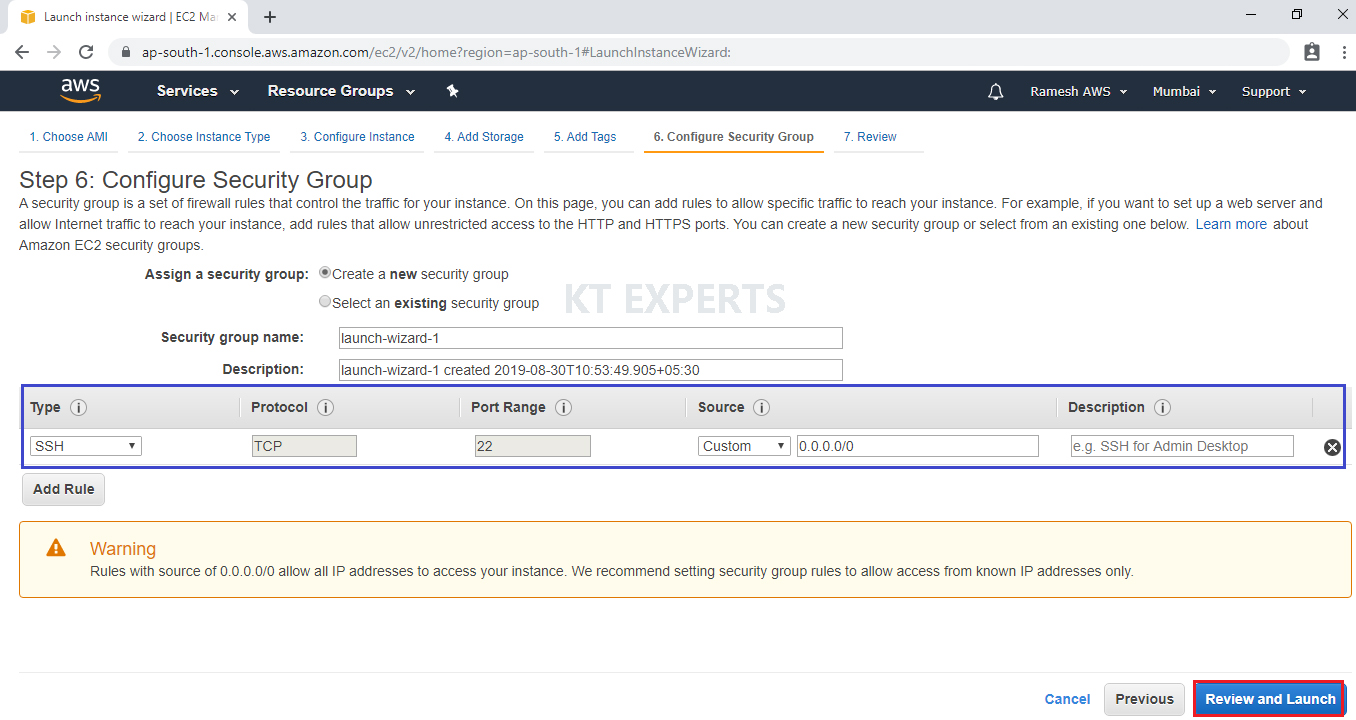
STEP 10:
Configure Security Group
A security group allows configuring firewall rules to allow traffic as needed. Only one rule has been added to allow remote connection.
SSH Is enough to connect to our Linux virtual server and click on Review and Launch.
SSH – Secure Shell
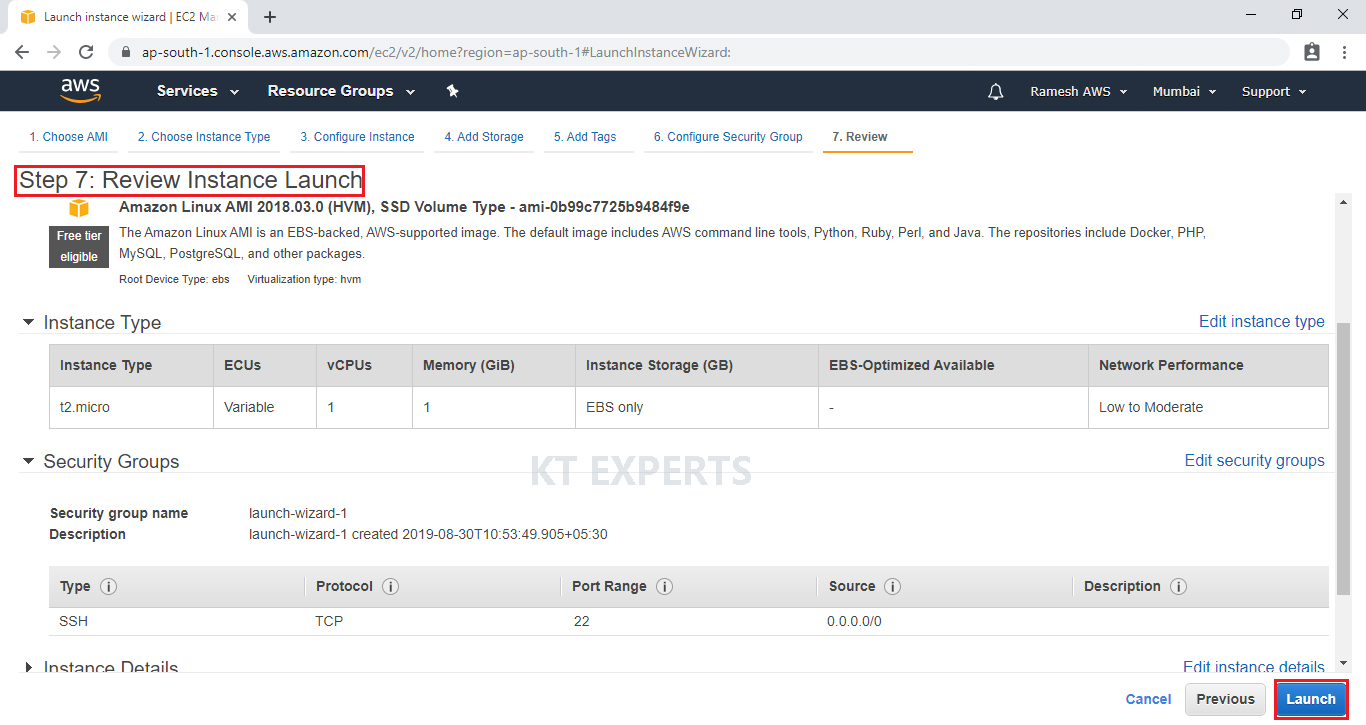
STEP 11:
Review Instance Launch
Review and confirm the configuration of the instance. Click on the Edit button on each configuration item to make changes and click on Launch.
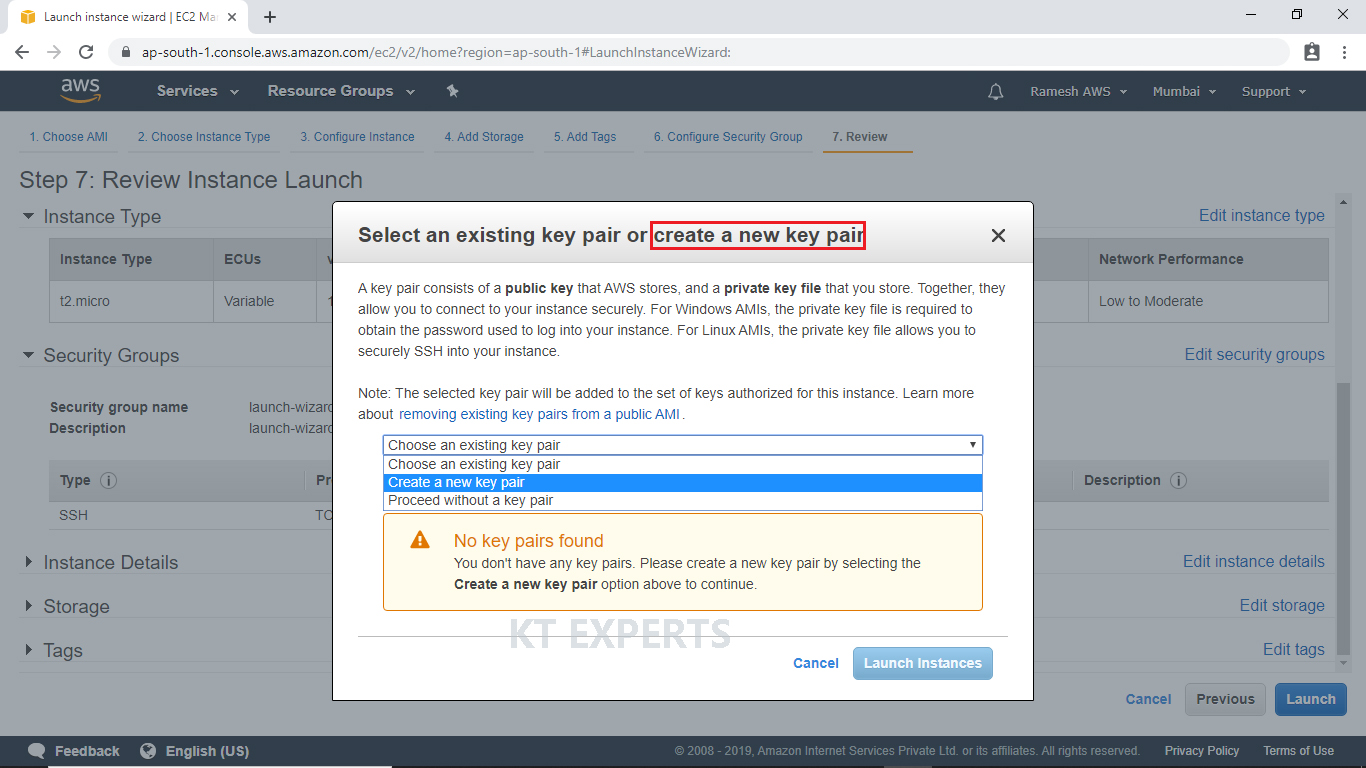
STEP 12:
Create a Key Pair and Launch Your Instance
To connect to your virtual machine, you need a key pair. A key pair is used to log into your instance and Choose create a new key pair.
Create a new key pair and name it My Linux. Then click Download Key Pair.
After you have downloaded and saved your key pair, click on Launch Instance to start your Linux Virtual Server instance.
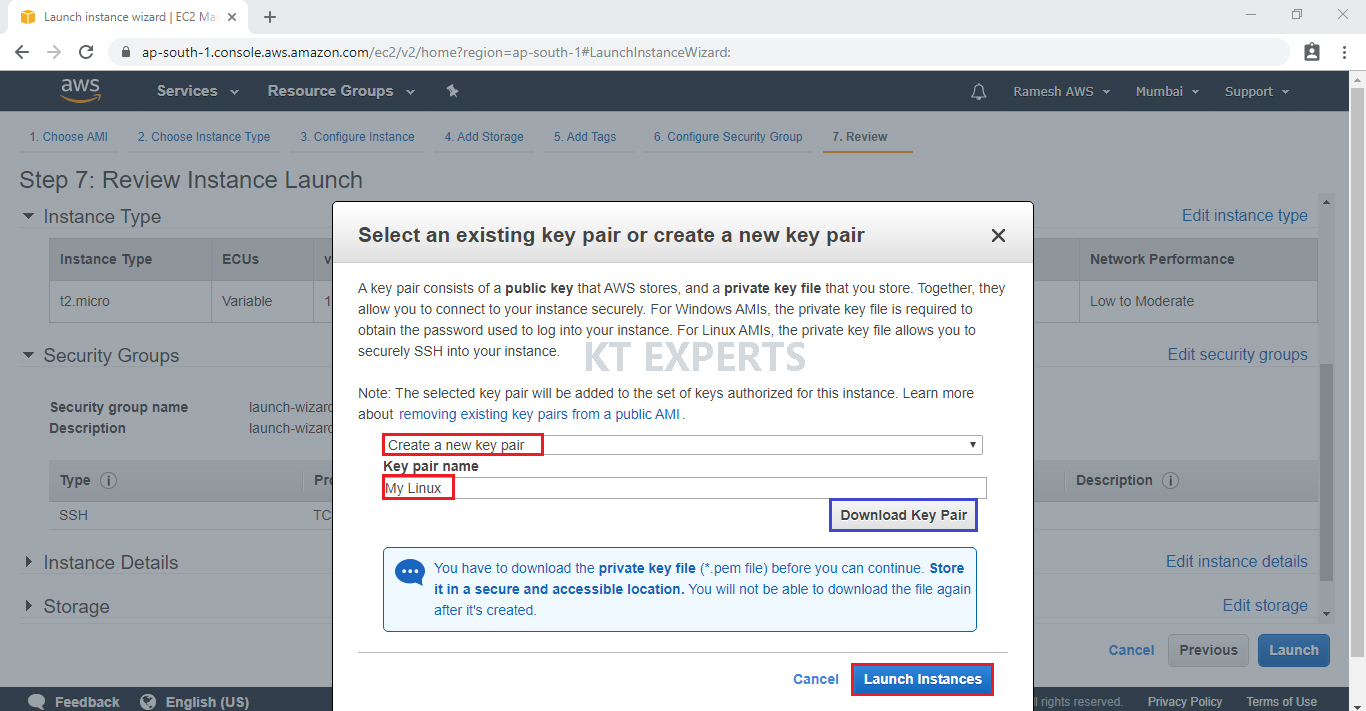
My Linux.pem will be downloaded to your computer — make sure to save this key pair in a safe location on your computer.

click on View Instances to view the instance you have just created and see its status.

we can see instance which was created earlier.
STEP 13:
Download putty and puttygen tools
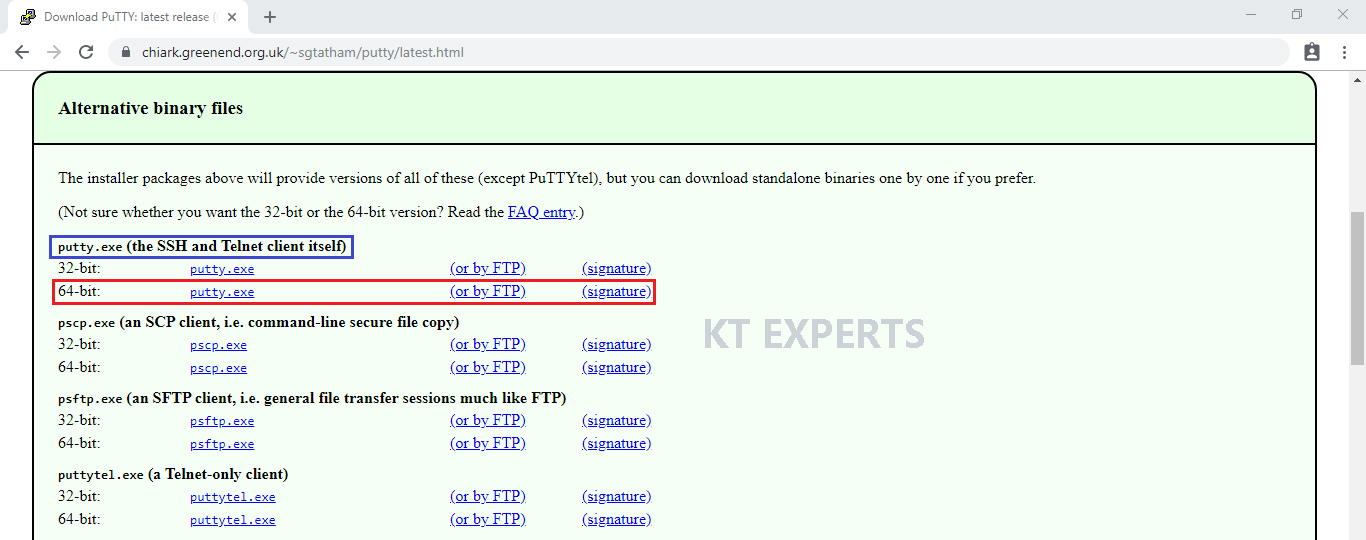
First of all, you need to have puttygen and Putty exe for connecting to the server from Windows (or the SSH command on Linux). You can download putty by following link. https://www.chiark.greenend.org.uk/~sgtatham/putty/latest.html
Go to putty.exe and click on 64 bit.
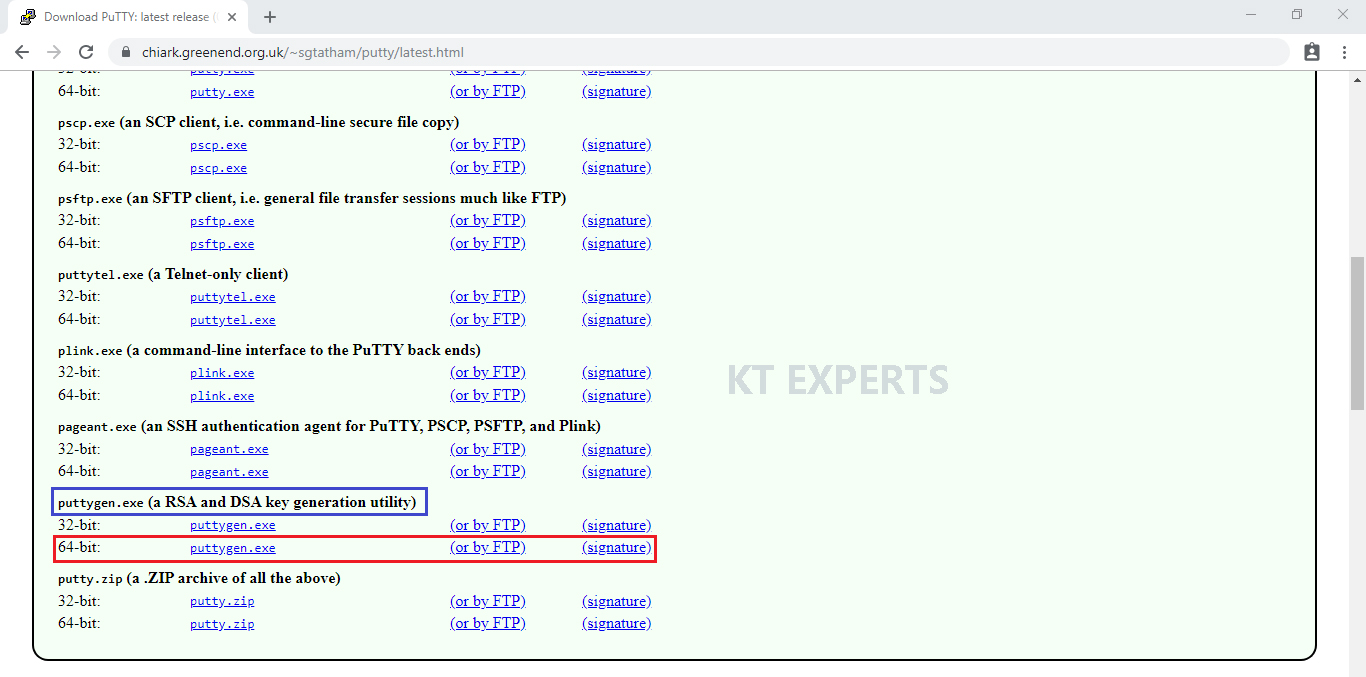
Go to puttygen.exe then click on 64 bit to download the tool.
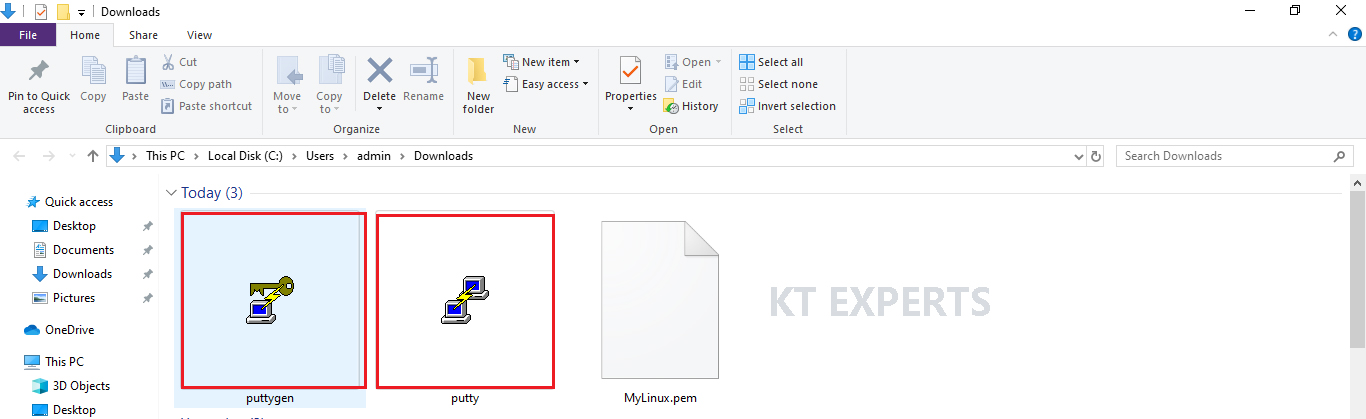
Go to physical location and check the putty and puttygen tools.
STEP 14:
Convert My Linux.pem file to My Linux.ppk file by using puttygen
Go to physical location and click on puttygen tool.
You need to click on the Load button, browse and select the keypair file (MyLinux.pem).

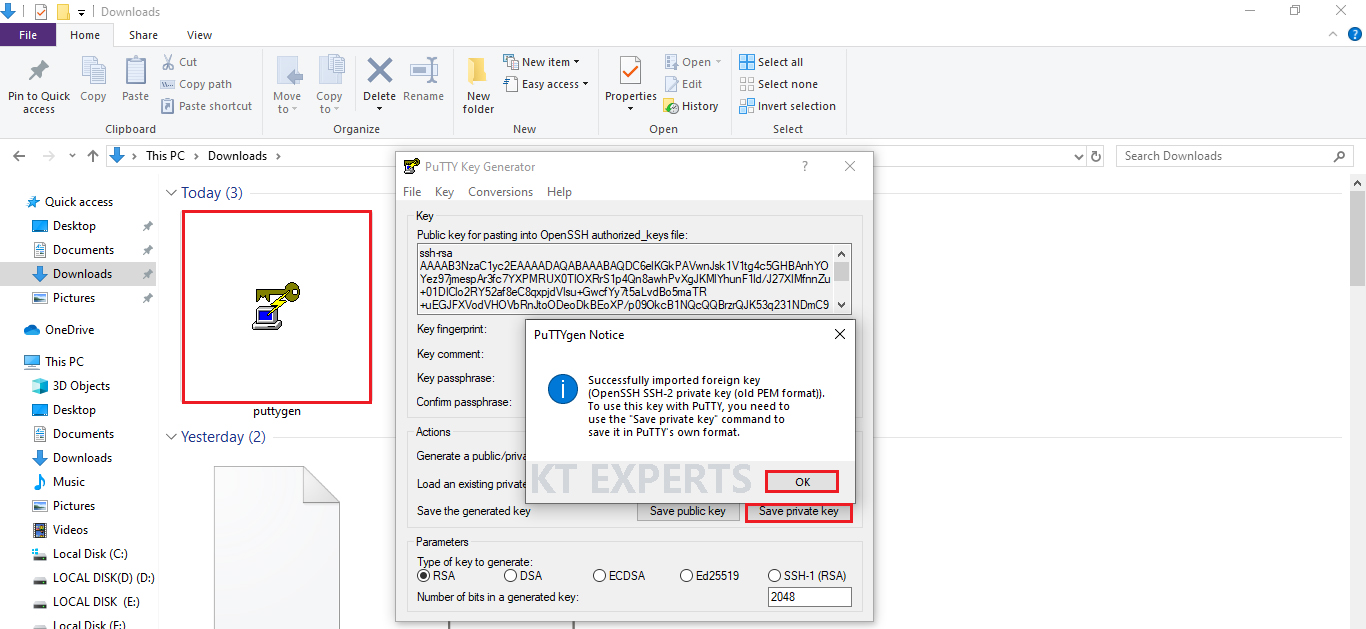
Click on Save private key and click on yes.
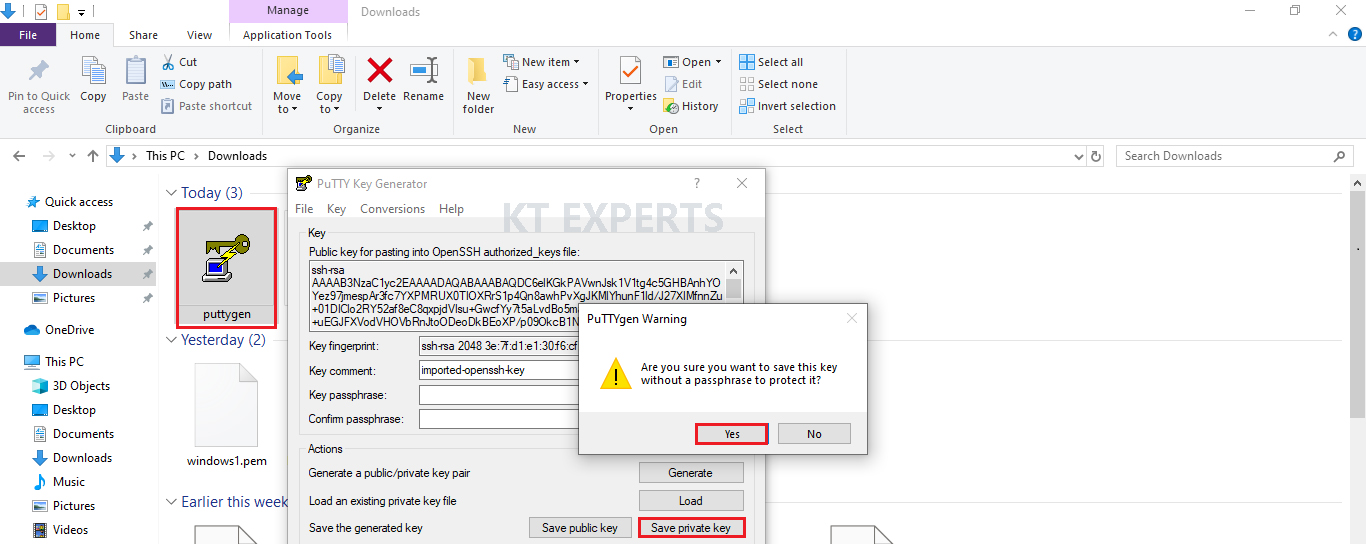
click on ok.
Save the converted file with the name of MyLinux.ppk.
PPK -Putty Private Key
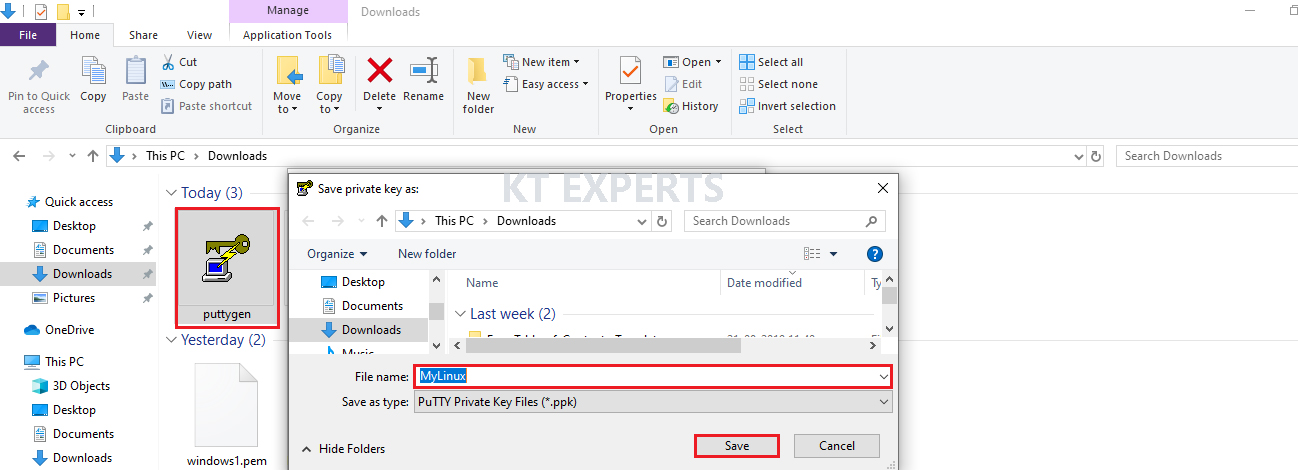
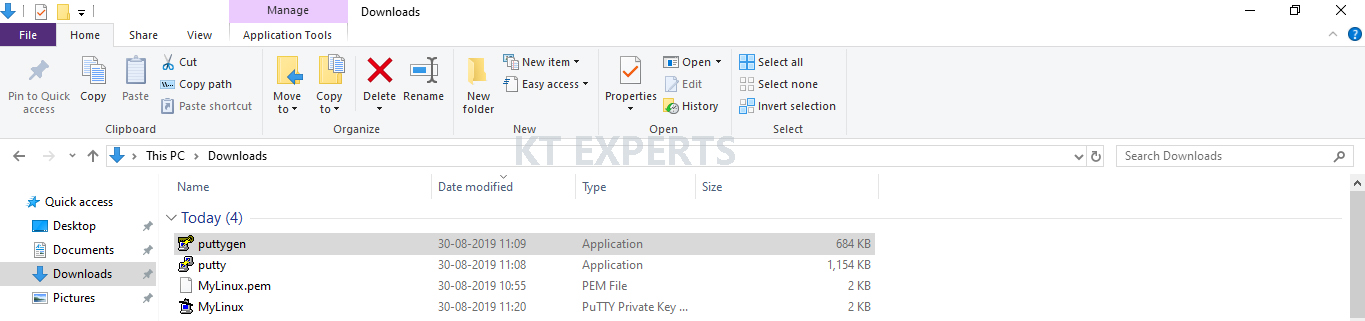
The file has been saved in physical location with the name of MyLinux (format is PPK).

STEP 15:
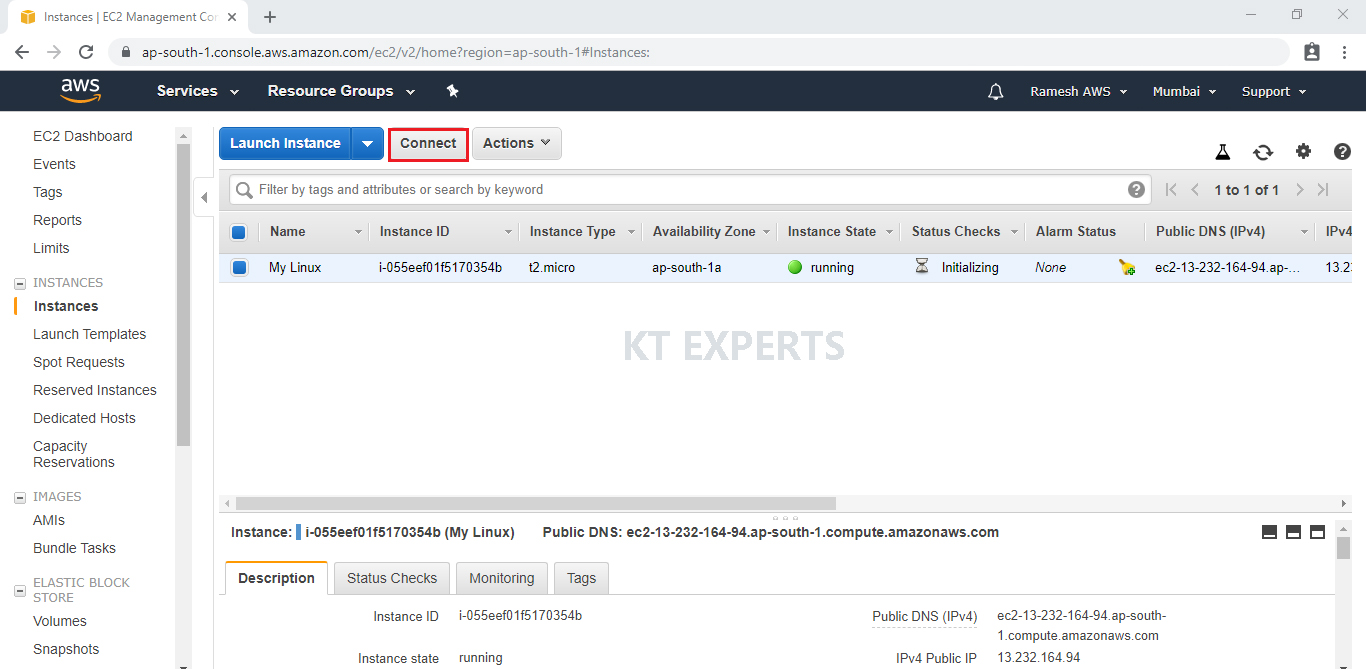
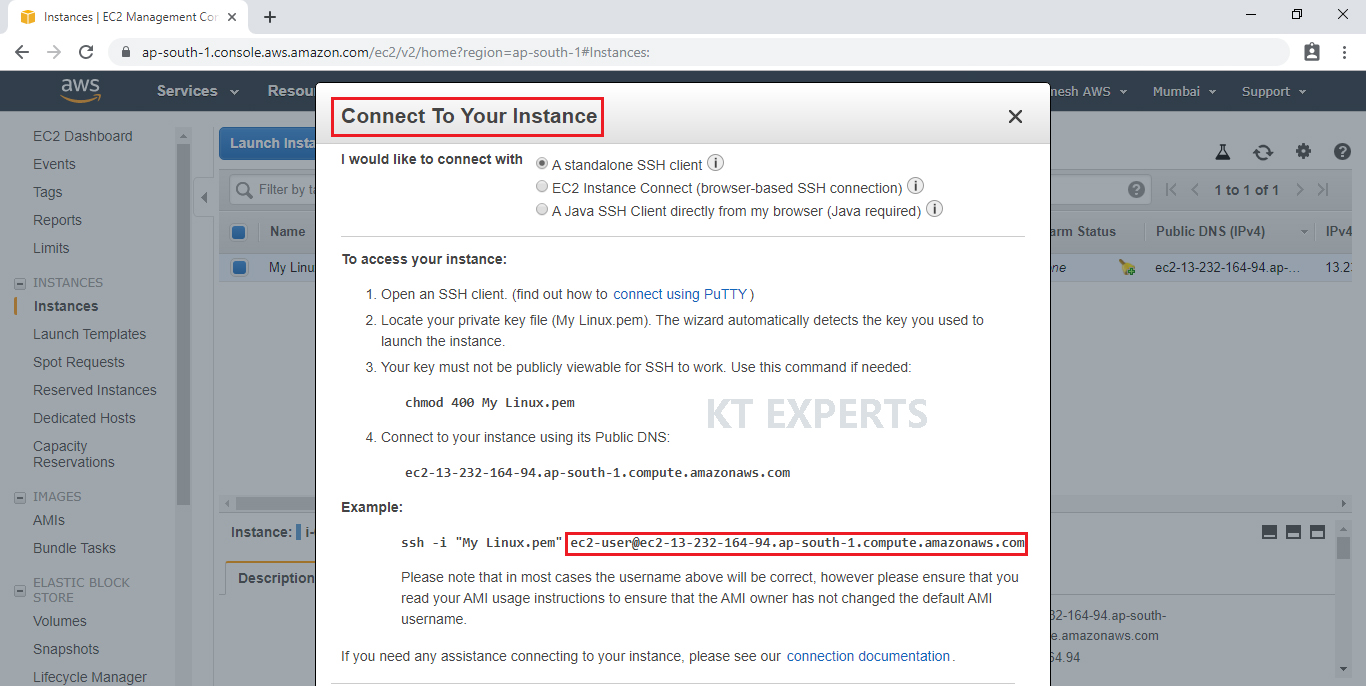
Connect to Your Instance
Once EC2 Instance / Linux virtual Server has been ready then we select the instance and click on connect.
In order to connect to your Linux virtual machine instance, you will need a third-party tool like putty
Copy the DNS for connect your instance through putty.
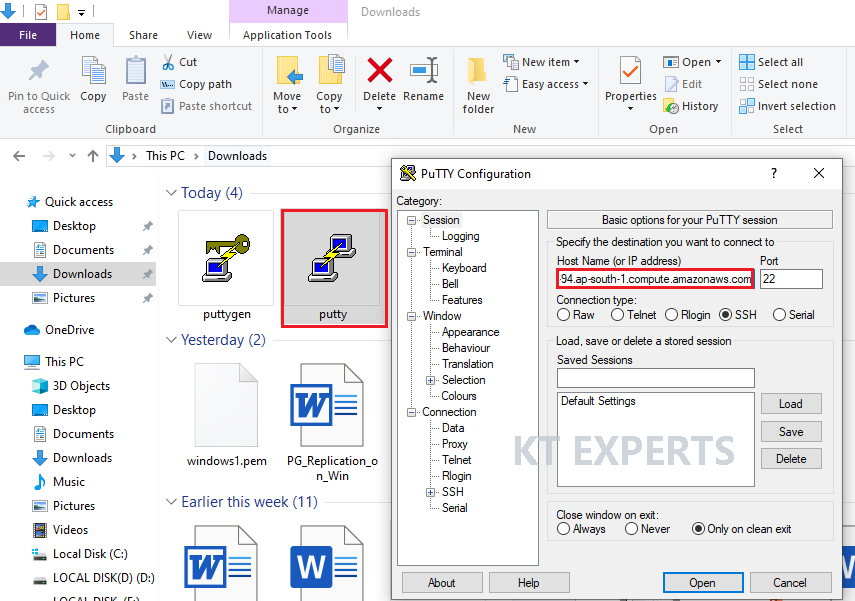
Go to physical location and you need to open Putty.exe then enter DNS which was copied earlier from your instance.
Go to connection at the left side menu then select “SSH” and then select “Auth”. You need to click on the browse button to select the My Linux.ppk file that we created recently.
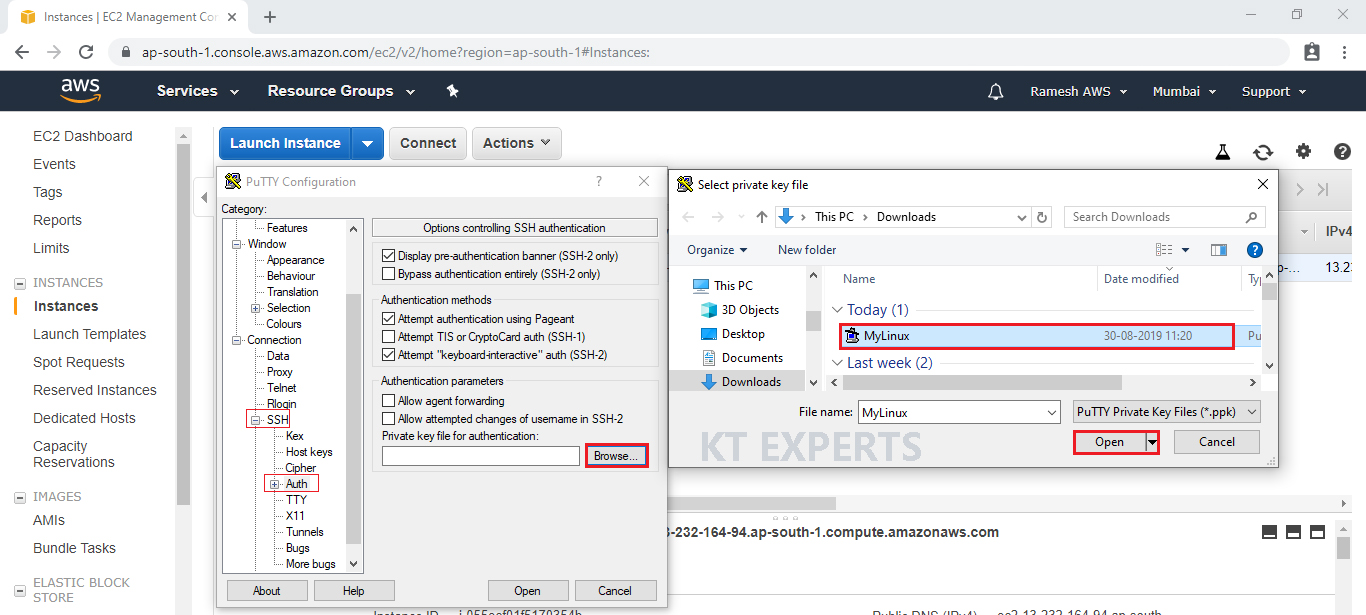
Click on open.

Ignore warnings and click on yes.
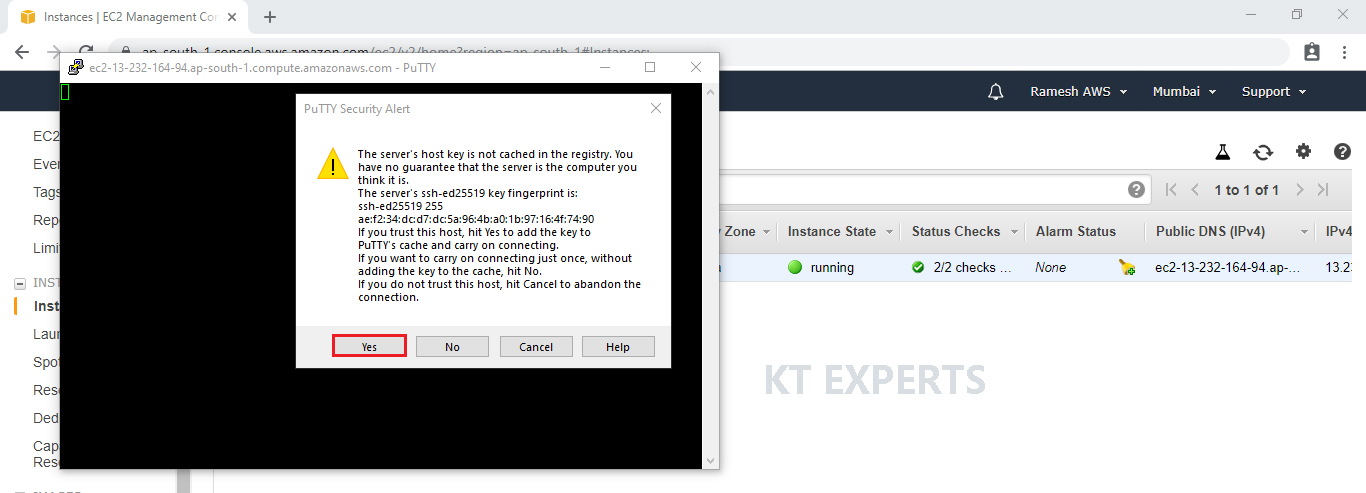
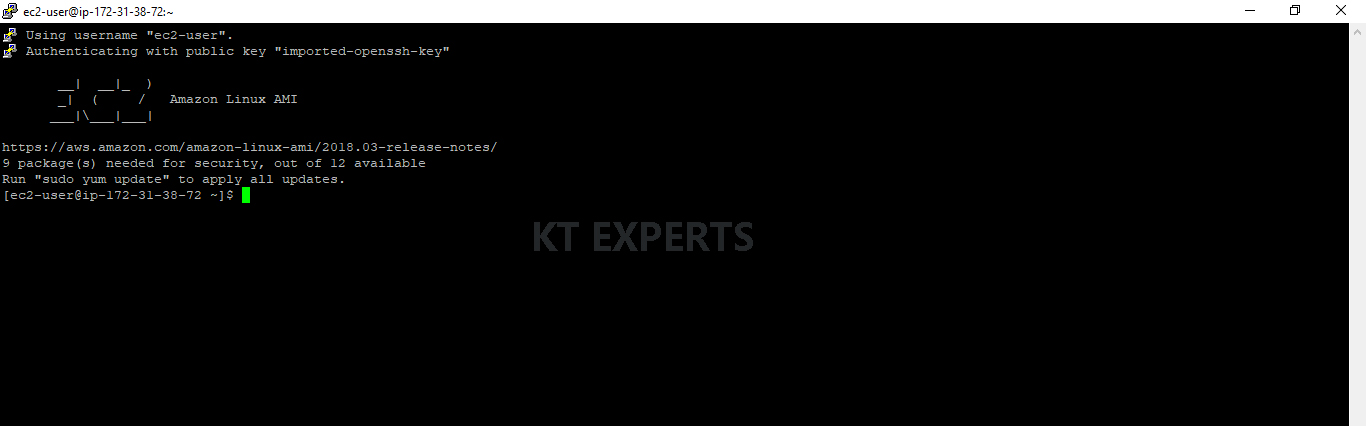
Once you connect, you will successfully see the Linux virtual Server prompt.
Thank you for giving your valuable time to read the above information. Please click here to subscribe for further updates
KTEXPERTS is always active on below social media platforms.
Facebook : https://www.facebook.com/ktexperts/
LinkedIn : https://www.linkedin.com/company/ktexperts/
Twitter : https://twitter.com/ktexpertsadmin
YouTube : https://www.youtube.com/c/ktexperts
Instagram : https://www.instagram.com/knowledgesharingplatform


Surya
Helpful
Thulasi Ram
By seeing this article I came to know lot of things…Great Ramesh
Gaurav Sonawane
its awesome bro …whenever i have any doubt i always prefer this site.Thanks Bro
Peter
I think it’s awe bro… It’s also helpful
k. sai chaitanya
Great Job!!!
Surya
Awesome, good knowledge transfer. Thank you for sharing.