Dear Readers,
In this article,we will see Amazon DynomoDB in AWS.

Steps to Follow :
- Create one role and attached to source “Amazon EC2” and Destination “Amazon DynamoDB FullAccess”.
- Launch DynamoDB Web Server and Attach Role “Dynamodb”.
- Connect to Dynamo DB Web Server through putty.
- Run 2 commands(AWS SDK for PHP-Install by using composer) inside html folder.
- Go to dynamodb directory open createtables.php and uploaddata.php files and change the required region(ap-south-1).
- Create tables and upload data into dynamoDB.
What is DynamoDB?
It is a fully managed NoSQL Database Service
Not to worry about maintenance or administration
Helps in creating databases that can restore any amount of data and
serve any level of request traffic.
How DynamoDB works?
In DynamoDB, tables, items, and attributes are the core components that you work with.
A table is a collection of items, and each item is a collection of attributes.
DynamoDB uses primary keys to uniquely identify each item in a table and secondary indexes to provide more querying flexibility.
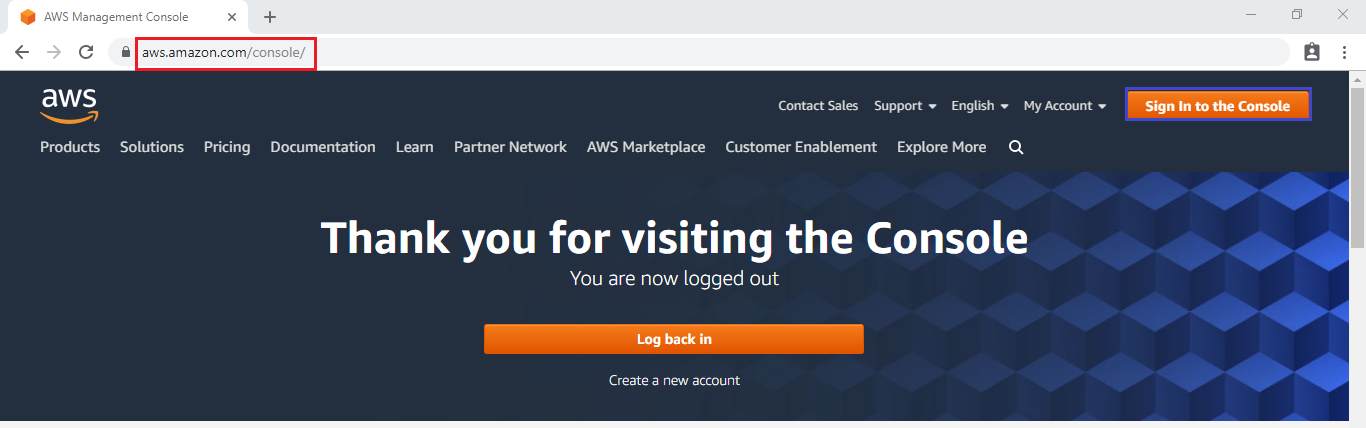
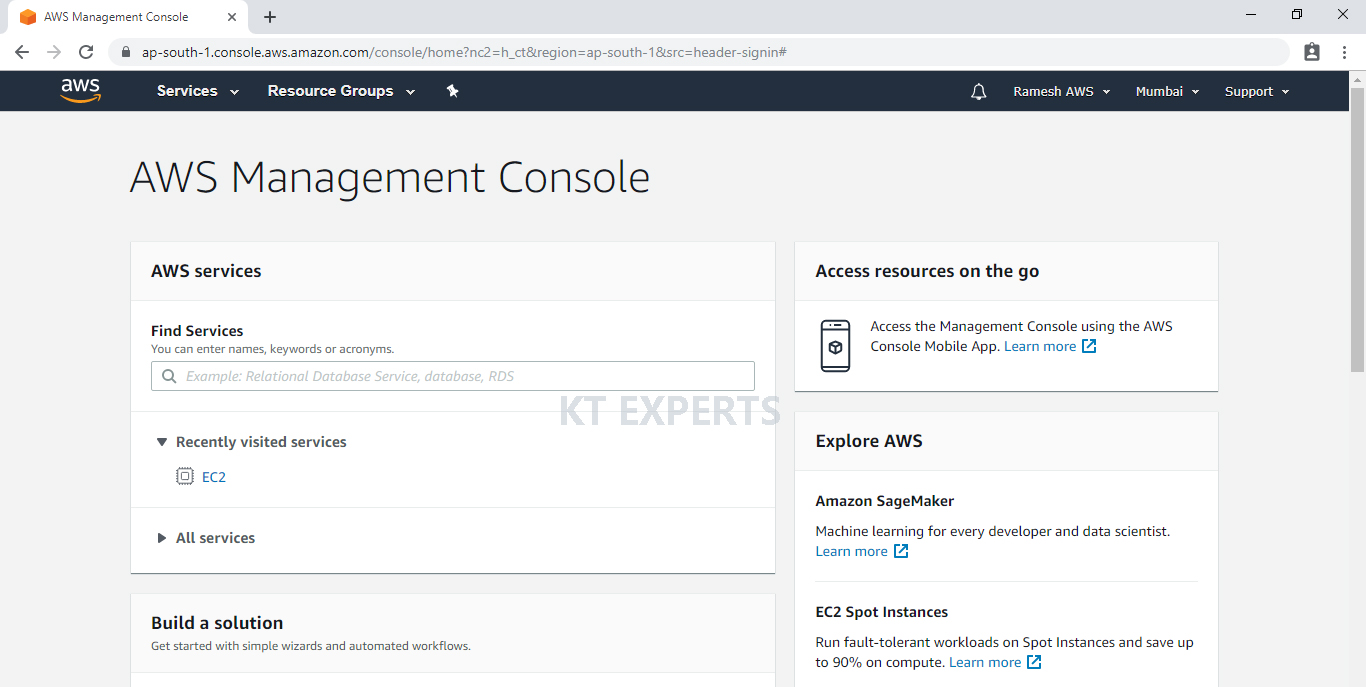
First, we need to AWS Console page by using below link.
https://aws.amazon.com/console/
Click on sign in to Console button.
Logging to aws account
Login using username & password and click on sign in.
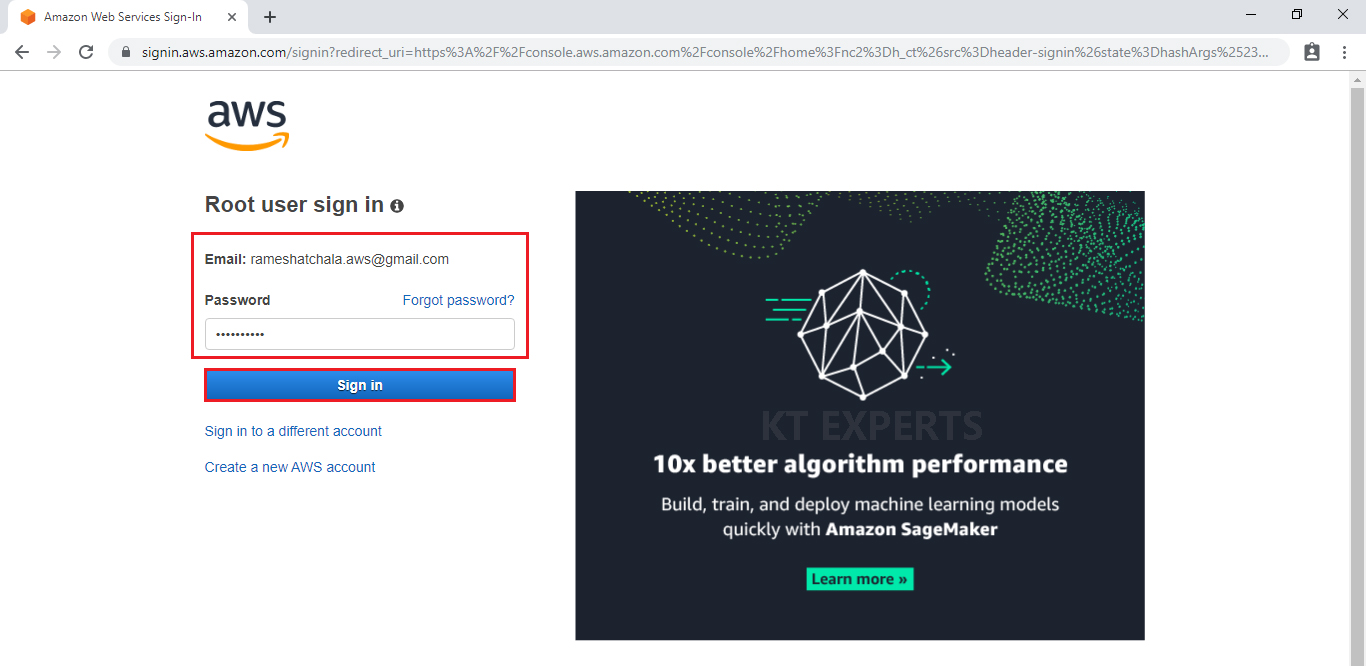
Enter to AWS Management Console
We can see the AWS Management Console Dashboard.
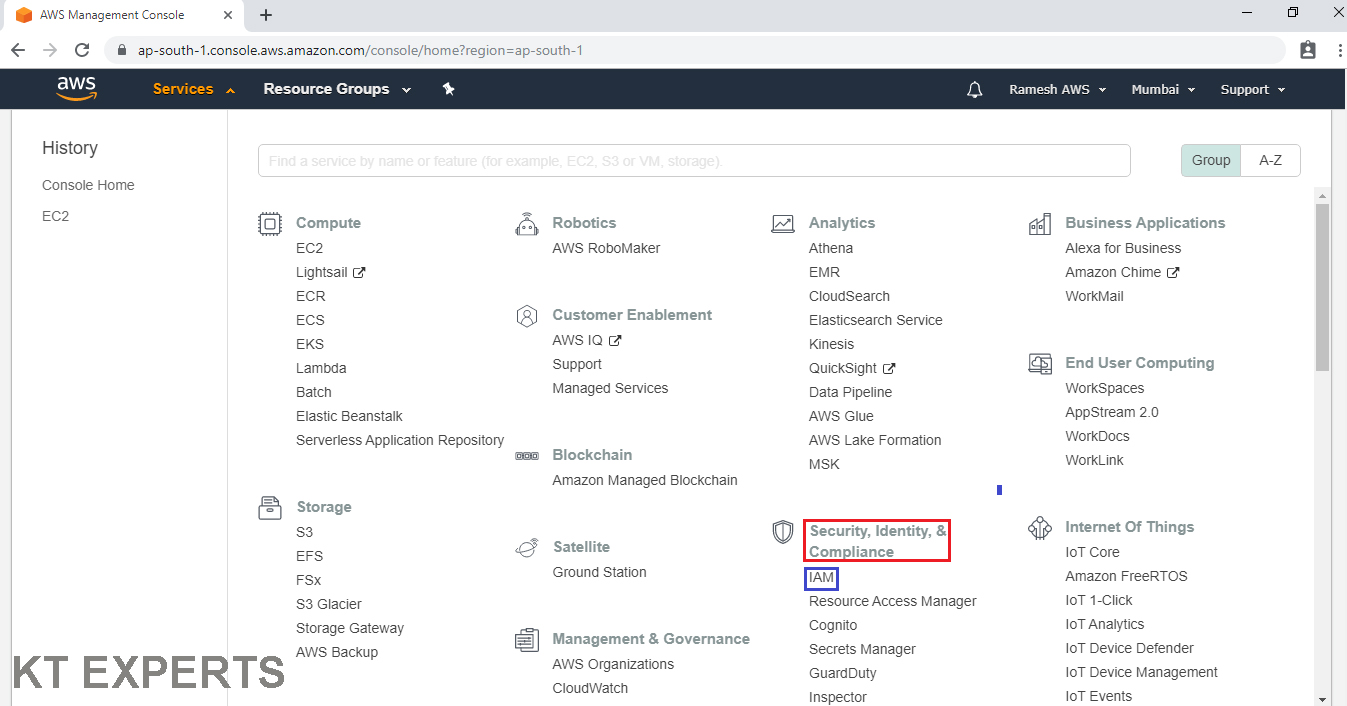
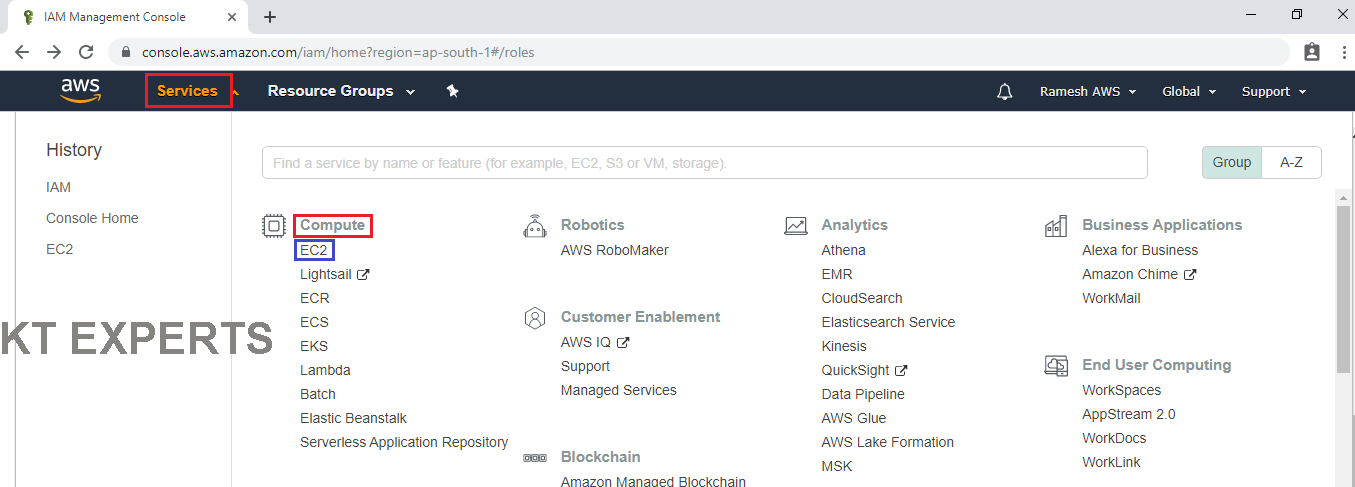
Go to services and click on IAM under security, identity & Compliance.
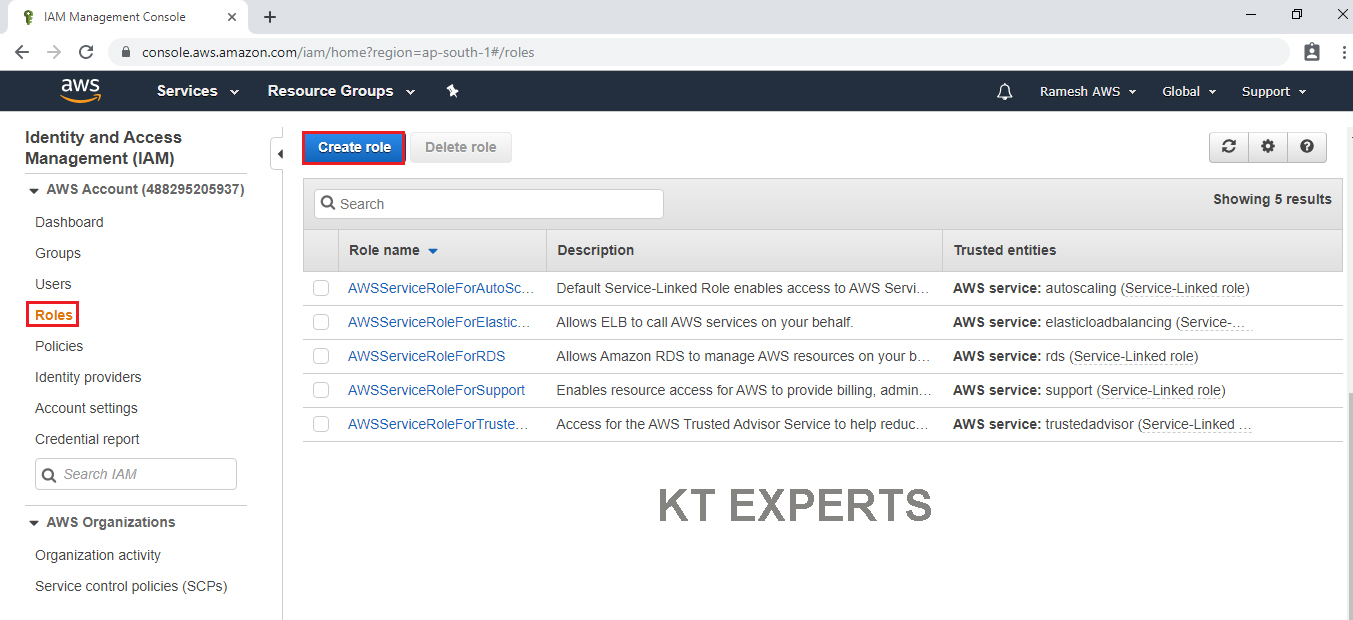
Create Role and attached to source “Amazon EC2” and Destination “Amazon DynamoDB FullAccess”
Go to Roles and click on Create role.
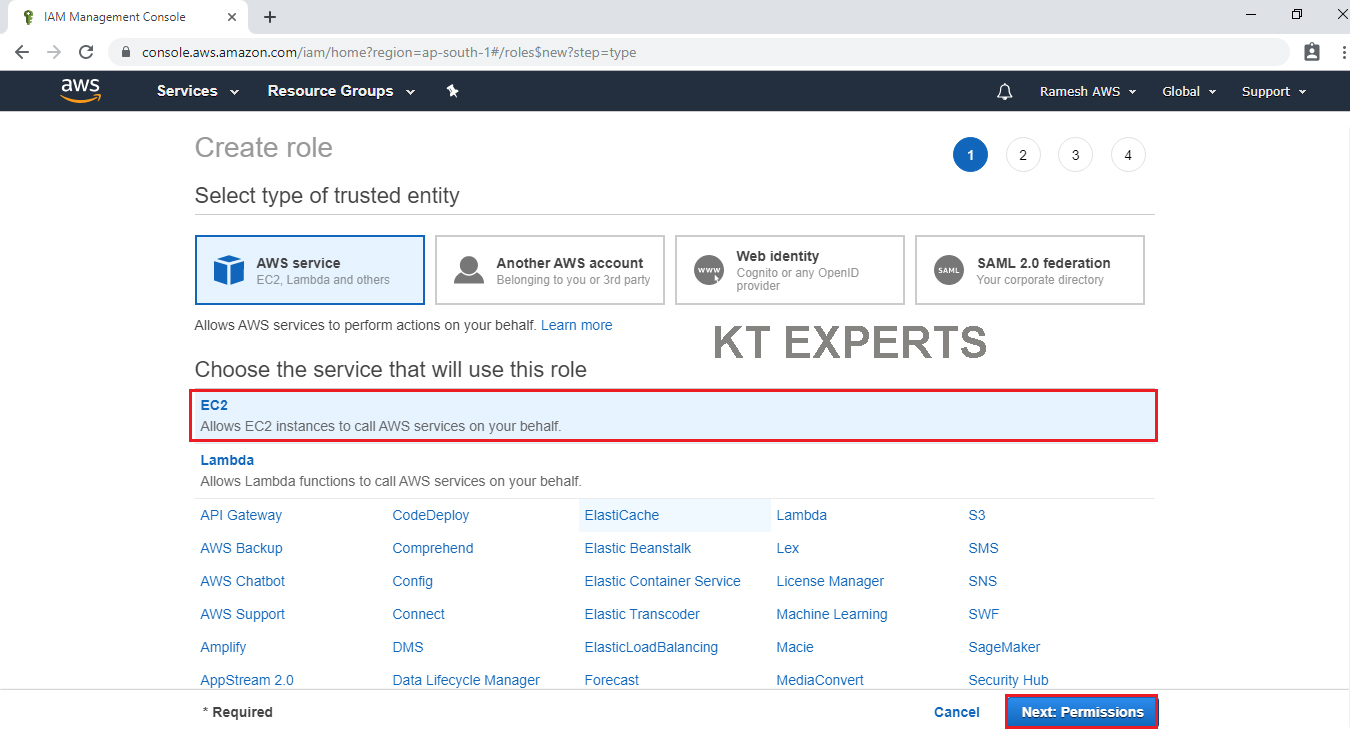
Choose Source
Choose EC2 service and click on Permissions.
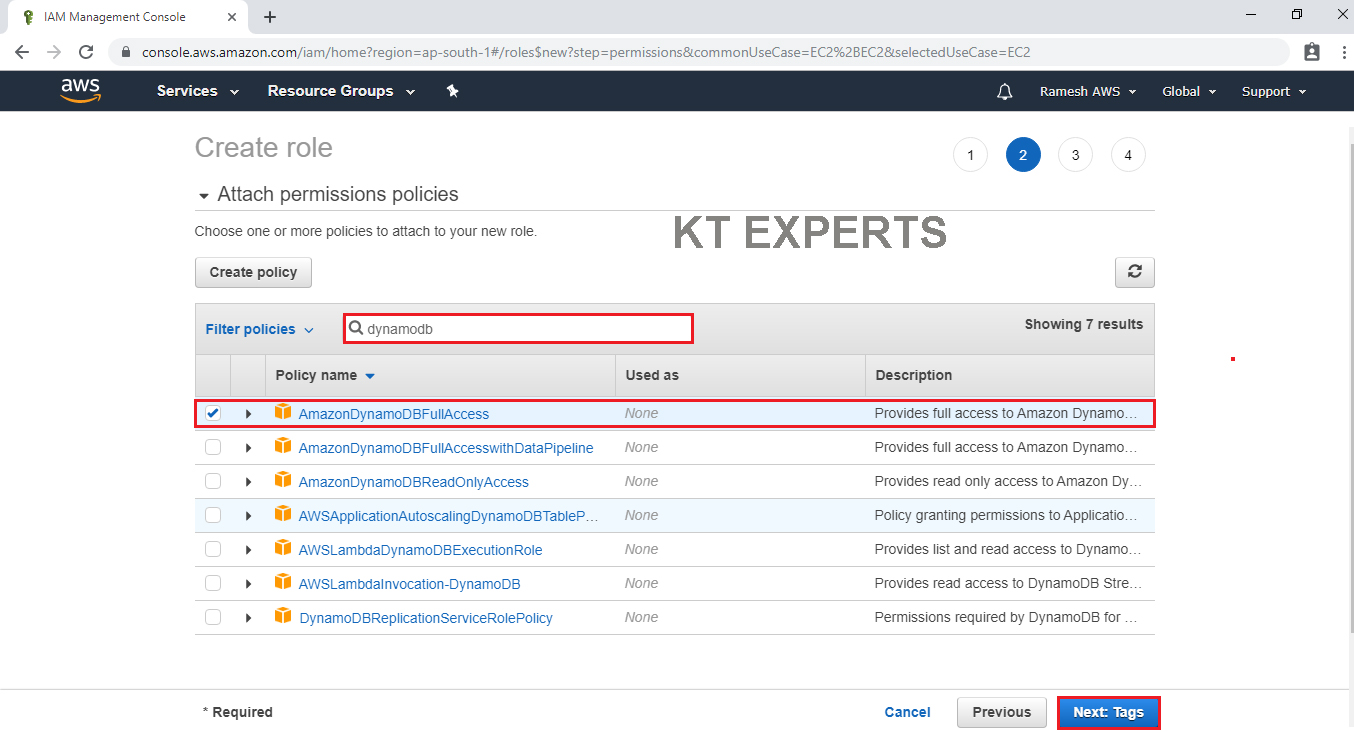
Provide Destination Permission to the role
Select AmazonS3FullAccess by searching S3Full in search bar and click on Tags.
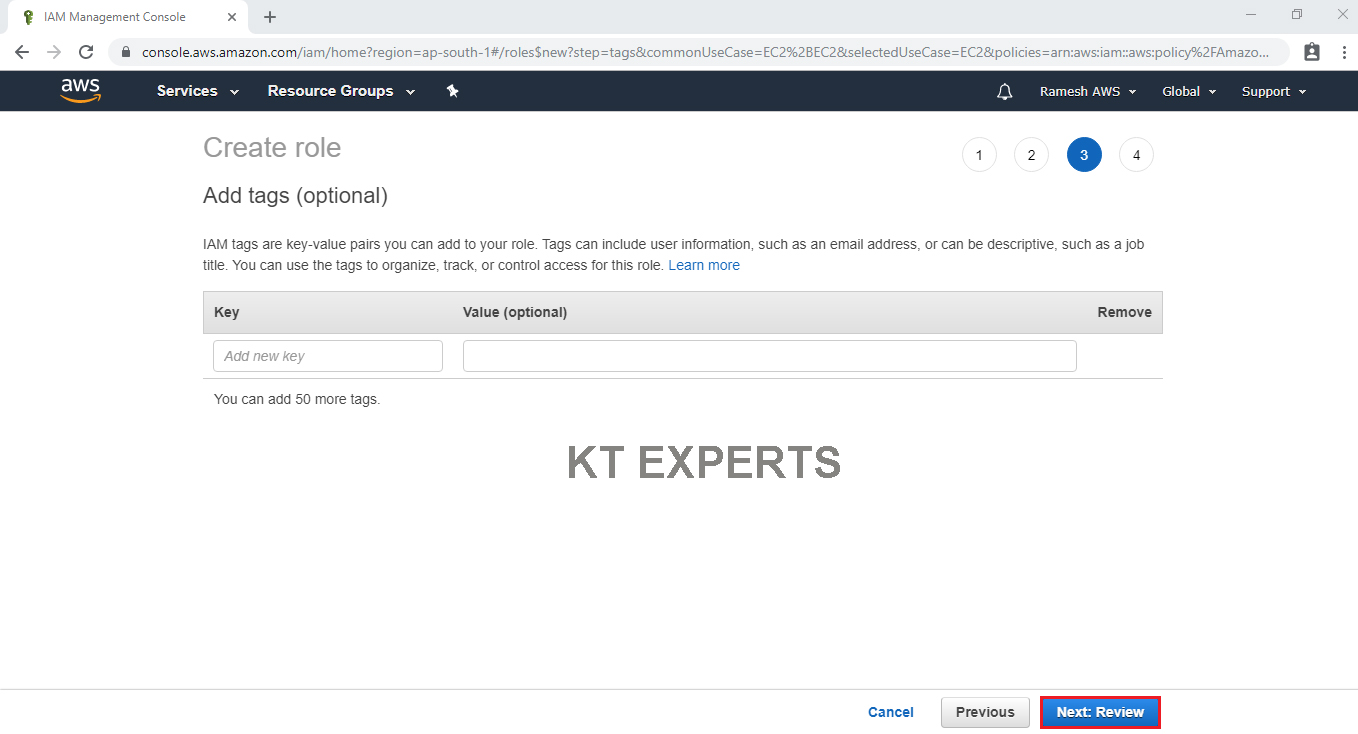
Click on Review.
Specify Role name “Dynamodb” and click on Create role.
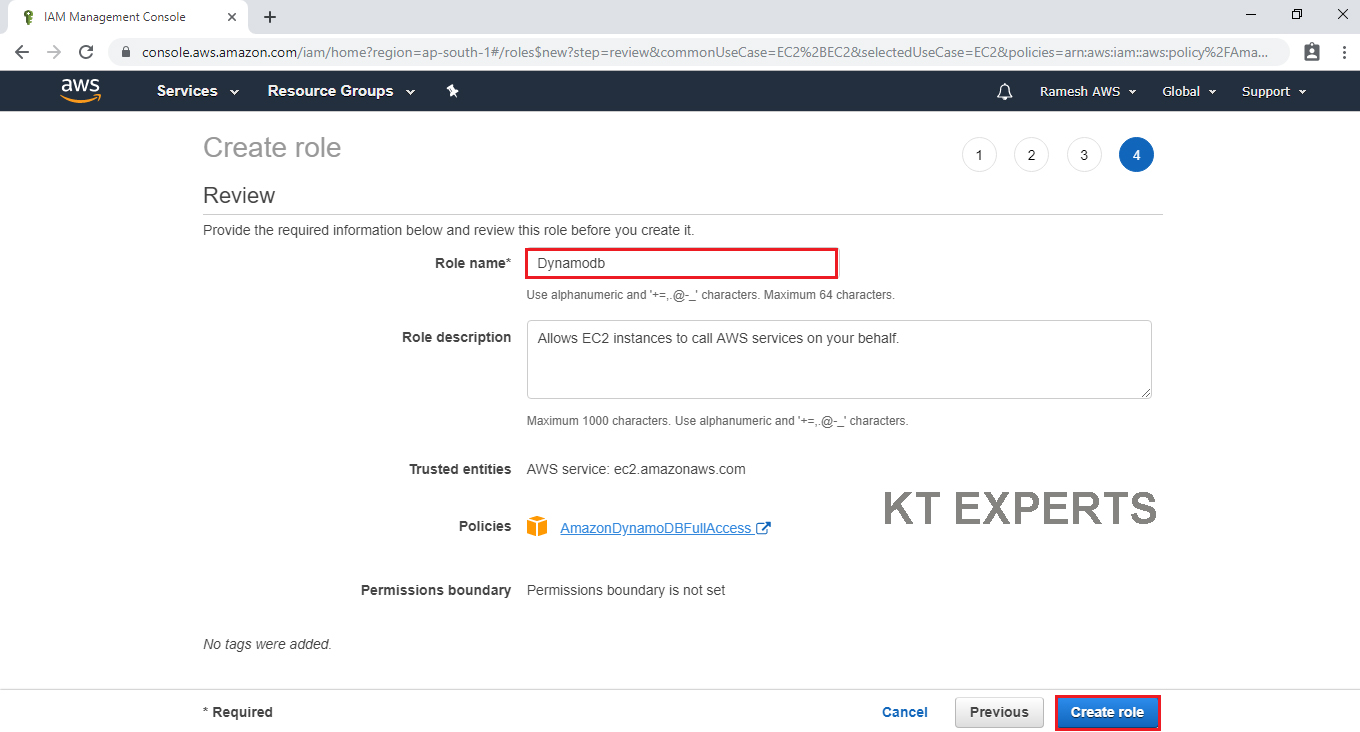
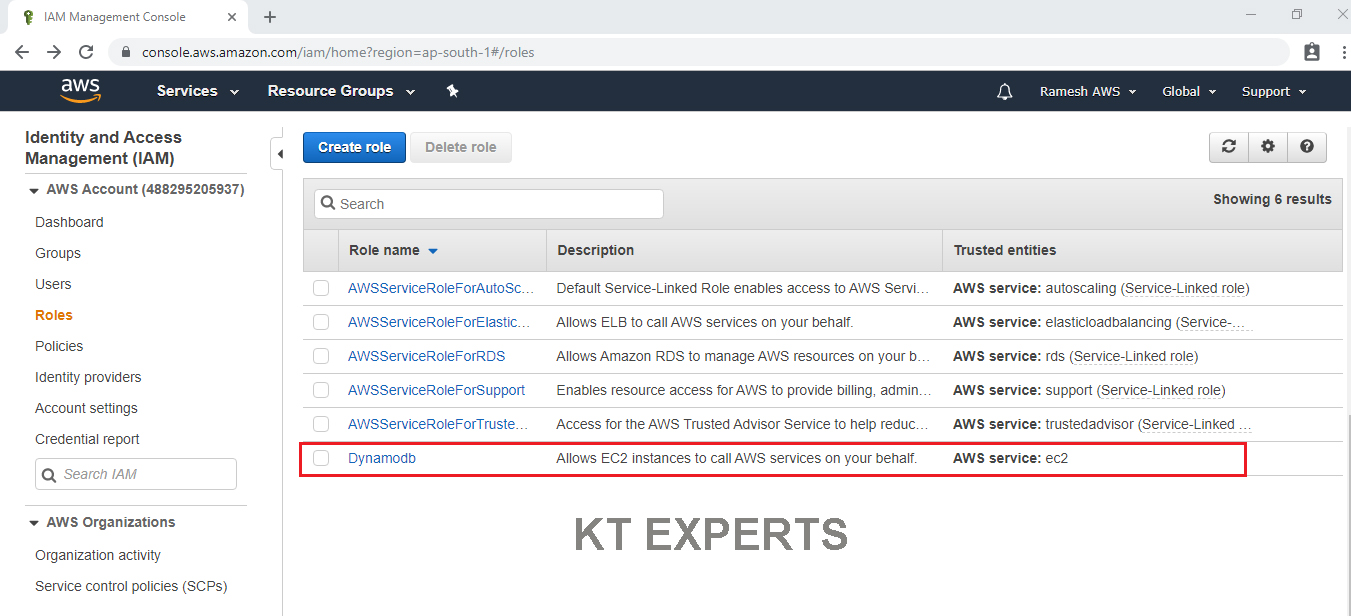
The Role has been created successfully with the name of “Dynamodb”.
In this Role, Source is “EC2” and Destination is “AmazonDynamodbFullAccess”.
Launch DynamoDB Web Server and Attach Role “Dynamodb”
Launch DynamoDB Web Server
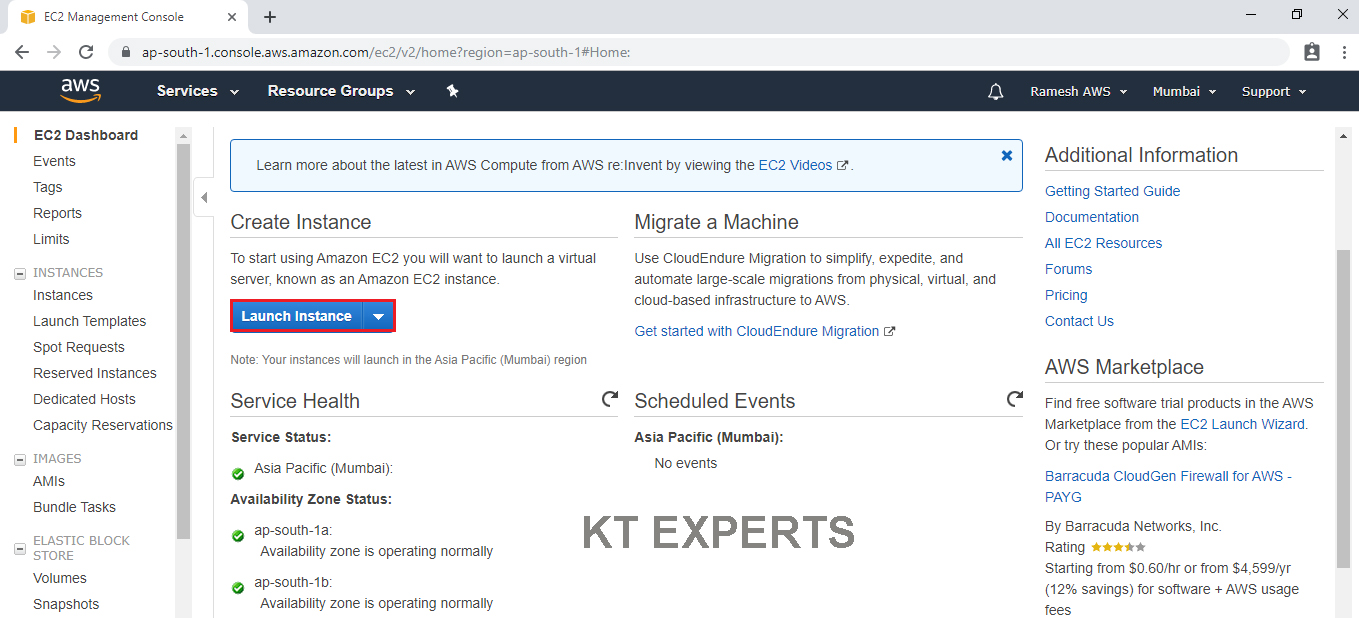
Go to Services, under the compute module click EC2 service to open.
Create and Configure a Virtual Machine
We can see EC2 Dashboard by default one security group is available and click on Launch Instance.
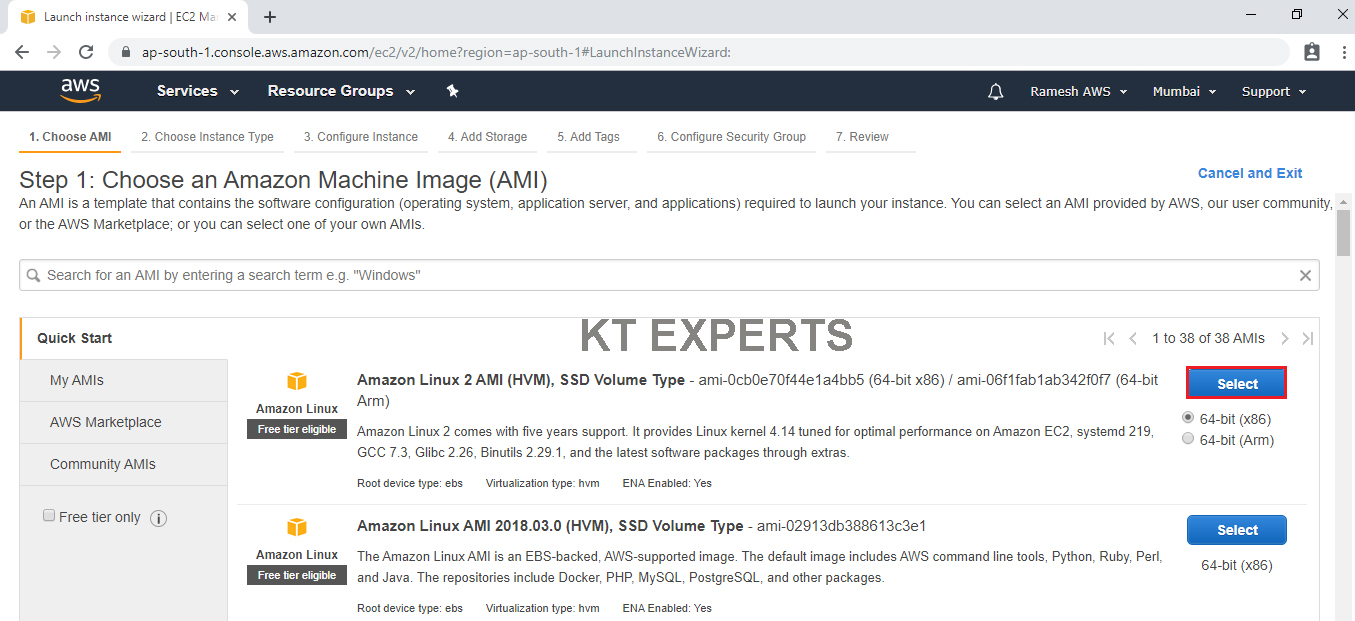
Choose an Amazon Machine Image (AMI)
Select the Operating system of the EC2 instance by choosing any of the Amazon Machine Images (AMI). Select the Microsoft Amazon Linux AMI.
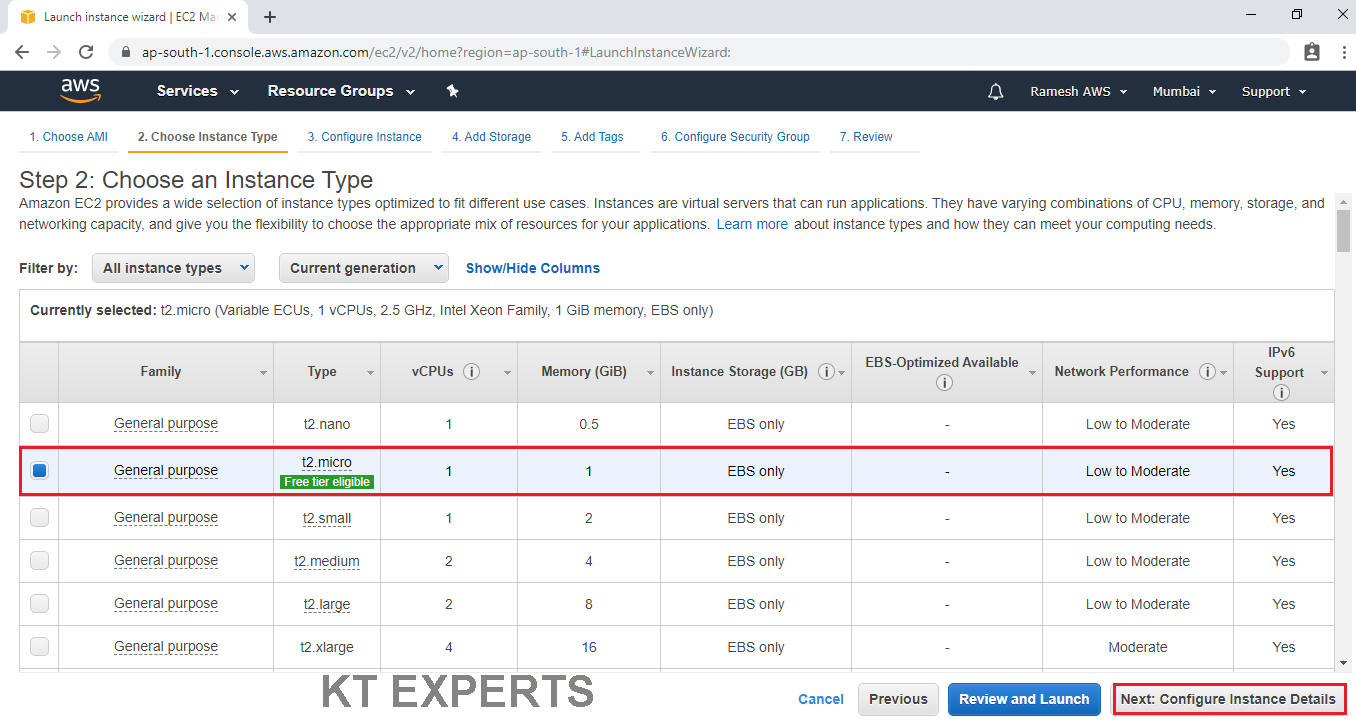
Choose an Instance type
Choose the Type of instance depending on your requirements.
Instance types comprise of varying combinations of CPU, memory, storage, and networking capacity so you can choose the appropriate mix for your applications.
select the default option of t2. micro – this instance type is covered within the free tier. Then click on Configure Instance Details
Click on Configure Instance Details.
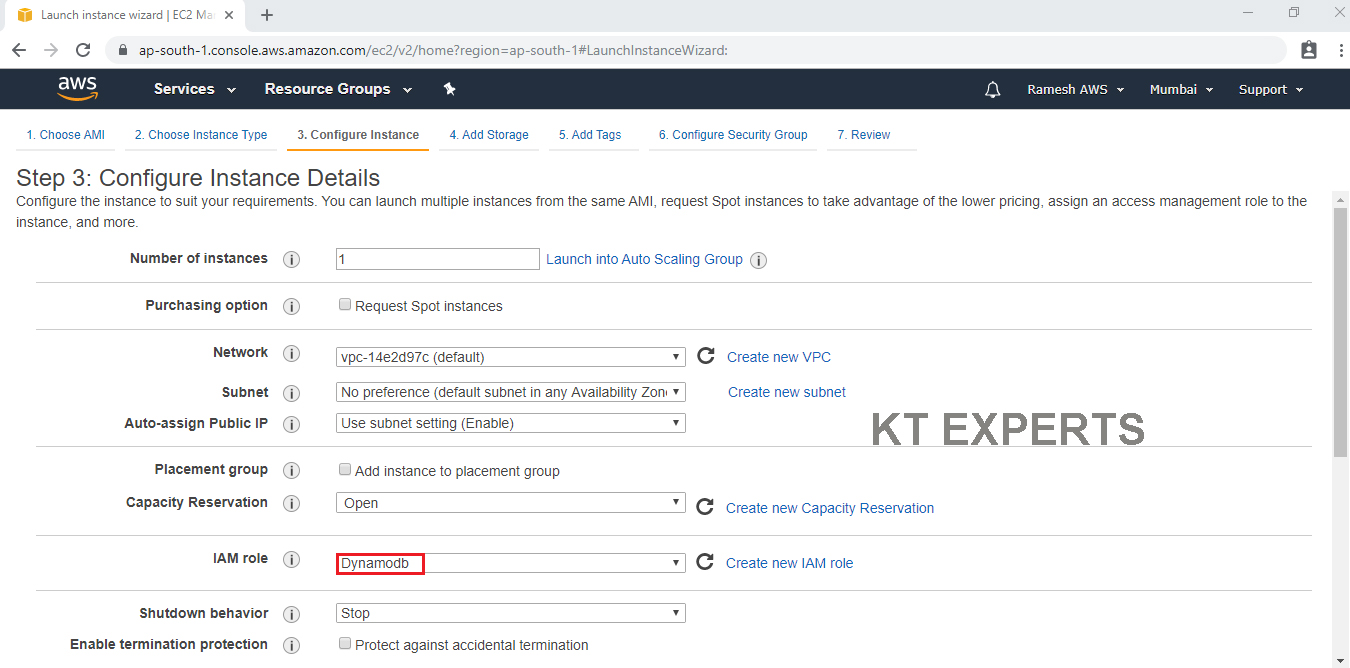
Configure Instance Details
Configure EC2 instance details as per requirements of your environment
Go to IAM role and choose the required role “Dynamodb” which was created earlier.
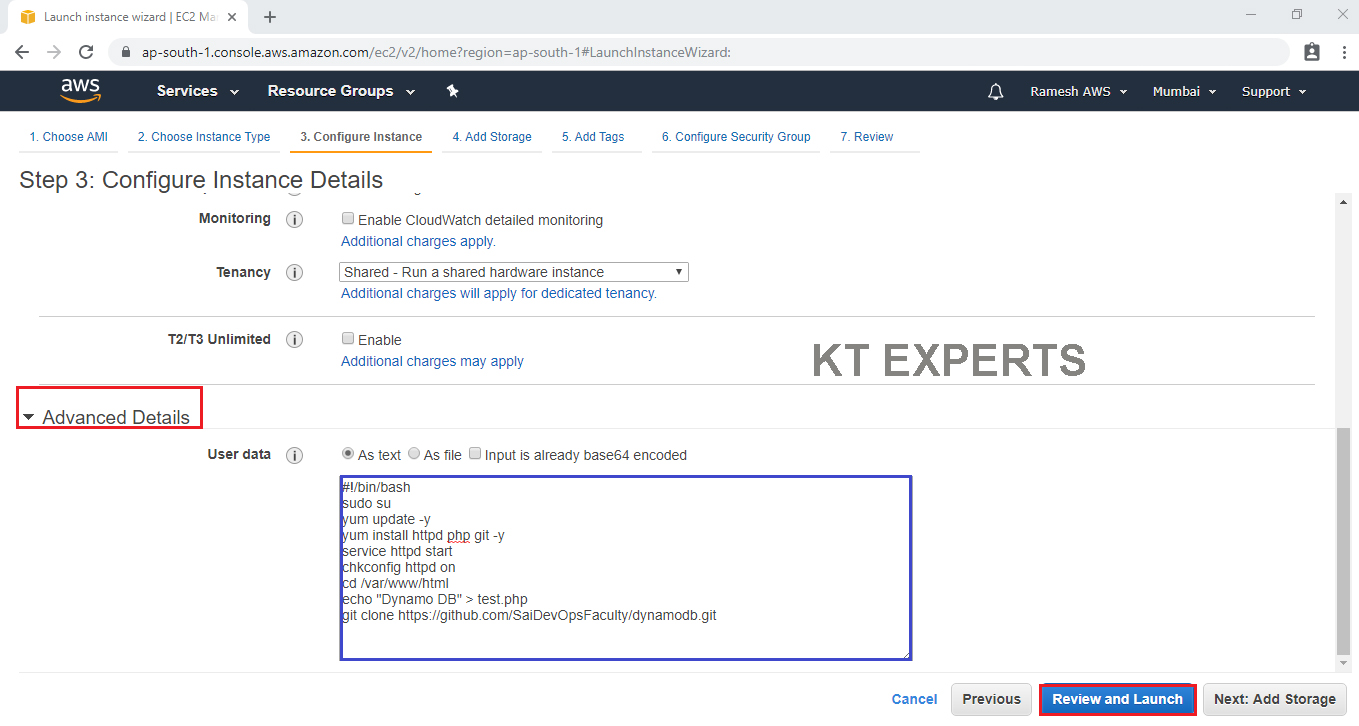
Go to Advanced Details and we type some commands in userdata then click on Review and Launch.
The commands are
#!/bin/bash
sudo su
yum update -y
yum install httpd php git -y
service httpd start
chkconfig httpd on
cd /var/www/html
echo “Dynamo DB” > test.php
git clone https://github.com/SaiDevOpsFaculty/dynamodb.git
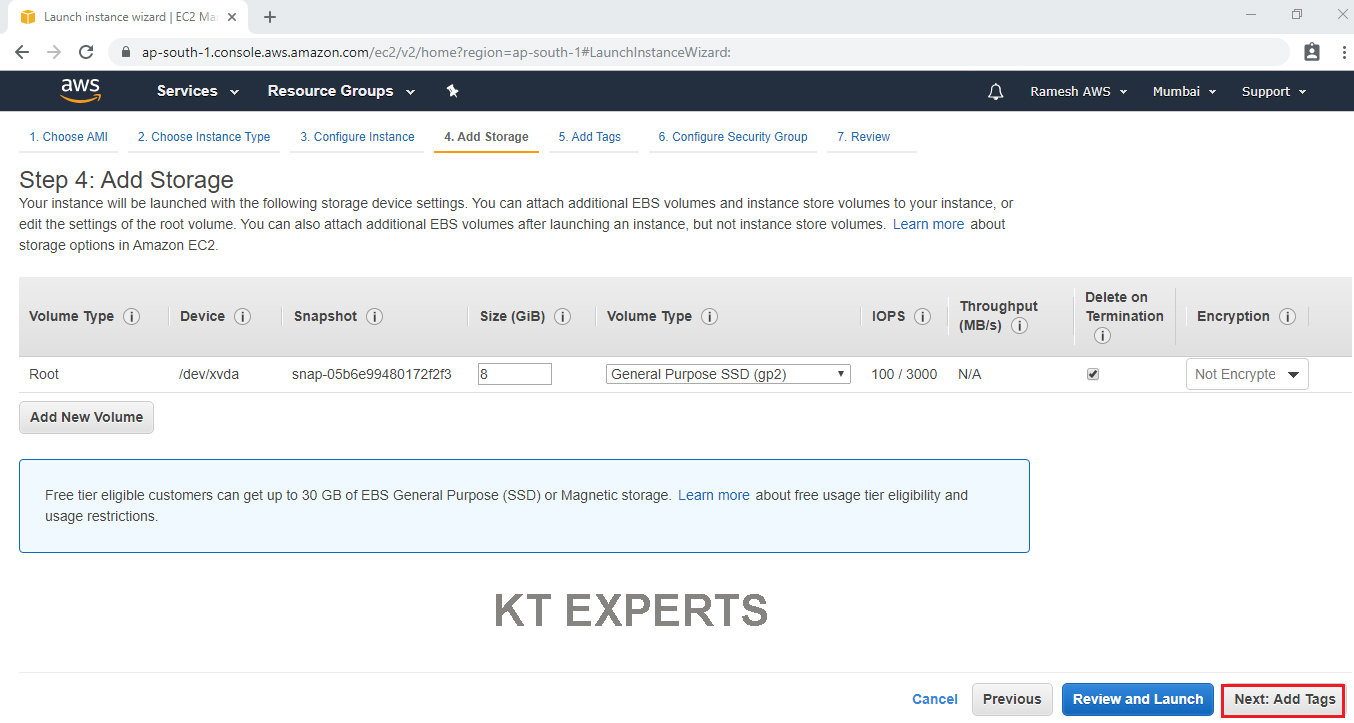
Add Storage
Here, we can see root volume by default and size of 8GB
Add a new volume if required
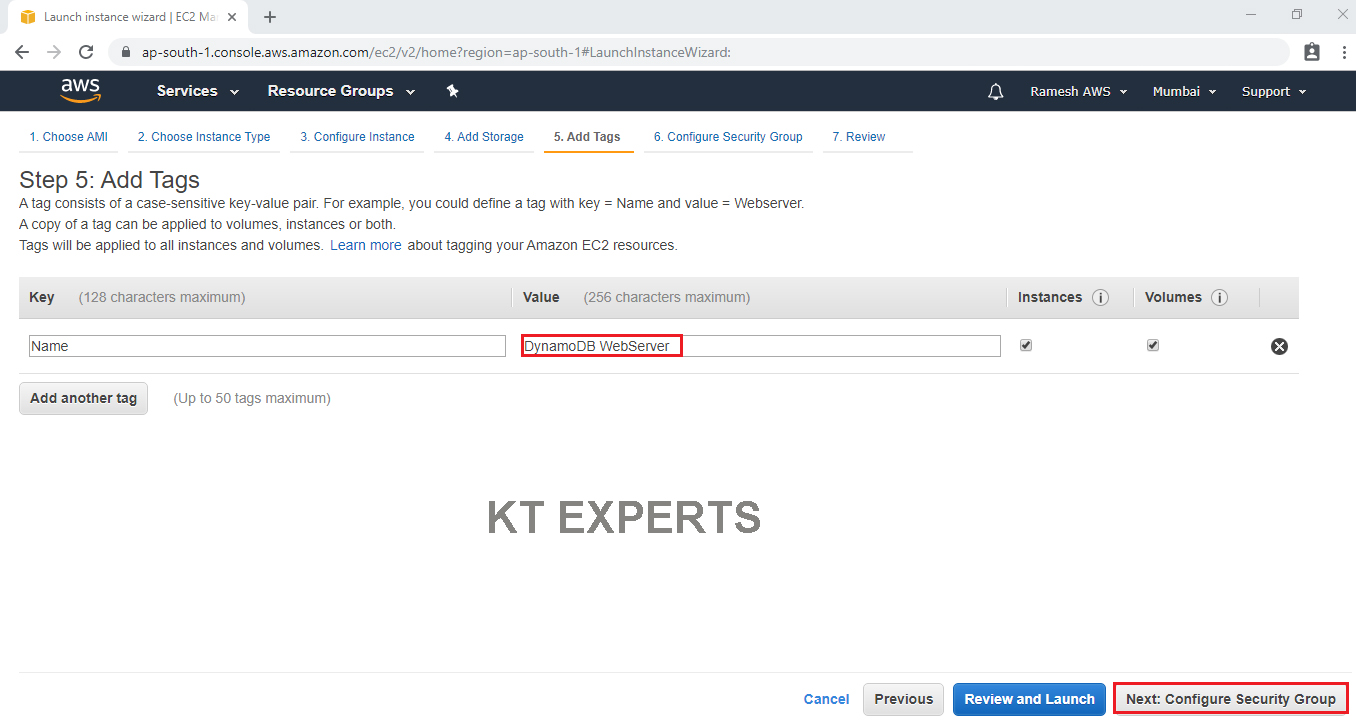
Click on Add Tags.
Add Tags
Tags assist in easier identification and classification of the various instances in your AWS environment.
Click on click to add a Name tag to provide name for our server.
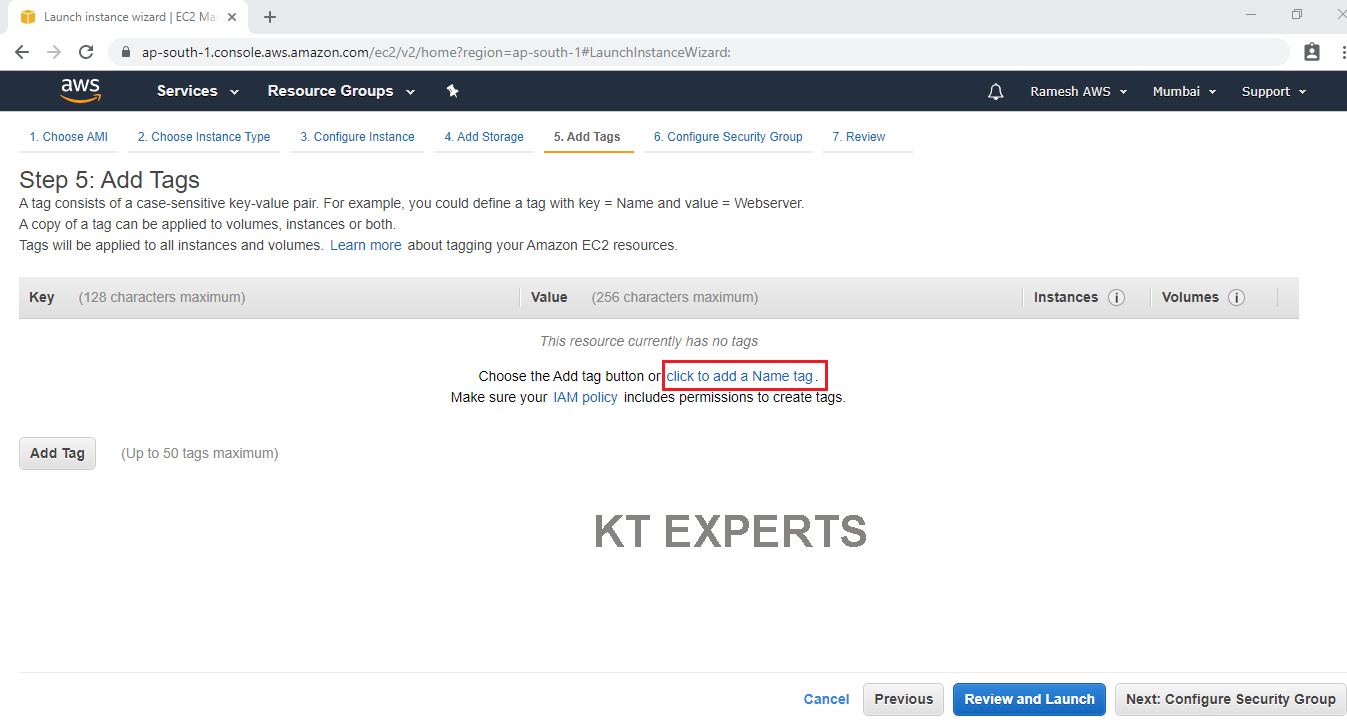
Provide the name for the Linux virtual machine for easier understanding and click on Configure Security Groups.
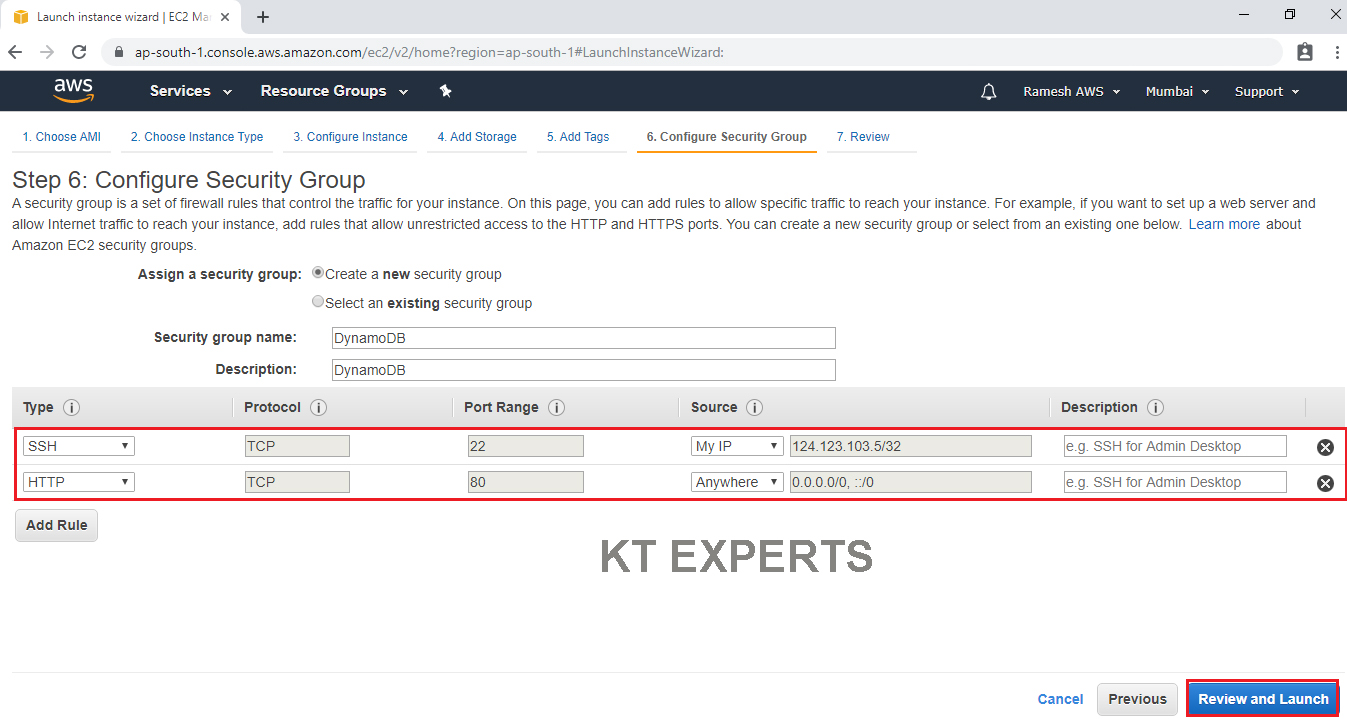
Configure Security Group
A security group allows configuring firewall rules to allow traffic as needed. Only one rule has been added to allow remote connection.
Add SSH – open to My IP and HTML – open to Anywhere and click on Review and Launch.
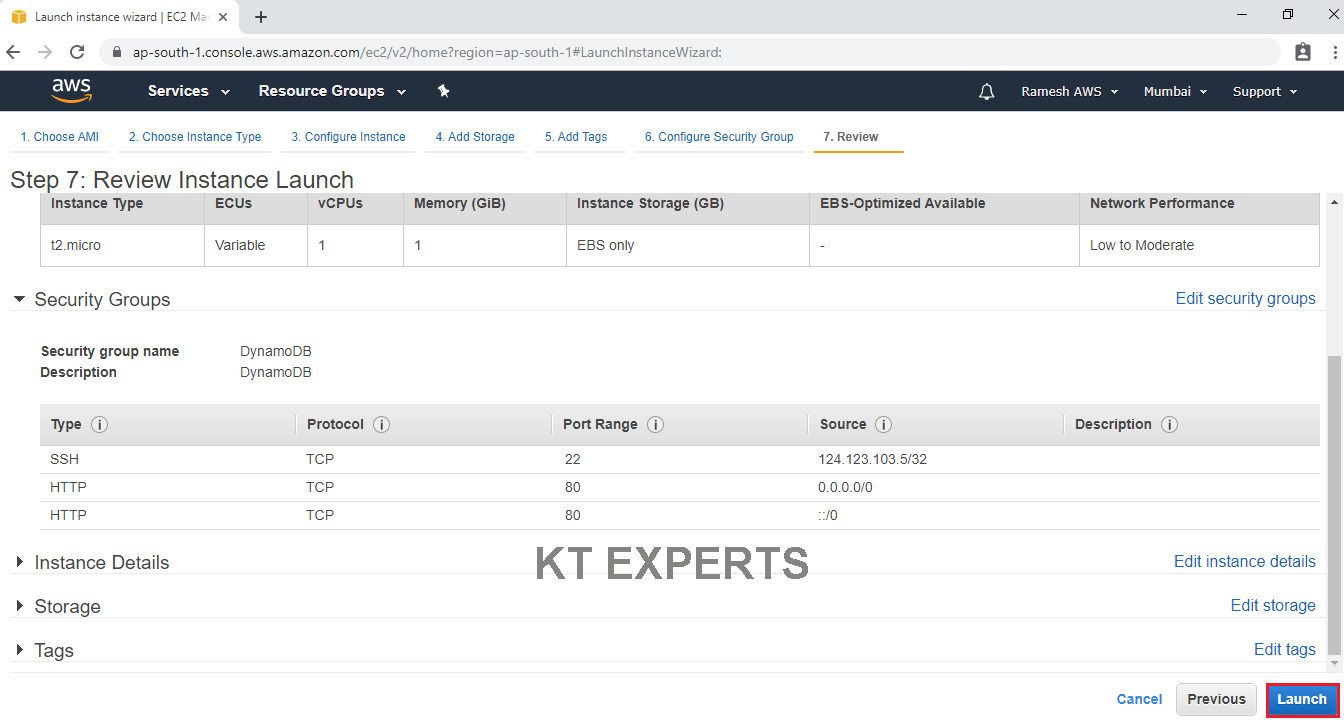
Review Instance Launch
Review and confirm the configuration of the instance. Click on the Edit button on each configuration item to make changes and click on Launch.
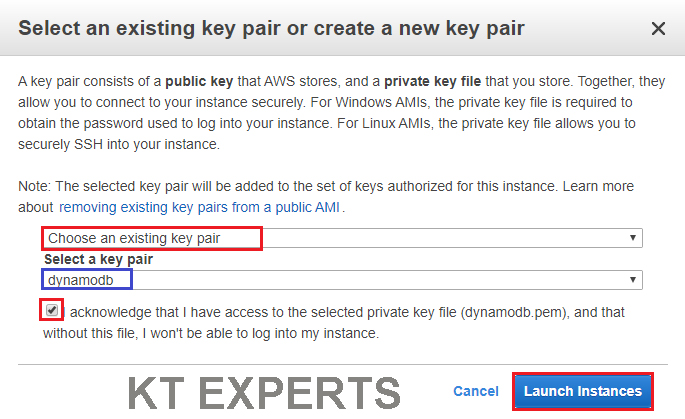
Choose existing Key Pair and Launch Your Instance
To connect to your virtual machine, you need a key pair. A key pair is used to log into your instance and select existing key pair
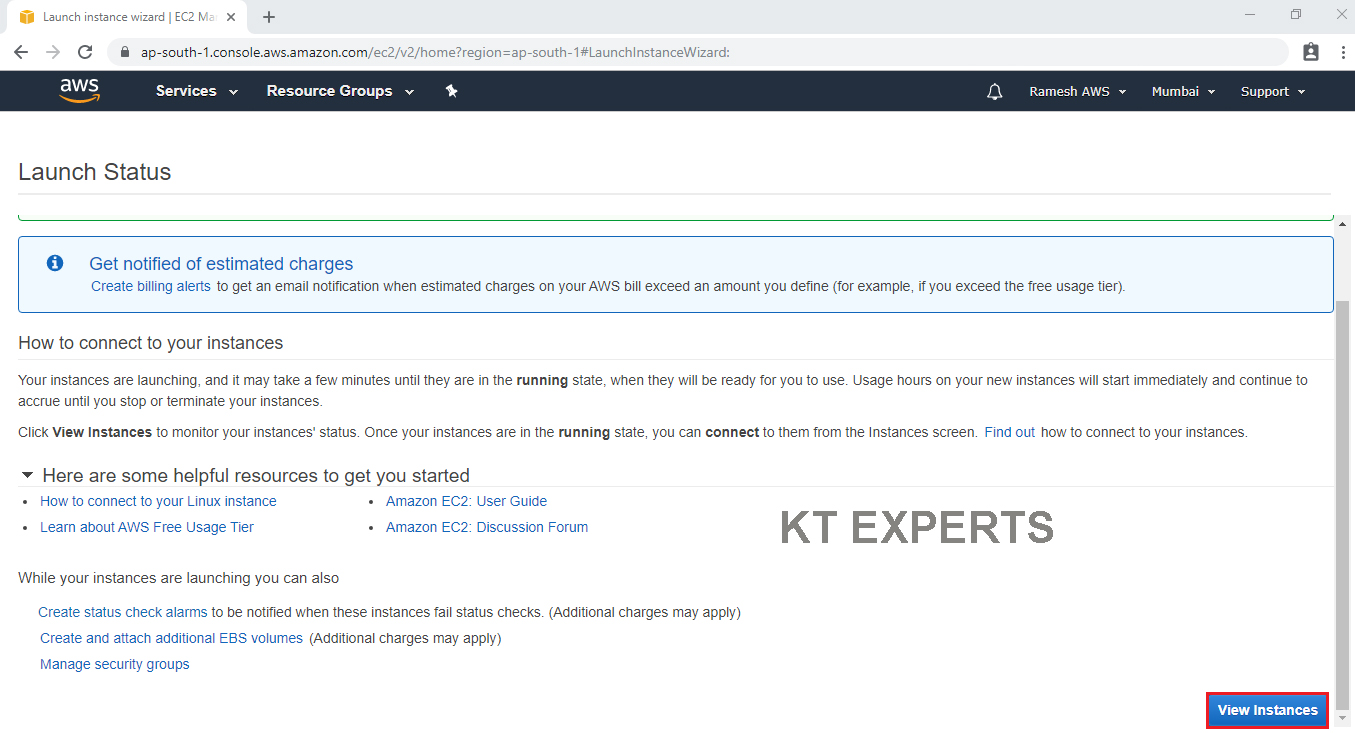
click on View Instances to view the instance you have just created and see its status.
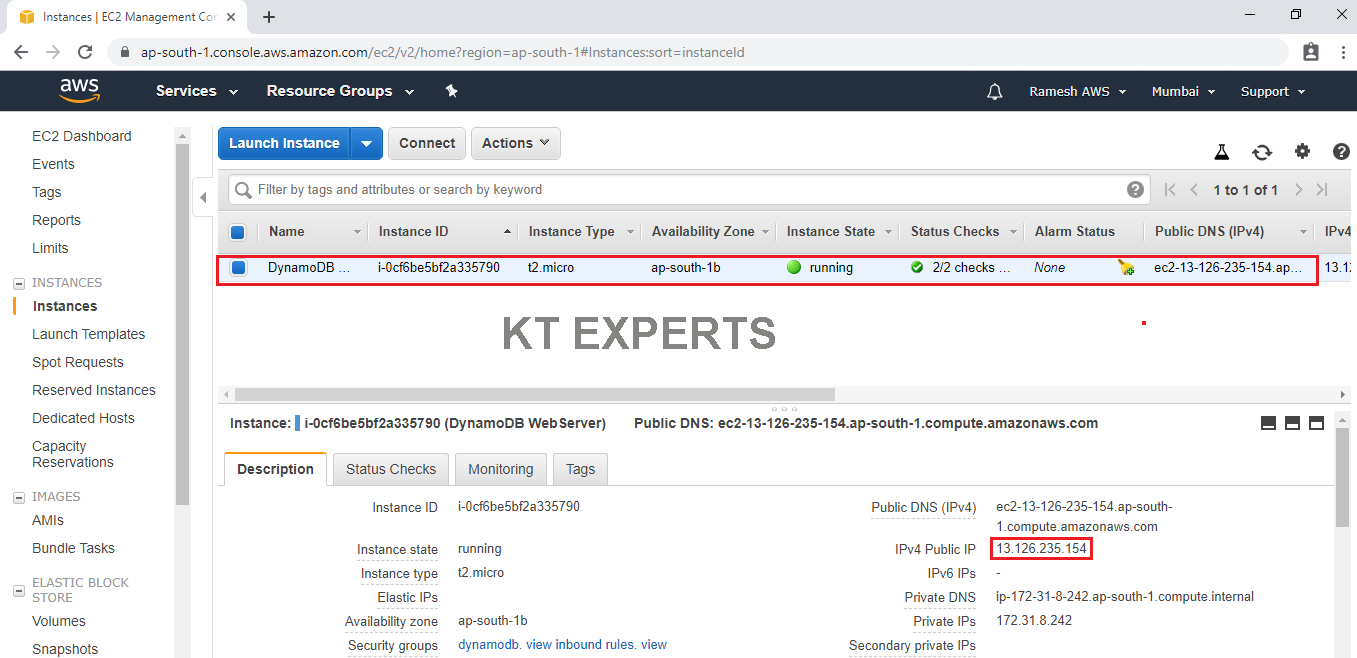
We can see created instance
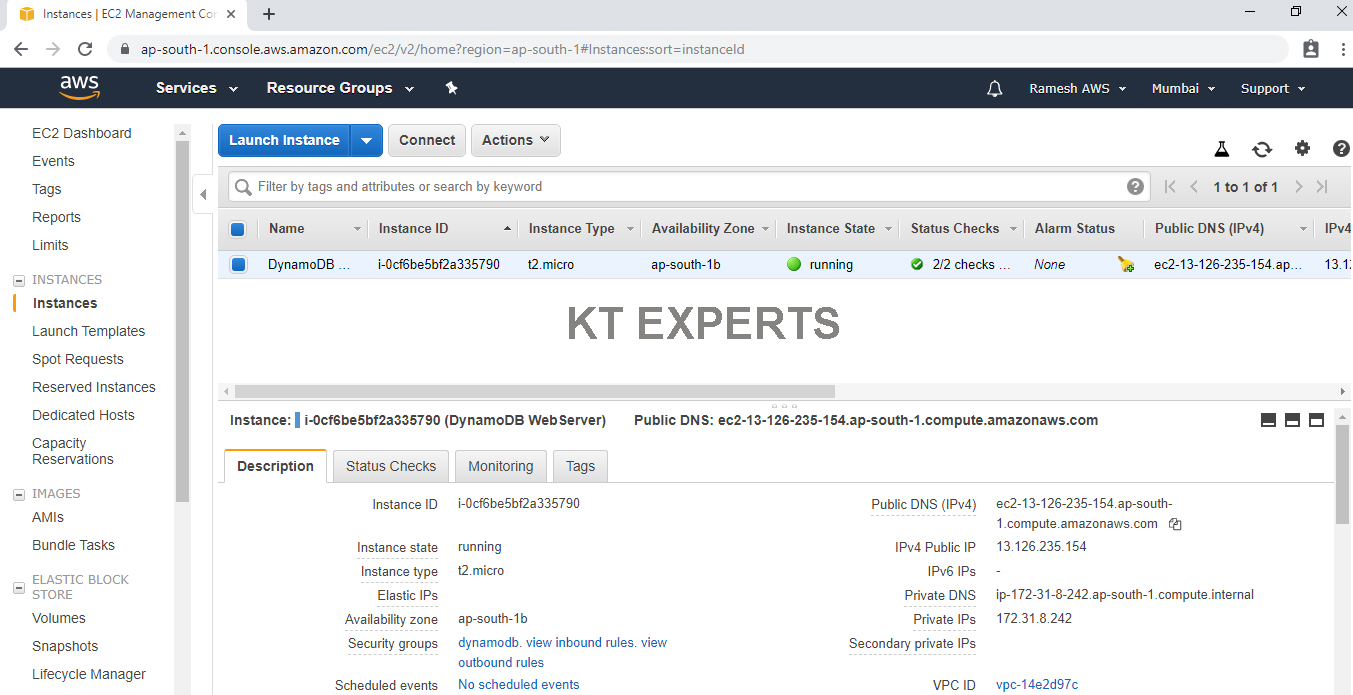
Copy Public IP of the DynamoDB.
Search Public IP/test.php in the browser.

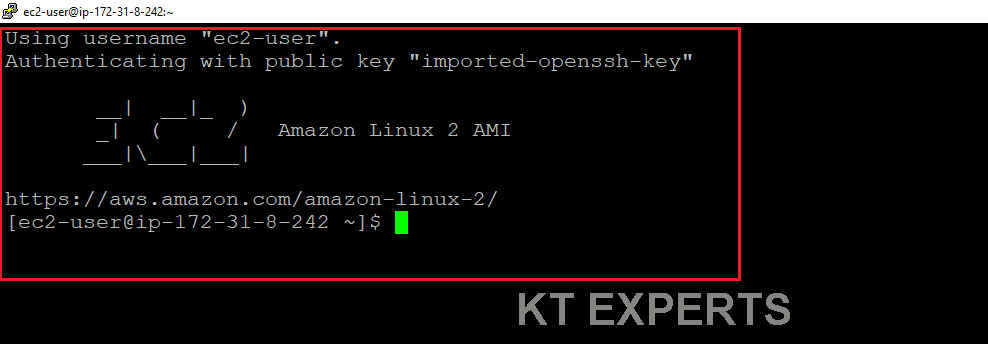
Connect to Dynamo DB Web Server through putty
Open Linux terminal of Dynamodb WebServer.
Run 2 commands(AWS SDK for PHP-Install by using composer) inside html Directory.
Go to /var/www/html Directory
|
1 2 3 4 5 6 7 8 9 10 11 12 13 14 15 16 17 18 19 20 21 22 23 24 25 26 |
Using username "ec2-user". Authenticating with public key "imported-openssh-key" __| __|_ ) _| ( / Amazon Linux 2 AMI ___|\___|___| https://aws.amazon.com/amazon-linux-2/ [ec2-user@ip-172-31-8-242 ~]$ [ec2-user@ip-172-31-8-242 ~]$ sudo su [root@ip-172-31-8-242 ec2-user]# cd /var/www/html/ [root@ip-172-31-8-242 html]# ls dynamodb test.php |
First Command “curl -sS https://getcomposer.org/installer | php”
|
1 2 3 4 5 6 7 8 9 10 11 12 |
[root@ip-172-31-8-242 html]# curl -sS https://getcomposer.org/installer | php All settings correct for using Composer Downloading... Composer (version 1.9.0) successfully installed to: /var/www/html/composer.phar Use it: php composer.phar |
Second Command “php composer.phar require aws/aws-sdk-php”
|
1 2 3 4 5 6 7 8 9 10 11 12 13 14 15 16 17 18 19 20 21 22 23 24 25 26 27 28 29 30 31 32 33 34 35 36 37 38 39 40 |
[root@ip-172-31-8-242 html]# php composer.phar require aws/aws-sdk-php Using version ^2.8 for aws/aws-sdk-php ./composer.json has been created Loading composer repositories with package information Updating dependencies (including require-dev) Package operations: 3 installs, 0 updates, 0 removals - Installing symfony/event-dispatcher (v2.8.50): Downloading (100%) - Installing guzzle/guzzle (v3.9.3): Downloading (100%) - Installing aws/aws-sdk-php (2.8.31): Downloading (100%) symfony/event-dispatcher suggests installing symfony/dependency-injection symfony/event-dispatcher suggests installing symfony/http-kernel guzzle/guzzle suggests installing guzzlehttp/guzzle (Guzzle 5 has moved to a new package name. The package you have installed, Guzzle 3, is deprecated.) aws/aws-sdk-php suggests installing doctrine/cache (Adds support for caching of credentials and responses) aws/aws-sdk-php suggests installing ext-apc (Allows service description opcode caching, request and response caching, and credentials caching) aws/aws-sdk-php suggests installing monolog/monolog (Adds support for logging HTTP requests and responses) aws/aws-sdk-php suggests installing symfony/yaml (Eases the ability to write manifests for creating jobs in AWS Import/Export) Package guzzle/guzzle is abandoned, you should avoid using it. Use guzzlehttp/guzzle instead. Writing lock file Generating autoload files [root@ip-172-31-8-242 html]# |
Go to dynamodb directory open createtables.php and uploaddata.php files and change the required region(ap-south-1)
Go to dynamodb directory and verify files
|
1 2 3 4 5 6 |
[root@ip-172-31-8-242 html]# cd dynamodb/ [root@ip-172-31-8-242 dynamodb]# ls createtables.php README.md uploaddata.php |
Open createtables.php file and change the required region(ap-south-1)
|
1 2 3 4 5 6 7 8 9 10 11 12 13 14 15 16 17 18 19 20 21 22 23 24 25 26 27 28 29 30 31 32 33 34 35 36 37 38 39 40 41 42 43 44 45 46 47 48 49 50 51 52 53 54 55 56 |
[root@ip-172-31-8-242 dynamodb]# nano createtables.php <?php //Code is provided by AWS and available here; http://docs.aws.amazon.com/amazondynamodb/latest/dev$ // Date now needs to be set, which I guess is a good thing! date_default_timezone_set('Europe/London'); // Find out what the issues are: ini_set('display_errors',1); ini_set('display_startup_errors',1); error_reporting(-1); require '/var/www/html/vendor/autoload.php'; use Aws\DynamoDb\DynamoDbClient; $client = DynamoDbClient::factory(array( 'region' => 'ap-south-1', // replace with your desired region visit http://docs.aws.amazon.co$ 'version' => '2012-08-10' // Now needs a version )); $tableNames = array(); $tableName = 'ProductCatalog'; echo "Creating table $tableName..." . PHP_EOL; $response = $client->createTable(array( 'TableName' => $tableName, |
Open uploaddata.php change required region (ap-south-1)
|
1 2 3 4 5 6 7 8 9 10 11 12 13 14 15 16 17 18 19 20 21 22 23 24 25 26 27 28 29 30 31 32 33 34 35 36 37 38 39 40 41 42 43 44 45 46 47 48 49 50 51 52 53 54 55 56 57 58 |
[root@ip-172-31-8-242 dynamodb]# nano uploaddata.php GNU nano 2.9.8 uploaddata.php Modified <?php // Date now needs to be set, which I guess is a good thing! date_default_timezone_set('Europe/London'); // Find out what the issues are: ini_set('display_errors',1); ini_set('display_startup_errors',1); error_reporting(-1); require '/var/www/html/vendor/autoload.php'; use Aws\DynamoDb\DynamoDbClient; $client = DynamoDbClient::factory(array( 'region' => 'ap-south-1', // replace with your desired region 'version' => '2012-08-10' // Now needs a version )); # Setup some local variables for dates date_default_timezone_set('UTC'); $oneDayAgo = date('Y-m-d H:i:s', strtotime('-1 days')); $sevenDaysAgo = date('Y-m-d H:i:s', strtotime('-7 days')); $fourteenDaysAgo = date('Y-m-d H:i:s', strtotime('-14 days')); $twentyOneDaysAgo = date('Y-m-d H:i:s', strtotime('-21 days')); |
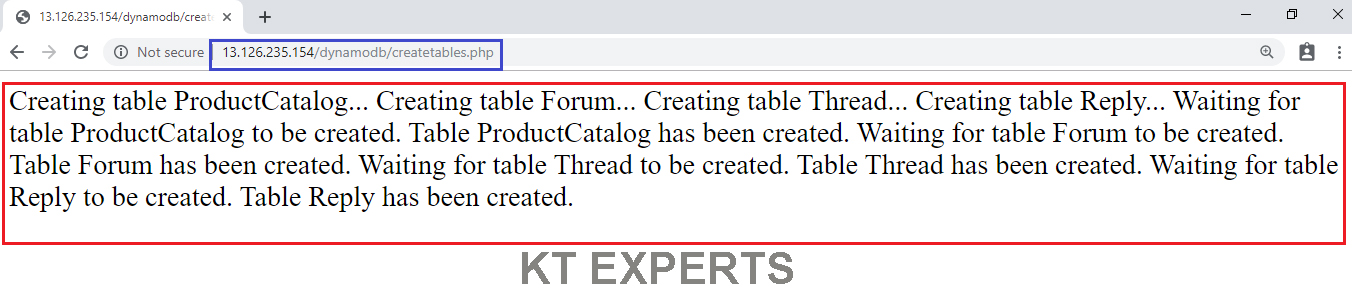
Create tables and upload data into dynamoDB.
Search PublicIP(EC2)(13.126.235.154)/dynamodb/createtables.php in browser.
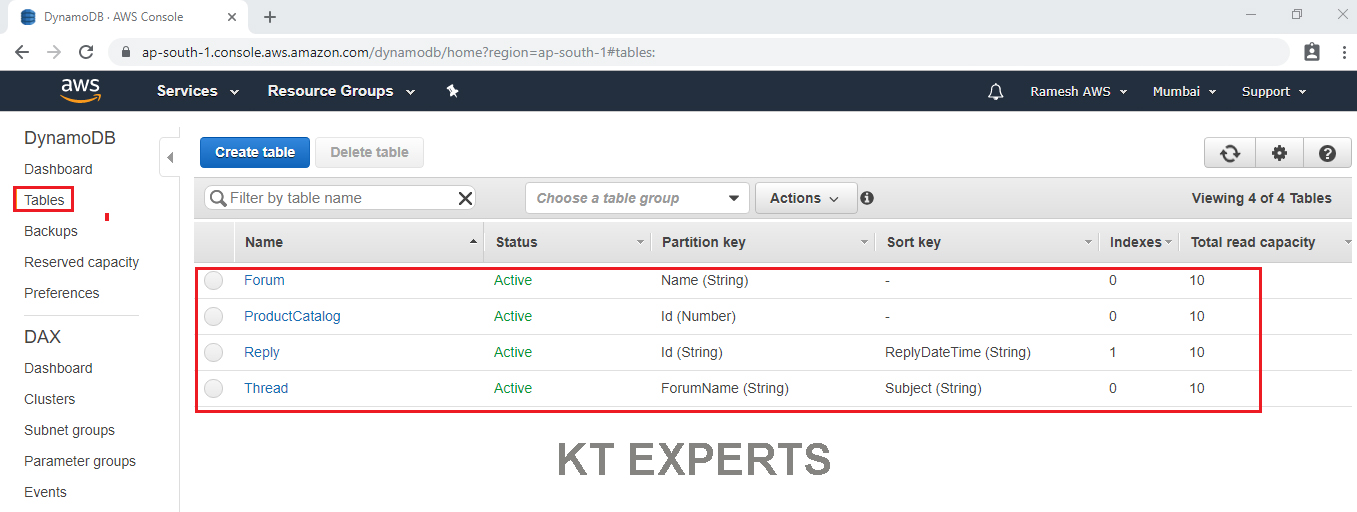
Verify tables in DynamoDB
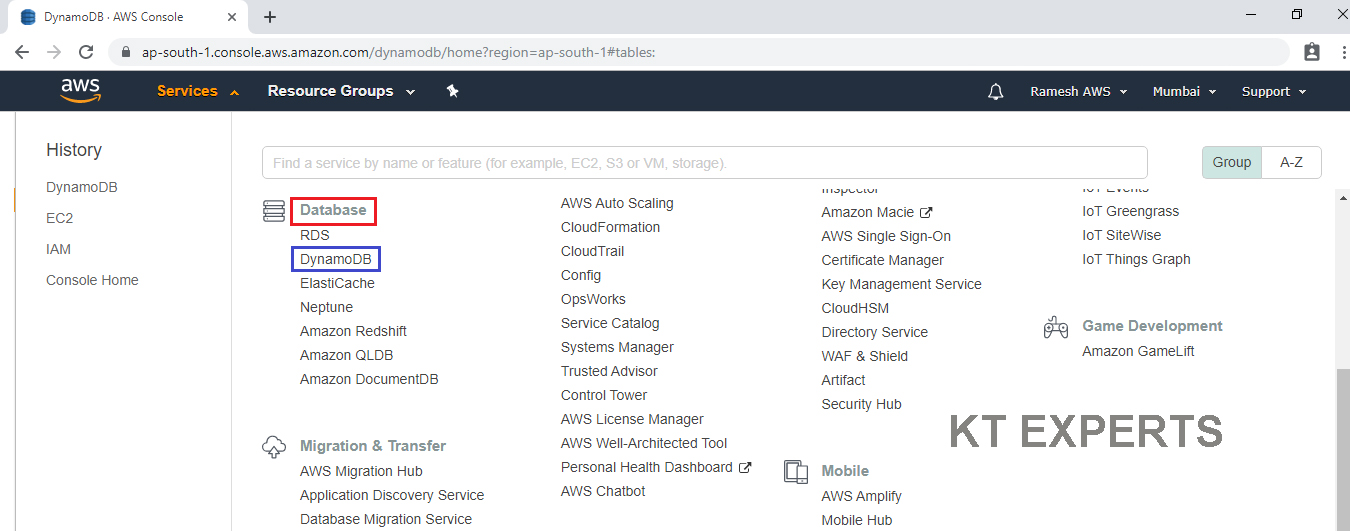
Go to services , click on DynamoDB in Database Module.
We can see the some created tables which was created by using “13.126.235.154/dynamodb/createtables.php”
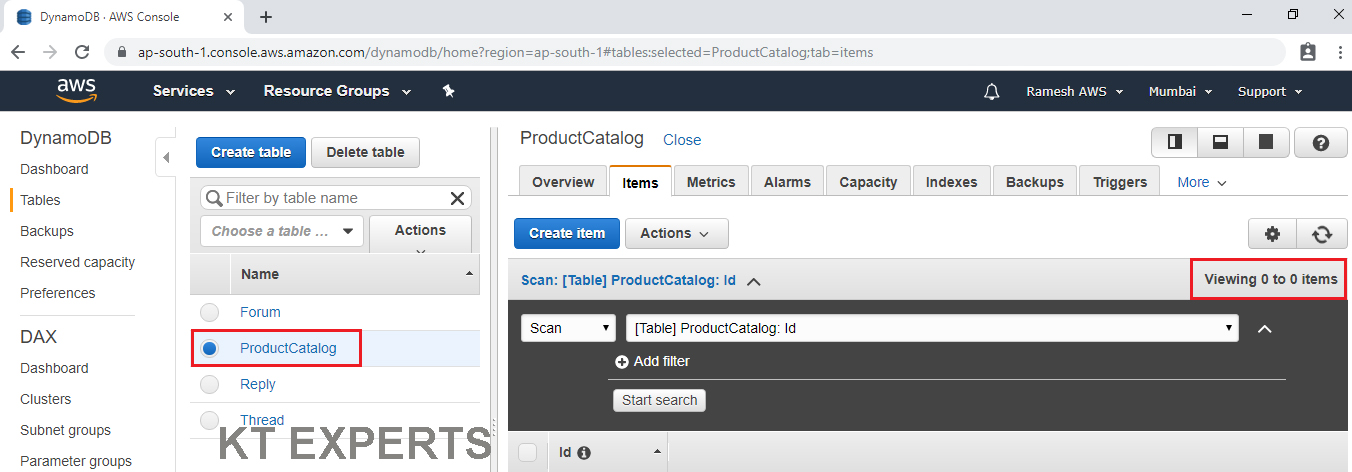
Verify data inside the tables
Currently,there is no data inside the tables.
Upload data into tables
Type PublicIP(EC2)(13.126.235.154)/dynamodb/uploaddata.php in browser.

We can see the data inside the tables which was created by using “13.126.235.154/dynamodb/uploaddata.php”

Connect to Dynamo DB Server Linux CLI to manage AWS Account
If you Connect to Dynamo DB Server Linux CLI to manage AWS Account, we have to run “aws configure” command.
Then it will ask the credentials.
|
1 2 3 4 5 6 7 8 9 10 11 12 |
[root@ip-172-31-8-242 html]# aws configure AWS Access Key ID [None]: AWS Secret Access Key [None]: Default region name [text]: ap-south-1 Default output format [None]: text [root@ip-172-31-8-242 html]# |
Verify table to run below command
|
1 2 3 4 5 6 7 8 9 10 11 12 13 14 15 16 17 18 19 20 21 22 |
[root@ip-172-31-8-242 html]# aws dynamodb get-item --table-name ProductCatalog --key '{"Id":{"N":"202"}}' BICYCLETYPE Road BRAND Brand-Company A SS Black SS Green DESCRIPTION 202 Description GENDER M ID 202 PRICE 200 PRODUCTCATEGORY Bicycle TITLE 21-Bike-202 |
Thank you for giving your valuable time to read the above information. Please click here to subscribe for further updates
KTEXPERTS is always active on below social media platforms.
Facebook : https://www.facebook.com/ktexperts/
LinkedIn : https://www.linkedin.com/company/ktexperts/
Twitter : https://twitter.com/ktexpertsadmin
YouTube : https://www.youtube.com/c/ktexperts
Instagram : https://www.instagram.com/knowledgesharingplatform