In this article, we will see Installation of Oracle Database 18c(18.3.0.0.0) On Windows.
Click on below link to download 18c software binaries for windows platform
Software binaries for oracle 18c
Once you downloaded the file unzip and double click on setup.exe application file.
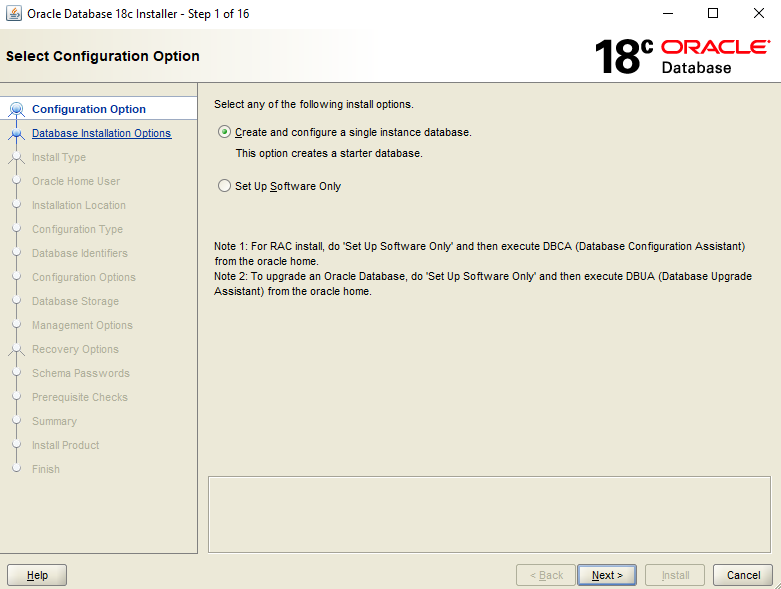
Step 1 :
Choose a option Create and configure a single instance database
Click on Next
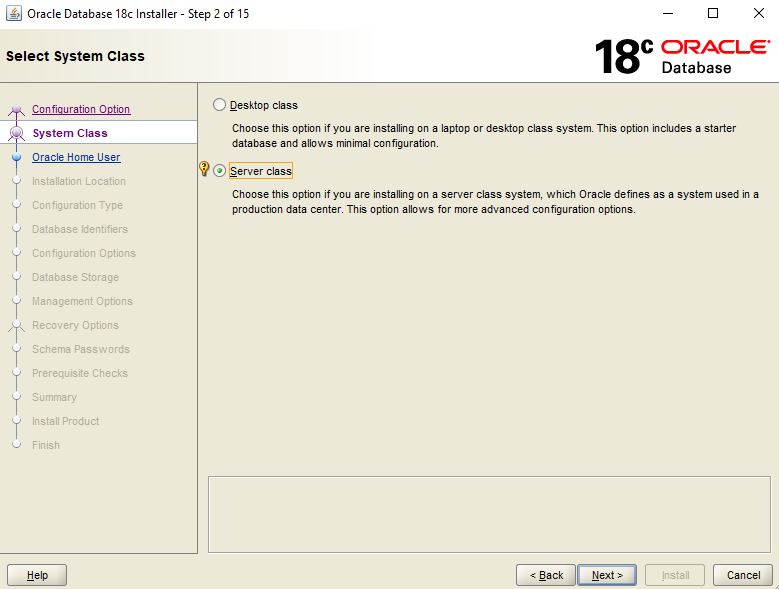
Step 2:
Choose Server Class which is used in production servers
Click on Next
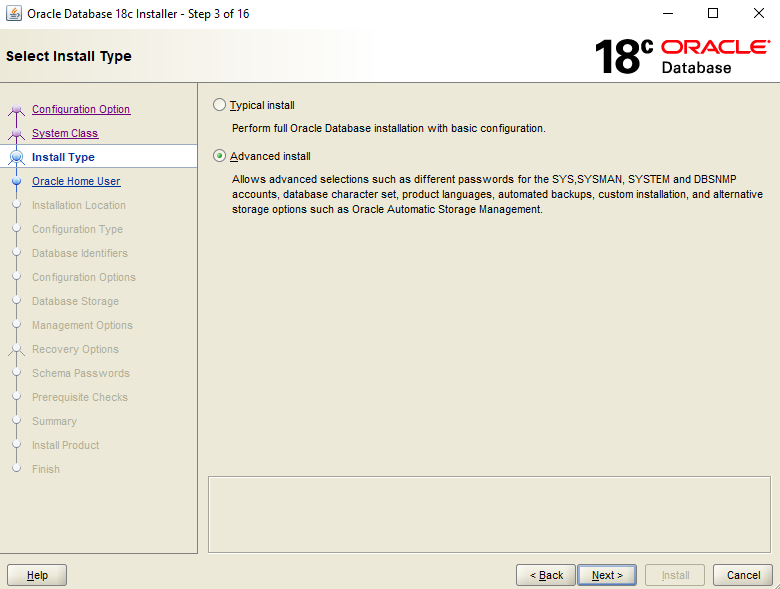
Step 3:
Choose an Advanced Install option.
With this option we can intsall oracle database software with advanced features like passwords for sys,sysman,system,dbsnmp accounts,db character set,languages,storage options, etc…,
Click on Next
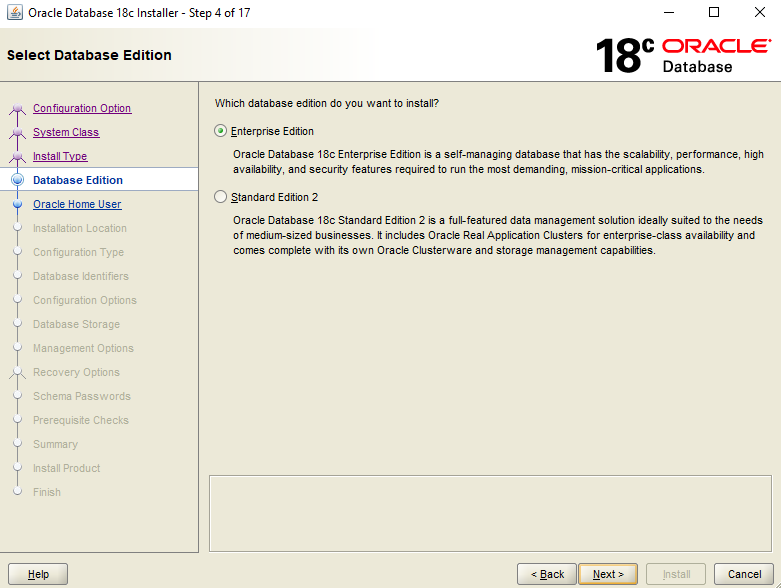
Step 4:
Choose Enterprise Edition Option.
Click on Next
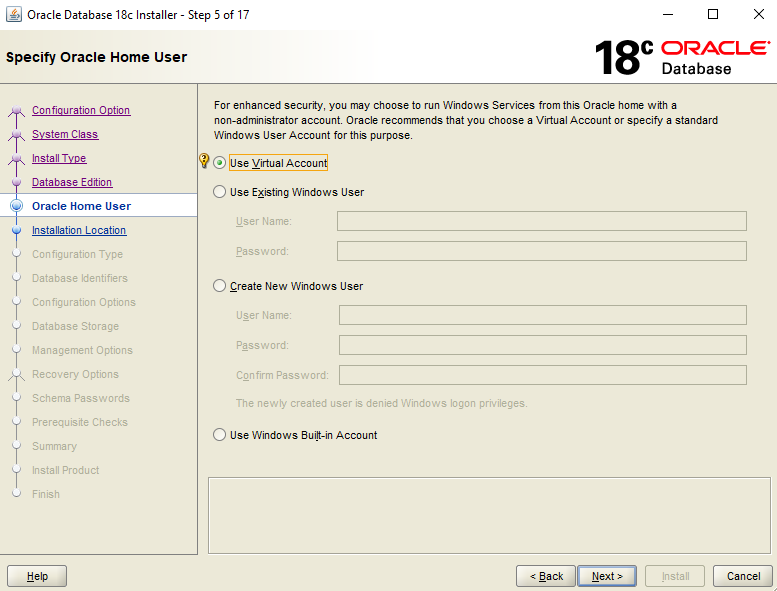
Step 5 :
Choose Virtual account
Click on Next
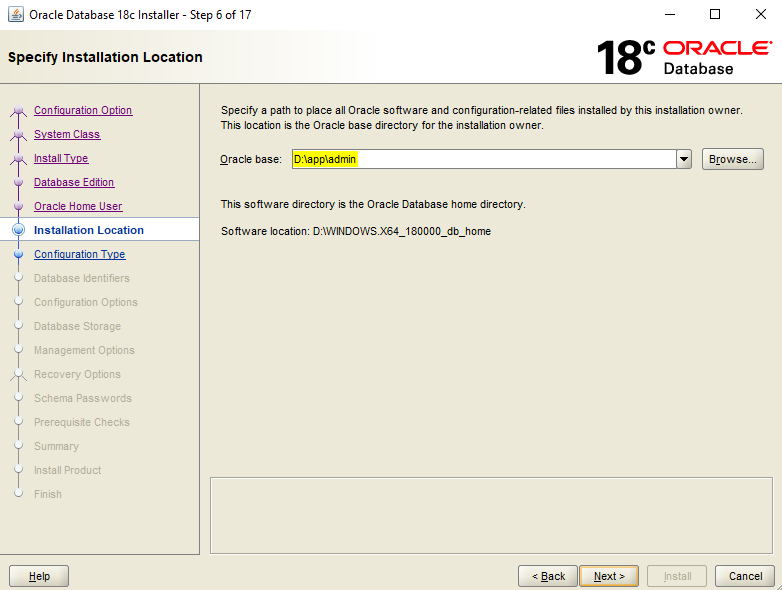
Step 6 :
Specify Oracle base location and make sure the directory should have enough space.
Click on Next
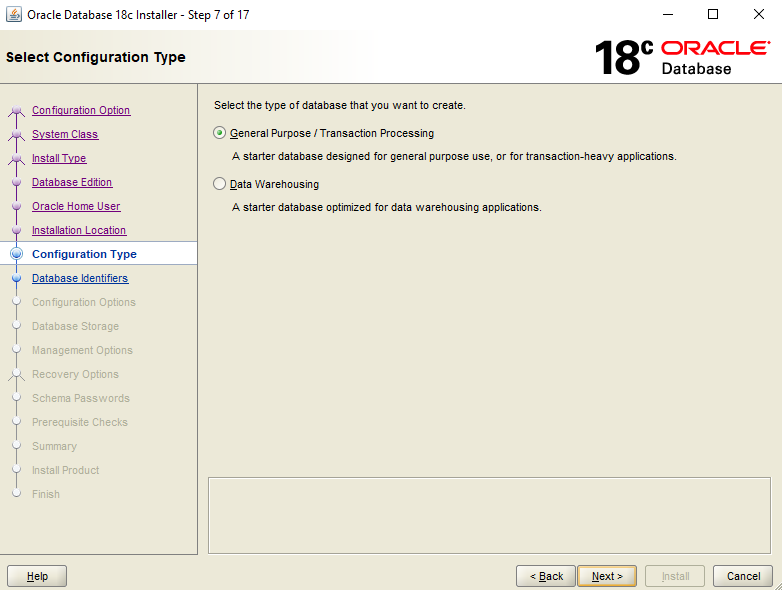
Step 7 :
Choose General Purpose/Transaction Processing
Click on Next
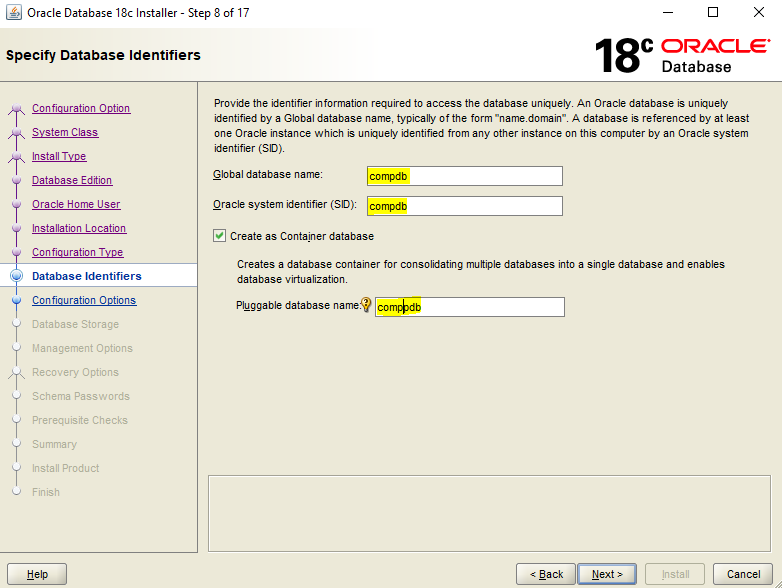
Step 8 :
Specify Global db name and SID name (I given compdb)
If you want to create container db then choose below option and specify pdb prefix name.
Click on Next
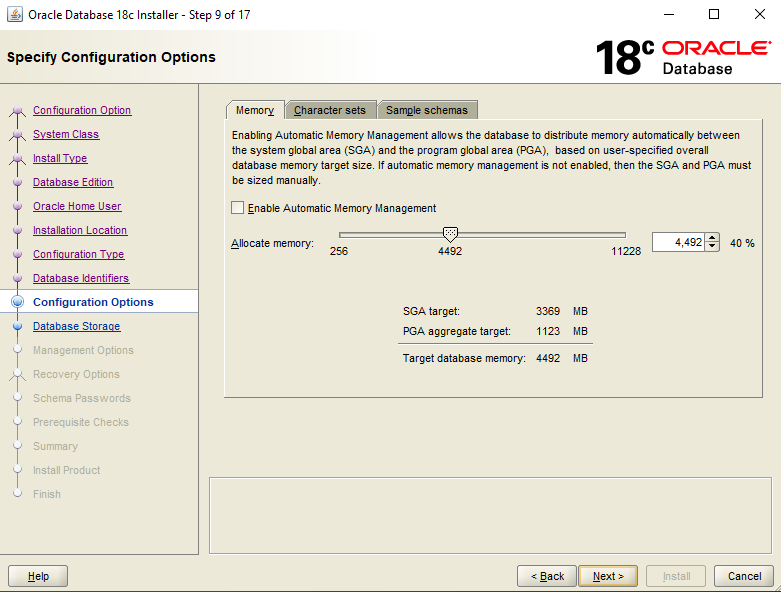
Step 9 :
if you want enable AMM then below option and modify memory as per requirements.
If you want to set character set choose another tab
Click on Next
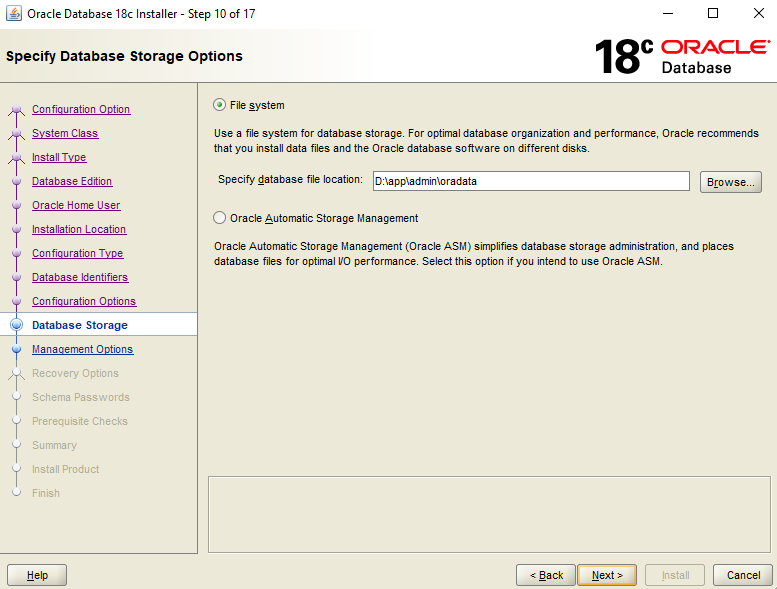
Step 10 :
Choose File System type and specify location where to store CRD files
Click on Next
Step 11 :
if any existing Enterprise Manager available then enable below option then specify all required details.
Click on Next

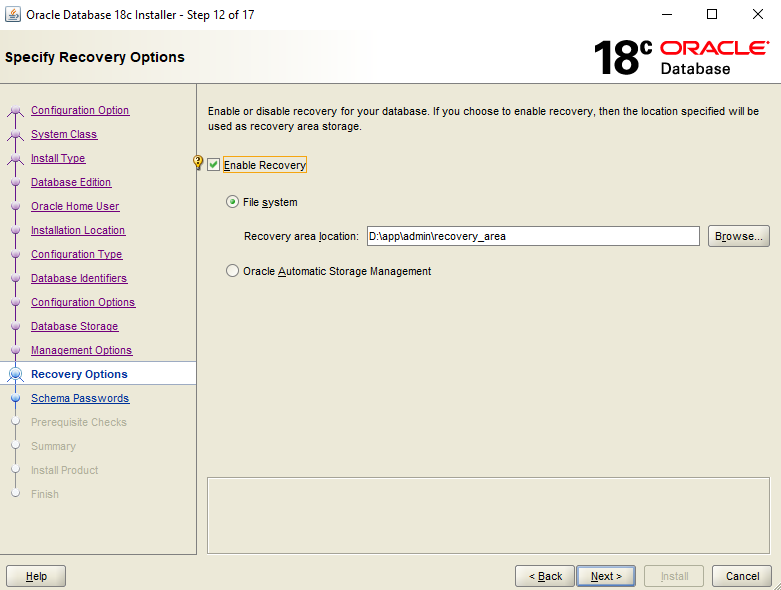
Step 12 :
To enable FRA choose Enable Recovery and Specify Location.
Click on Next
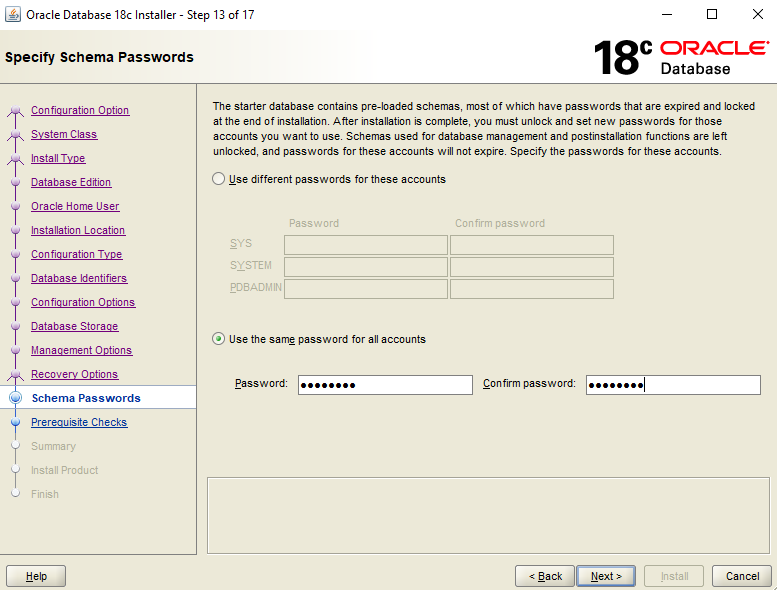
Step 13 :
Choose same passwords for all accounts and specify password
Click on Next
Step 14 :
Oracle performs prerequisite checks
Click on Next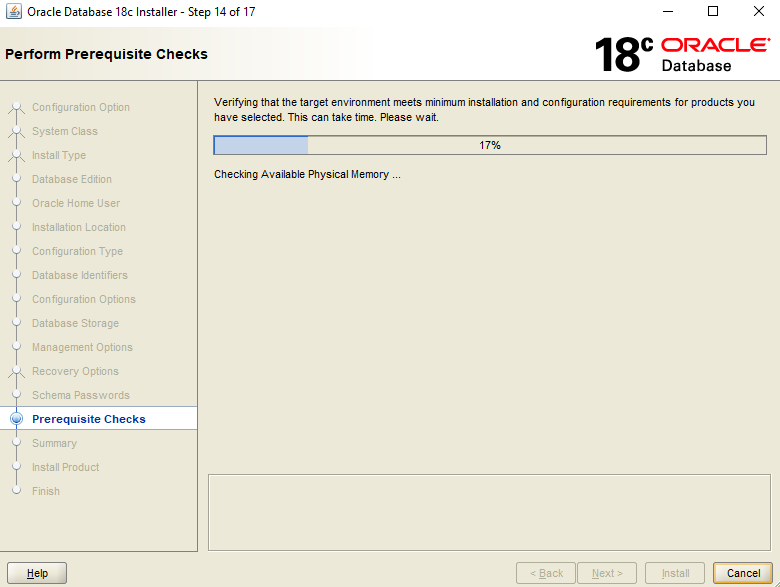
Step 15 :
Verify all software locations and
Click on Install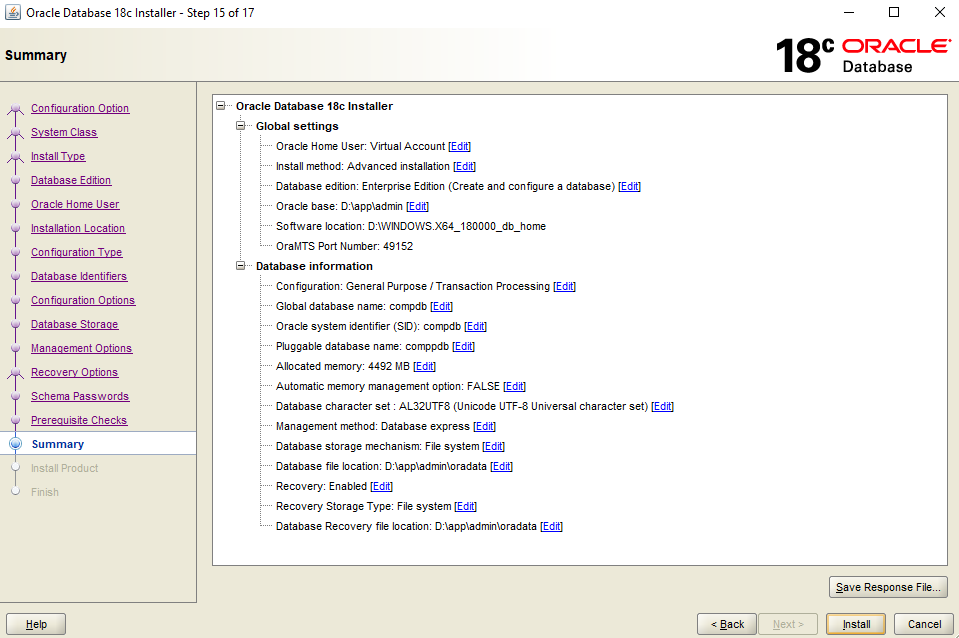
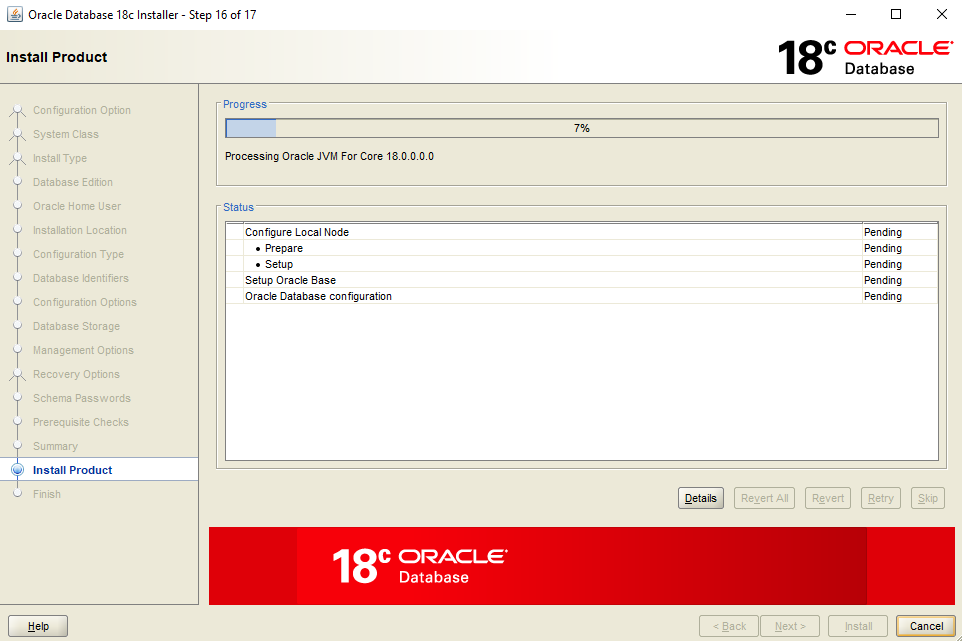
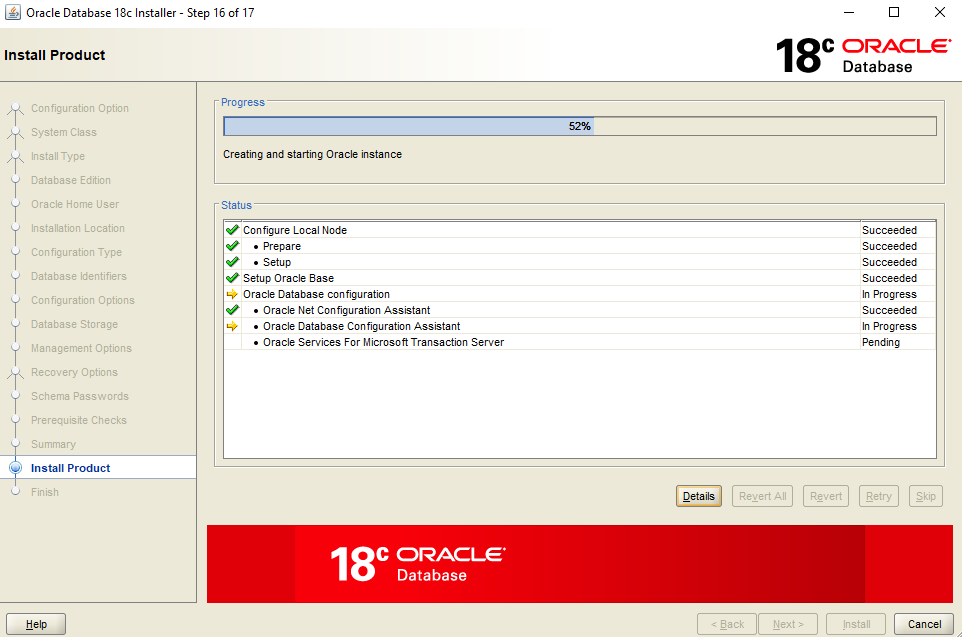
Step 16 :
Oracle starts installing software
On the same steps oracle copying database files
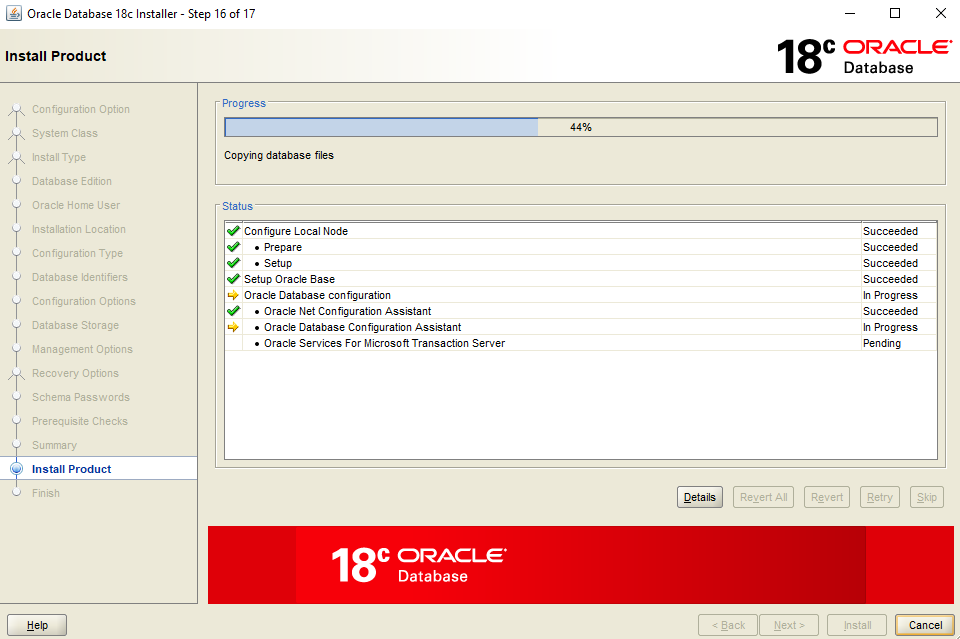
On the same step instance and database creates
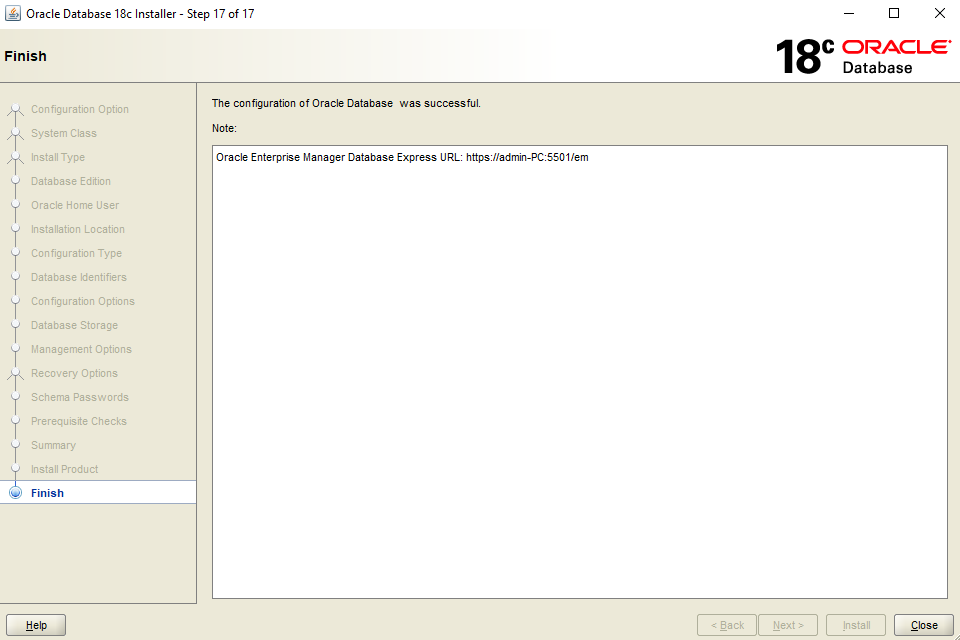
Step 17:
In this step The configuration oracle database was successful.
Click on Close
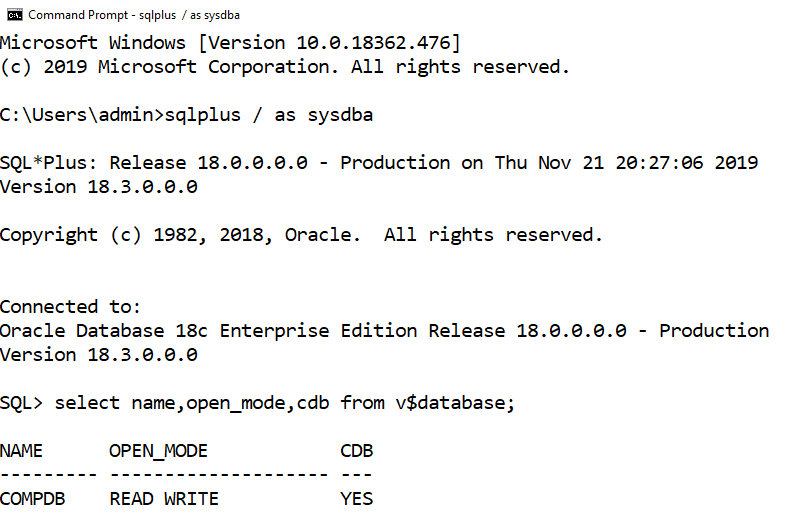
Now open Command Prompt and connect to database.
Check the below details
I hope above information was very helpful.
Thank you for giving your valuable time to read the above information.If you want to be updated with all our articles send us the Invitation or Follow us :
Facebook Page: KTexperts
Ajay Kumar’s Linkedin : https://www.linkedin.com/in/ajay-kumar90/