In this article,we will see
- Create two S3 Buckets inside two different regions
- Enable CRR in Source Bucket.
- Put some content in the source bucket.
- Verify Content in destination bucket(can see the same content).
Cross Region Replication
Cross-region replication is a new feature
It replicates data from one region to another region automatically.
Cross-region replication can be used to back up your data in another region.
It provides asynchronous copying of objects across buckets in different regions.
Once enabled, every object uploaded to a particular S3 bucket is automatically replicated to a designated
destination bucket located in a different AWS region.
For doing CRR (Cross Region Replication), we have to follow below steps.
- Create 2 buckets (Source bucket, Destination bucket)
- Regions must be unique
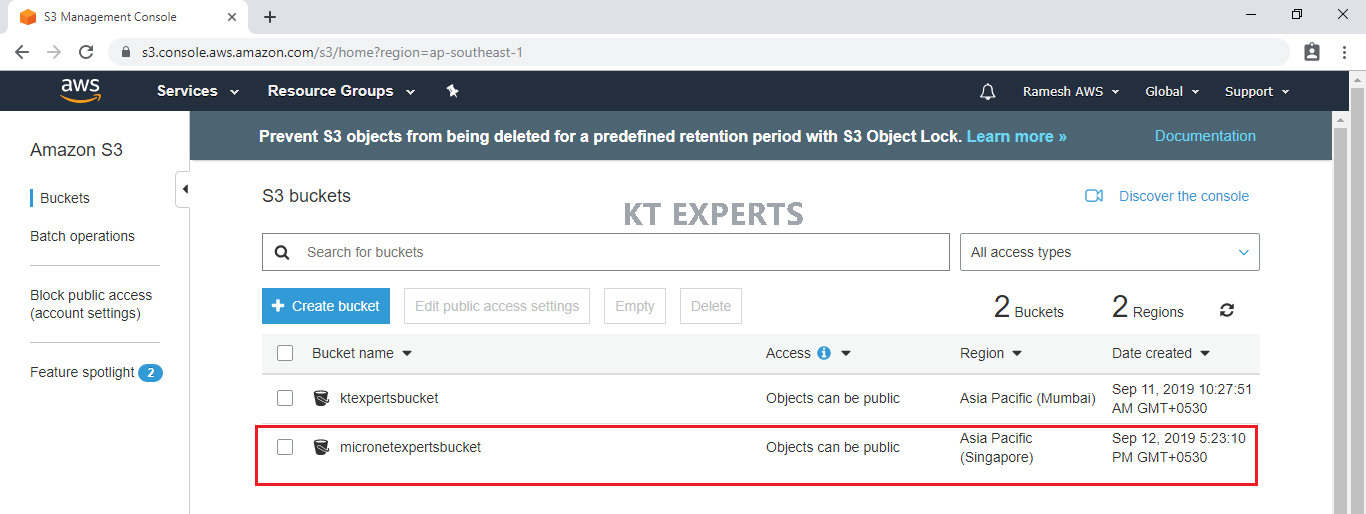
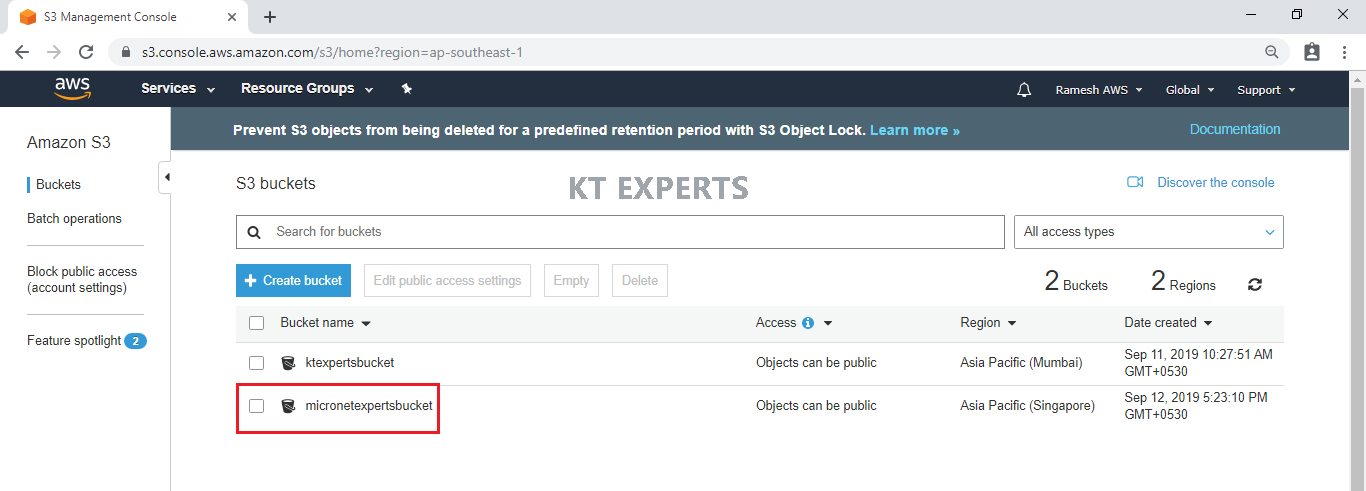
- Source Bucket – ktexpertsbucket (Mumbai)
- Destination Bucket – micronetexpertsbucket (Singapore)
- Enabled Versioning – Versioning must be enabled on both the source and destination buckets.
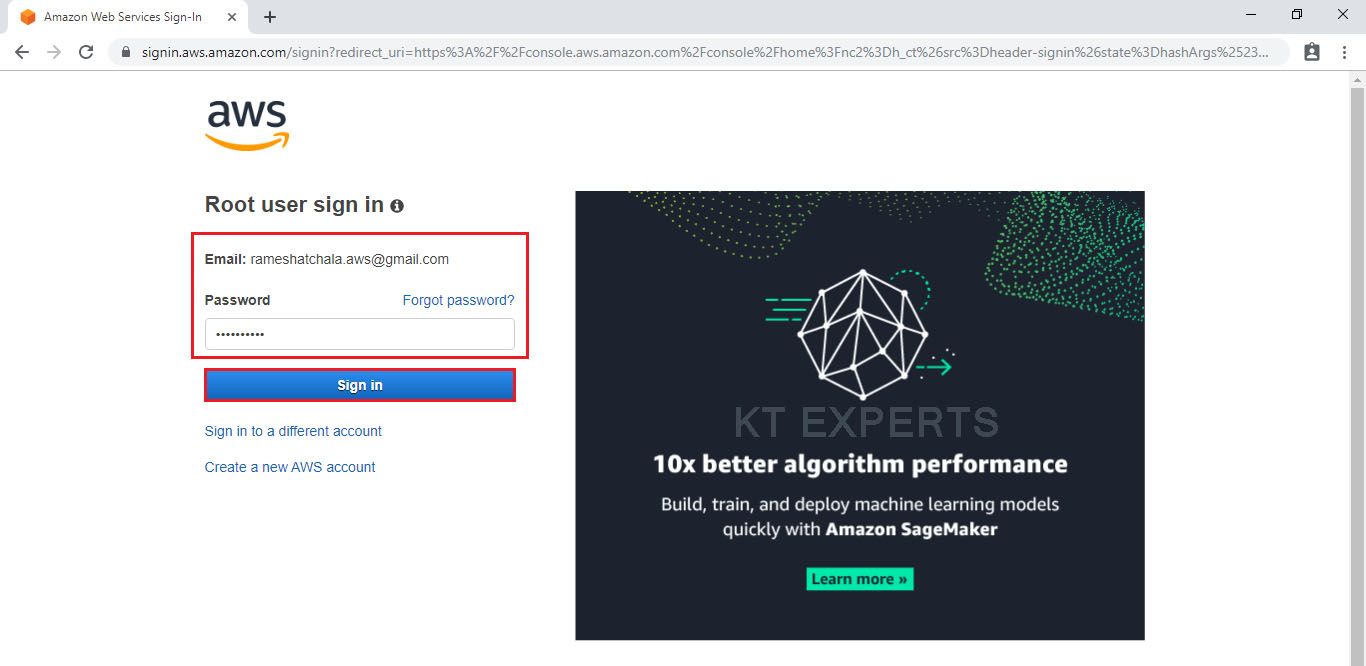
First, we need to sign in AWS Console page by using below link.
https://aws.amazon.com/console/
Click on sign in to Console button.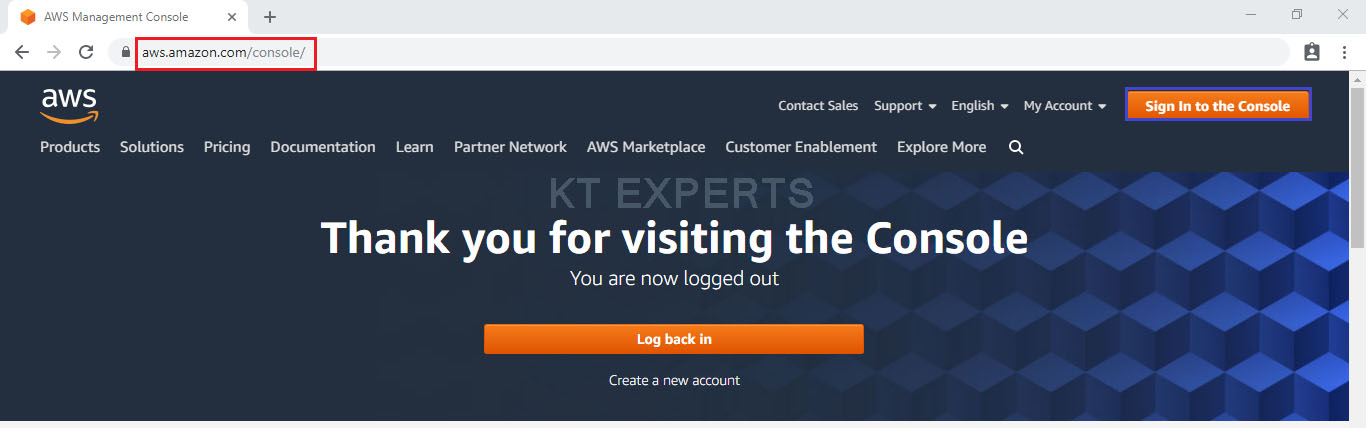 Logging to aws account
Provide username and password then click on sign in.
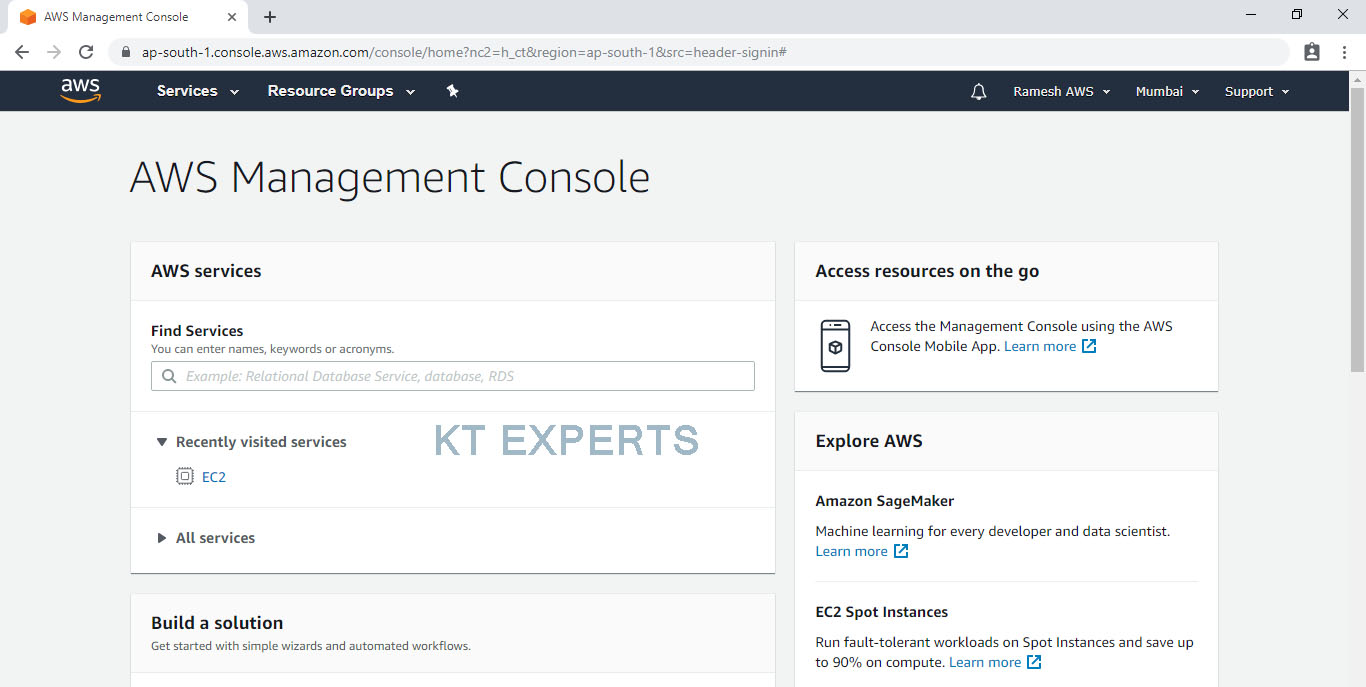
Enter to AWS Management Console
We can see the AWS Management Console Dashboard.
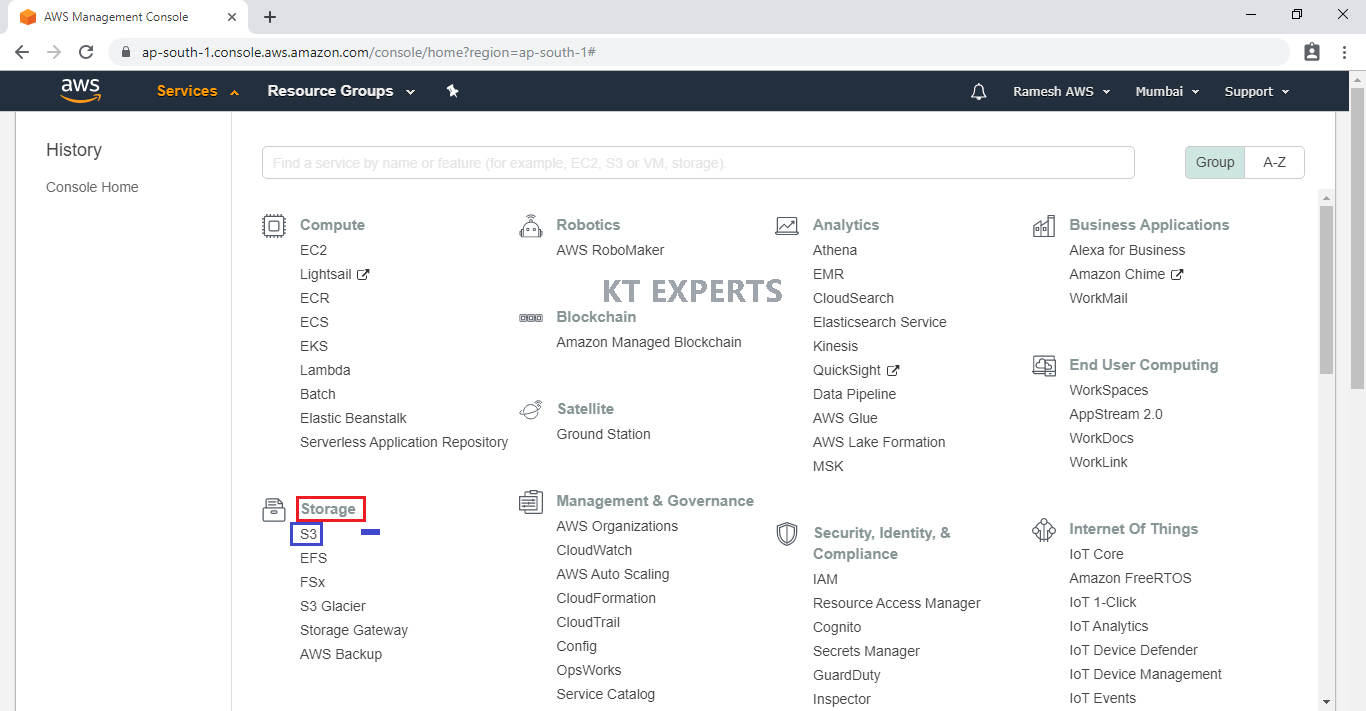
Go to Services, under the storage module click on S3 service to open.
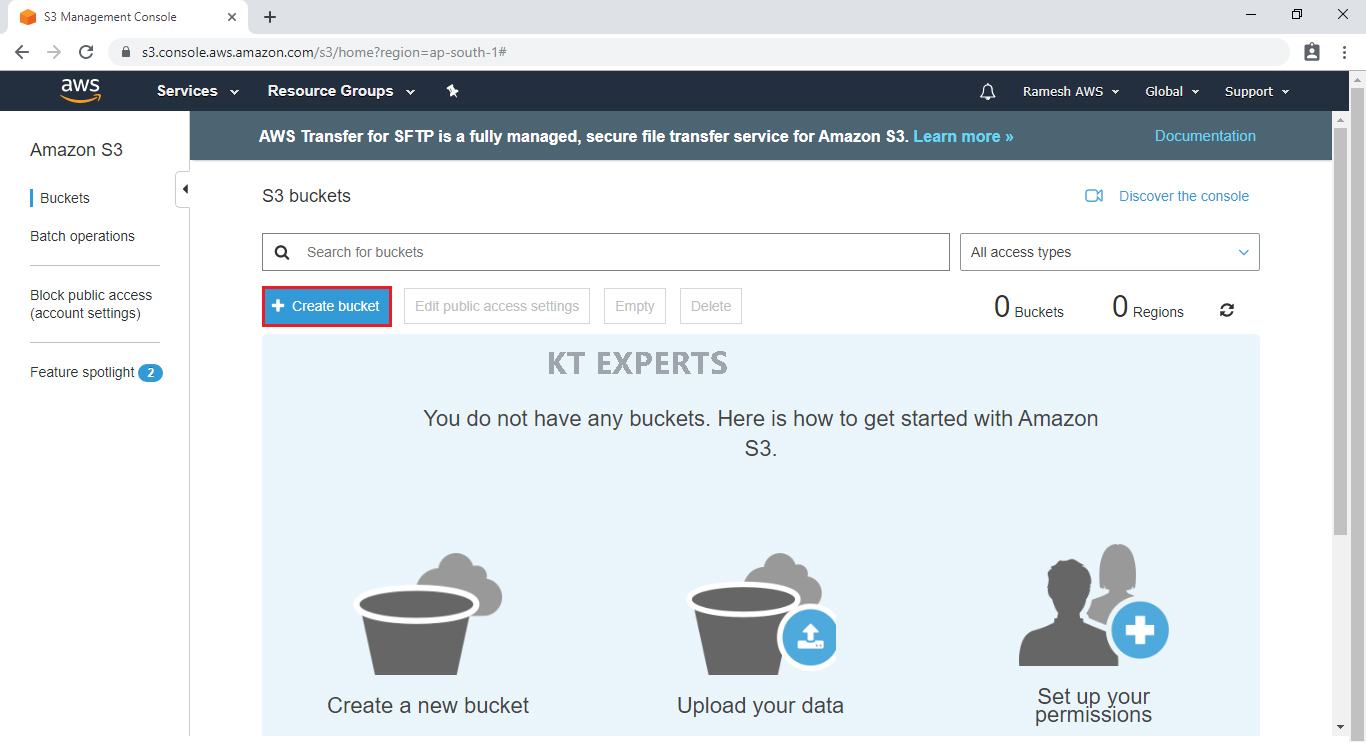
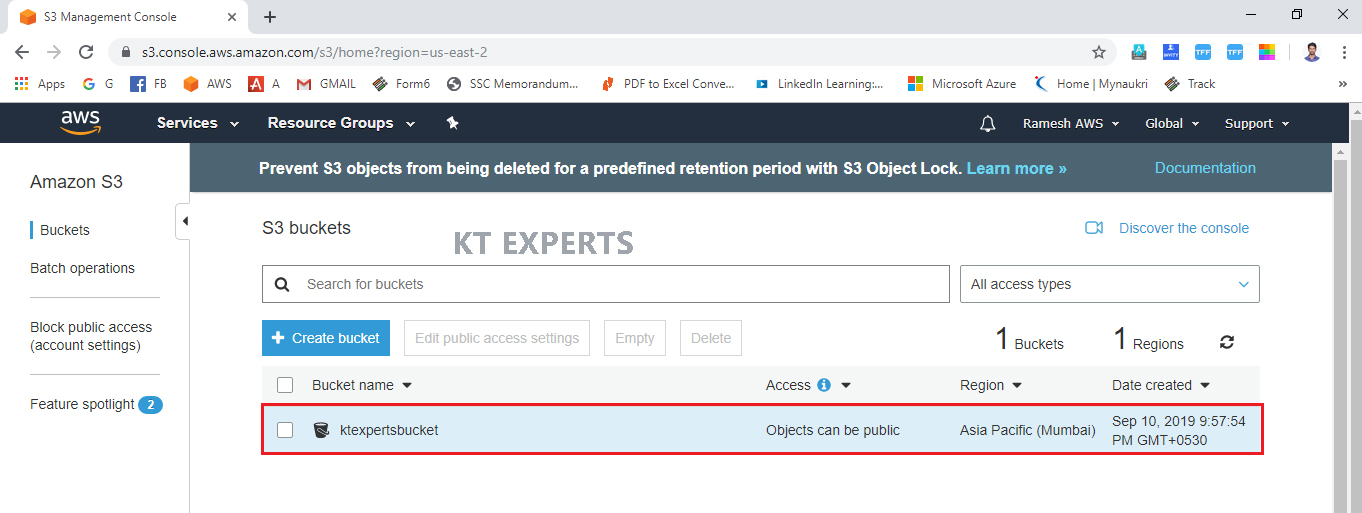
Create Source Bucket “ktexpertsbucket”
Create Bucket
Click on Create Bucket to create an new bucket.
- Provide the bucket name must be globally unique across all existing bucket name in Amazon S3
- In the Bucket name field we need to follow some guidelines
- The bucket name can be between 3 and 63 characters long.
- contain only lower-case characters, numbers, periods, and dashes.
- The bucket name must start with a lowercase letter or number.
- The bucket name cannot contain underscores, end with a dash, have consecutive periods.
- use dashes adjacent to periods.
- The bucket name cannot be formatted as an IP address (192.81.800.24).
- After you have created a bucket, you can’t change its Region.
In Region, Choose required region.
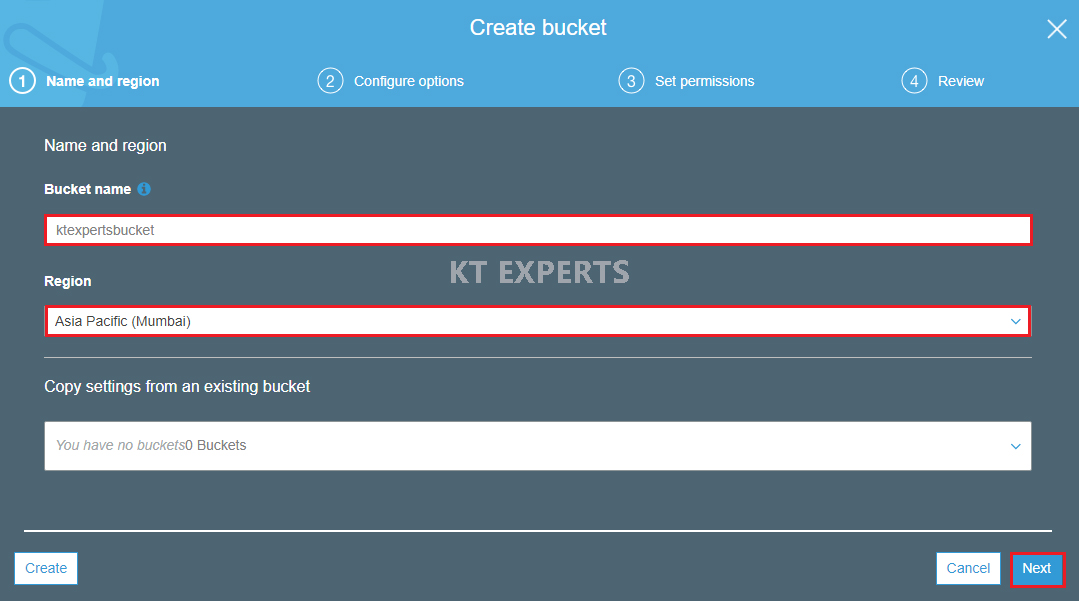
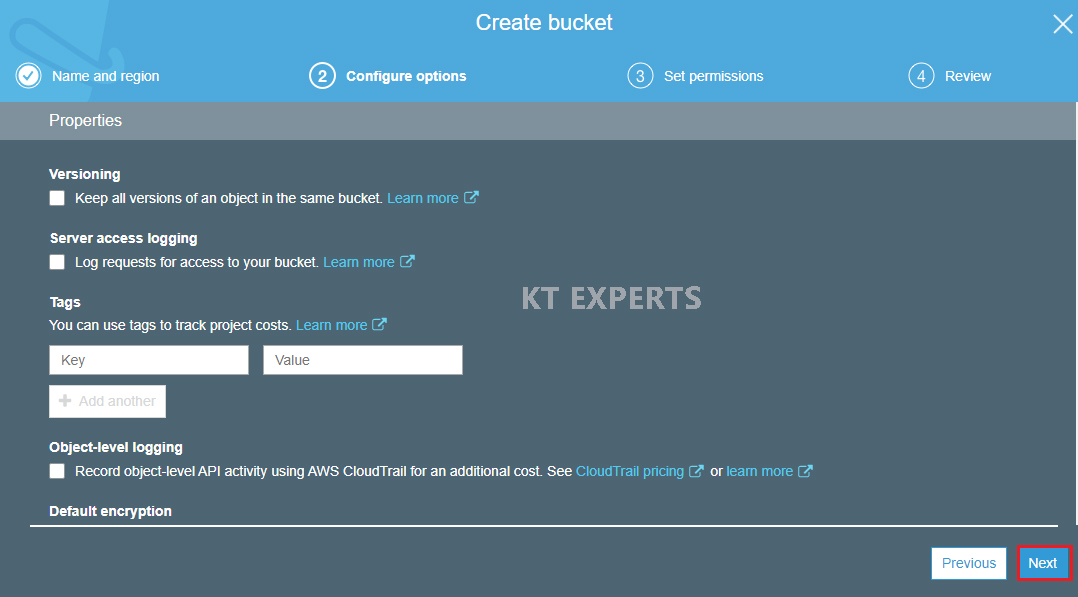
Click on Next.
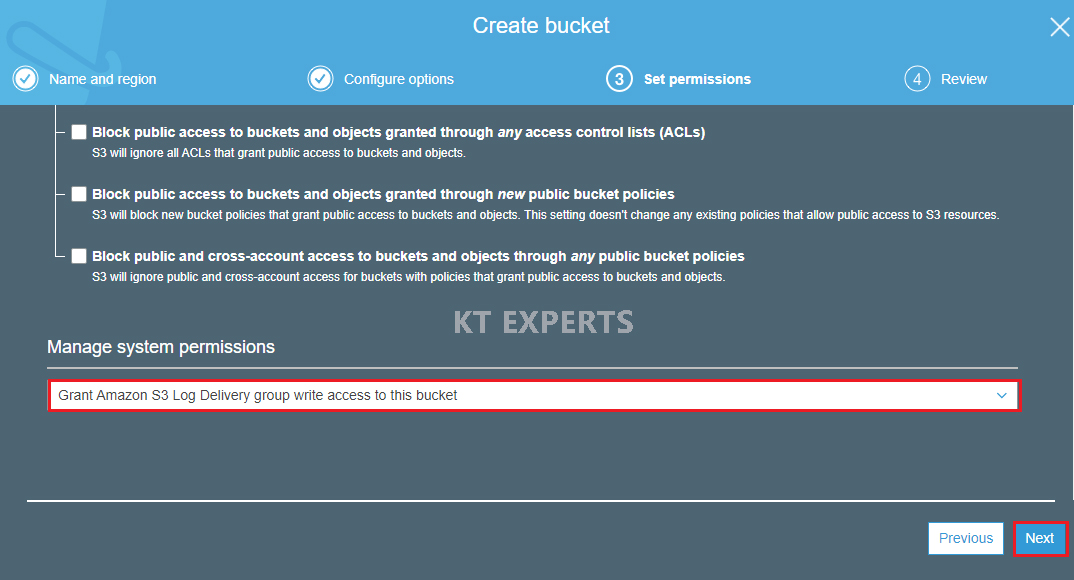
Make bucket to public
Unchecked Block all public access.

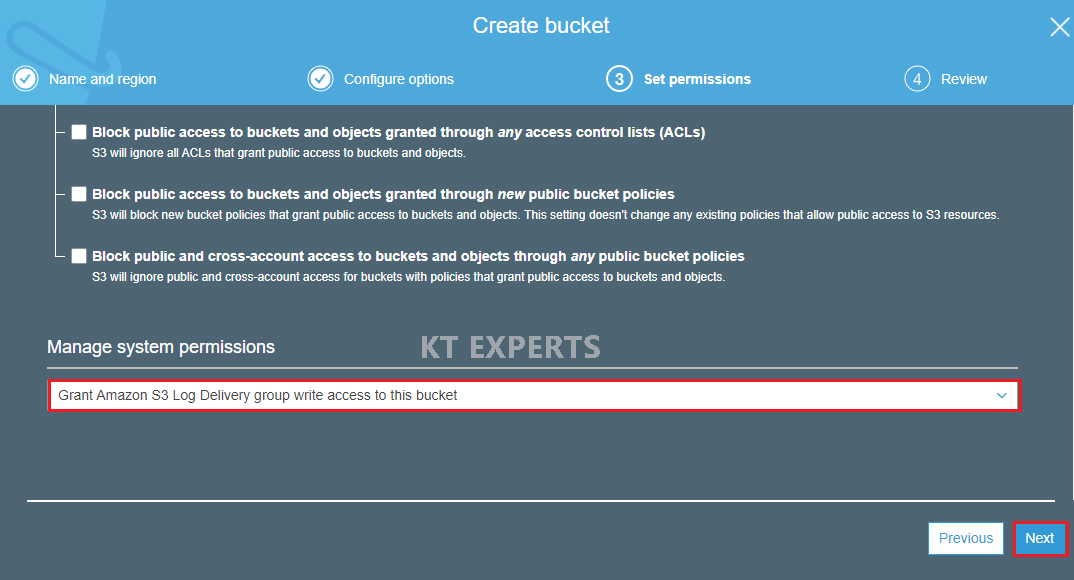
Go to Manage System permissions and choose Grant Amazon S3 Log Delivery group write access to this bucket then click on Next.
Verify all the details which has given by user then click on create bucket.
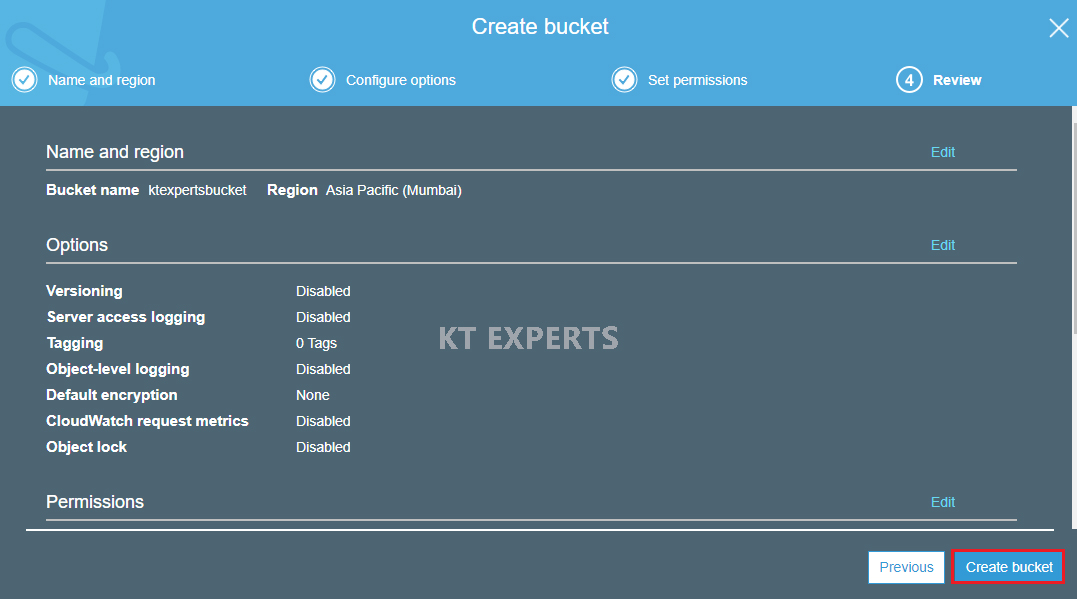
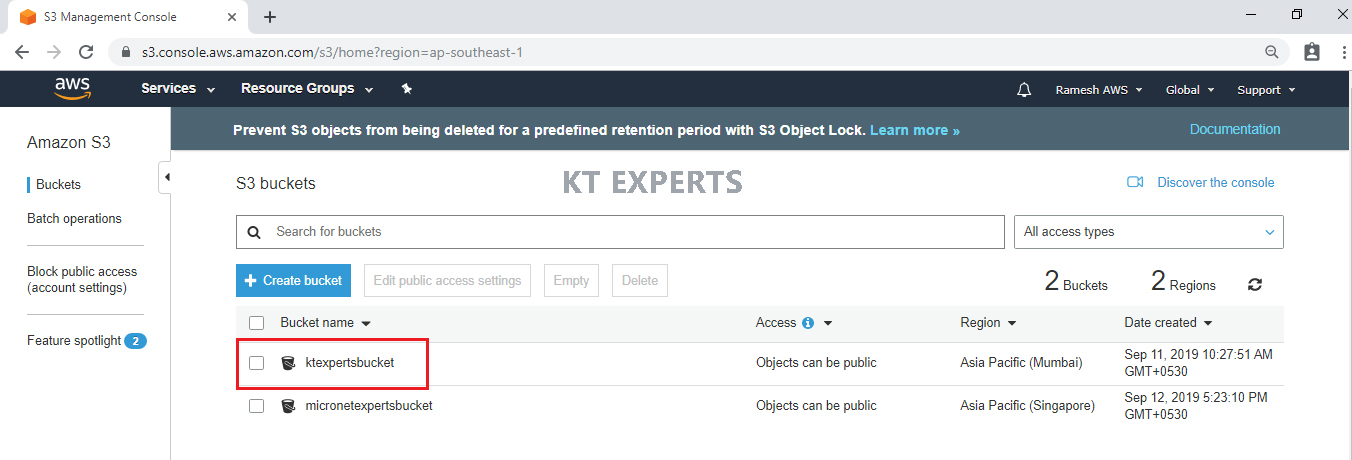
We can see the Source Bucket “ktexpertsbucket”.
 Create Destination Bucket “micronetexpertsbucket”
Create Bucket
Click on Create Bucket to create Destination Bucket.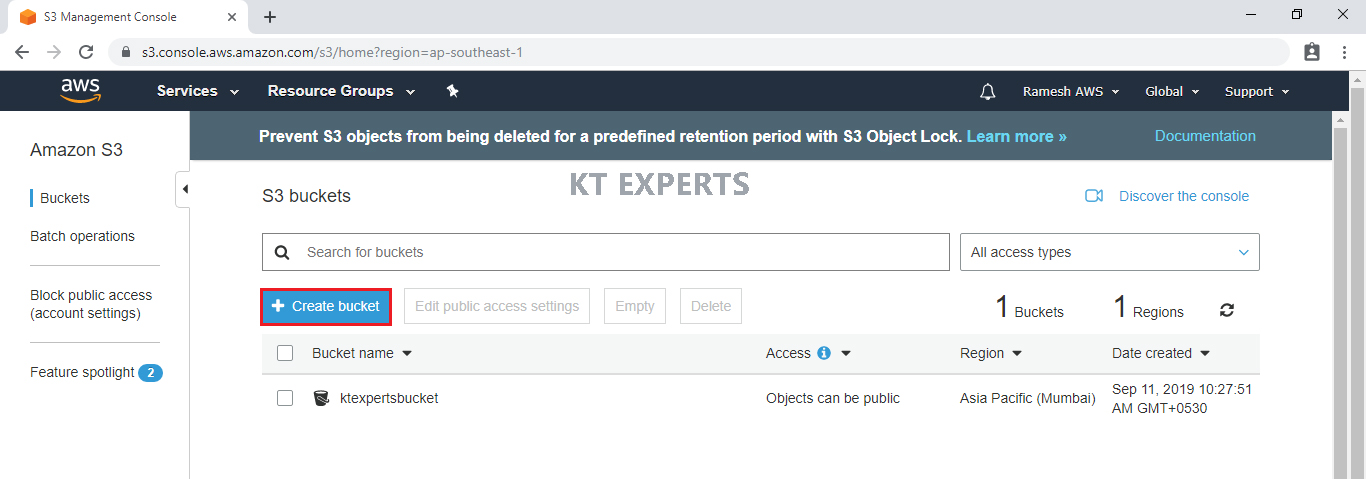
Provide name of the bucket and select region ( must be different ) and Click on Next.
Click on Next.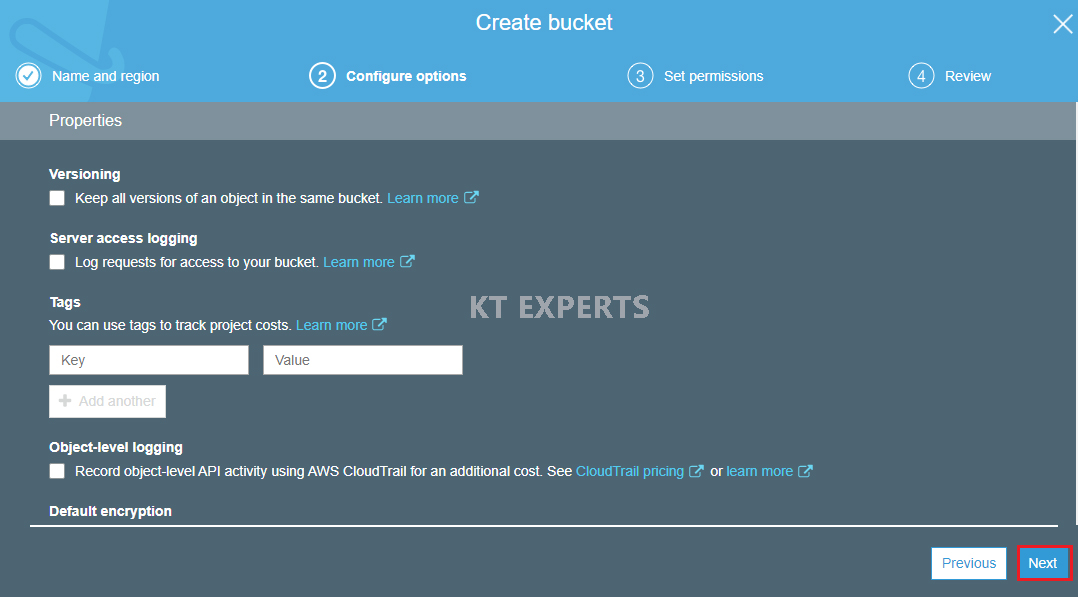
Make bucket to public
Unchecked Block all public access.

Go to Manage System permissions and choose Grant Amazon S3 Log Delivery group write access to this bucket then click on Next.
Verify all the details which has given by user then click on create bucket.
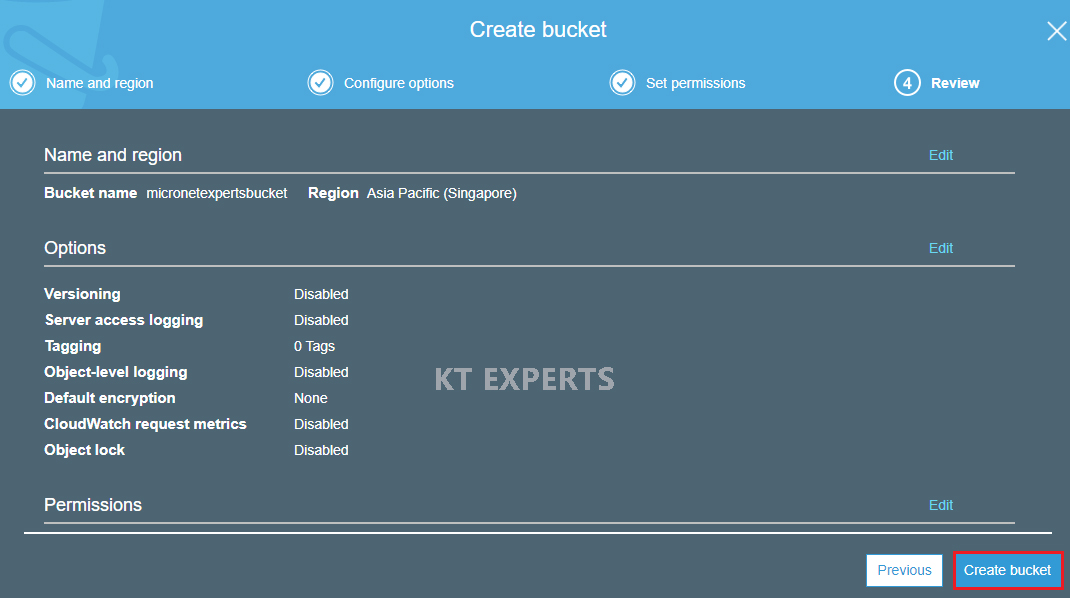
We can see the Destination Bucket “micronetexpertsbucket”.
Replication
Click on name of the bucket “ktexpertsbucket” to open.
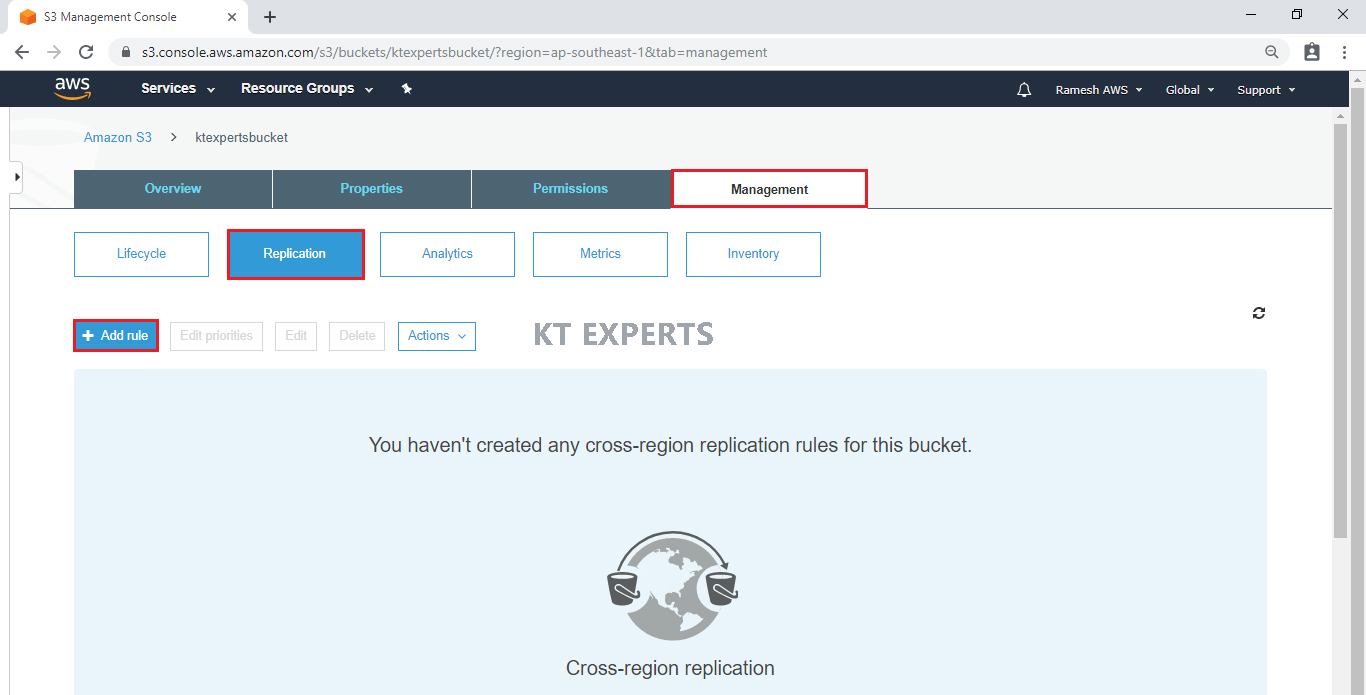
Go to Management then click on Replication.
Currently we don’t have any rule now, create one rule just click on Add rule.
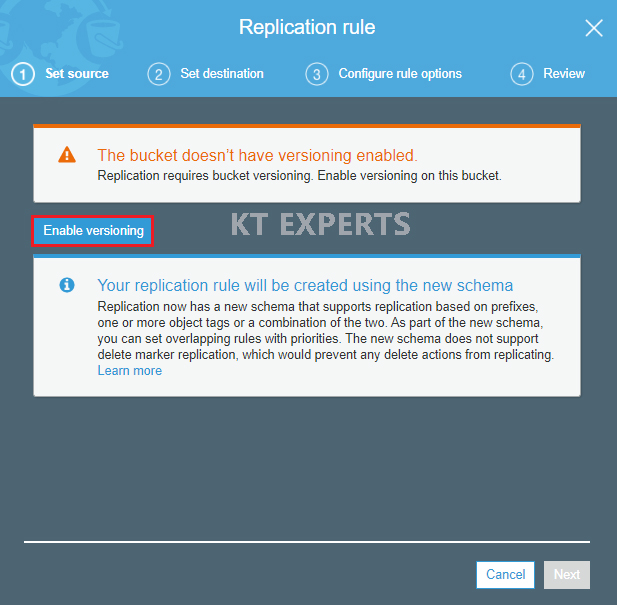
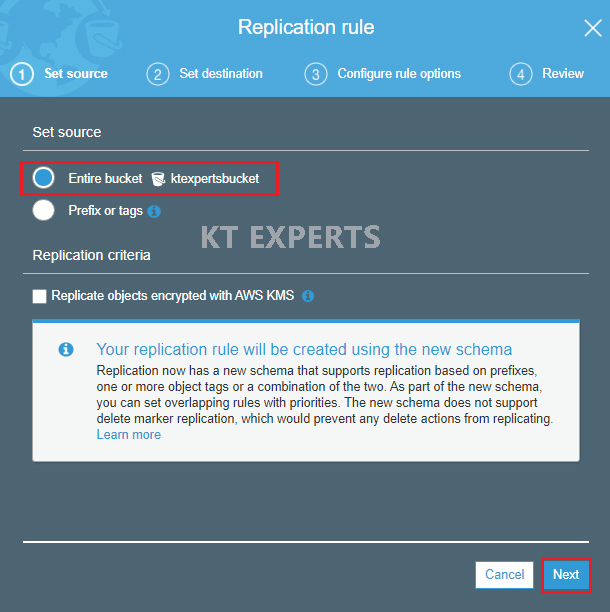
Choose Entire bucket and click on Next.
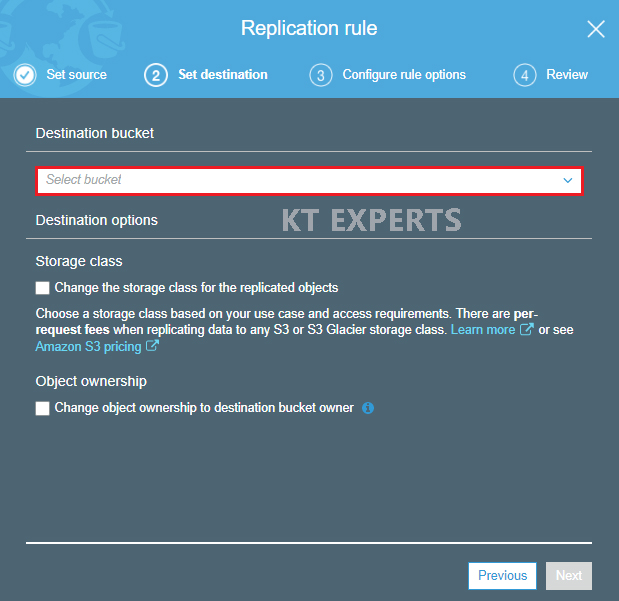
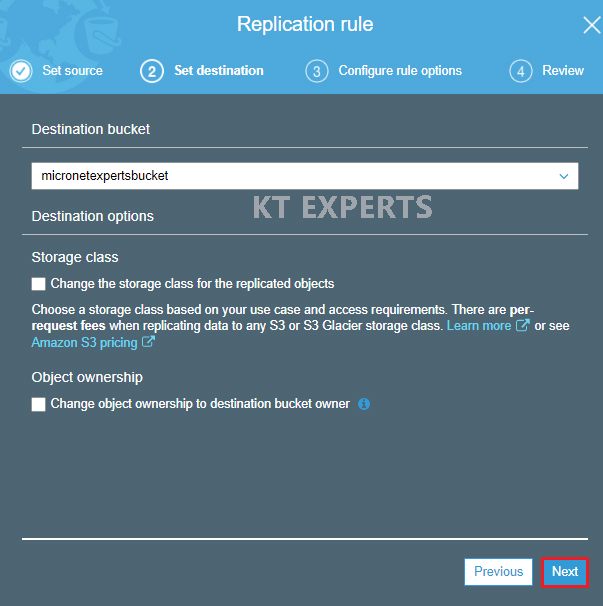
Choose Destination Bucket
Click on destination bucket field.
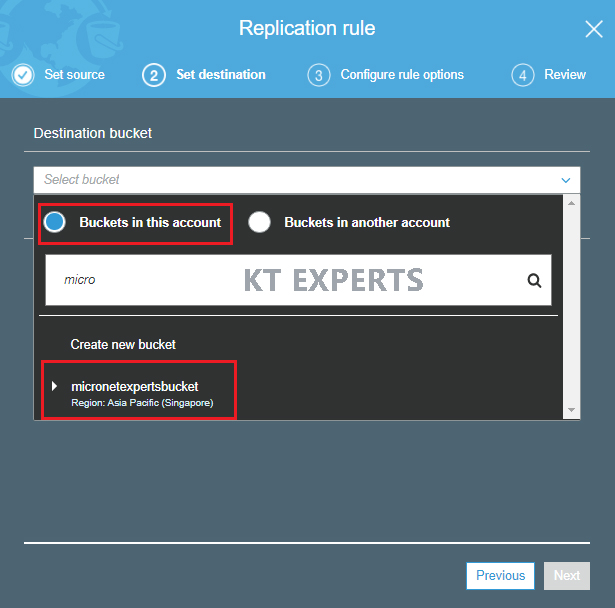
Choose bucket in this account (this option will be there by default).
Select the destination bucket “micronetexpertsbucket”.
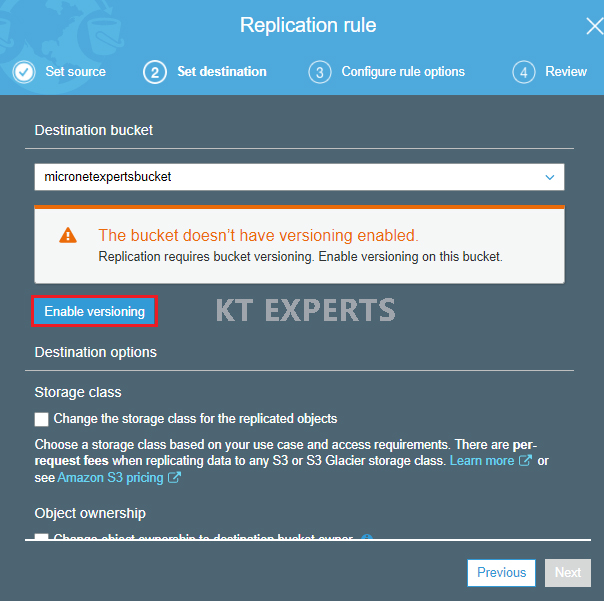
Enable versioning for destination bucket “micronetexpertsbucket”
Need to enable versioning for destination bucket too so, click on Enable Versioning.
Click on Next.
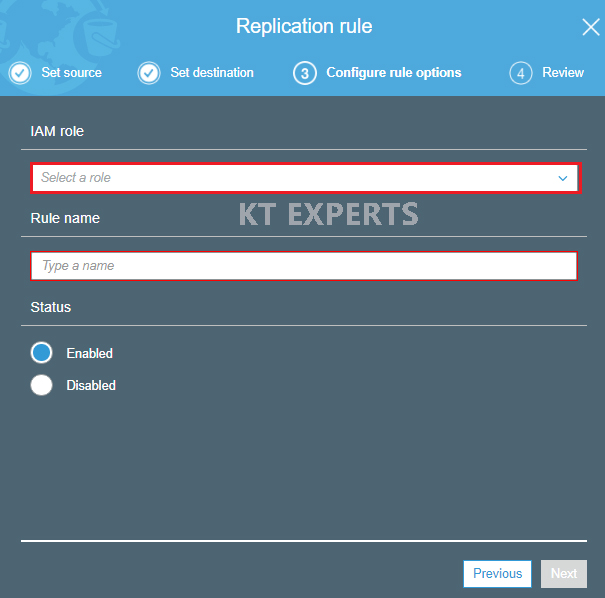
IAM role
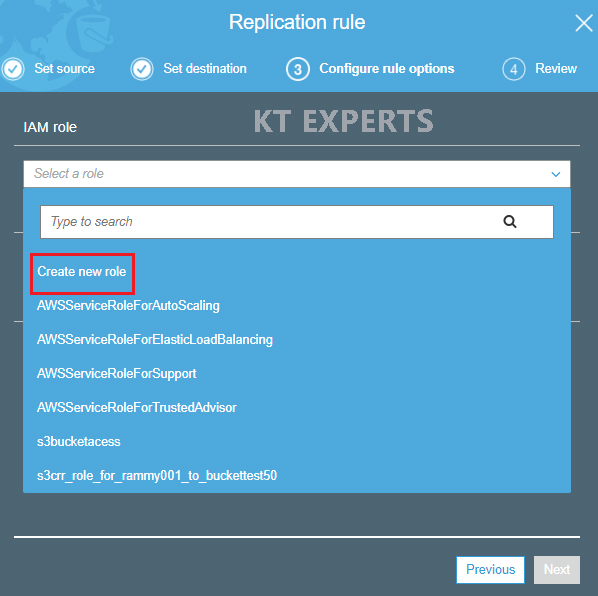
We need create one IAM role for doing the replication so click on IAM role filed (empty field).
Click on Create new role.
Choose IAM role type and give name for the new role then click on Next.
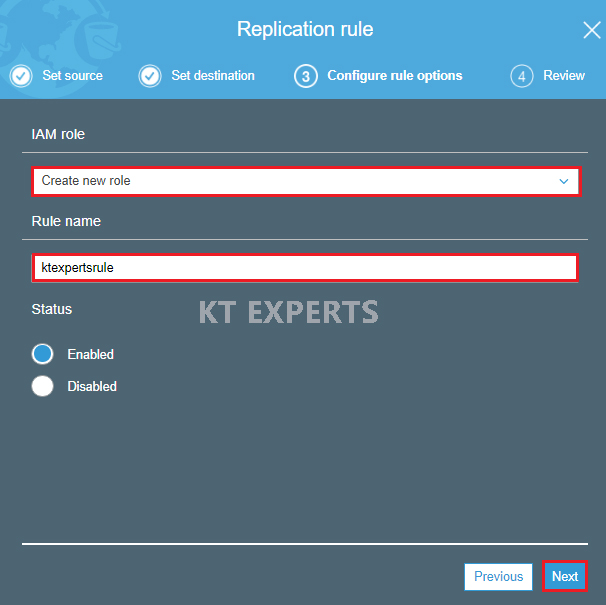
Verify all the details and click on save.
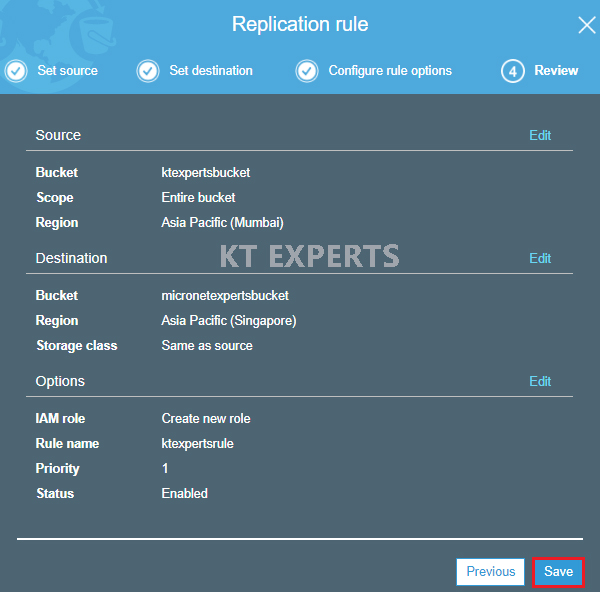
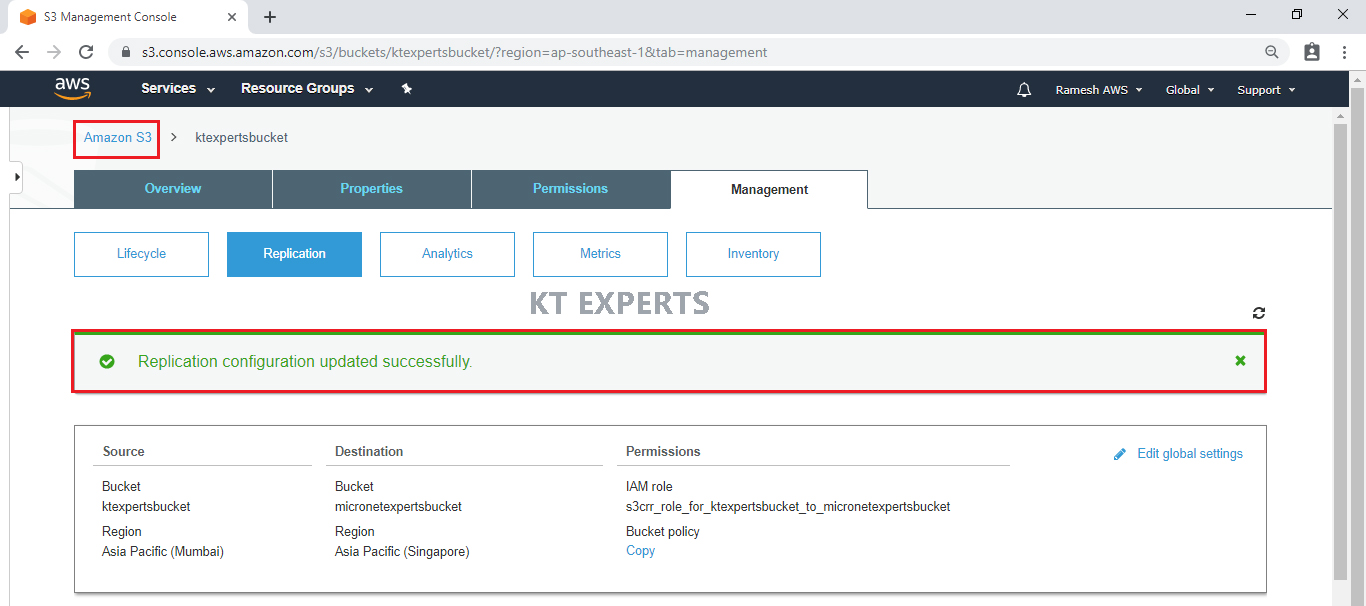
The role has been created , we can see one message “Replication Configuration updated successfully”
Click on Amazon S3 to go for S3 console.
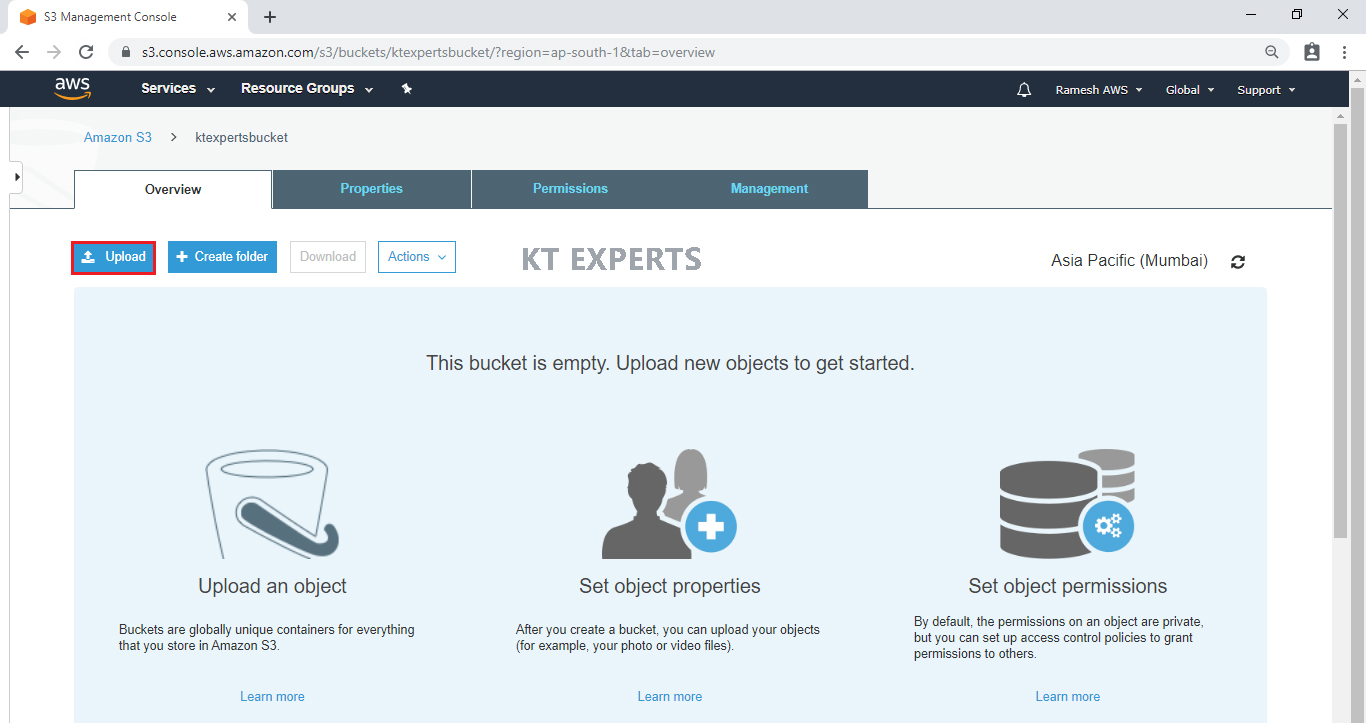
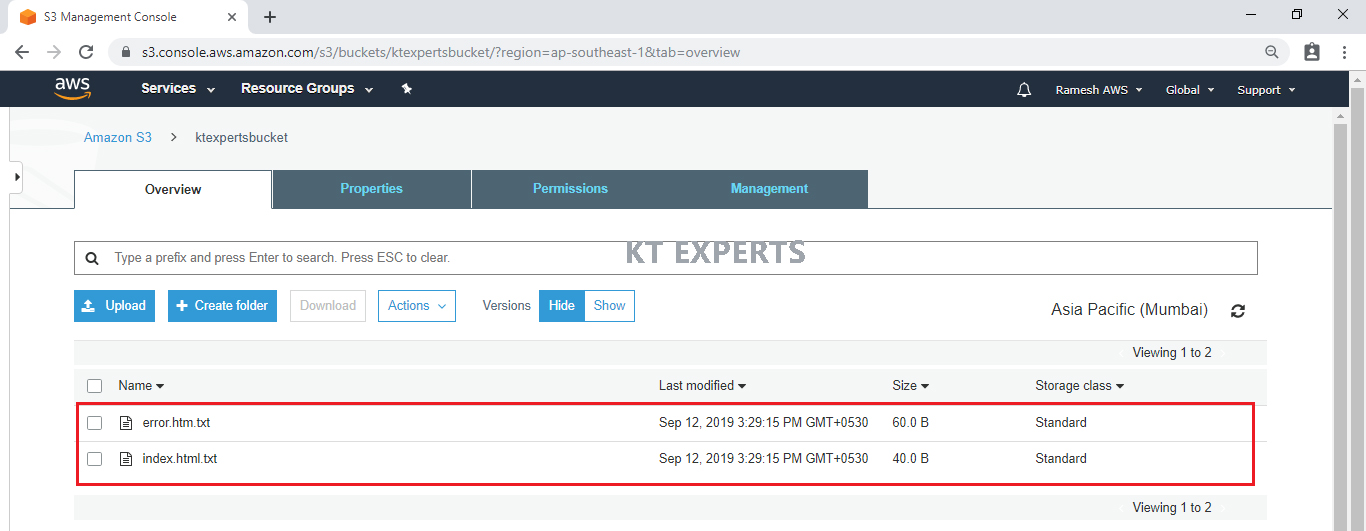
Upload objects in Source Bucket “ktexpertsbucket”.
Open the bucket by clicking on name of the bucket “ktexpertsbucket”.
Note :
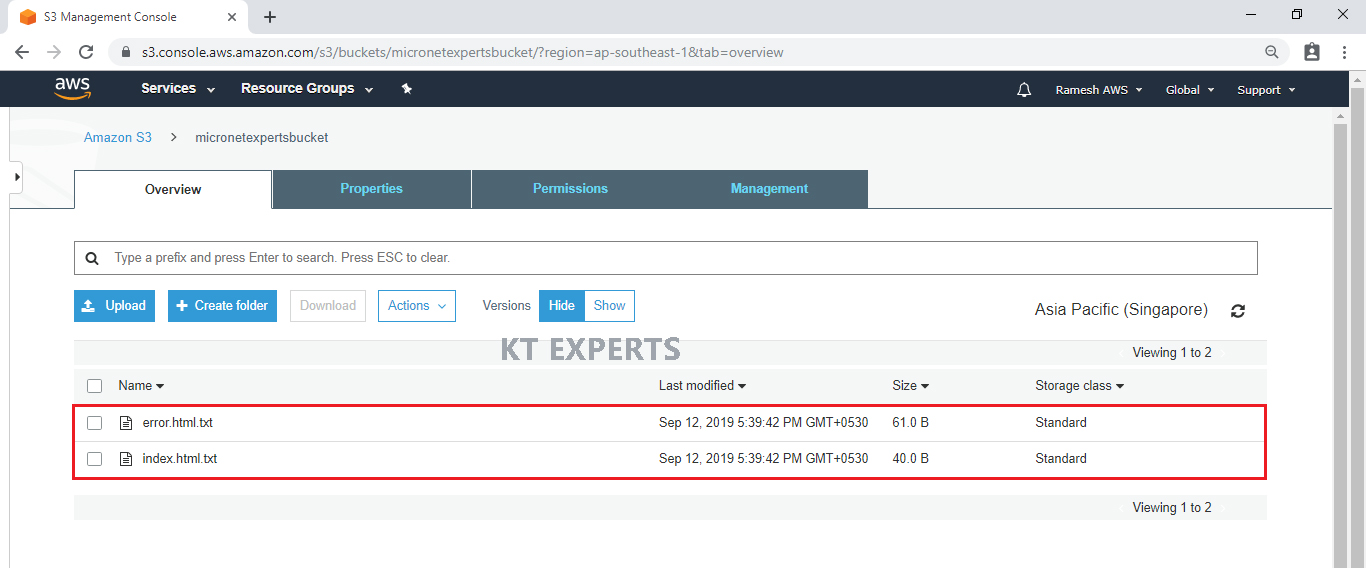
Whatever objects uploaded in the Source Bucket “ktexpertsbucket” those objects are replicate to Destination Bucket “micronetexpertsbucket”.
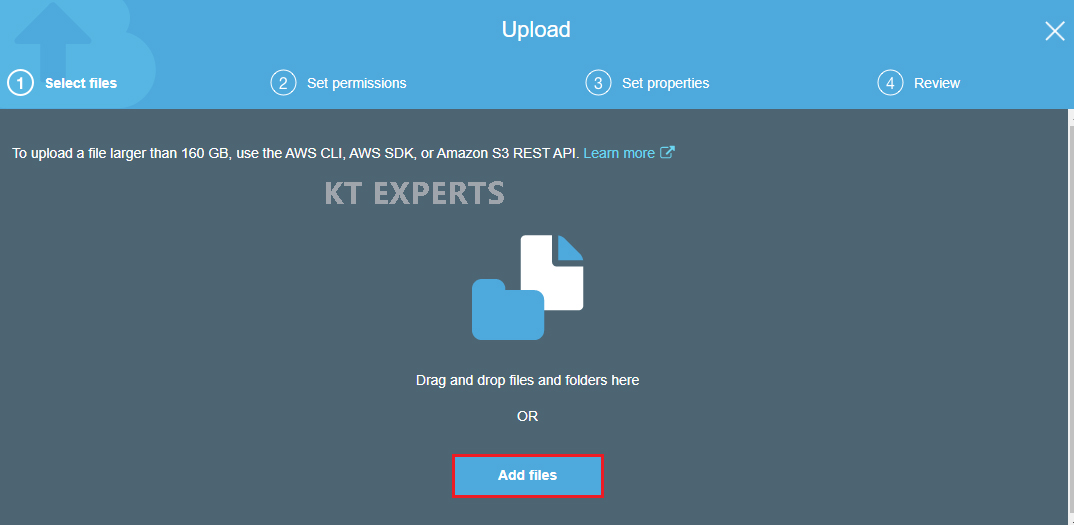
Click on upload.
Click on Add files.
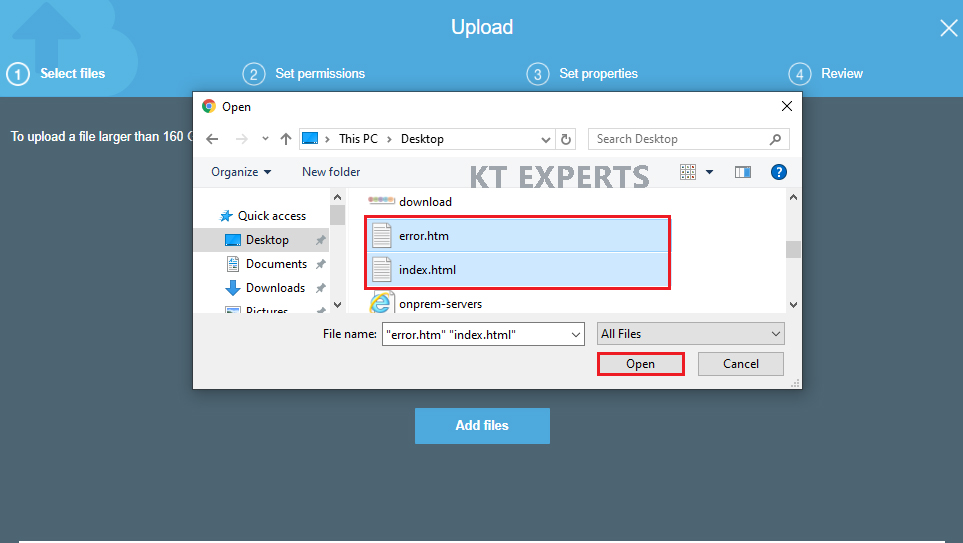
Choose index.html and error.html text files and click on open.
Or
else we can drag and drop to bucket to directly.
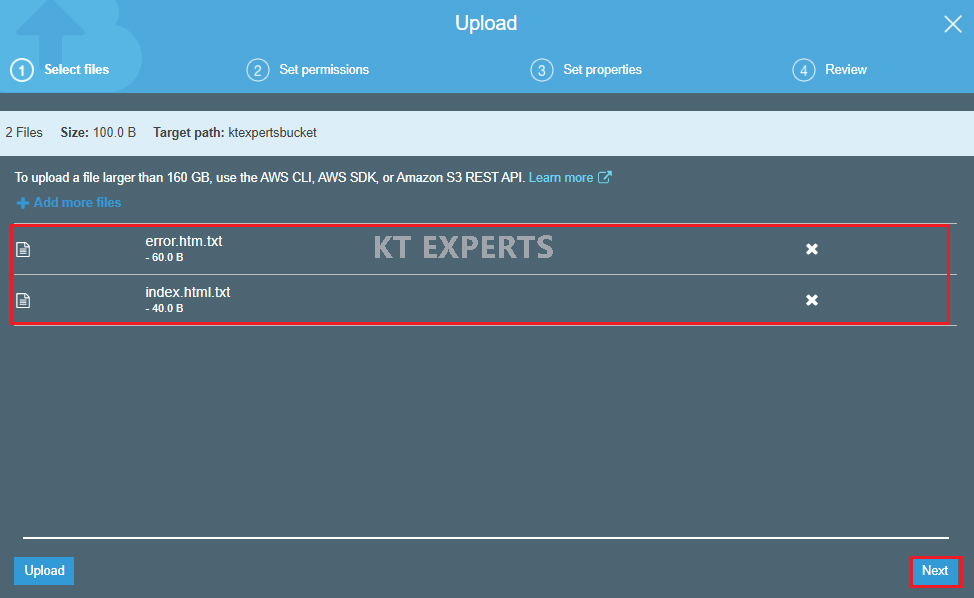
Click on Next.
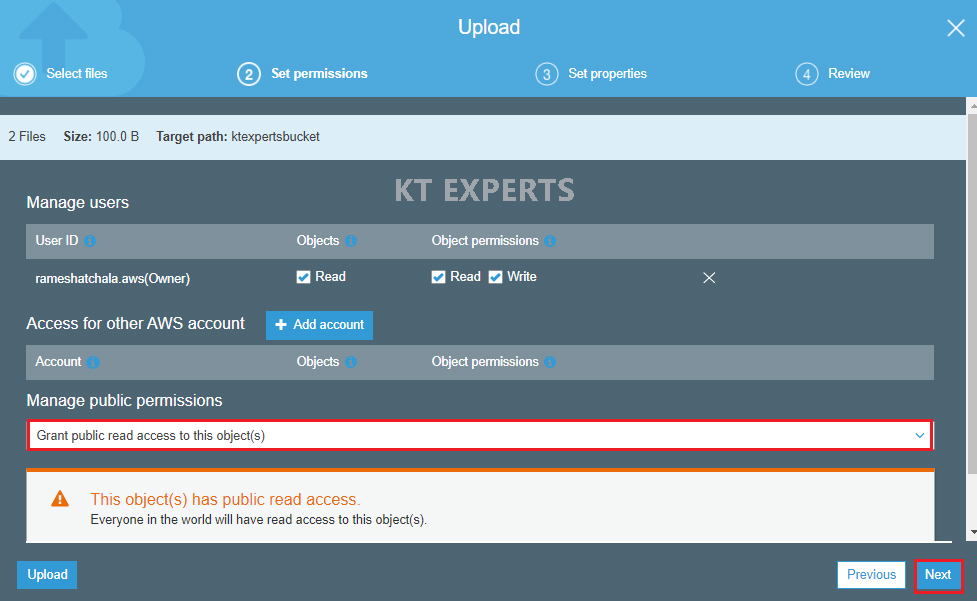
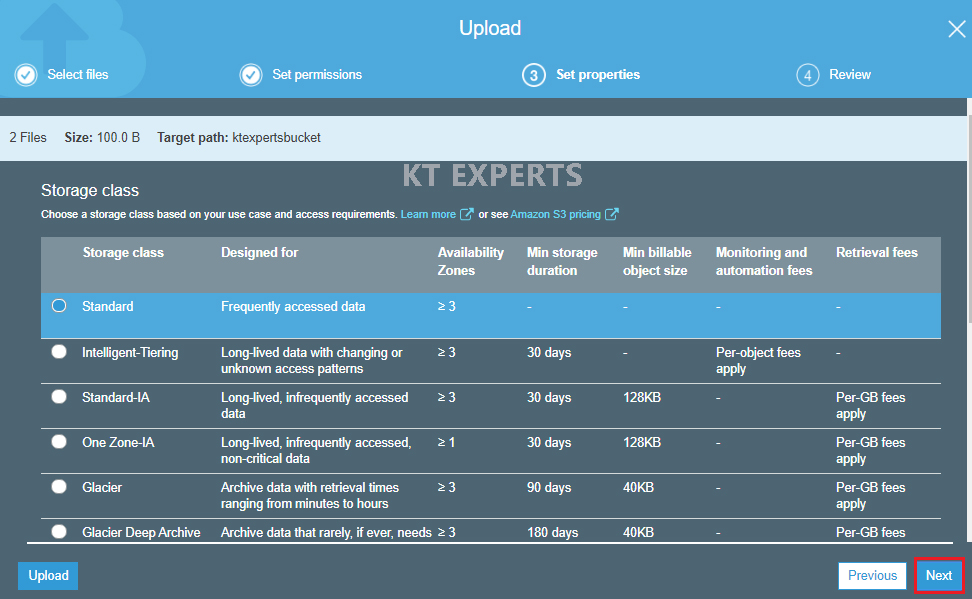
Make an objects to public
Go to Manage public permissions choose Grant public read access to objects then click on Next.
Click on Next.
Verify all the details and click on upload.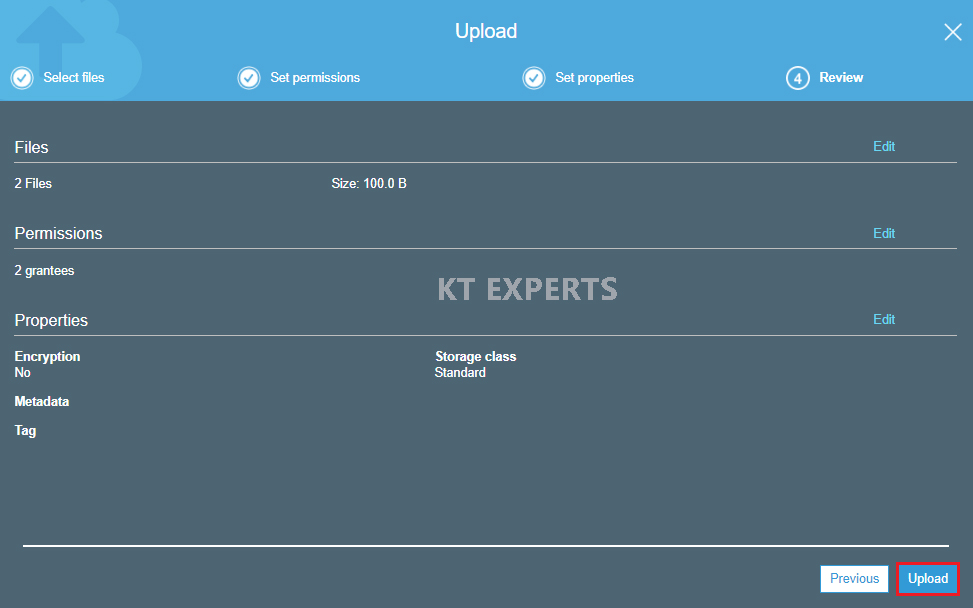
We can see the two objects has been uploaded successfully.
Verify objects are replicated or not in second bucket “micronetexpertsbucket”
Click on Amazon S3.
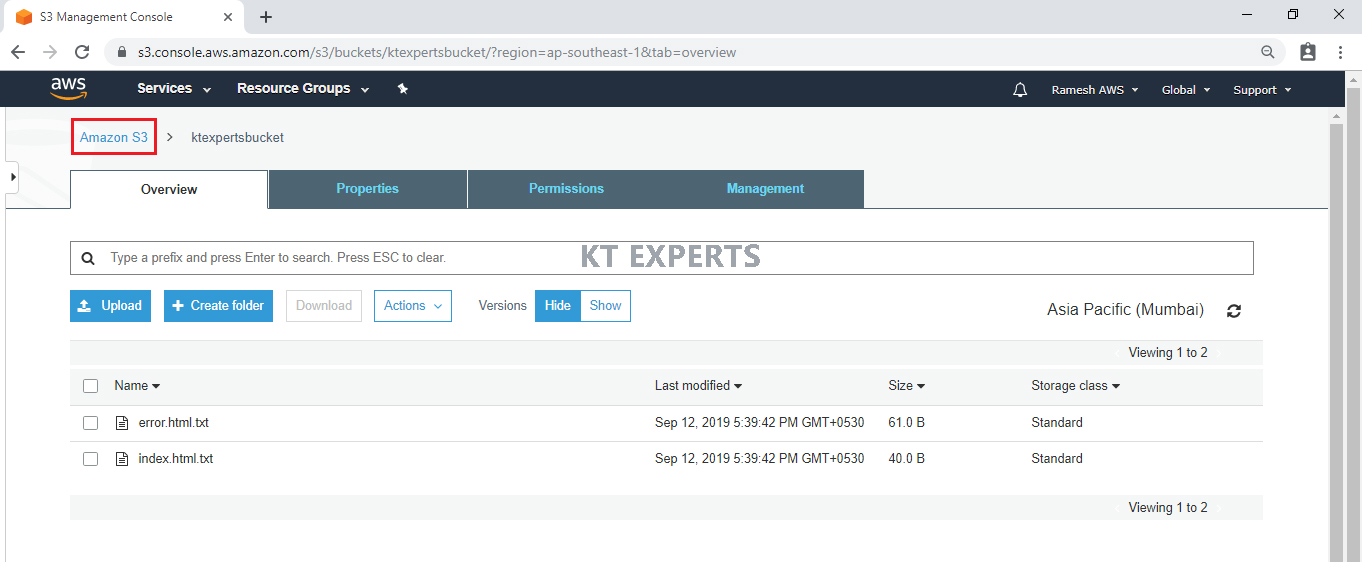
Click on name of the bucket “micronetexperts” to open.
The objects are replicated to Destination bucket “micronetexpertsbucket” so replication is working properly.
Thank you for giving your valuable time to read the above information.
Follow us on
Website : www.ktexperts.com
Facebook Page : KTexperts