
In this article,we will see to create a bastion server inside the public subnet “192.168.1.0/24 – ap-south-1a (subnet-1)

Please check below link for part-3
Amazon Virtual Private Cloud in AWS (Amazon Web Services) (PART – 3)
we can call as jump server,we can connect to database server with the help of bastian server.
Create Bastian Server
Go to services and click on EC2 under the compute module to open.
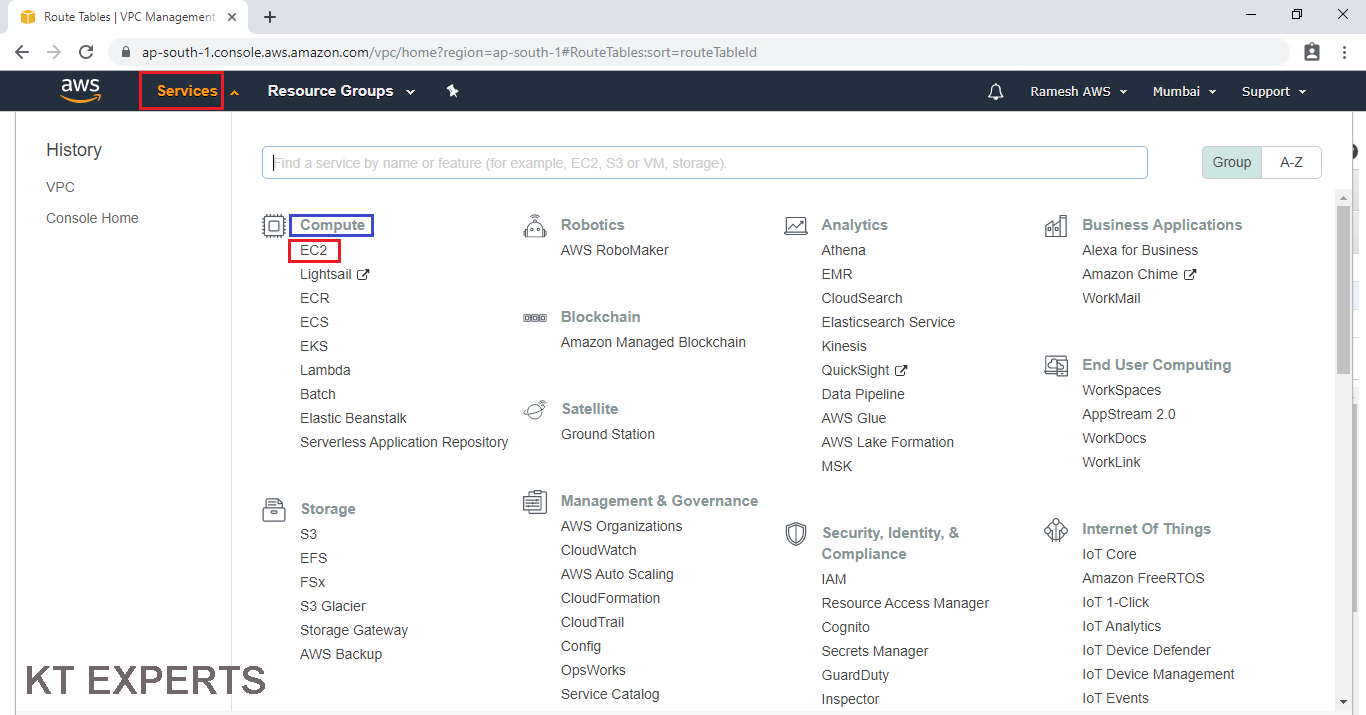
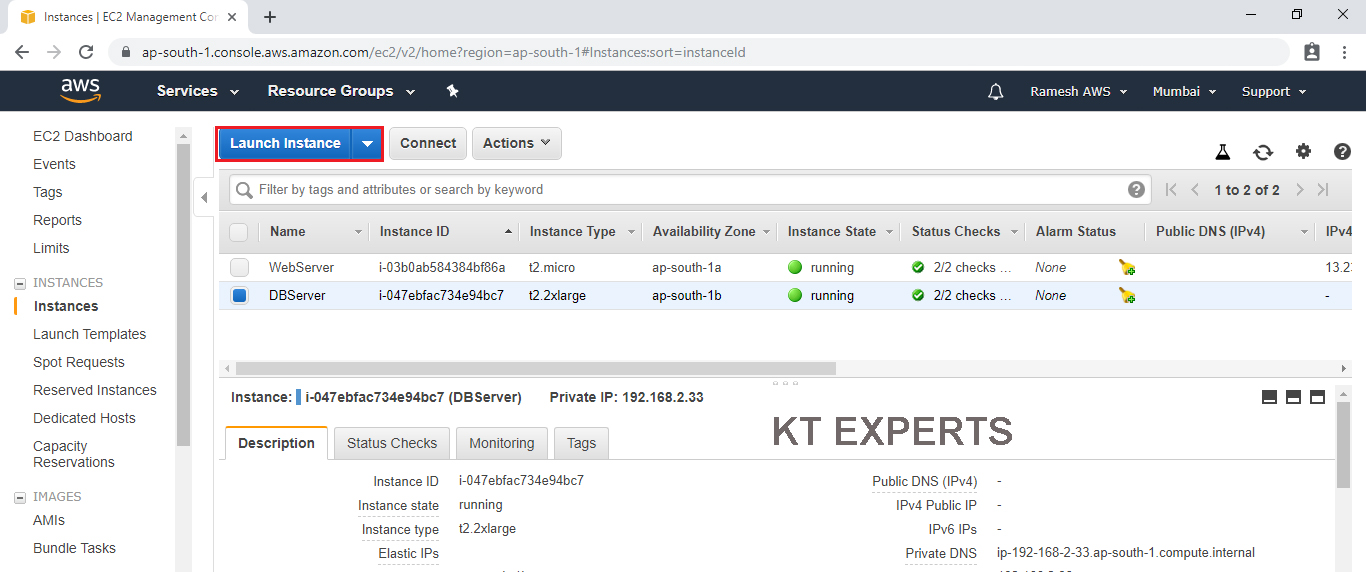
We can see EC2 Dashboard.
There are two security groups available by default and click on Launch Instance.
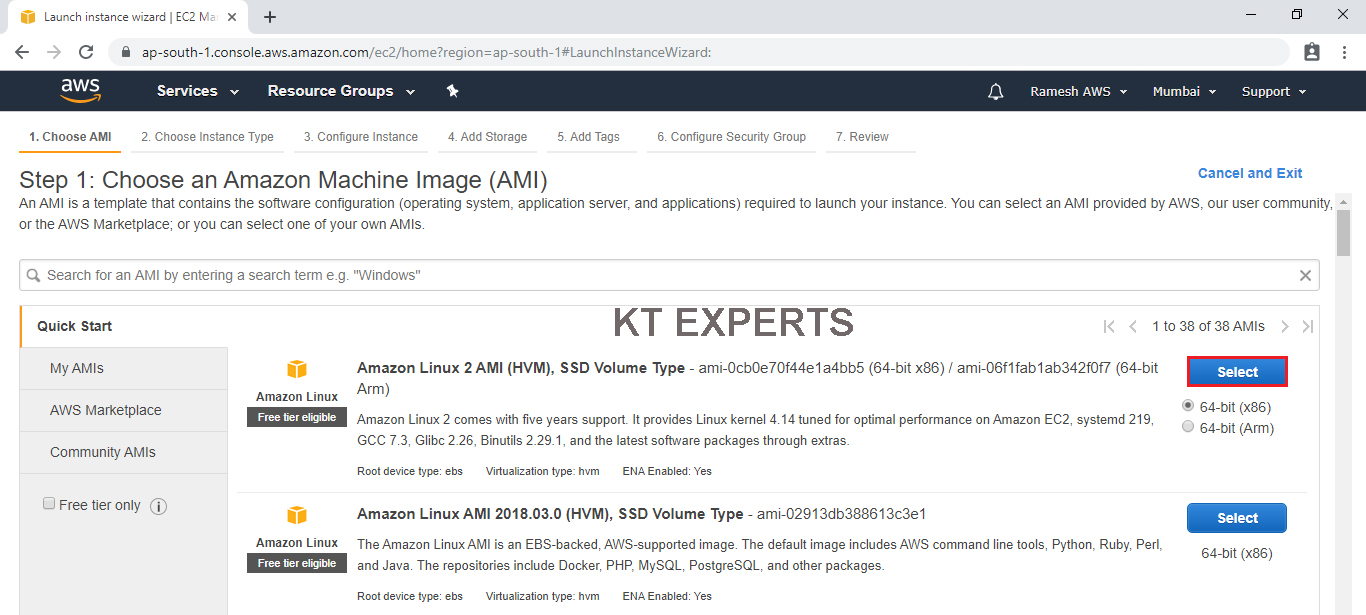
Choose an Amazon Machine Image (AMI)
Select the Operating system of the EC2 instance by choosing any of the Amazon Machine Images (AMI). Select the Microsoft Amazon Linux AMI.
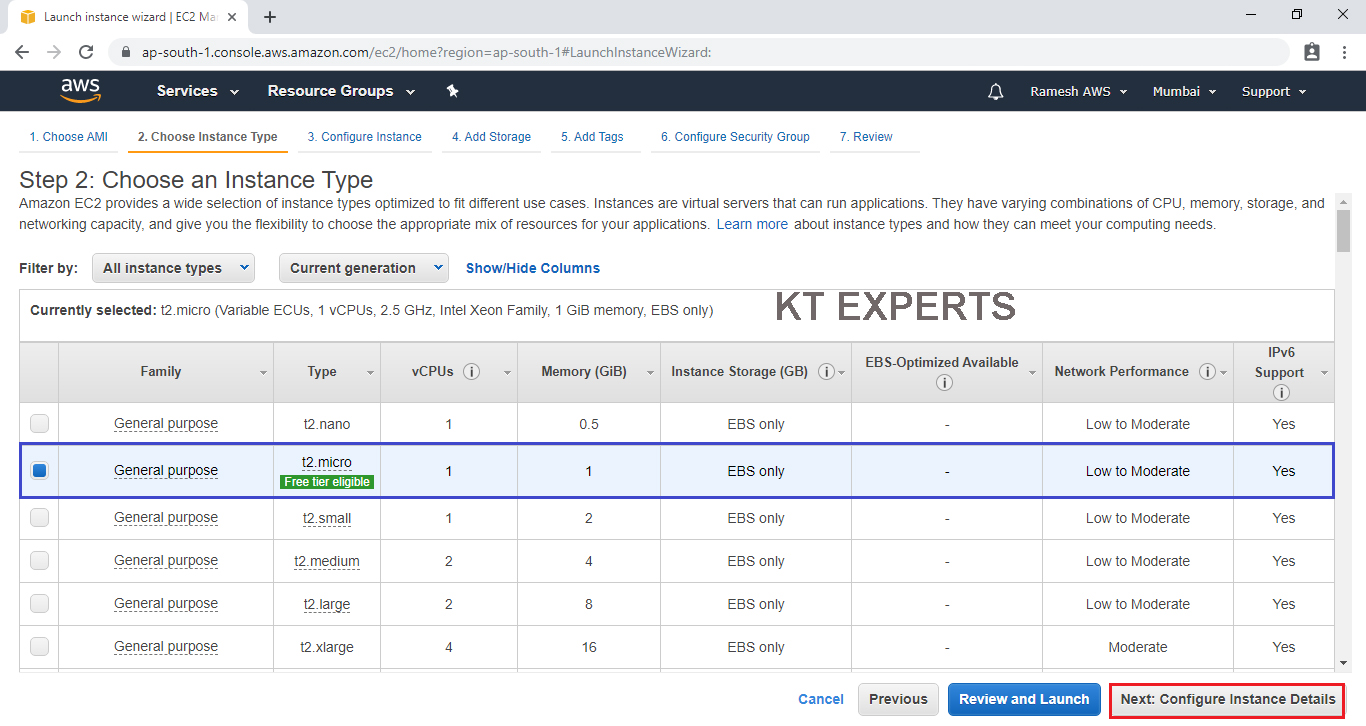
Choose an Instance type
Choose the Type of instance depending on your requirements.
Instance types comprise of varying combinations of CPU, memory, storage, and networking capacity.
select the default option of t2. micro – this instance type is covered within the free tier. Then click on Configure Instance Details.
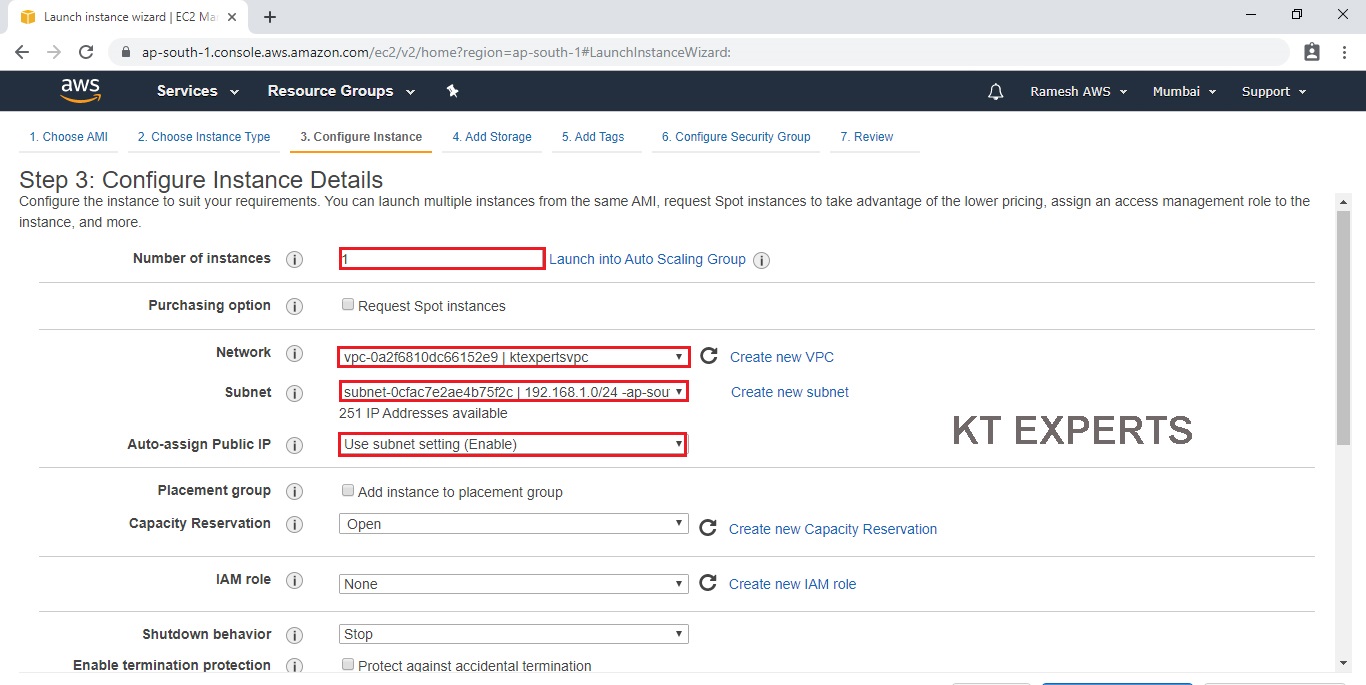
Configure Instance Details
Configure EC2 instance details as per requirements of your environment.
Choose your VPC network.

Choose subnet 1 “192.168.2.0/24 – ap-south-1a (subnet-1)”
![]()
Choose required instances to create web server and auto-assign public IP should be enable for public subnet.
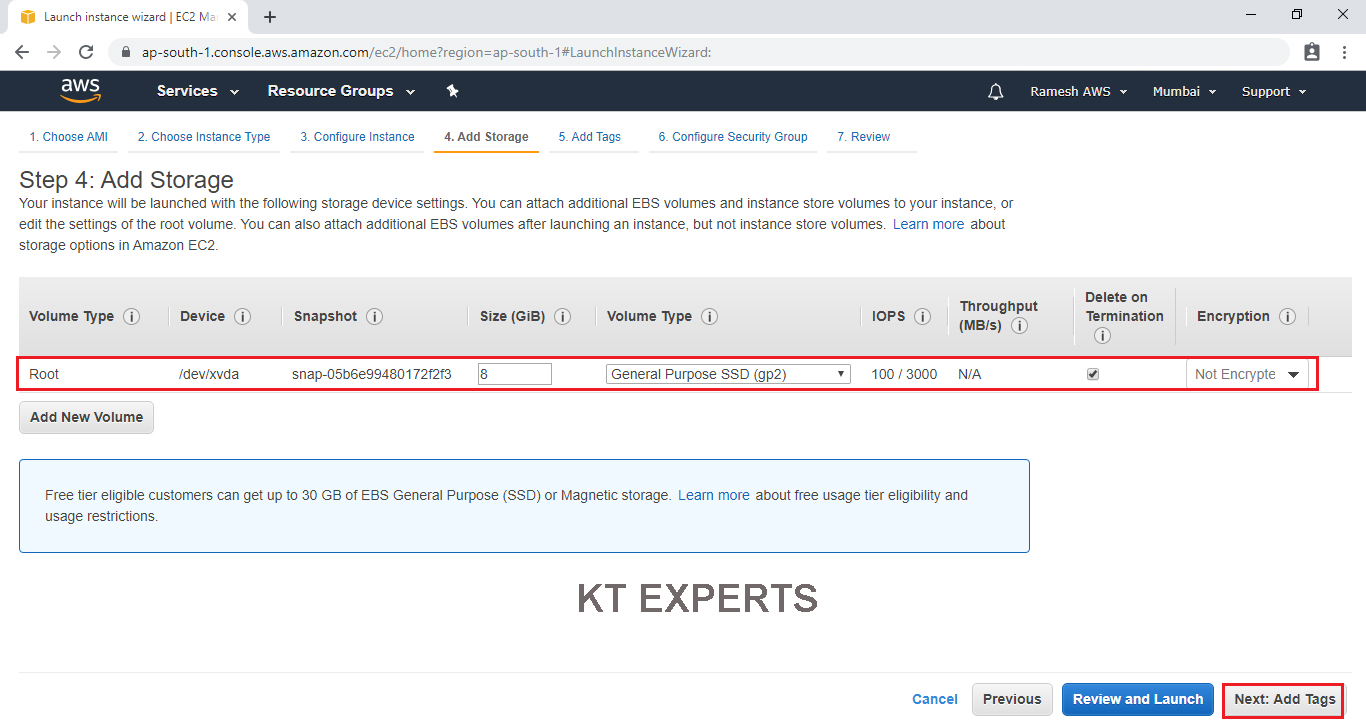
Add Storage
Here, we can see root volume by default and size of 8GB
Add a new volume if required
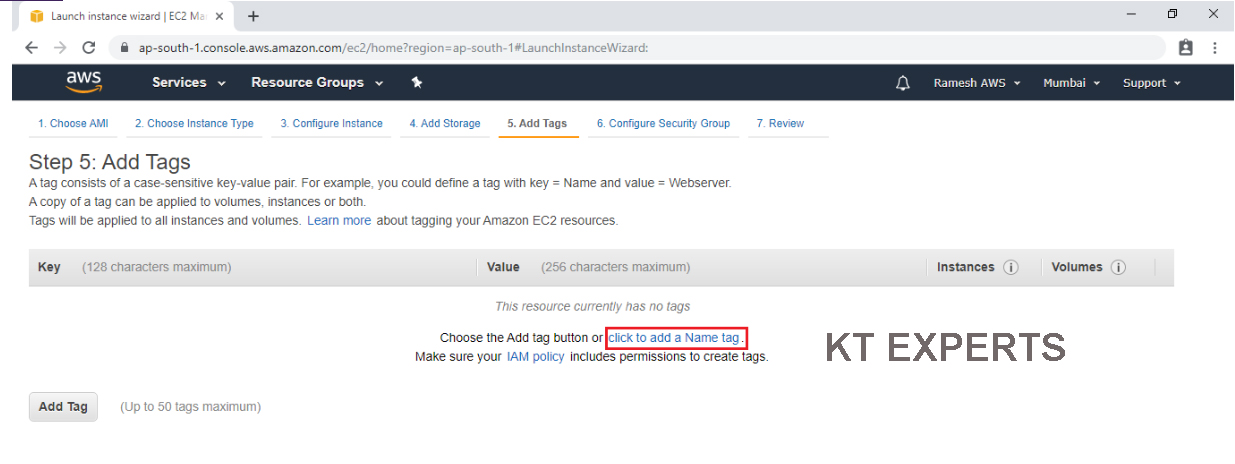
Click on Add Tags.
Tags assist in easier identification and classification of the various instances in your AWS environment.
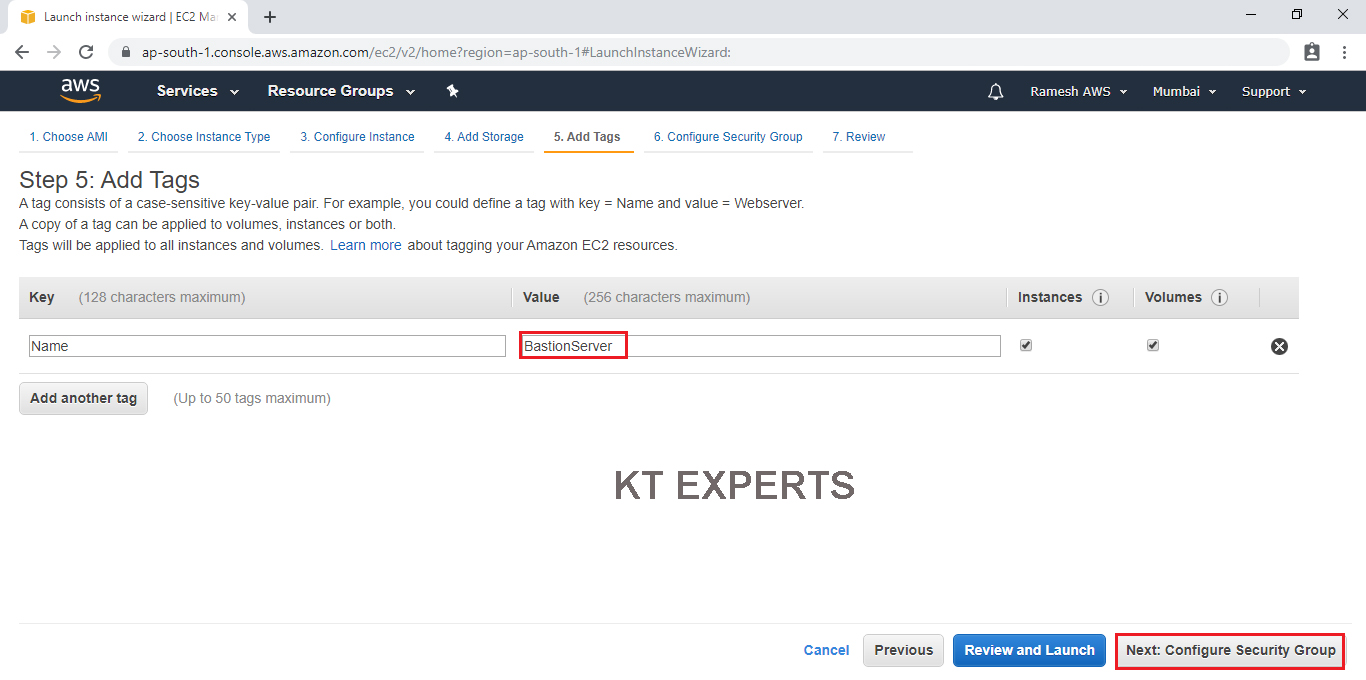
Click on click to add a Name tag to provide name for our server.
Provide the name for the Linux virtual machine for easier understanding and click on Configure Security Groups.
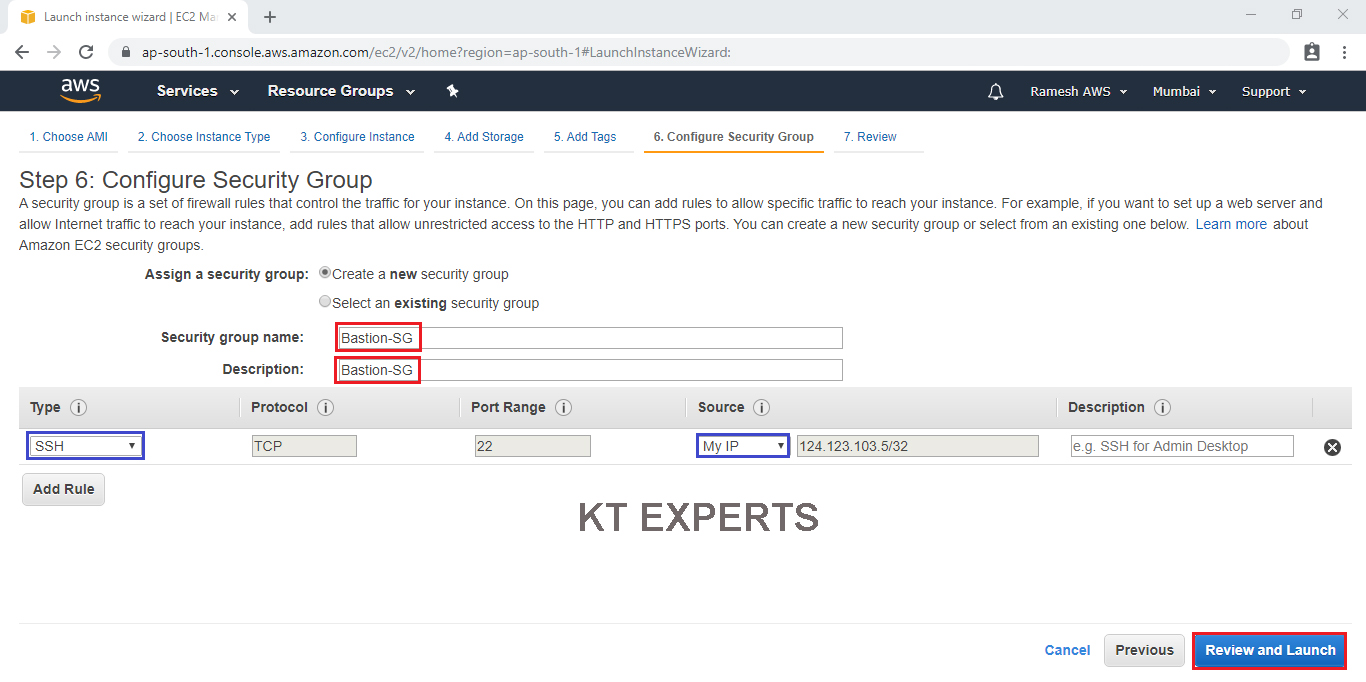
Configure Security Group
A security group allows configuring firewall rules to allow traffic as needed. Only one rule has been added to allow remote connection.
SSH – Secure Shell
click on Review and Launch.
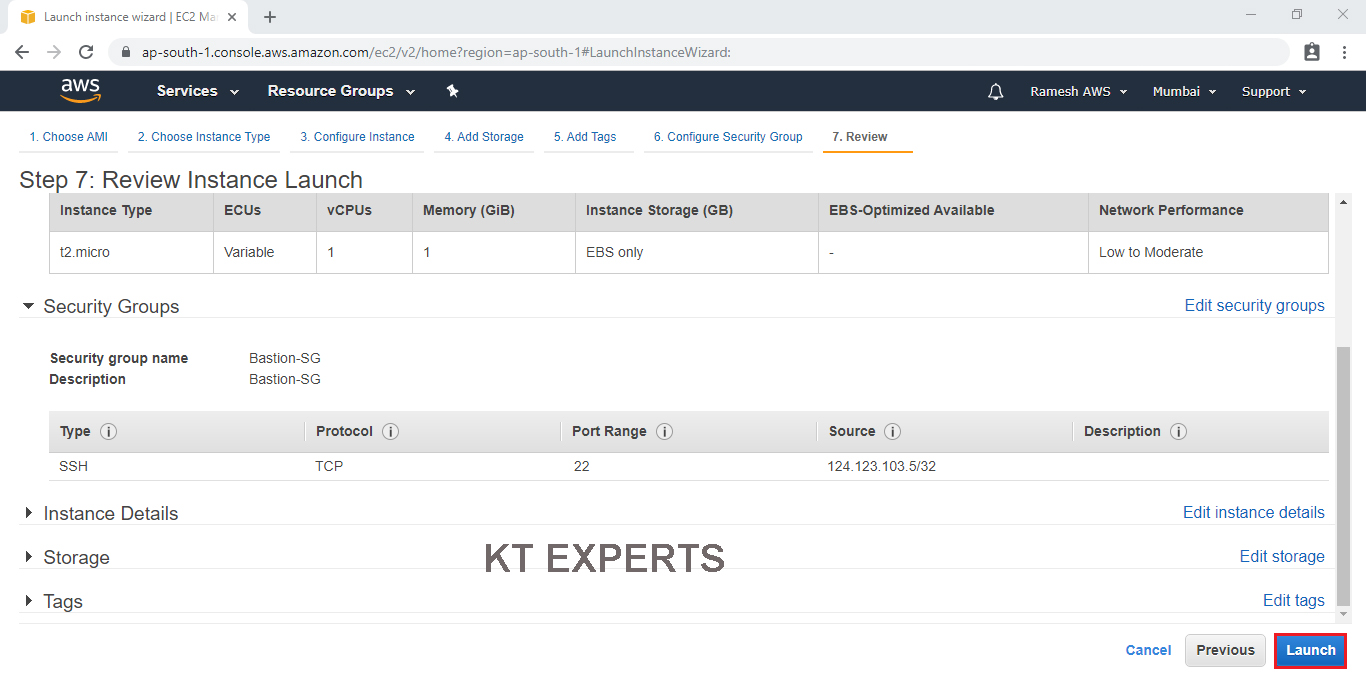
Review Instance Launch
Review and confirm the configuration of the instance. Click on the Edit button on each configuration item to make changes and click on Launch.
Create a Key Pair and Launch Your Instance
To connect to your virtual machine, you need a key pair. A key pair is used to log into your instance and Choose create a new key pair.
Create a new key pair and name it My Linux. Then click on Download Key Pair.
After you have downloaded and saved your key pair, click on Launch Instance to start your Windows Server instance.
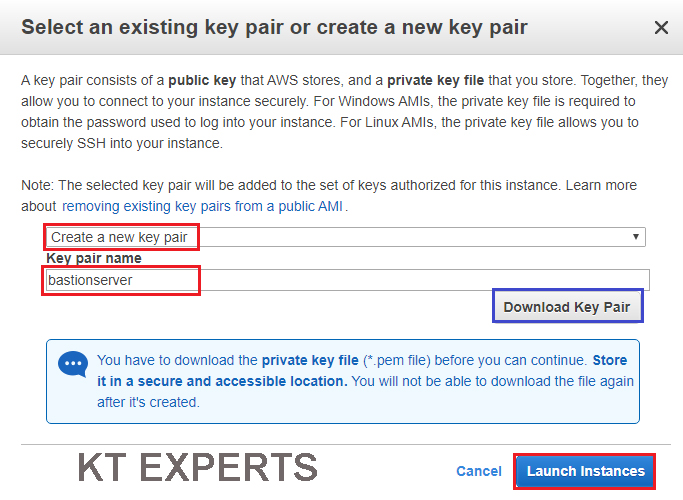
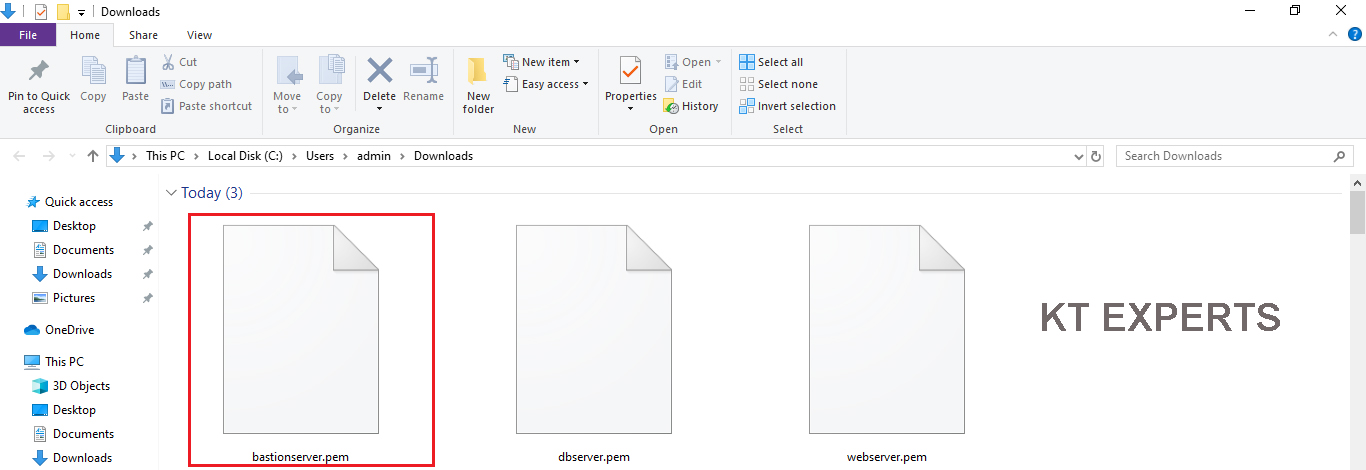
bastionserver.pem be downloaded to your computer — make sure to save this key pair in a safe location on your computer.
click on View Instances to view the instance you have just created and see its status.
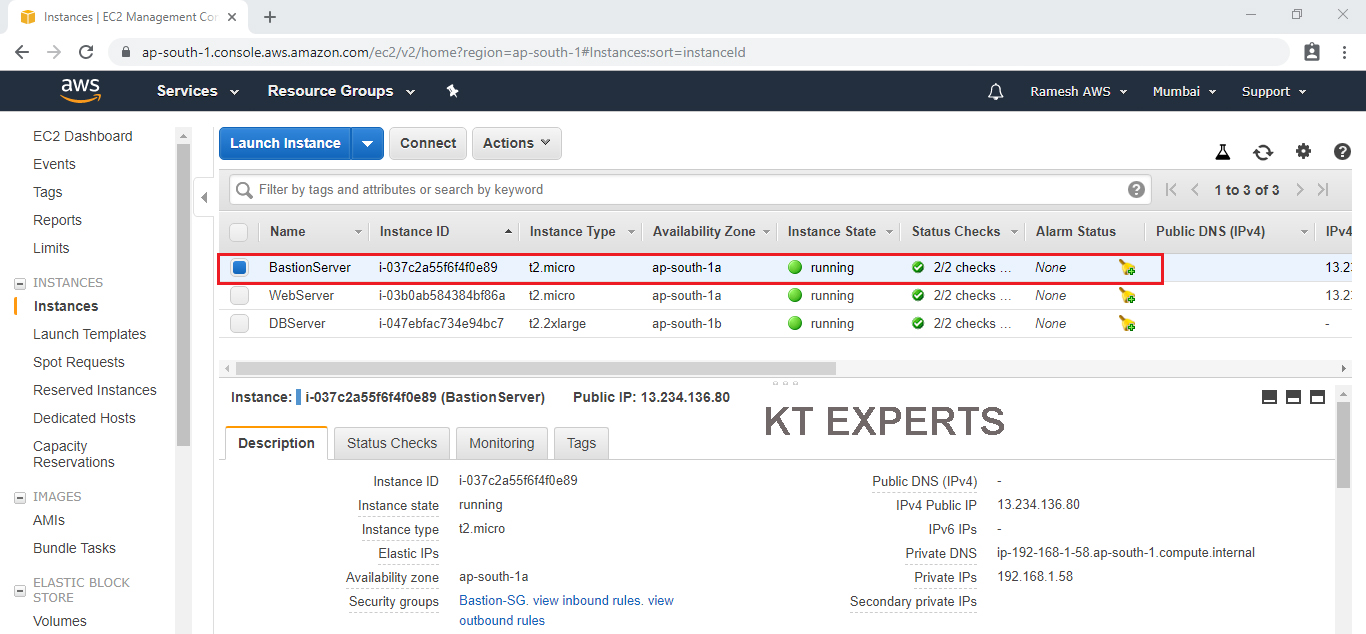
we can see created Bastion Server as shown below.
Add SSH Port and open to BastionServer Private IP to DBServer
Note
If you want to connect to database server you need to add ssh port and open to bastian server private IP.
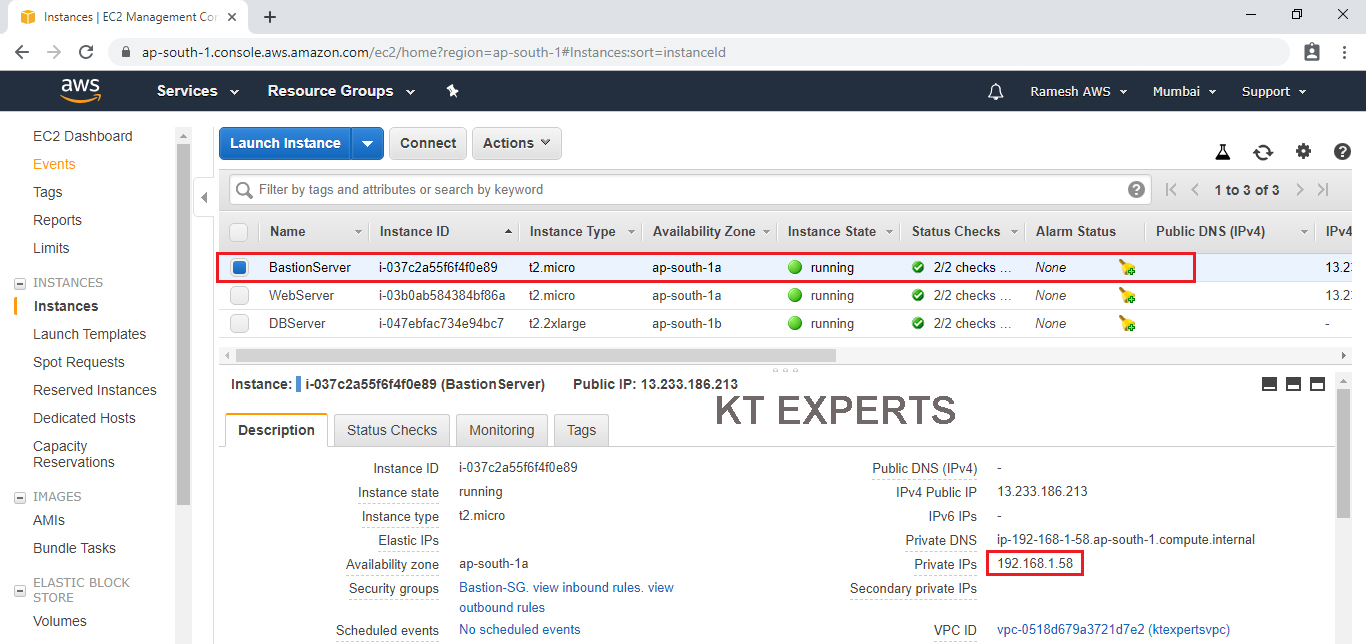
Select BastionServer and Copy BastionServer Private IP.
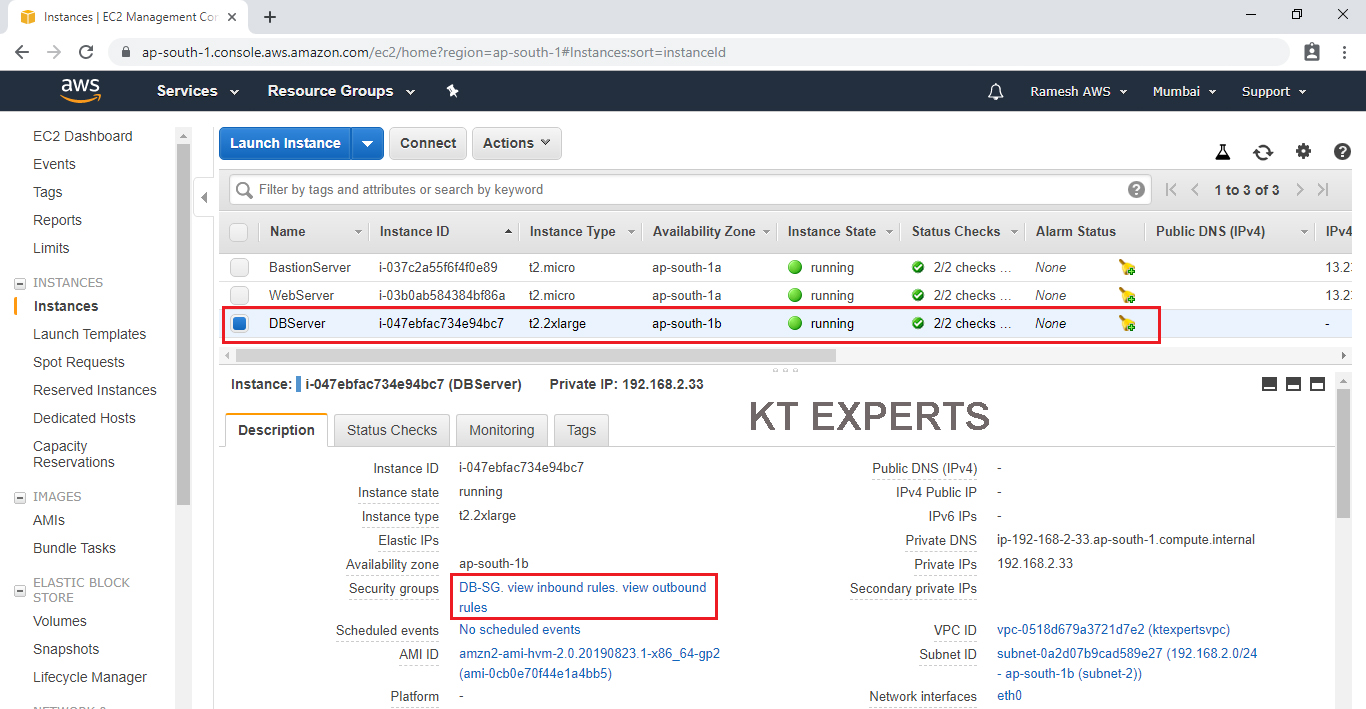
Select DBServer and click on DBServer Security Groups “DB-SG”.
Go to Inbound and click on Edit.
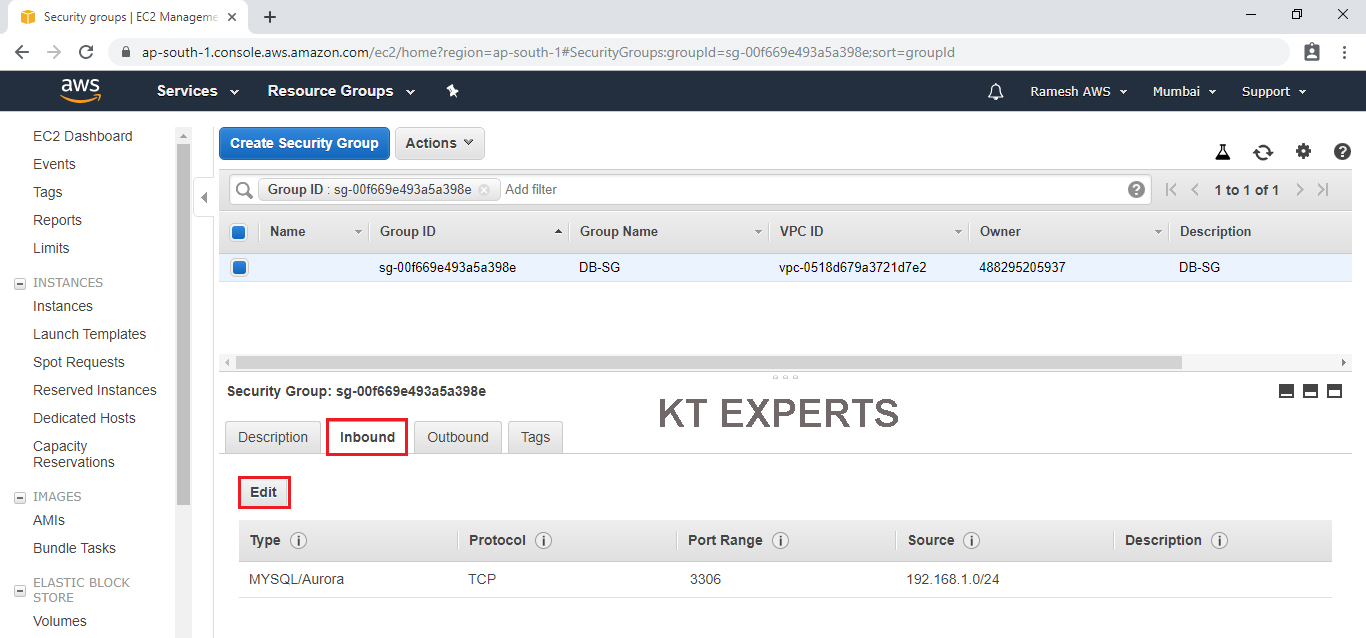
Click on Add Rule.
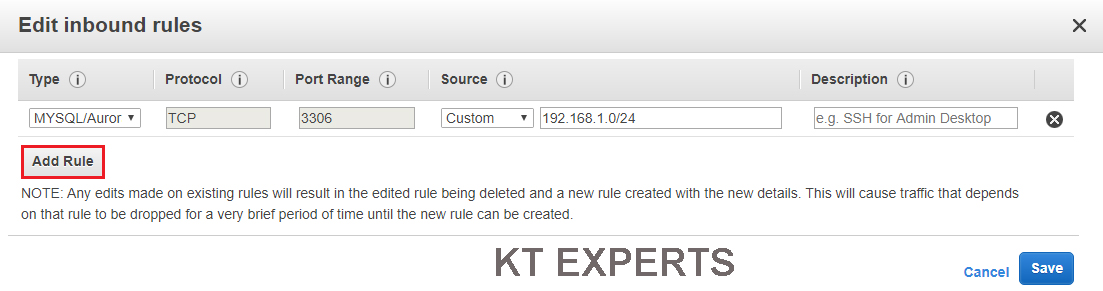
Add SSH Port and open to BastionServer Private IP “192.168.1.58” and we need to give “/32” additionally and click on Save.
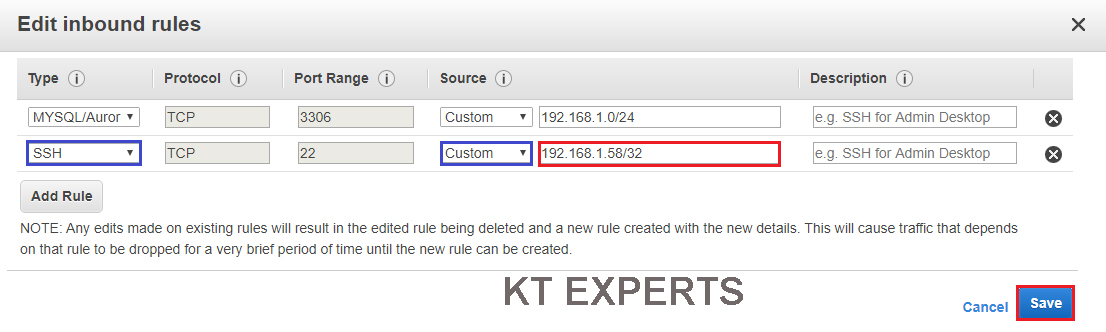
In the DBServer we have 2 ports
- MYSQL/Auror open to Private subnet “192.168.1.0/24”.
- SSH Port open to BastionServer Private IP “192.168.1.58/32”.
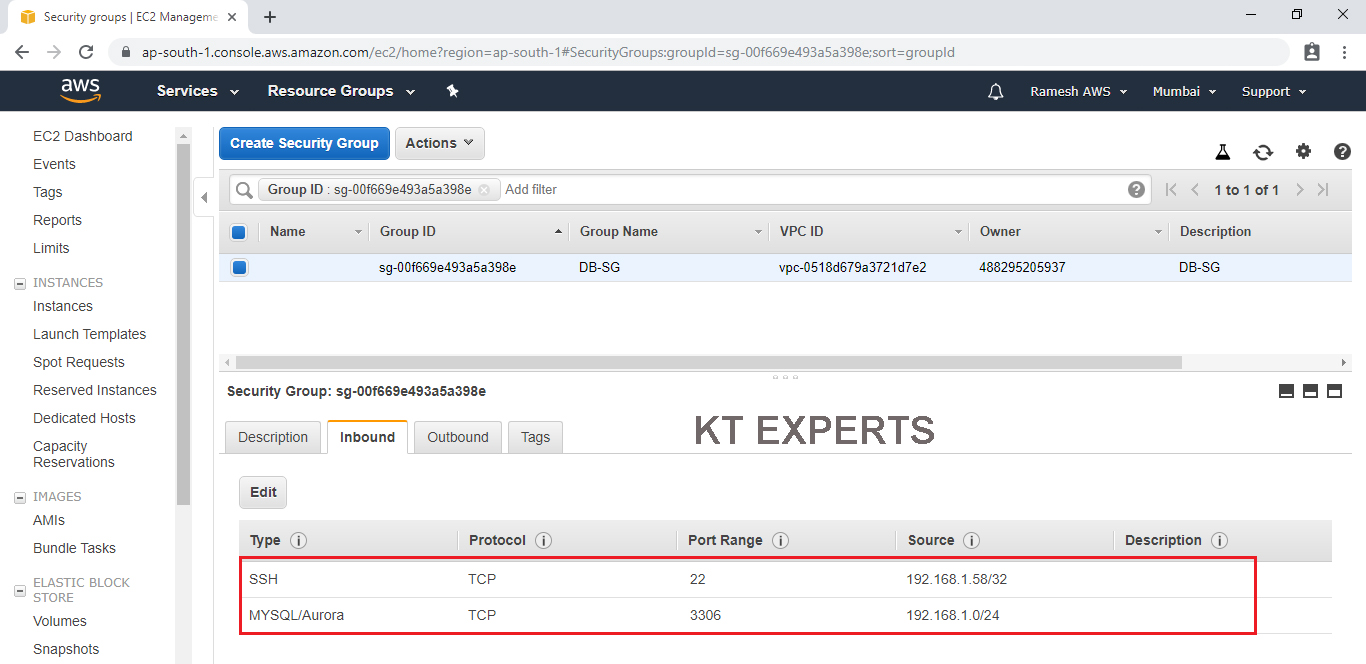
The bastion server has been created successfully.
Note
Bastian Server
SSH – My IP
Database Server
MYSQL – Public Subnet
SSH – Bastian Private IP
In Next article,we will see connect to database server through bastian server.
Thank you for giving your valuable time to read the above information. Please click here to subscribe for further updates
KTEXPERTS is always active on below social media platforms.
Facebook : https://www.facebook.com/ktexperts/
LinkedIn : https://www.linkedin.com/company/ktexperts/
Twitter : https://twitter.com/ktexpertsadmin
YouTube : https://www.youtube.com/c/ktexperts
Instagram : https://www.instagram.com/knowledgesharingplatform


Kiran Kumar7
Very nice and informative collection of articles will go through all of them for sure. Thank you very much for doing this