Creating Docker Container using Docker file:

Use Case of Docker:
▪️ Consider a team working on a Java application. Various groups are involved in the Software Development lifecycle: designing, development, testing, production, deployment, etc.
Step 1: The developer will create an environment that includes a Tomcat server.
Step 2: The tester must test the application after it has been developed. The tester will now create a new Tomcat environment to test the application from scratch.
Step 3: The application will be deployed to the production server when the testing is completed. Again, Tomcat must be installed in the production environment to host the Java application.
▪️ The same Tomcat environment setup is done three times. While various teams are engaged in launching the application
▪️ To overcome this problem, we use Docker.
▪️ In Docker, if we can create an image that contains information about required packages, say Tomcat server, to run the Java application, we can share that image to testing and production environment.
▪️ Then, they can run that image which creates a container where the Java application gets hosted in an isolated environment.
Are containers stateless or stateful?
▪️ By design, containers are lightweight, ephemeral and stateless.
▪️ But organizations have many options when it comes to using containers for stateful applications.
▪️ Orchestrators such as Kubernetes spin up, stop, destroy and re-create containers in response to changing workload requirements.
Bringing State fulness to Containers
▪️ How can a container be stateful, if it doesn’t have persistent storage?
▪️ There are now several well-established vendors that do provide persistent storage for containers, including databases for storing container state information.
▪️ Companies such as Docker, Kubernetes, Flocker, and Mesosphere provide ways of managing both stateless and stateful containers using persistently stored data.
▪️ Most of the key vendors in the container industry appear to see statefulness as a major part of the container landscape, and one that is here to stay, rather than being a vestige of pre-container development style.
▪️ For most developers, the question is not whether to use stateful containers, but when they should be used.
When should you use stateful containers?
▪️ When should you use stateful containers, and when are stateless containers better?
▪️ Not surprisingly, the answer depends to a large extent on the kind of software that you are deploying, and what it needs to do.
▪️ Does it need to save information about its state, or could it achieve the same results if it were stateless?
▪️ For applications which were designed (or have been refactored) for containers, you can usually ask this question at the microservice level.
▪️ It may turn out that only a handful of containers actually need to store state data, allowing the rest to be run statelessly.
Types of Containers in Docker
There are two types of containers in Docker:
Stateless Containers:
▪️ These types of containers do not persist data, i.e., their data is deleted as soon as they are stopped.
▪️ These containers are typically used to run stateless applications such as web servers, reverse proxies, and load balancers.
Stateful Containers:
▪️ These types of containers persist data and are typically used to run stateful applications such as databases, message queues, and file servers.
▪️ The data stored inside the container is persistent even if the container is stopped or recreated.
Additionally, we have – Ephemeral Containers:
▪️ These types of containers are used for short-lived tasks, such as running one-off commands, performing CI/CD pipeline tasks, etc. They are typically used for testing and debugging purposes.
▪️ They are created and destroyed very quickly and are not meant to be long-lived.
▪️ It’s worth noting that you can use both stateless and stateful containers together to create a complete application.
▪️ For example, you might use a stateless container to run a web server and a stateful container to run a database, and use the network to connect them.
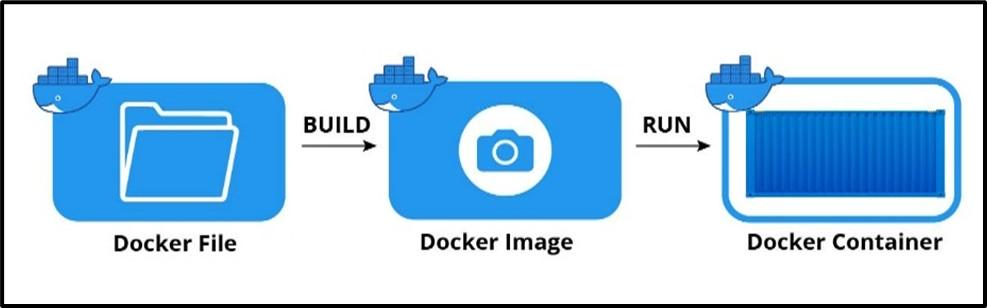
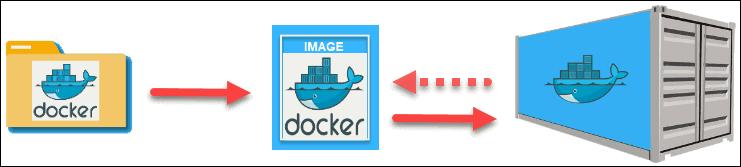
Creating Container from Docker file
From Docker file → to Image → to Container
▪️ It all starts with a script, set of instructions that define how to build a specific Docker image.
▪️ This script is called a Dockerfile.
▪️ The file automatically executes the outlined commands and creates a Docker image.
▪️ The command for creating an image from a Dockerfile is docker build.
▪️ The image is then used as a template (or base), which a developer can copy and use it to run an application.
▪️ The application needs an isolated environment in which to run – a container.
▪️ This environment is not just a virtual “space”. It entirely relies on the image that created it.
▪️ The source code, files, dependencies, and binary libraries, which are all found in the Docker image, are the ones that make up a container.
▪️ To create a container layer from an image, use the command docker create.
▪️ Finally, after you have launched a container from an existing image, you start its service and run the application.
Example:
Creating an App image/container from Docker file
Step 1: Install the Docker software.
▪️ The first step is to get Docker set up on your machine.
▪️ For the purposes of this tutorial, we’ll be using Docker Desktop on Windows.
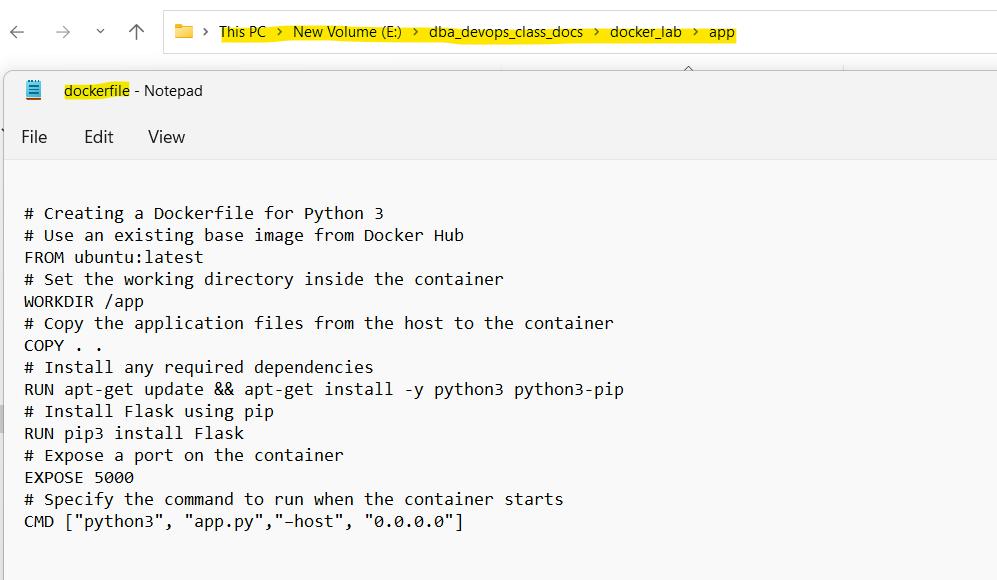
Step 2: Create the Docker file – with file name as docker file.
▪️ Creating a Docker file is as simple as creating a text file in your text editor with all the commands you would call in the command line to assemble an image.
▪️ You can name this file whatever you want, but we’ll be using the name “docker file” for simplicity.
▪️ Create a Docker file in the ‘/app’ directory of your project folder.
▪️ In docker file, we set the working directory to ‘/app’ inside the container.
▪️ Then, we copy the application files from the host machine to the container’s ‘/app’ directory.
▪️ Next, we use the ‘RUN’ instruction to update the package manager and install Python 3 and Flask inside the container. This ensures that the necessary dependencies are installed.
▪️ Finally, we use the ‘CMD’ instruction to specify the command that should be executed when the container starts.
▪️ In this case, it runs the ‘app.py’ Python script using the Python 3 interpreter.
▪️ This Docker file can be used to build a Docker image, which is a template for creating containers.
▪️ When the image is built and a container is created from it, the container will have the specified dependencies and will run the specified command when started.
//Docker file content //
|
1 2 3 4 5 6 7 8 9 10 11 12 13 14 15 |
# Creating a Docker file for Python 3 # Use an existing base image from Docker Hub FROM ubuntu: latest # Set the working directory inside the container WORKDIR /app # Copy the application files from the host to the container COPY... # Install any required dependencies RUN apt-get update && apt-get install -y python3 python3-pip # Install Flask using pip RUN pip3 install Flask. # Expose a port on the container EXPOSE 5000 # Specify the command to run when the container starts CMD ["python3", "app.py","–host", "0.0.0.0"] |
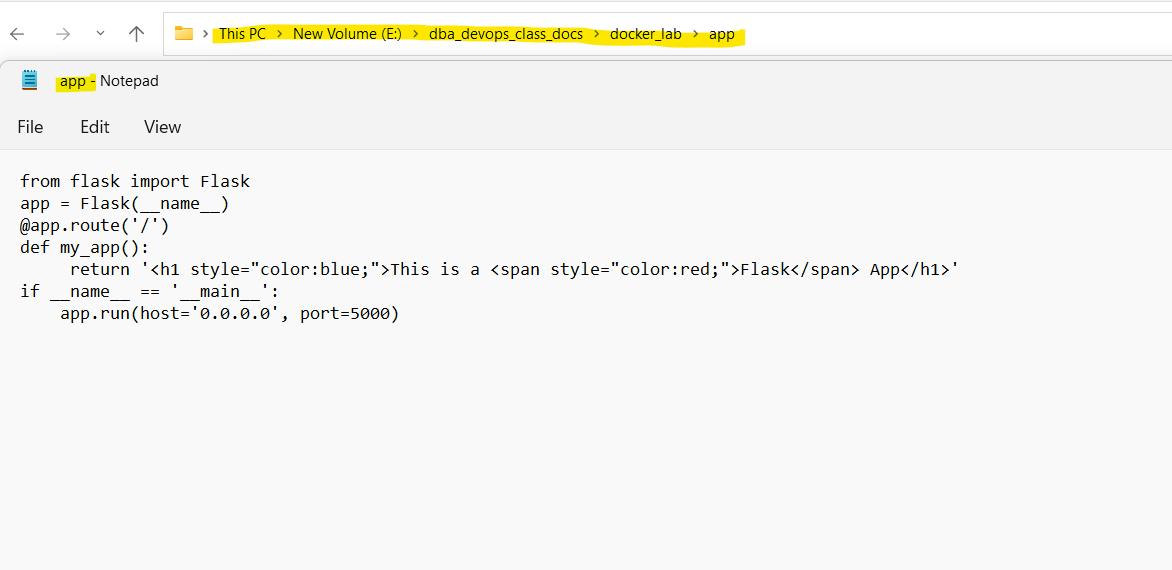
Step 3: Create the app file app.py – with flask app code.
▪️ In order for this tutorial to work, we’ll also create a simple Flask app in an ‘app.py’ file within the same directory:
▪️ app.py’ file has the flask sample application code
// App file content //
|
1 2 3 4 5 6 7 |
from flask import Flask app = Flask(__name__) @app.route(‘/’) def my_app(): return ‘This is a Flask App’ if __name__ == ‘__main__’: app.run(host=’0.0.0.0′, port=5000) |
In this example, we start with an Ubuntu base image pulled from Docker Hub.
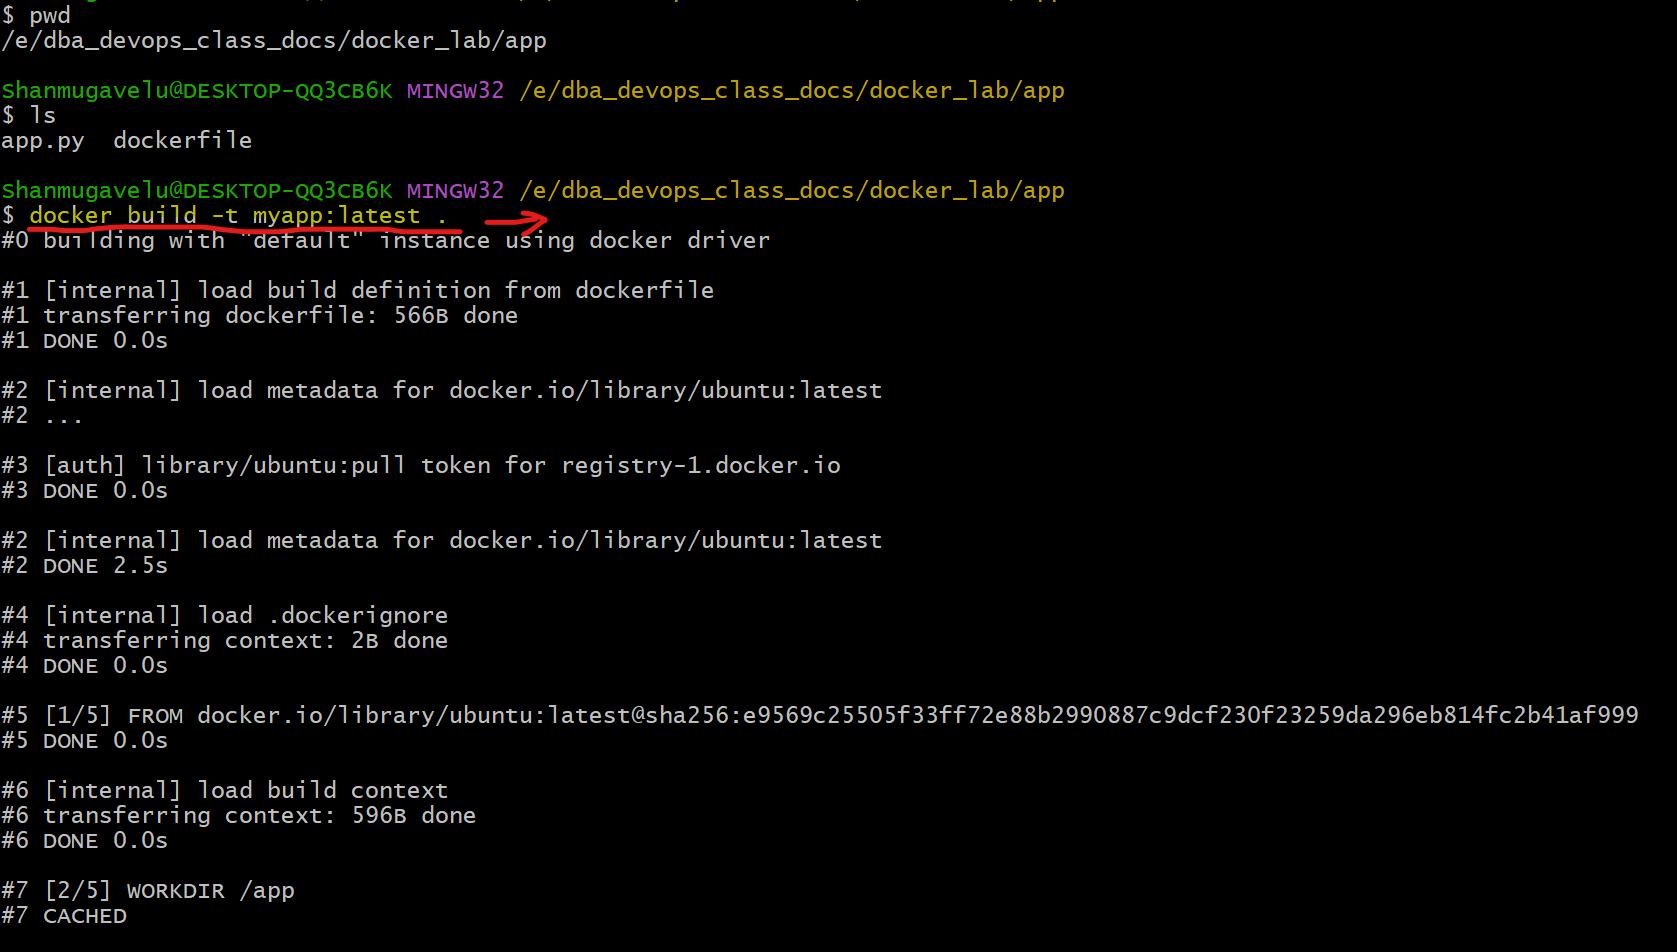
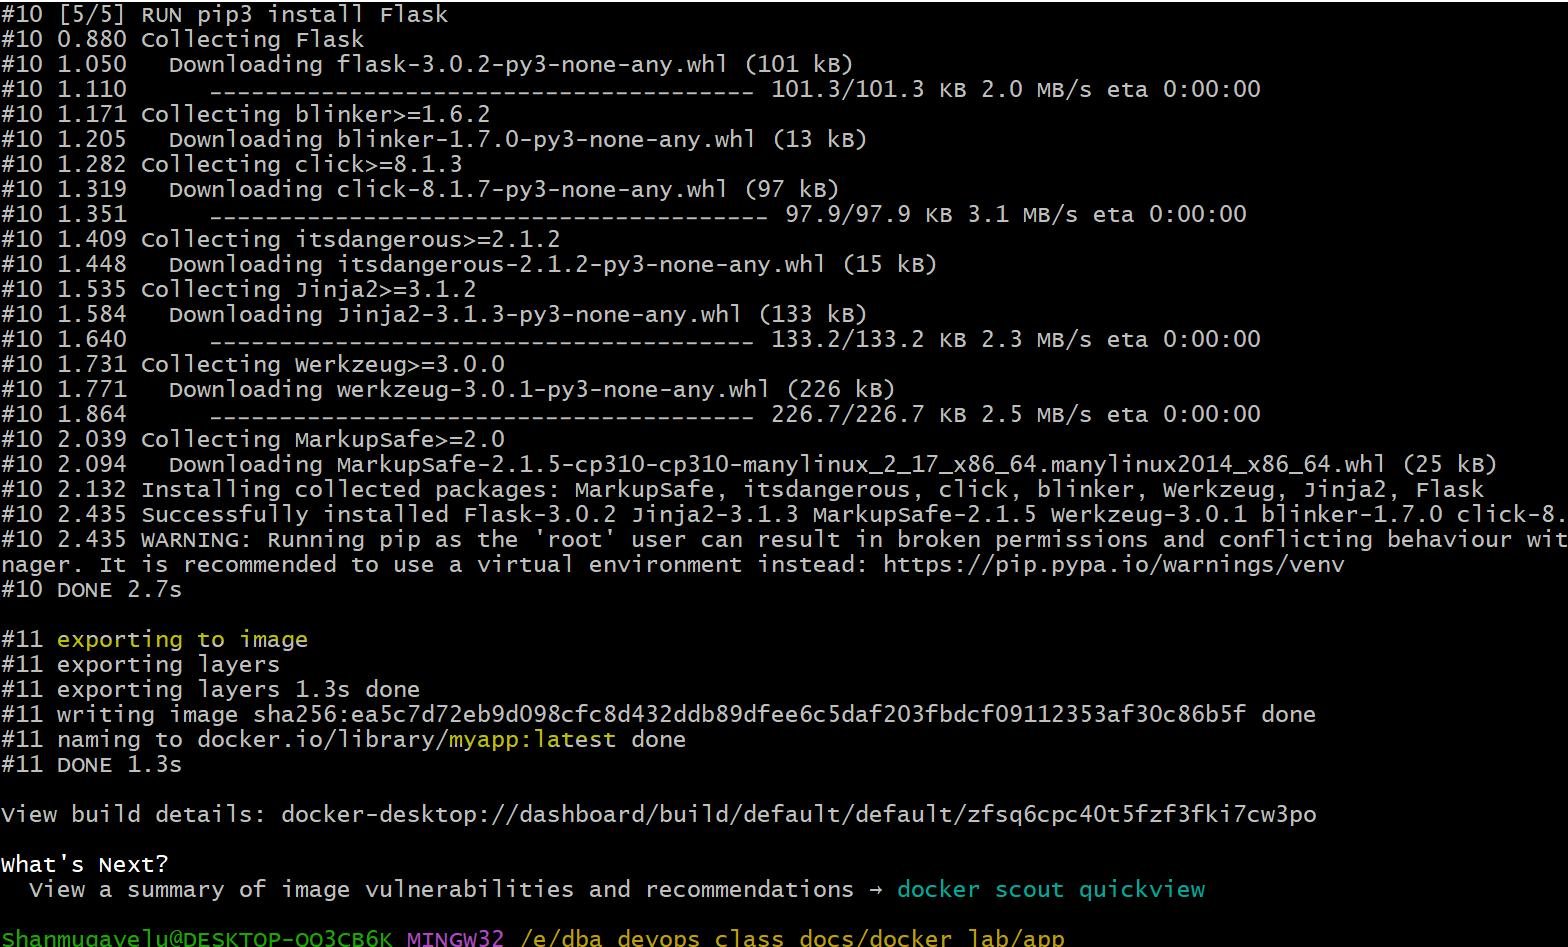
Step 4: Build the docker image.
▪️ With Docker file in hand, you can build the Docker image using the ‘docker build’ command while providing a name for the image with the ‘t’ flag (e.g., ‘myapp:latest’).
In the terminal type:
docker build -t myapp:latest . |
(Don’t forget the ‘.’ at the end)

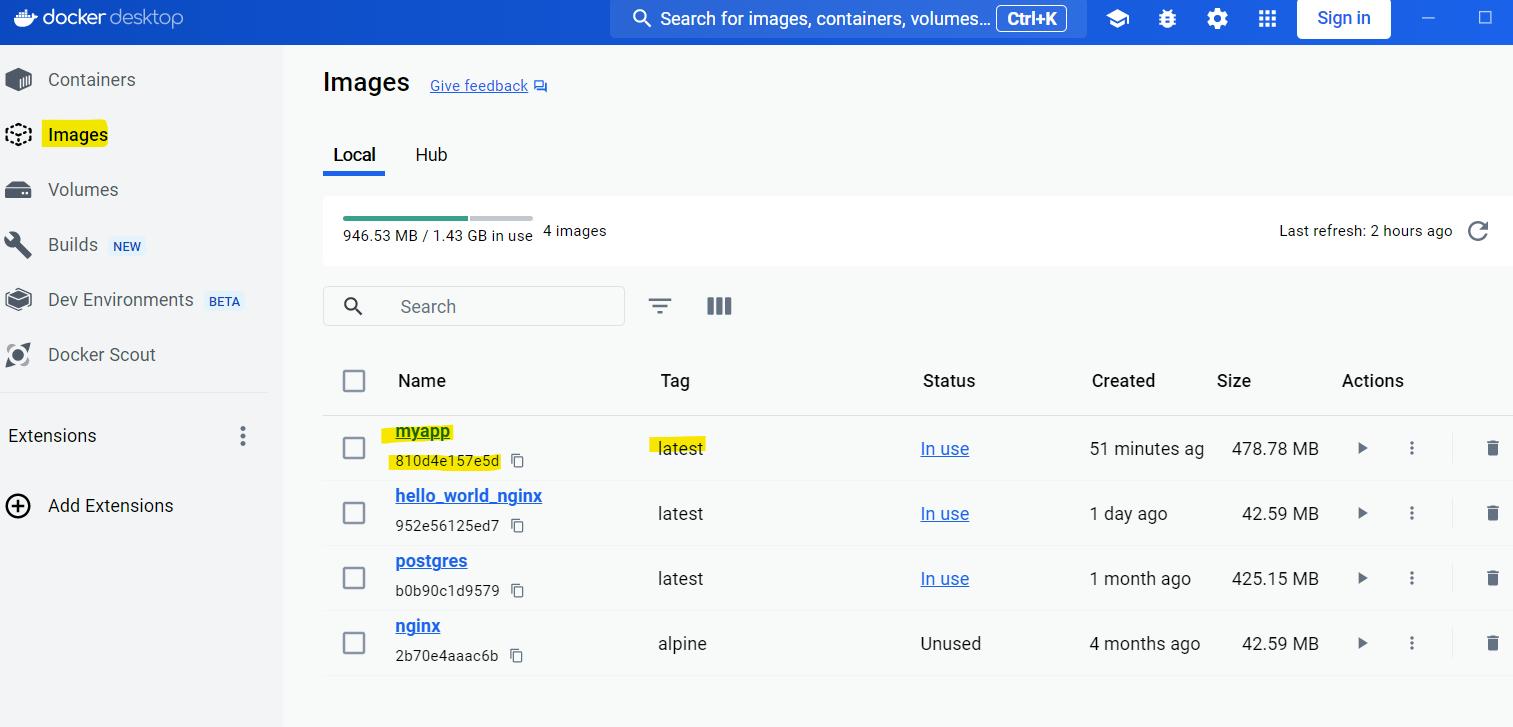
Step 5: Verify the docker image which is built.
▪️ You can verify that an image has been created by clicking the Images tab in Docker Desktop (or) from the command line
▪️ Each image can be identified by a name, a tag, and an image ID.

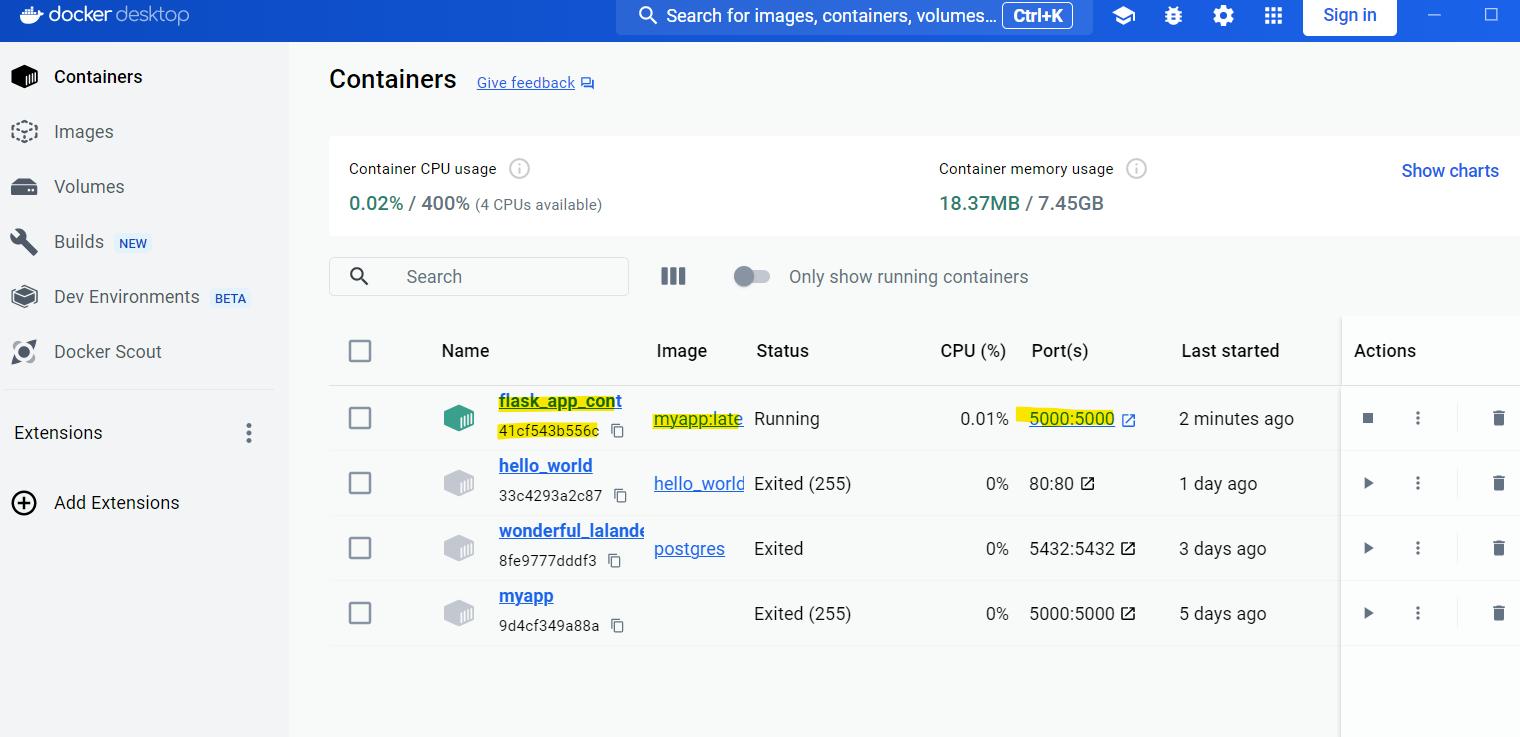
Step 6: Create/run the container from Docker image:
▪️ It’s time to create and run a container off of that image.
Type the following command into the terminal.
docker run -p 5000:5000 –name flask_app_cont -d myapp:latest▪️ This command will create and run the container flask_app_cont▪️ The ‘–name’ tag tells Docker to create and run a container named‘flask_app_cont’ based off of the image ‘myapp:latest’▪️ You now have an Ubuntu environment running the ‘app.py’file specified within the Dockerfile and Python 3. |
 |
Step 7: View the running container:
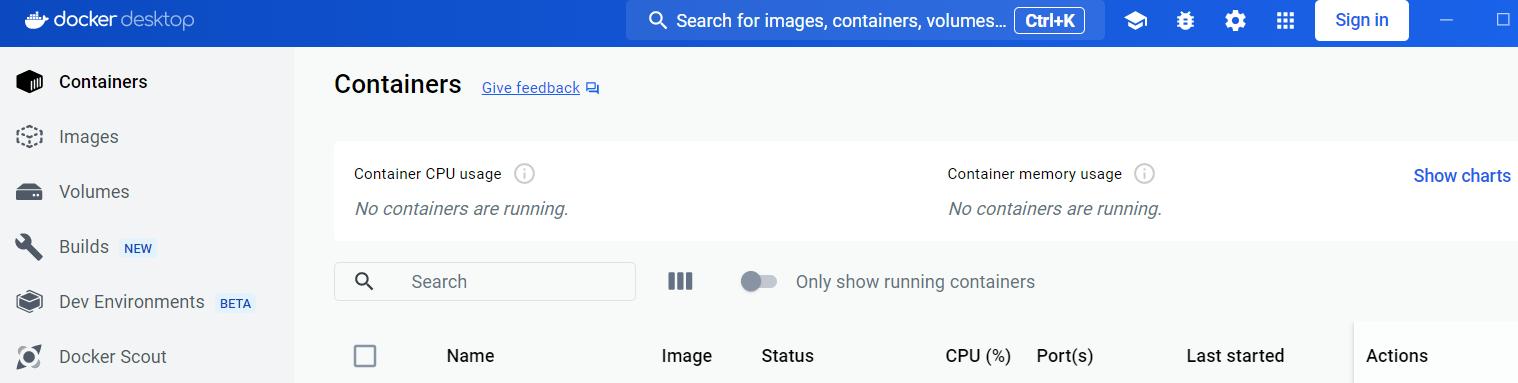
▪️ You can view your newly created active container in Docker Desktop
▪️ You can also view from command line.

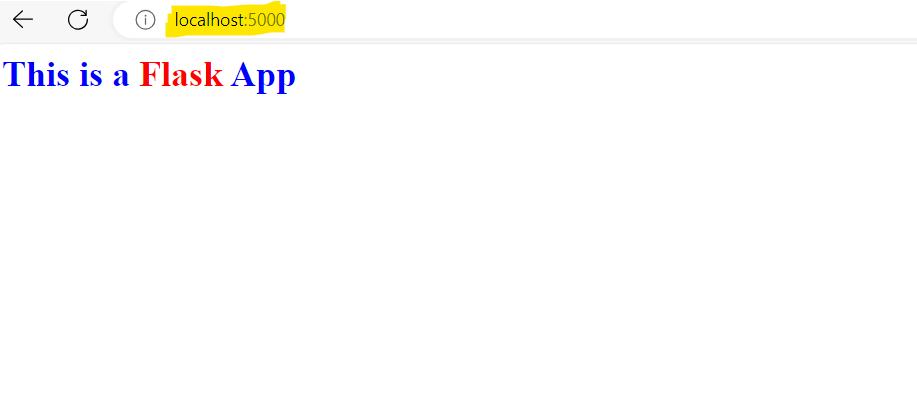
Step 8: Access/Check the app from Browser:
▪️ If you navigate to http://localhost:5000in the browser
▪️ It will allow you to see your app printing the text “This is a Flask App.”
Author : Venkat Vinod Kumar Siram
LinkedIn : https://www.linkedin.com/in/vinodsiram/
Assisted by Shanmugavel
Thank you for giving your valuable time to read the above information. Please click here to subscribe for further updates.
KTExperts is always active on social media platforms.
Facebook : https://www.facebook.com/ktexperts
LinkedIn : https://www.linkedin.com/company/ktexperts/
Twitter : https://twitter.com/ktexpertsadmin
YouTube : https://www.youtube.com/c/ktexperts
Instagram : https://www.instagram.com/knowledgesharingplatform
Note: Please test scripts in Non Prod before trying in Production.