Creation of Virtual Network Peering in Azure
What is VNet Peering?
VNet peering (Virtual Network peering) in Azure is used for connecting two or virtual networks for resource sharing in one region to another region. Virtual machines in the Vnet peering can communicate with each other.
VNet peering Architecture.
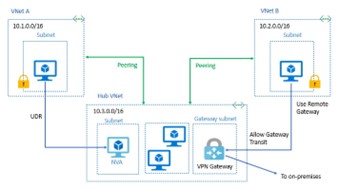
Credit-Microsoft
Key Benefits of VNet peering:
• Network traffic in peering networks will be private.
• No downtime issues to resources in the Azure virtual network when created the peering.
• It establishes low latency, high bandwidth connection between different resources in one virtual network to different virtual networks.
Creation of Virtual Network peering in Azure:
In order to peer Virtual network, it requires two virtual networks, and two 2 virtual machines are required to communicate with each other.
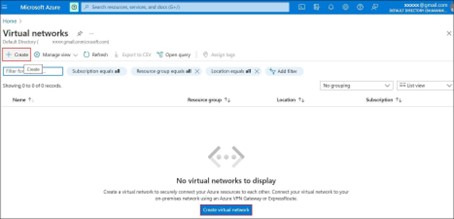
Step-1: Login into the Azure portal and search for virtual networks, click on the Virtual Networks and create one Virtual network.

Step-2: For the virtual network peering, here we are creating two virtual networks simultaneously by opening in the new tab named vnet1 and vnet2.
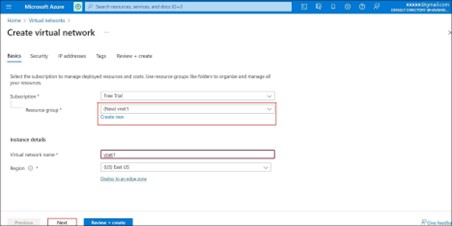
Step-3: In the virtual network tab, go to Resource group and create new network named as vnet1, in the instance details virtual network name, enter the name as vnet, then click on next.
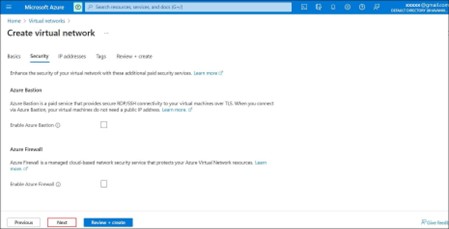
Step-4: In the next tab security, you will see the Azure Bastion enable button and Azure Firewall enable button.
Azure Bastion: Microsoft Azure Bastion is a service it provides secure RDP/SSH connectivity to your virtual machines directly in the Azure portal over the SSL.
Azure Firewall: Microsoft Azure Firewall provide best Firewall protection for your work overloads in Azure.
Here we are leaving unselected. Then click on next tab.
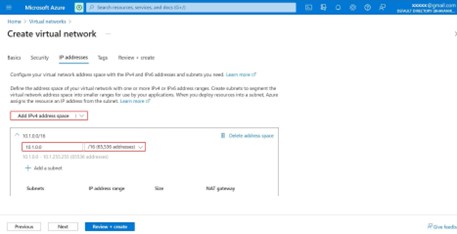
Step-5: In the next tab you will see the IP addresses, by default it will show the 10.0.0.0/16 IP address.

Step-6: In the next tab click on Add IPv4 address space, now you can change from default 10.0.0.0/16 to any number based on your requirement. like 10.1.0.0/16 for the first vnet1 IP address.
Step-7: After that go to add subnet, you will see the default subnet details.
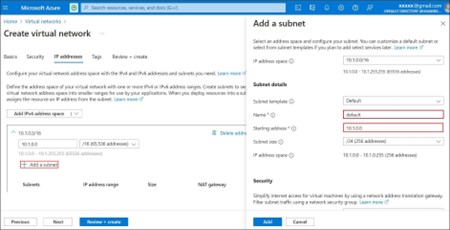
Step-8: Now add the name from default to unique name and for starting address change the value from default 10.0.0. To 10.1.1.0 and subnet size should be prefix 24.
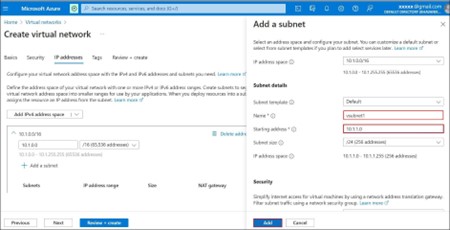
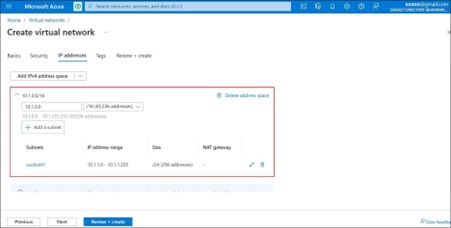
Step-9: In this step you will see both IP address and subnet has been updated.
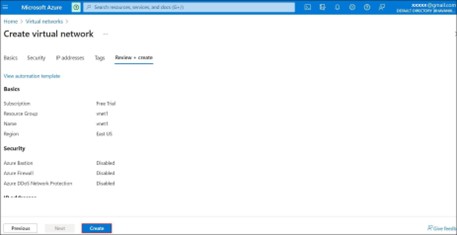
Step-10: Now Go to Tags – Tags are the metadata elements for the Azure resources add the
name and value if necessary or otherwise leave it default.
Step-11: Next click on Review and create.
Step-12: In the next tab you will see once the deployment is complete. Virtual network has been created for vnet1.
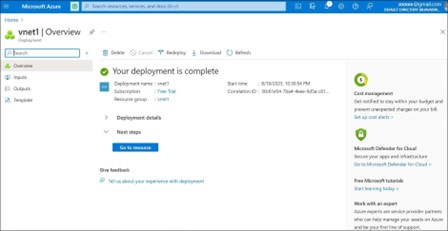
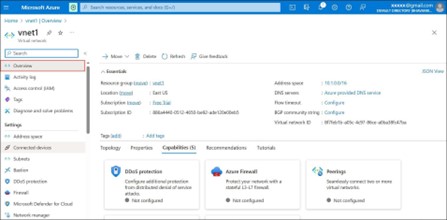
Step-13: Once the virtual network (vnet1) is created, click on vnet1 in the overview you will see the details of virtual network that you have created.
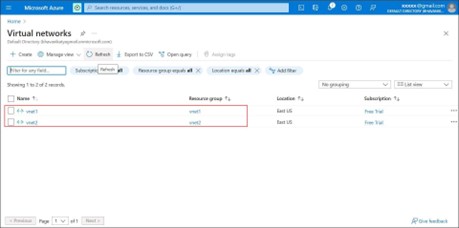
Step-14: Once you created first virtual network vnet1, create the 2nd virtual network (vnet2) like same process above. After the creation of 2nd virtual network (vnet2), You can see two virtual networks vnet1 and vnet2.
Step-15: Select first virtual network (vnet1), in that go to settings and select Peering’s, in that click on add tab.
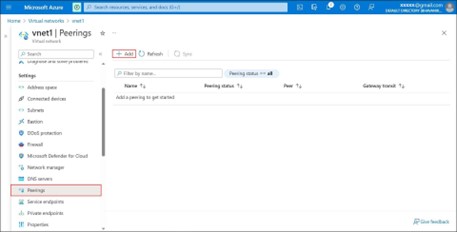
Step-16: You will see the Add peering tab.
Give Peering link name as pair vm1tovm2, as we are connecting to virtual networks (vnet1 and vnet2) and 2 virtual machines (vm1 and vm2), you will see options below.
Traffic to remote network: It will allow the communication between two networks.it is chosen by default.
Traffic forwarded to remote network: It will allow the traffic to flow to the peered virtual network.
Virtual network or gateway server: It allows traffic from virtual network to flow through VPN network gateway in the peered virtual network.
In the Remote virtual network Peering link name give the name as vm2 to vm1 as we are communicating from virtual machines vm1 to vm2 or vm2 to vm1.
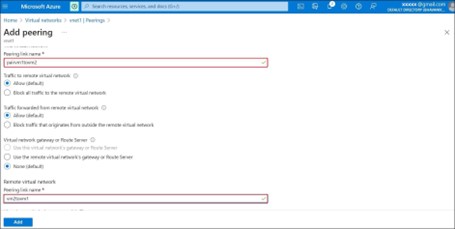
Step-17: By scrolling down, you will see the virtual network which is remote select 2nd virtual network, here you are selecting vnet2. Then click on add button.

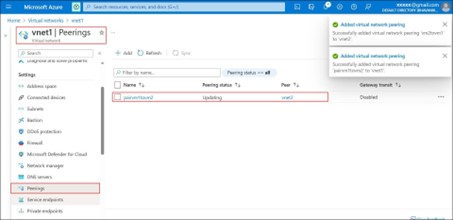
Step-18: In the next page of virtual network vnet1, go to settings and select Peering’s. Here it will show pairvm1tovm2, this indicates virtual network vnet1 is peered to vnet2.
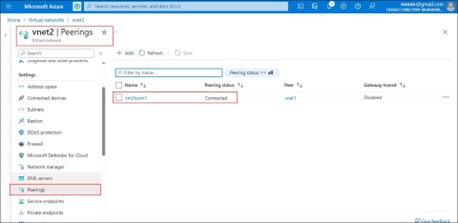
Step-19: Similarly go to virtual network2 vnet2, go to settings and select Peering’s. Here it will show vm2tovm1, this indicates virtual network2 is peered to virtual network1.
Author : Chandra Shekar |
LinkedIn : https://www.linkedin.com/in/chandra-sekhar-4488435/
Thank you for giving your valuable time to read the above information. Please click here to subscribe for further updates
KTExperts is always active on social media platforms.
Facebook : https://www.facebook.com/ktexperts/
LinkedIn : https://www.linkedin.com/company/ktexperts/
Twitter : https://twitter.com/ktexpertsadmin
YouTube : https://www.youtube.com/c/ktexperts
Instagram : https://www.instagram.com/knowledgesharingplatform
Note: Please test scripts in Non Prod before trying in Production.