Dear Readers,
In this article, we will see the following Realtime Usecase.
Realtime Usecase :
My Client wants to launch their Websites publicly along with its Database Servers at the back end.
Establish network connectivity between Web Servers & Database Servers.
Note: No need of Public Access for Database Servers Ensure Only Websites can access from Public Network.
Steps to Follow :
- Logging to AWS Account.
- Create VPC in Mumbai Region
- Create VPC in Singapore Region
- Create VPC Peering Connection in Mumbai Region
- Accept VPC Peering Connection in Singapore Region
- Add Peering Connection Routes for VPC1 (Mumbai Region)
- Add Peering Connection Routes for VPC 2 (Singapore Region)
- Go inside the Web Server of VPC 1 (Mumbai Region) and Connect to Database Server of VPC 2 (Singapore Region)
- Search web content of Webserver (Mumbai Region) in Database Server (Singapore Region)
- Go inside the Web Server of VPC 2 (Singapore Region) and Connect to Database Server of VPC 1 (Mumbai Region)
- Search web content of Webserver (Mumbai Region) in Database Server (Singapore Region)
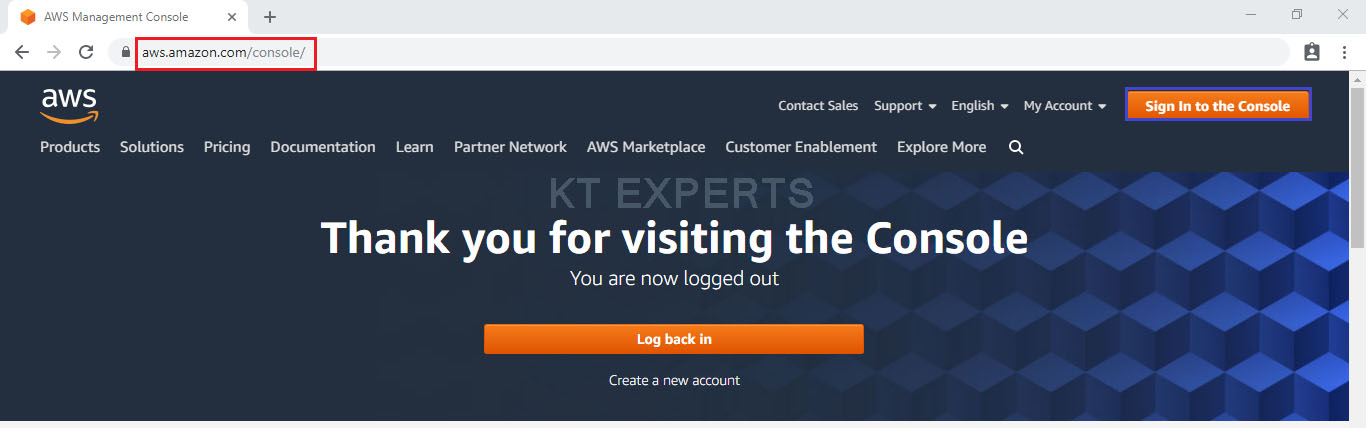
1. Logging to AWS Account
First, we need to AWS Console page by using below link.
https://aws.amazon.com/console/
Click on sign in to Console button.
Logging to aws account
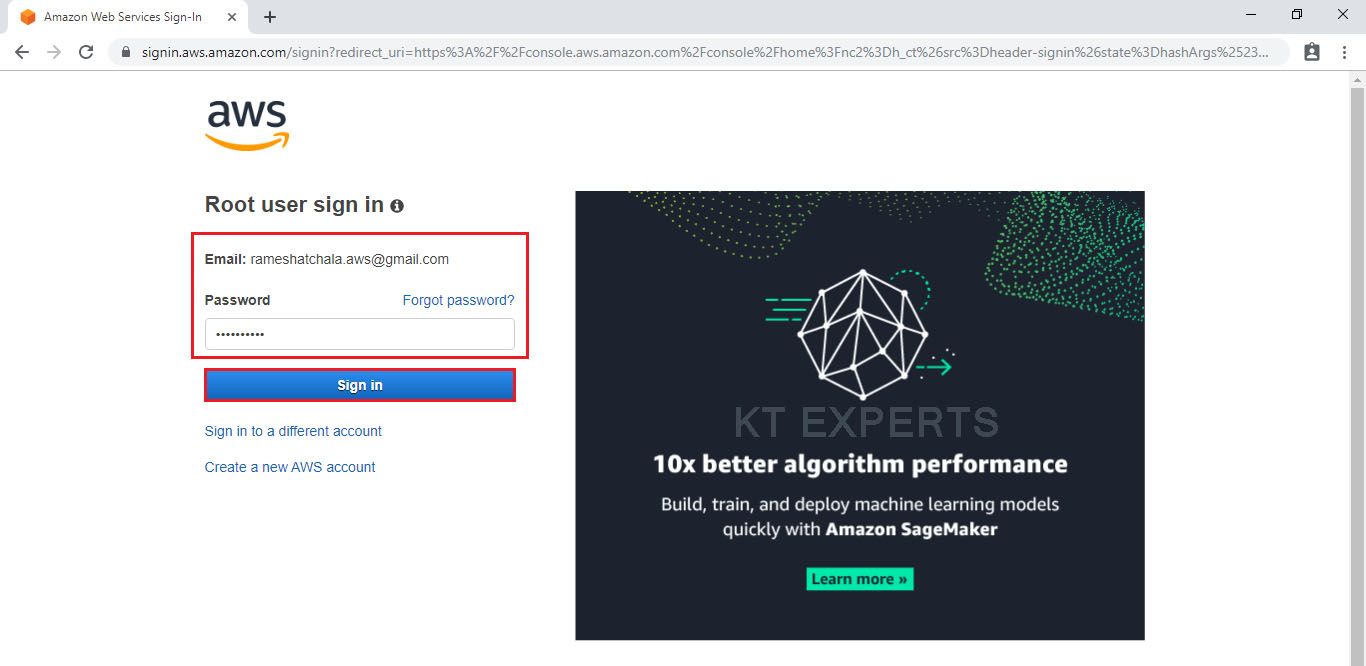
Provide username and password then click on sign in.
Enter to AWS Management Console
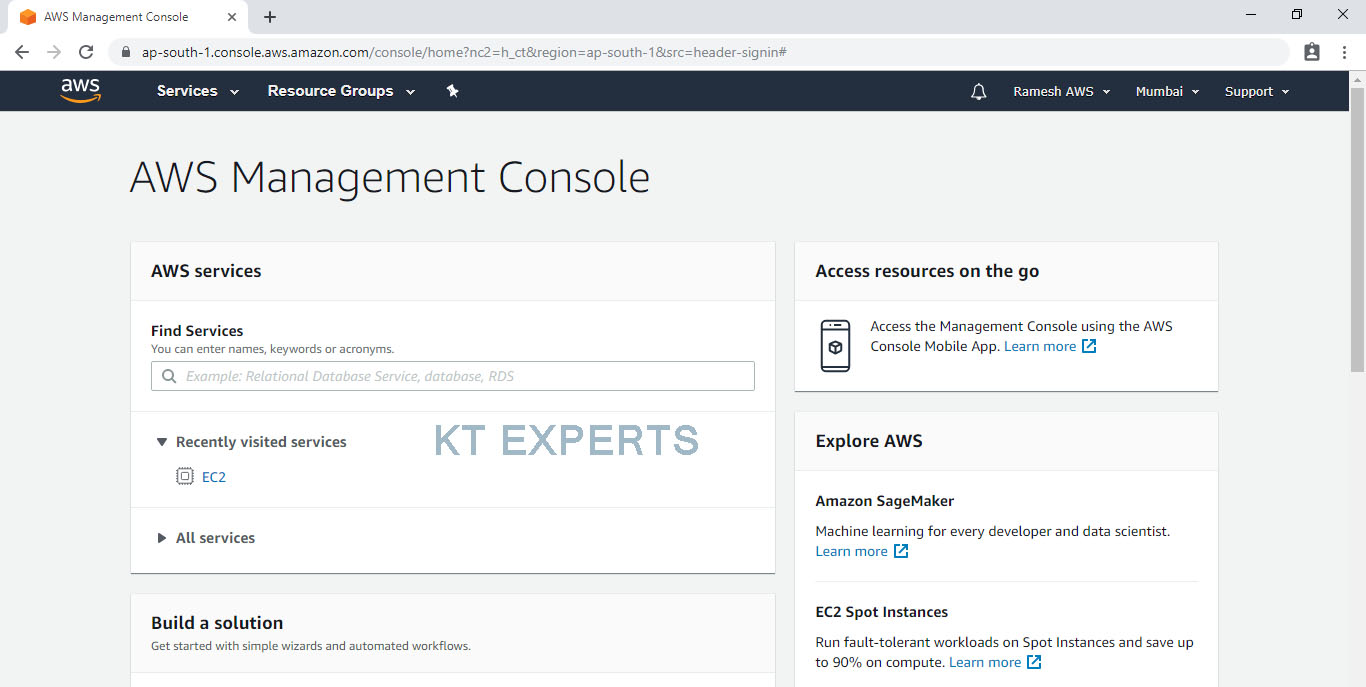
We can see the AWS Management Console Dashboard.
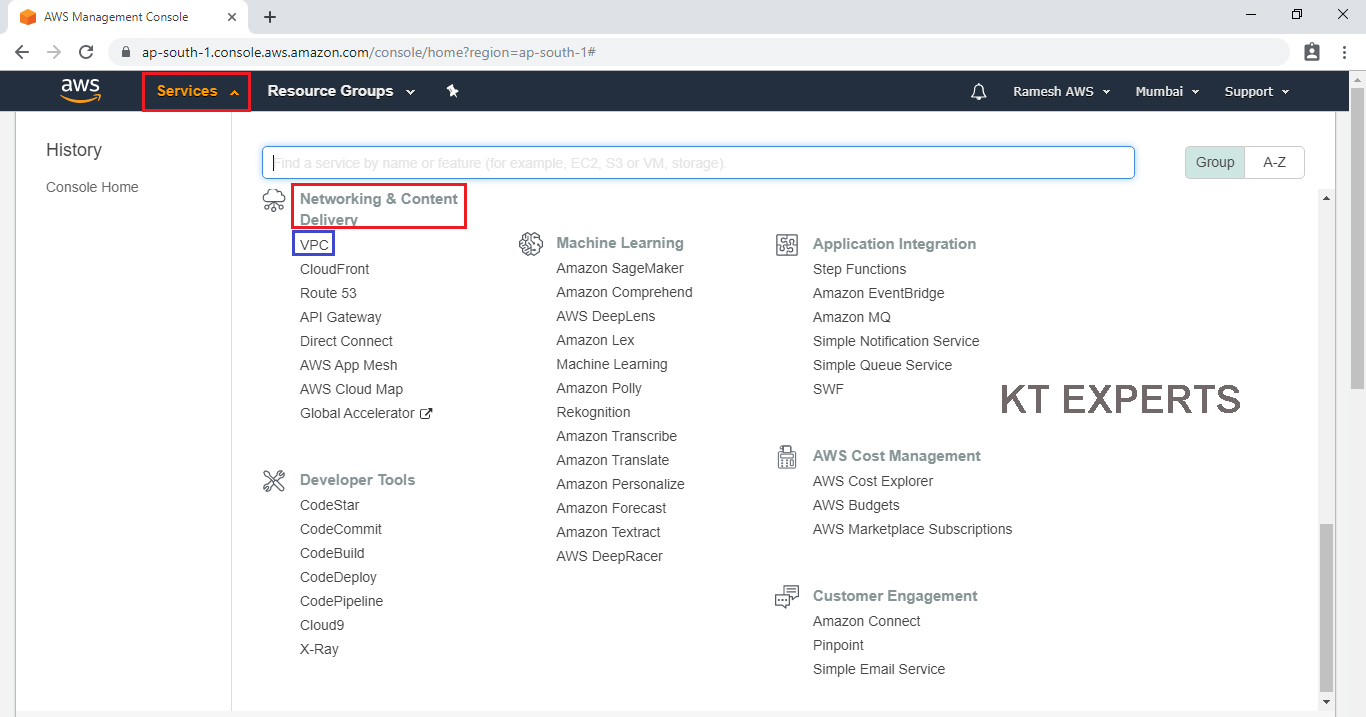
Go to Services, under the Networking & Content Delivery click VPC service to open.
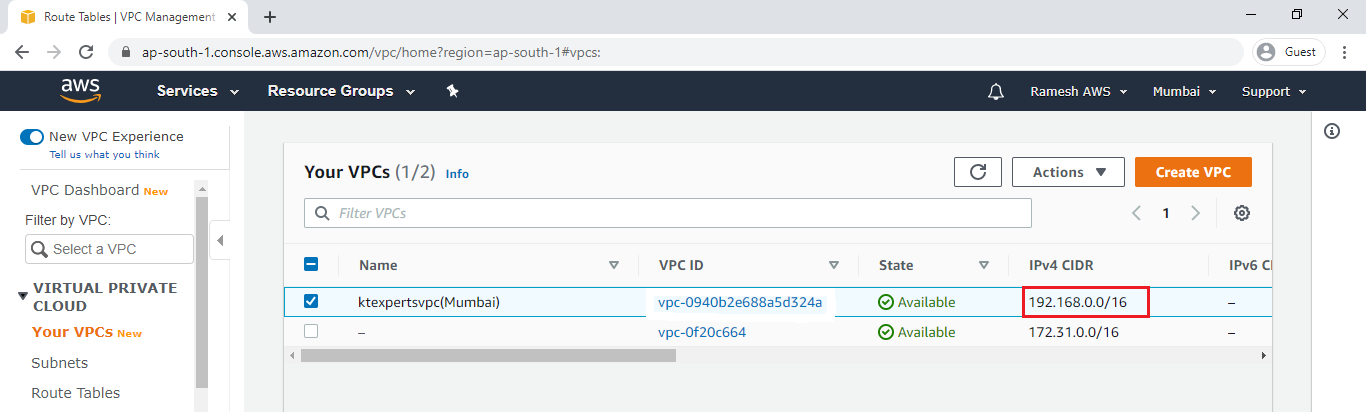
2. Create VPC in Mumbai Region
In this VPC,create web server in public subnet and database server in private subnet.
Use below link to create VPC.
3. Create VPC in Singapore Region
We can create VPC in Singapore Region same like above.
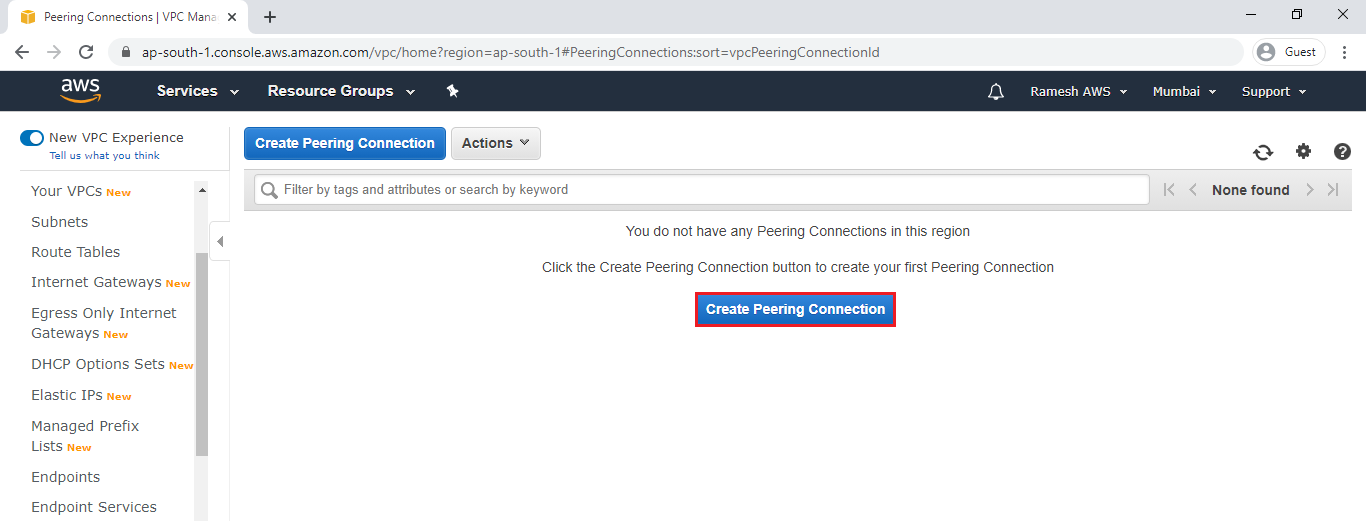
4. Create VPC Peering Connection in Mumbai Region
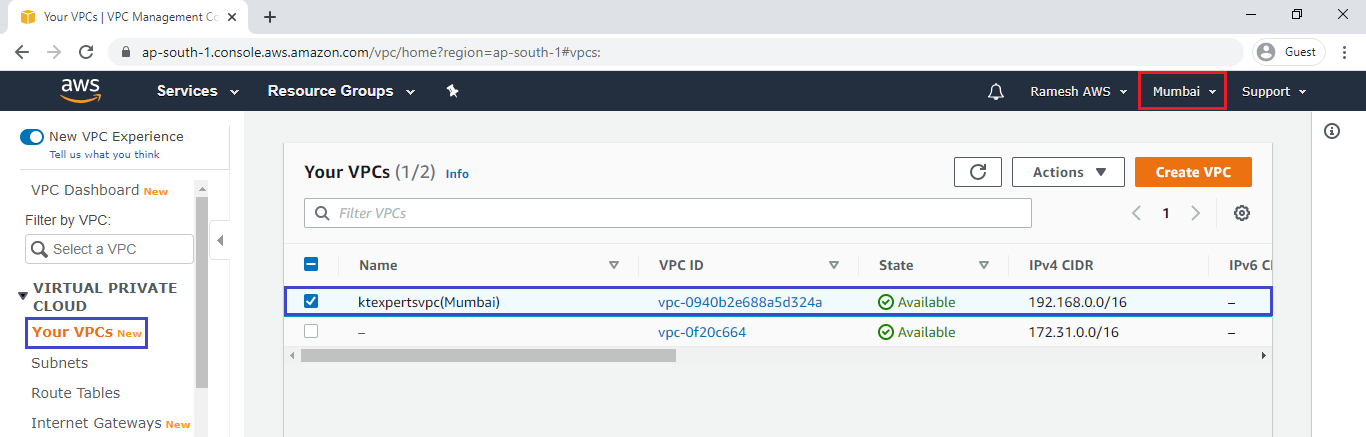
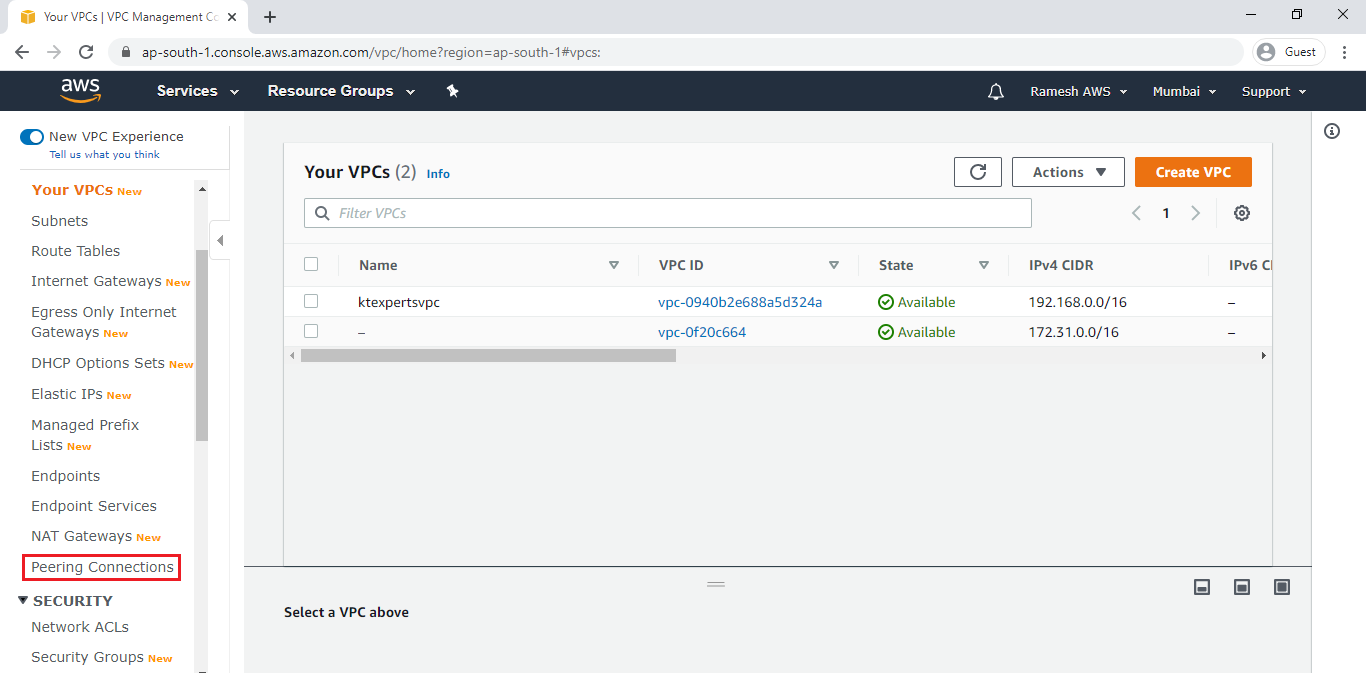
Go inside the VPC,We can see the VPC which was created in Mumbai Region.
Go to Peering Connection.
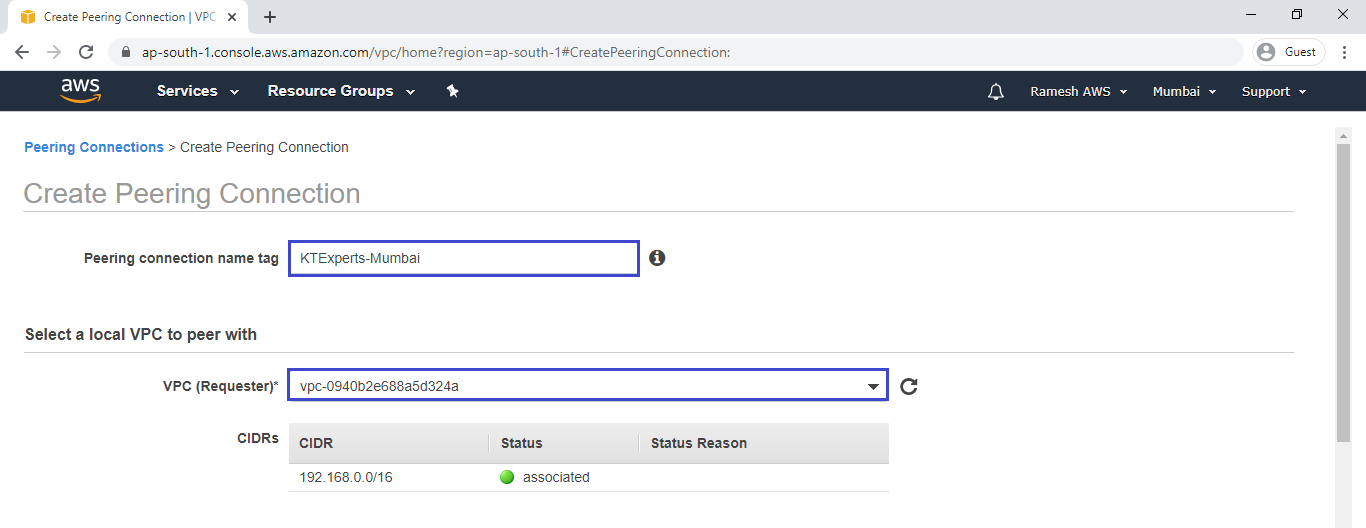
Click on Create Peering Connection.
Provide name tag for peering connection.
Select a local VPC (Requester). (Local VPC to initiate the request).
Specify your VPC in the vpc(Requester).
Go inside the another vpc which is Singapore region and copy the VPC ID.
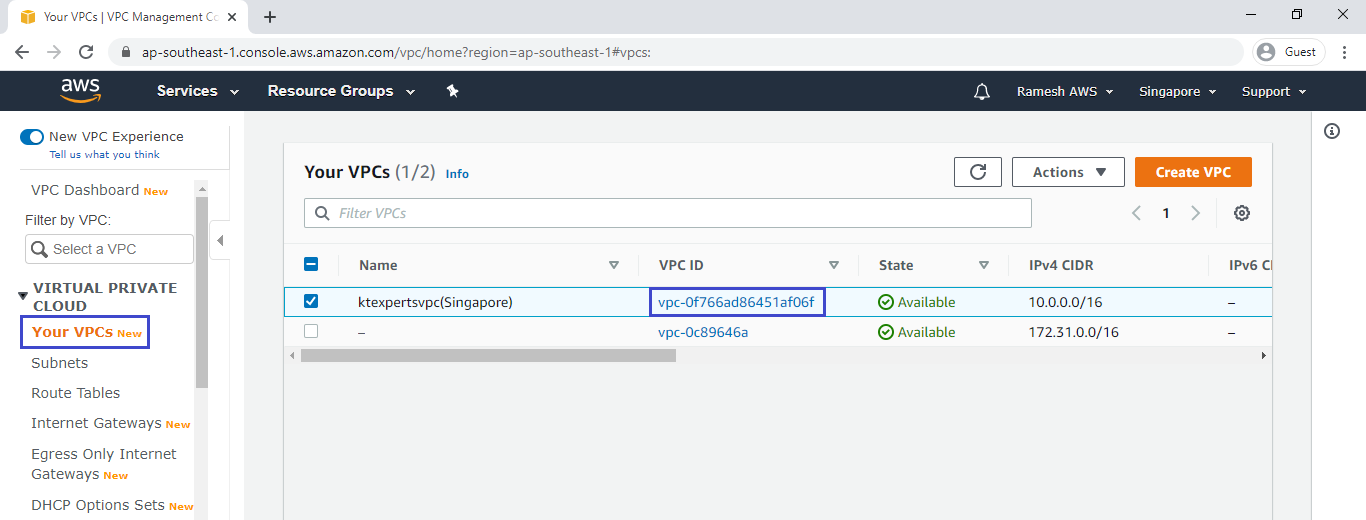
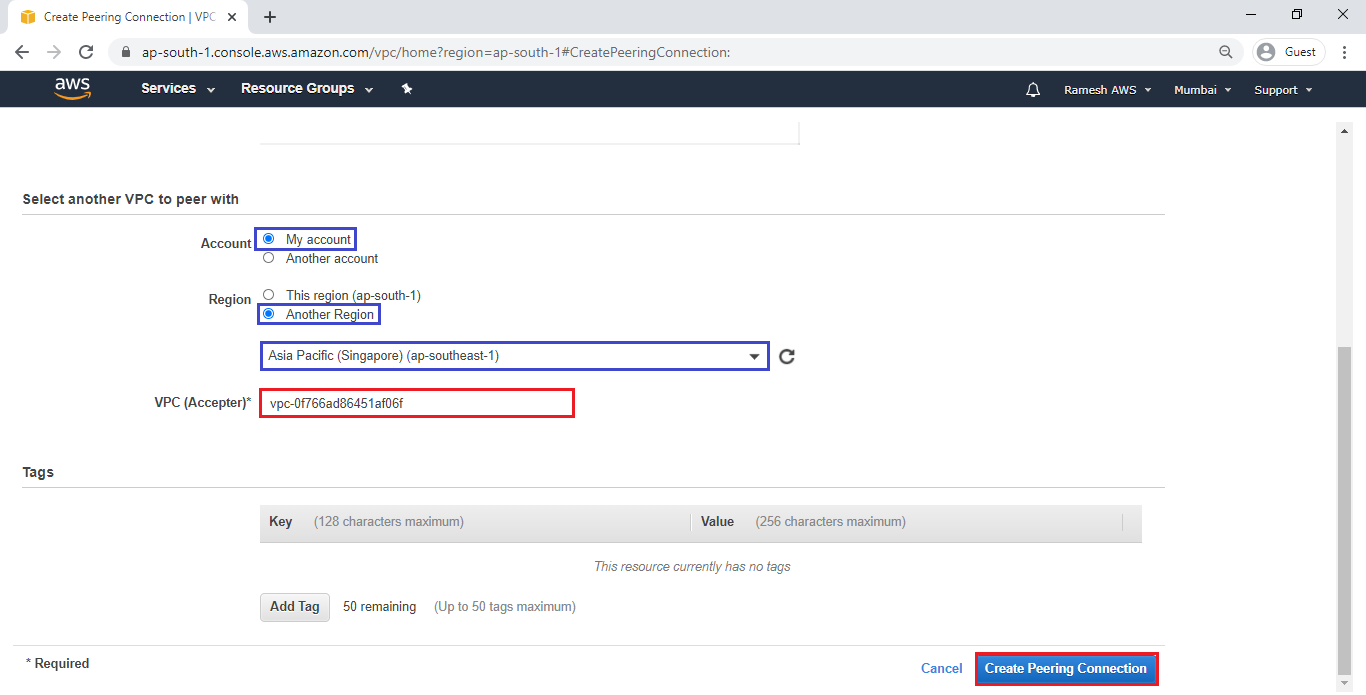
Select My account and Another Region then specify another VPC id (Singapore) which was copied.
Provide target VPC (Accepter) ID and Click on Create Peering Connection.
We can the create peering connection has been requested in Mumbai Region.
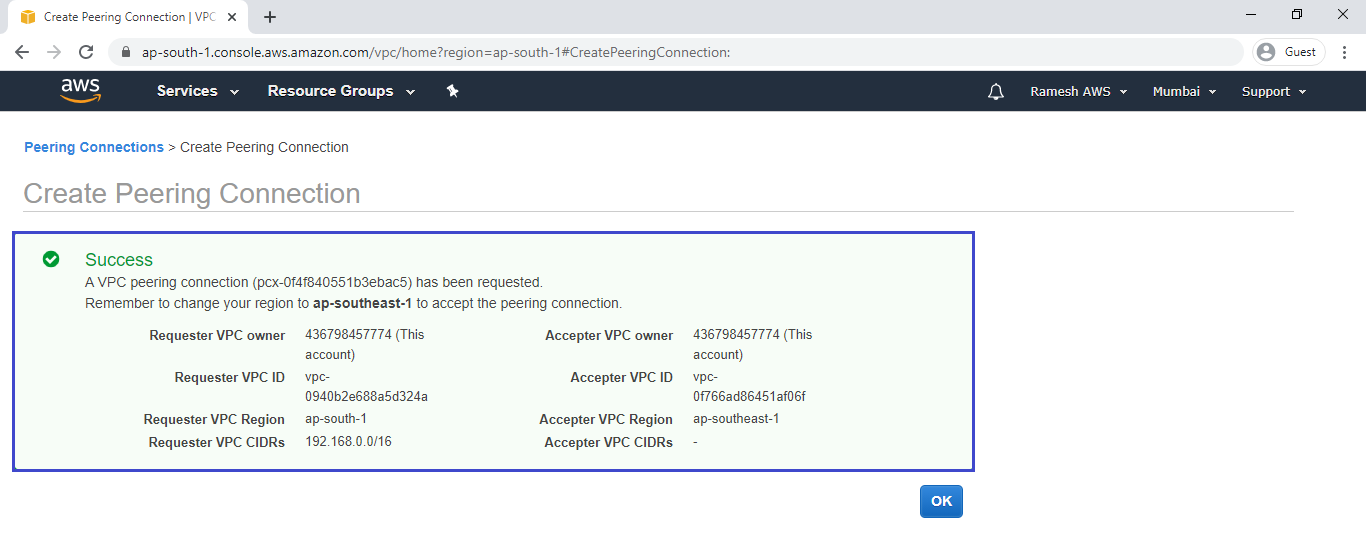
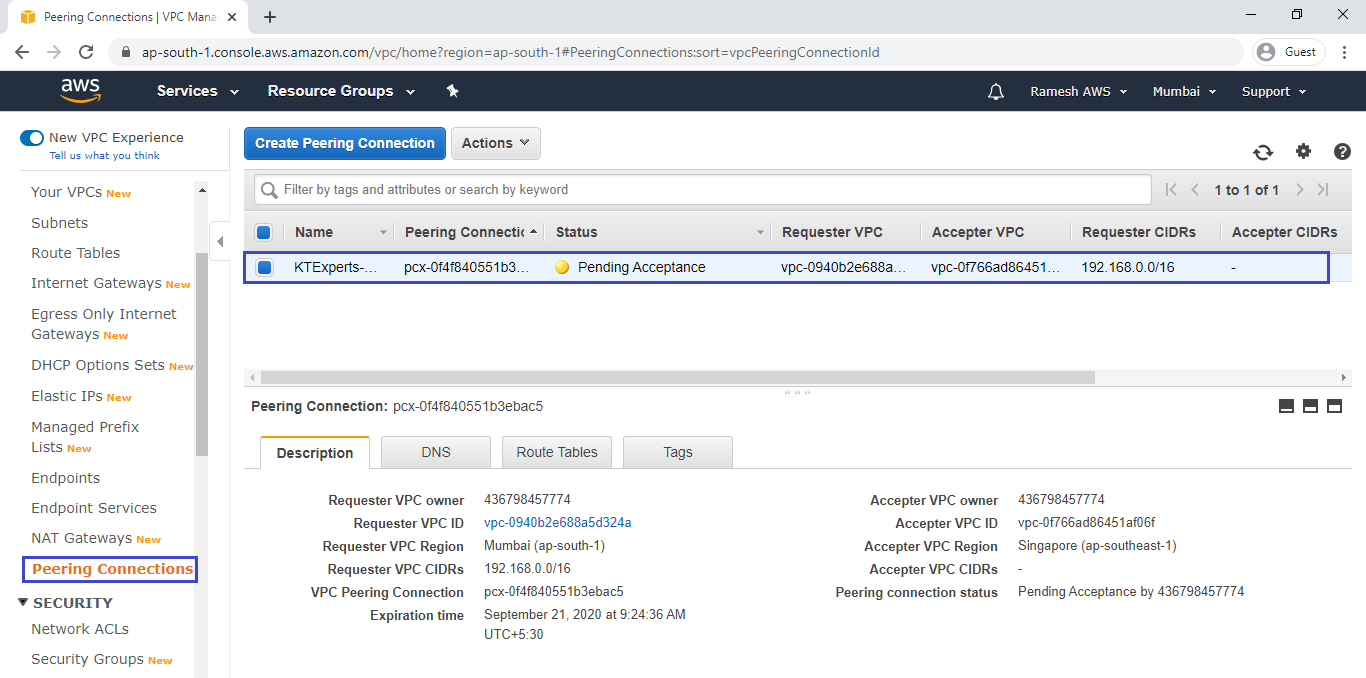
Now, we can see the Peering Connection is requested (Mumbai Region) and status is “Pending Acceptance”.
We need to accept the request on destination VPC (Singapore Region).
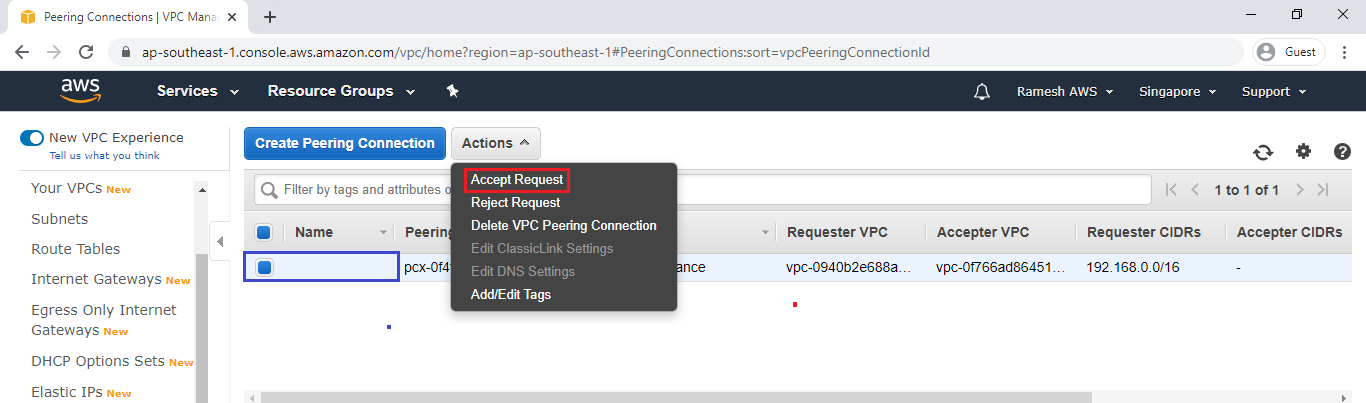
5. Accept VPC Peering Connection in Singapore Region
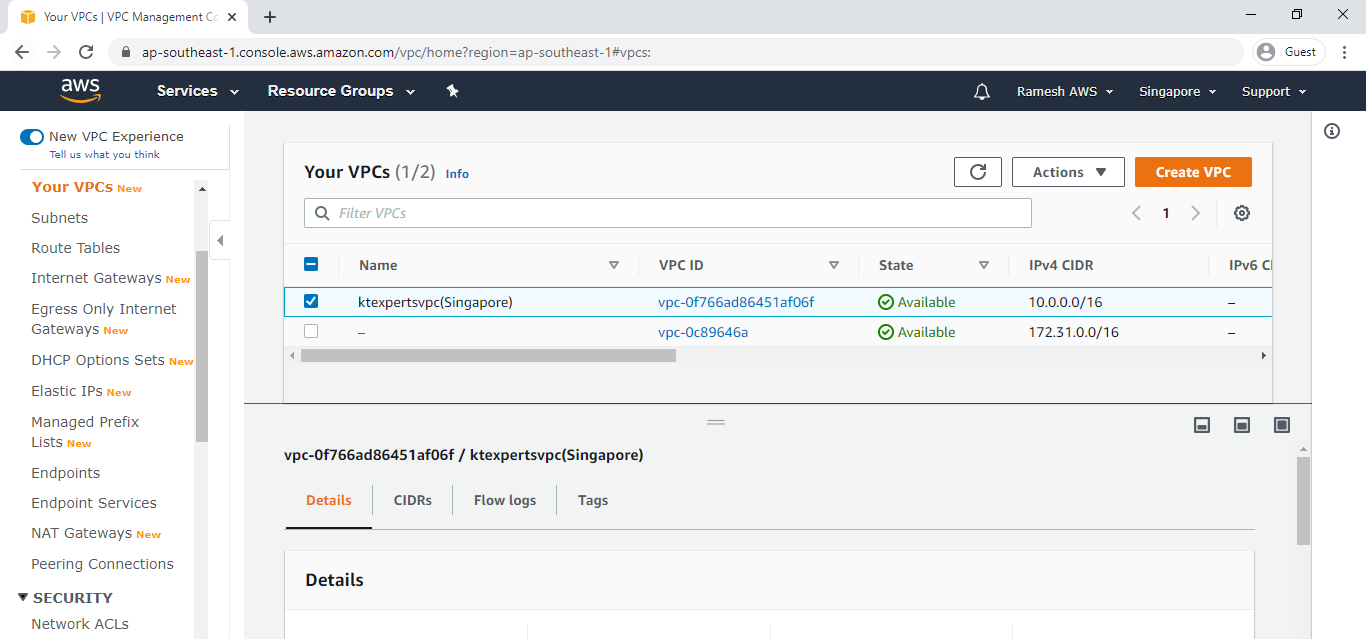
Go inside the VPC,We can see the VPC which was created in Singapore Region.
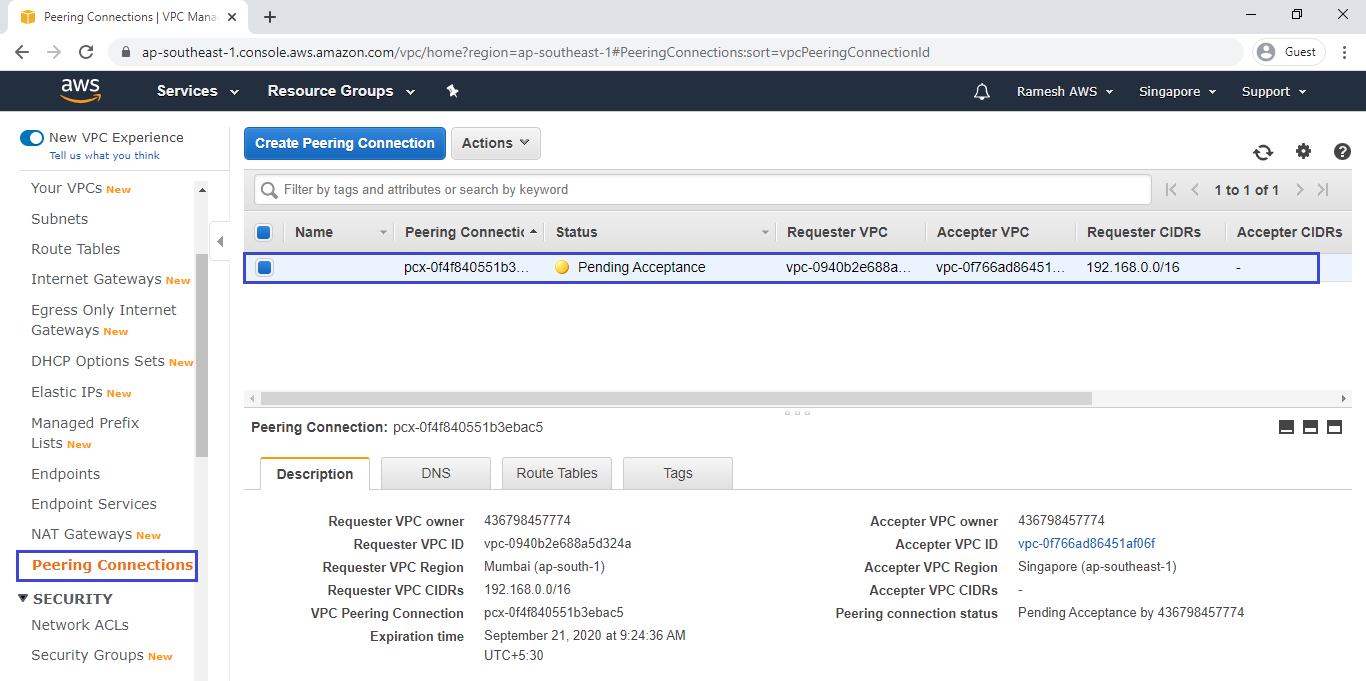
Go to Peering Connections,we can see the Peering Connection status is Pending Acceptance.
We need to accept the request then only peering connection will be happened.
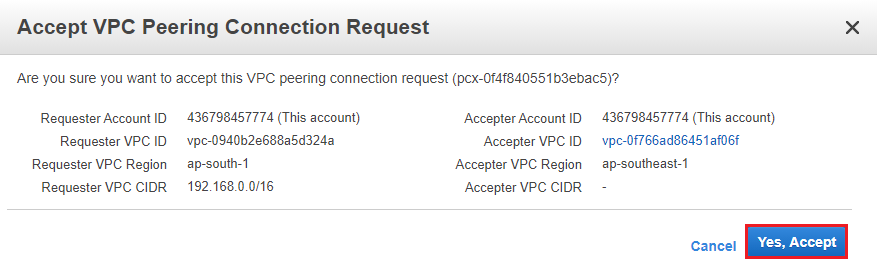
Select peering connection,Click on Accept Request in the Actions.
Click on Yes,Accept.
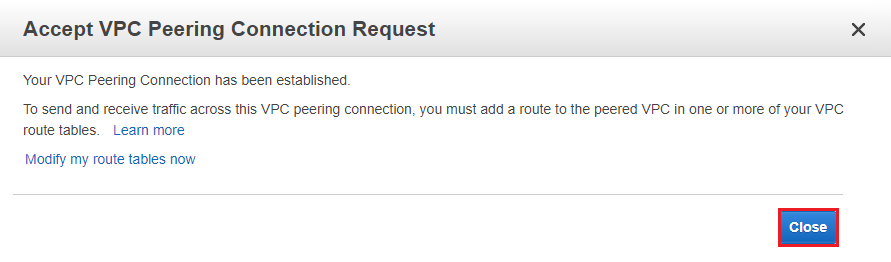
Click on Close.
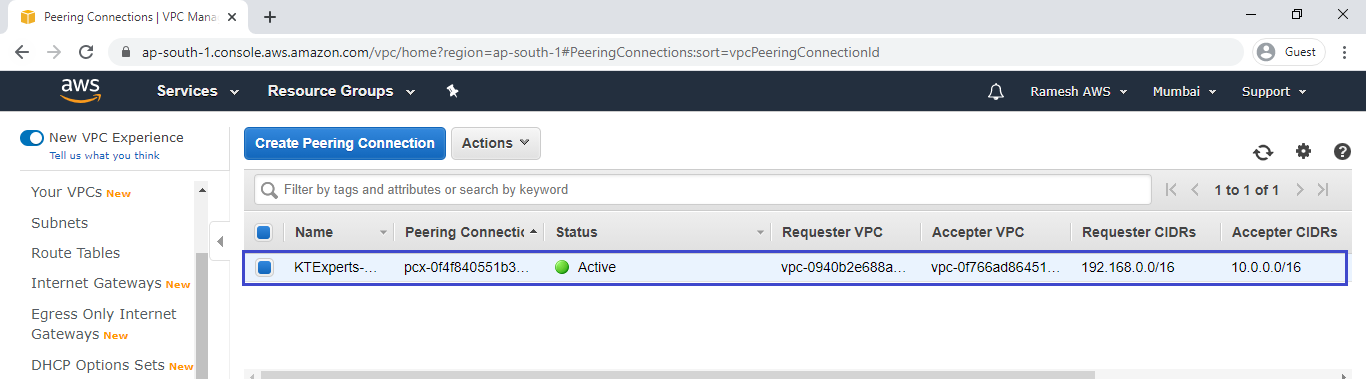
We can see the peering connection is in Active.
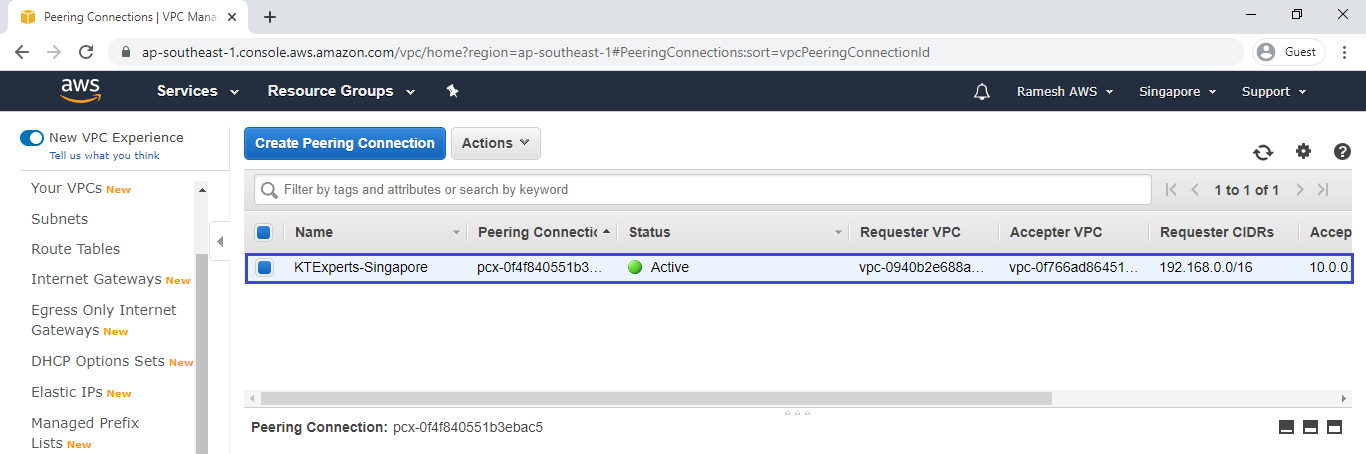
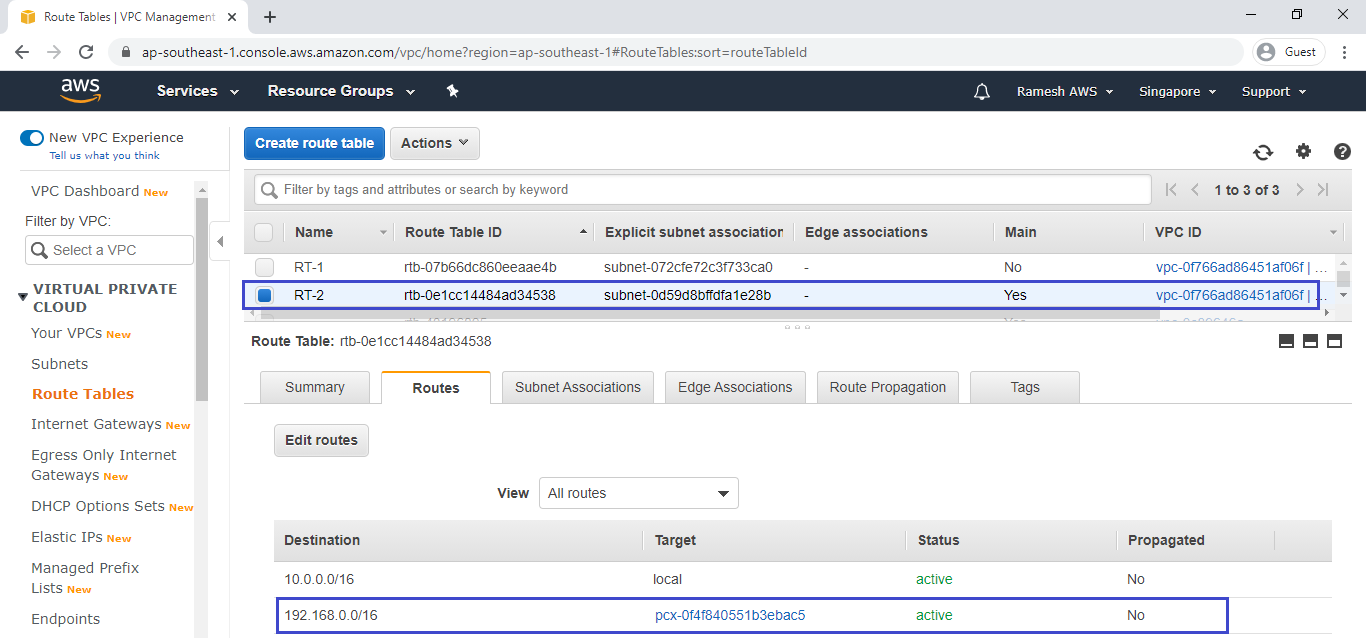
Verify the peering connection status in Mumbai region
Go to peering connection (Mumbai),we can see the peering connection status is Active
Means the peering connection has created successfully between 2 VPC’s.
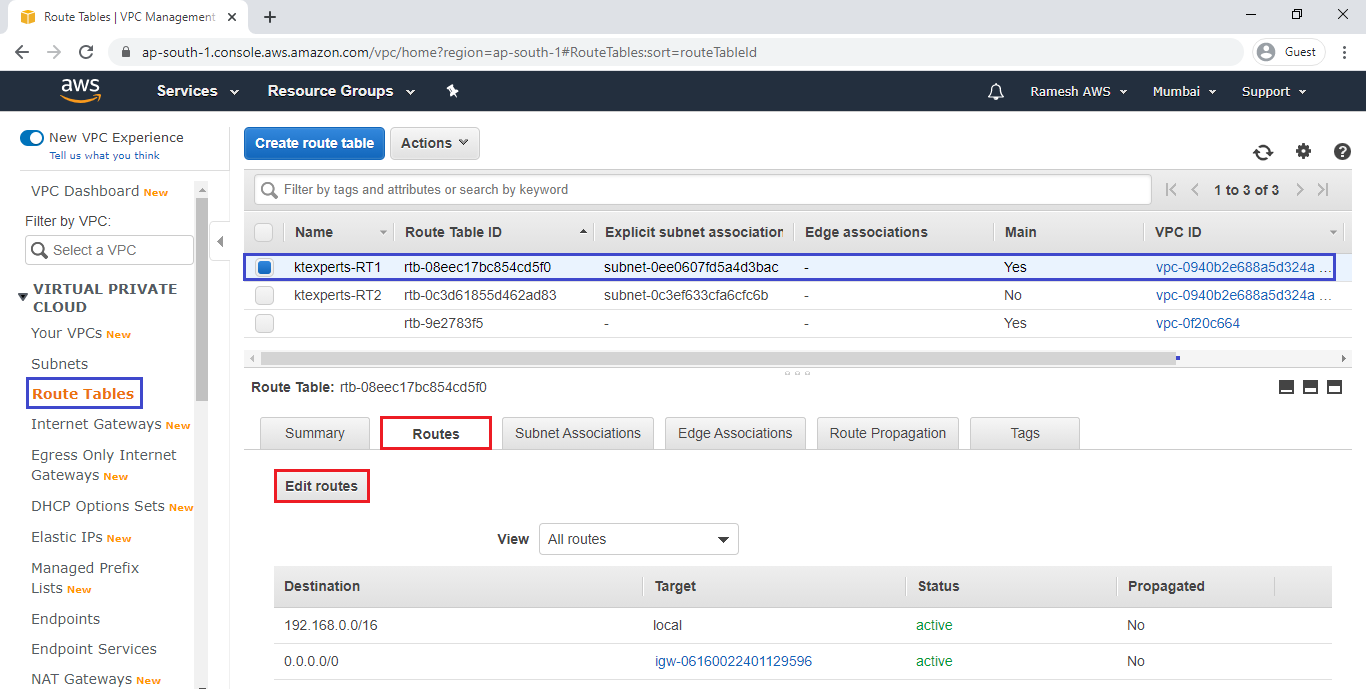
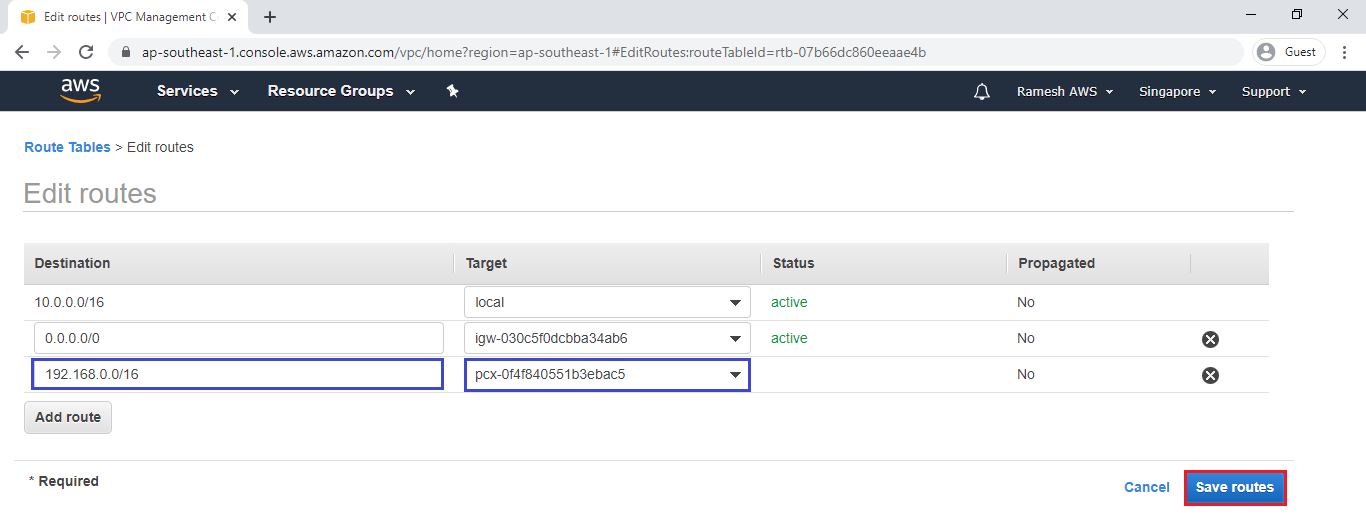
6. Add Peering Connection Routes for VPC1 (Mumbai Region)
We need to provide CIDR of VPC 2 (Singapore Region) and target should be Peering Connection.
Add Route for First Route Table
Go inside the Route table of VPC1 (Mumbai Region)
Select first route table and go to Routes and click on Edit routes.
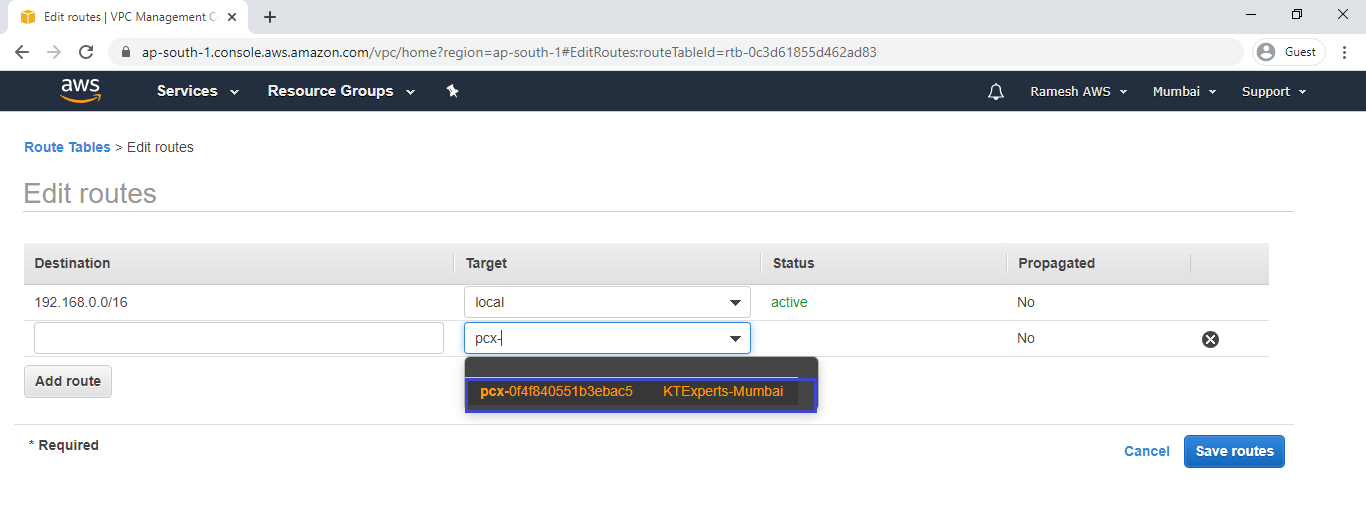
we need to select Peering connection in the target as shown below.
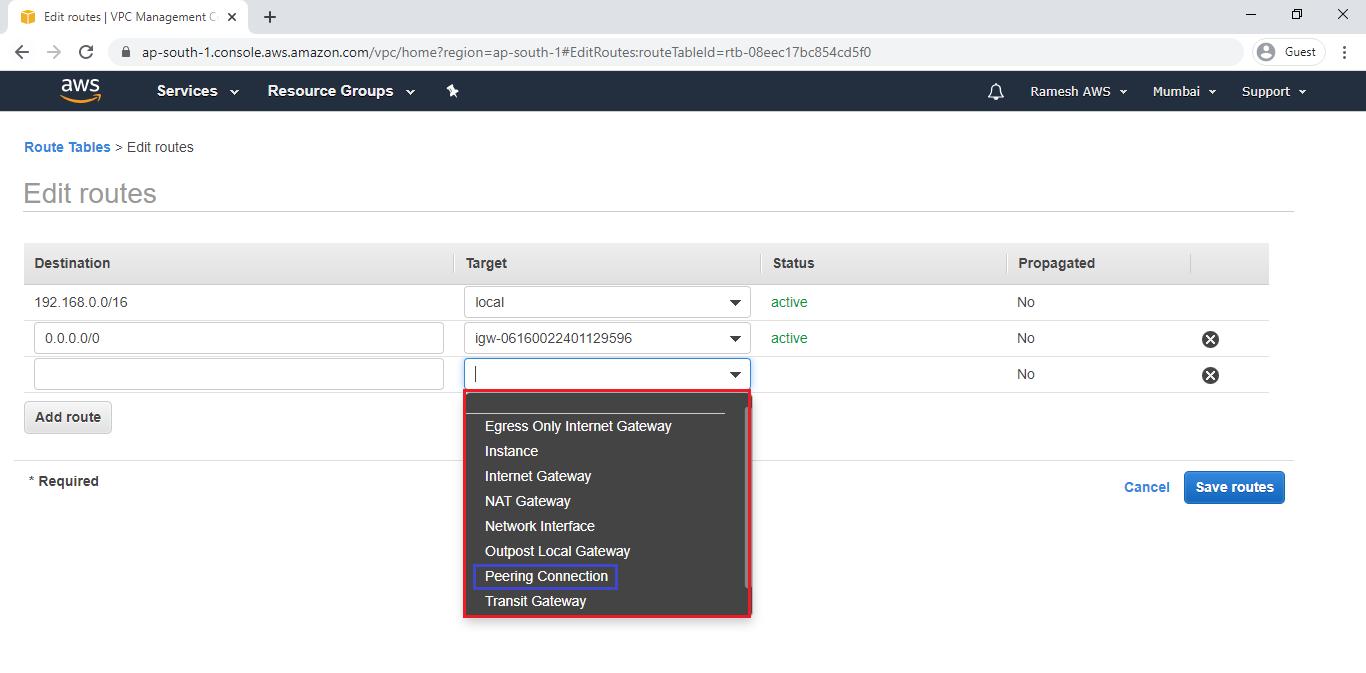
Once click on peering connection it will be shown peering connection id and name, so click on peering connection ID.
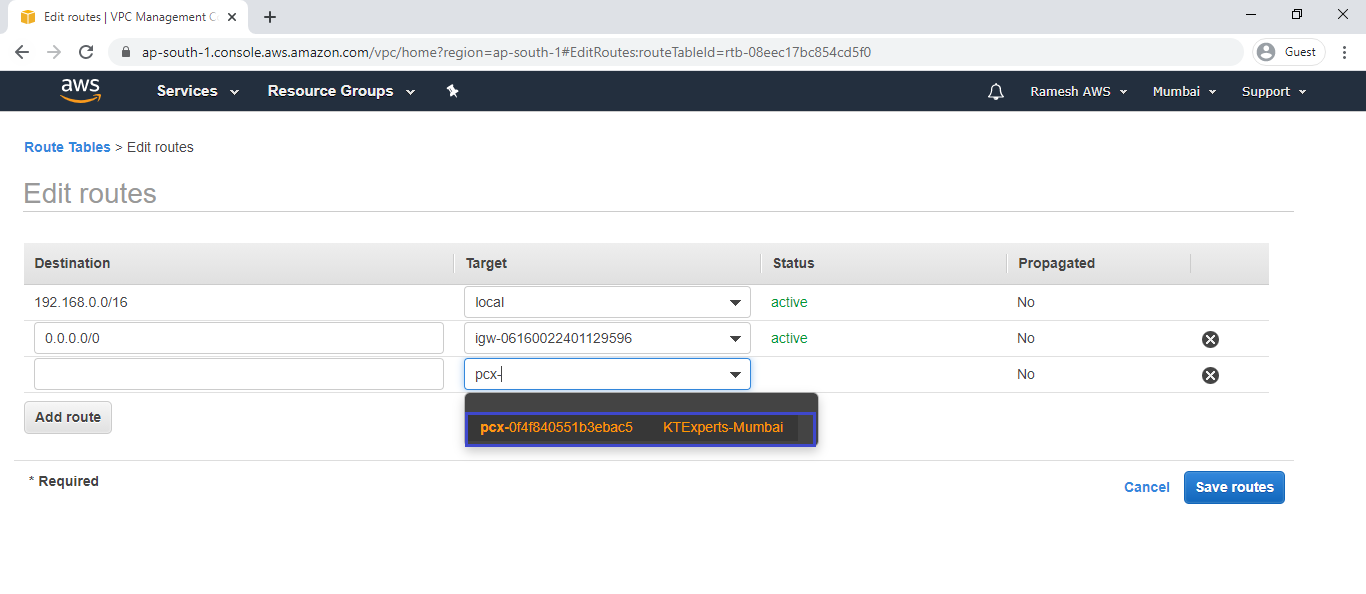
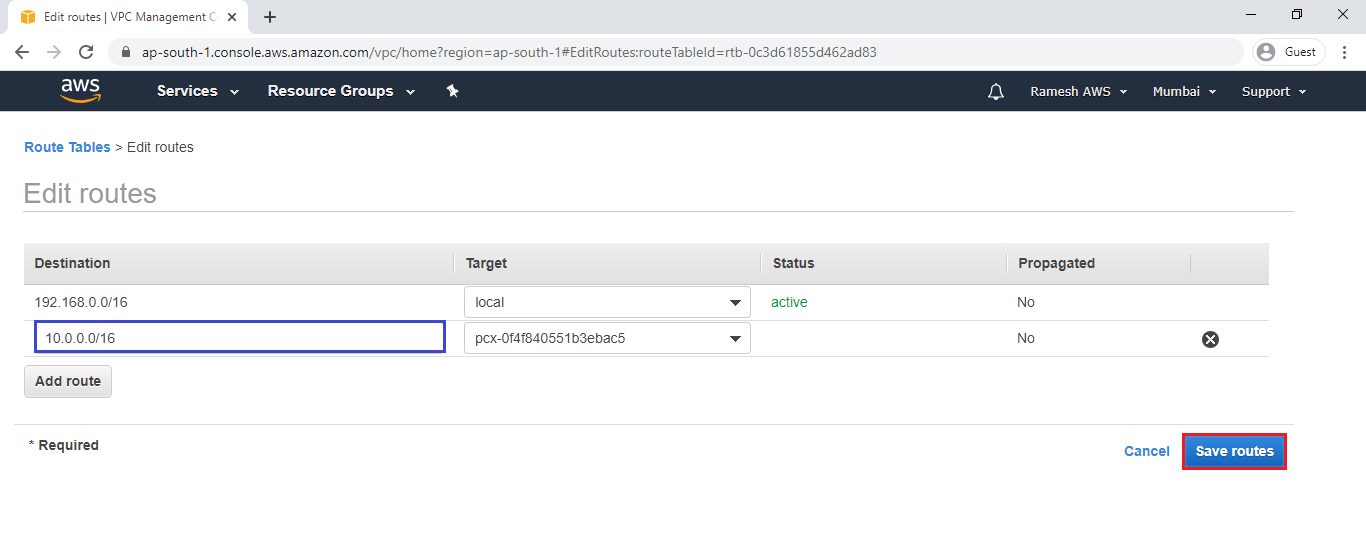
We have selected peering connection in the target and specify CIDR of VPC 2 (Singapore Region) and click on save routes.
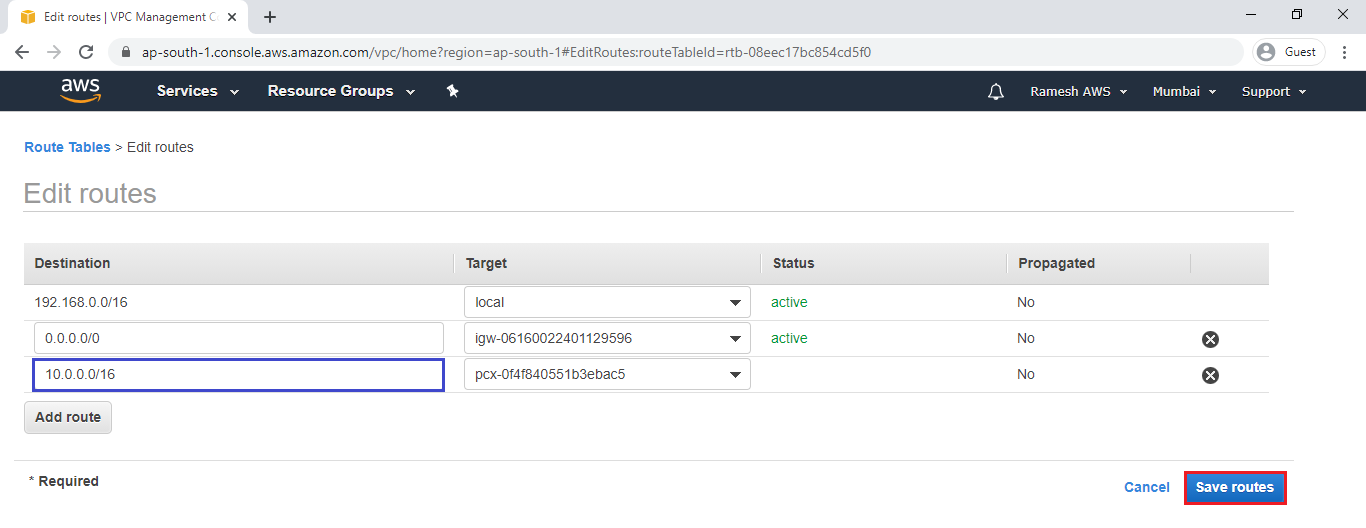
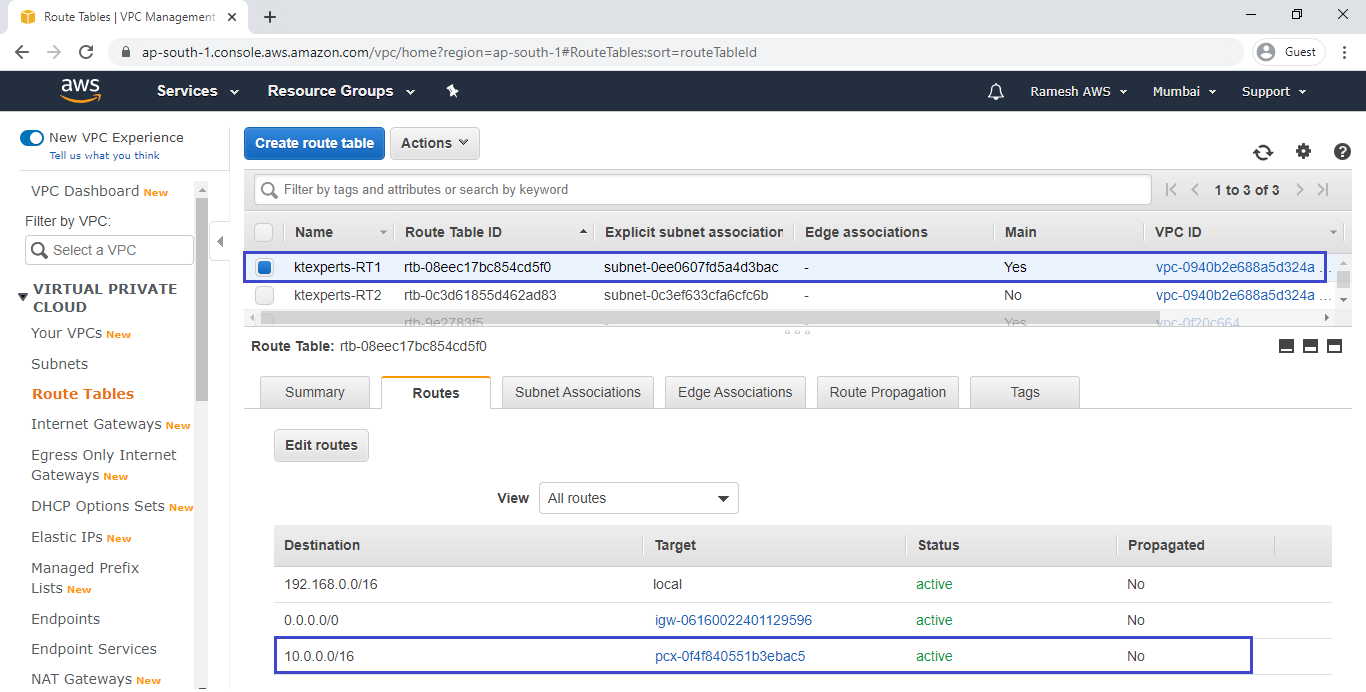
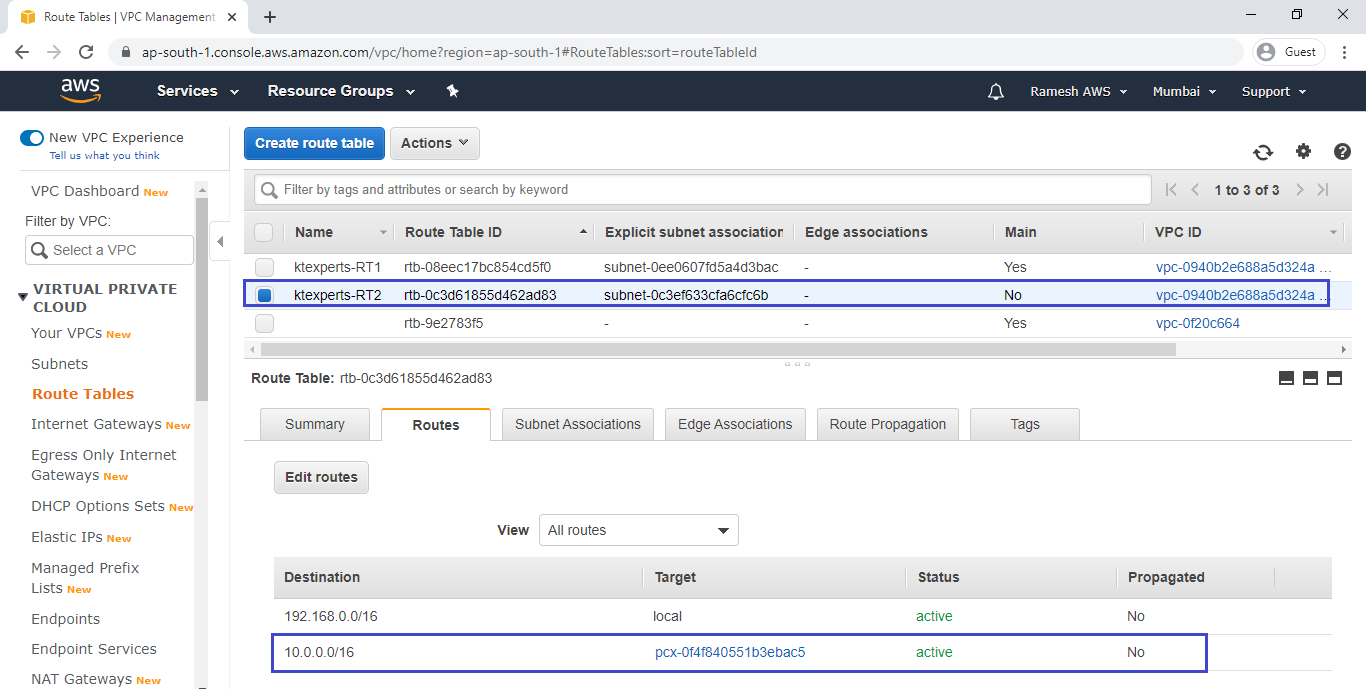
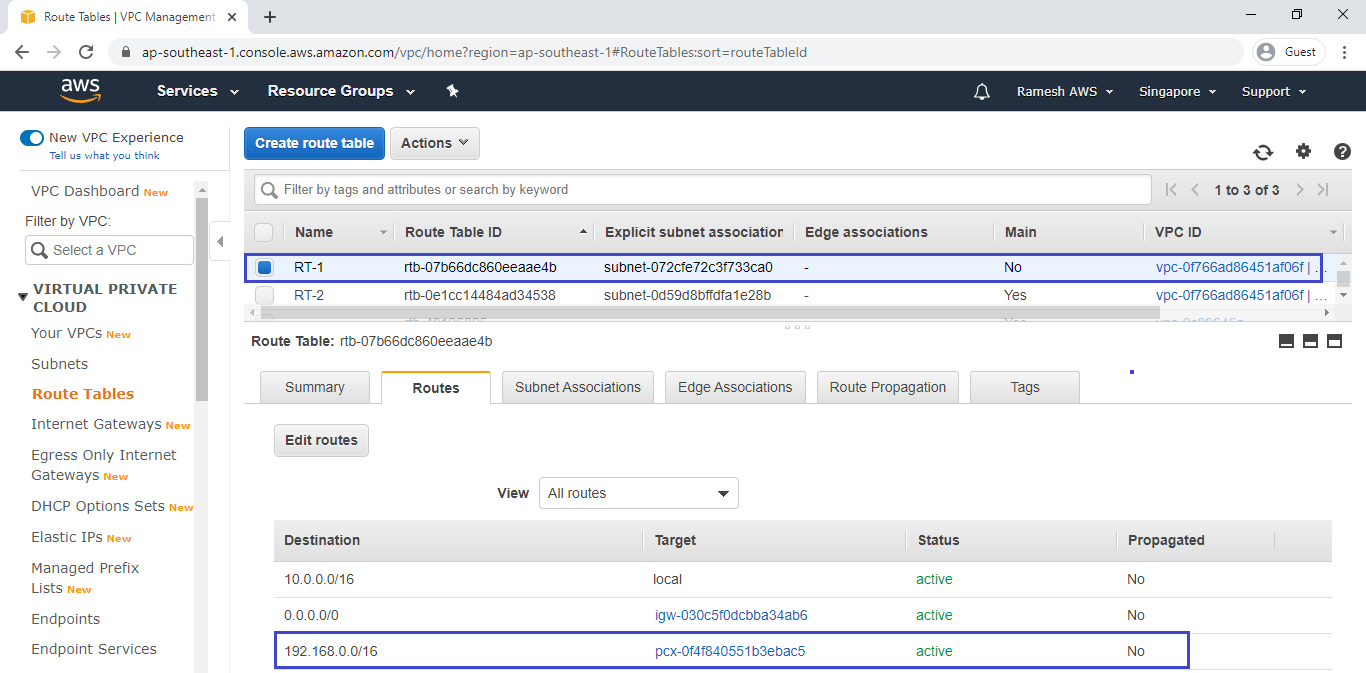
We can see the route has added for first route table successfully.
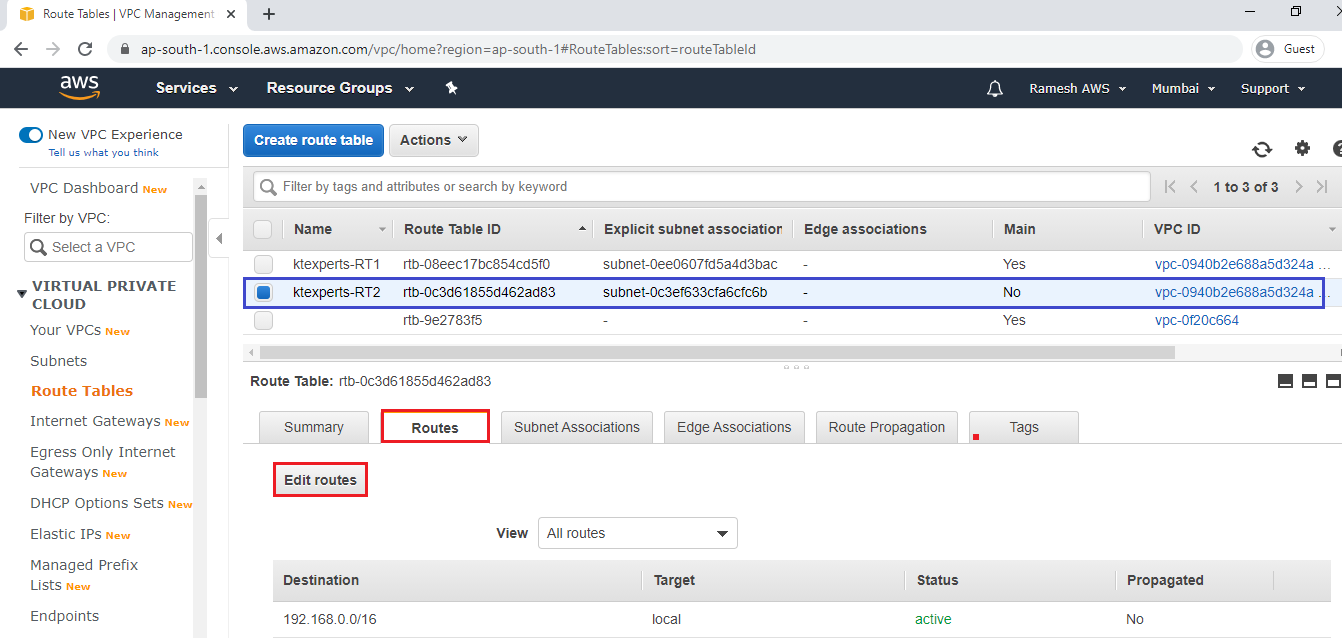
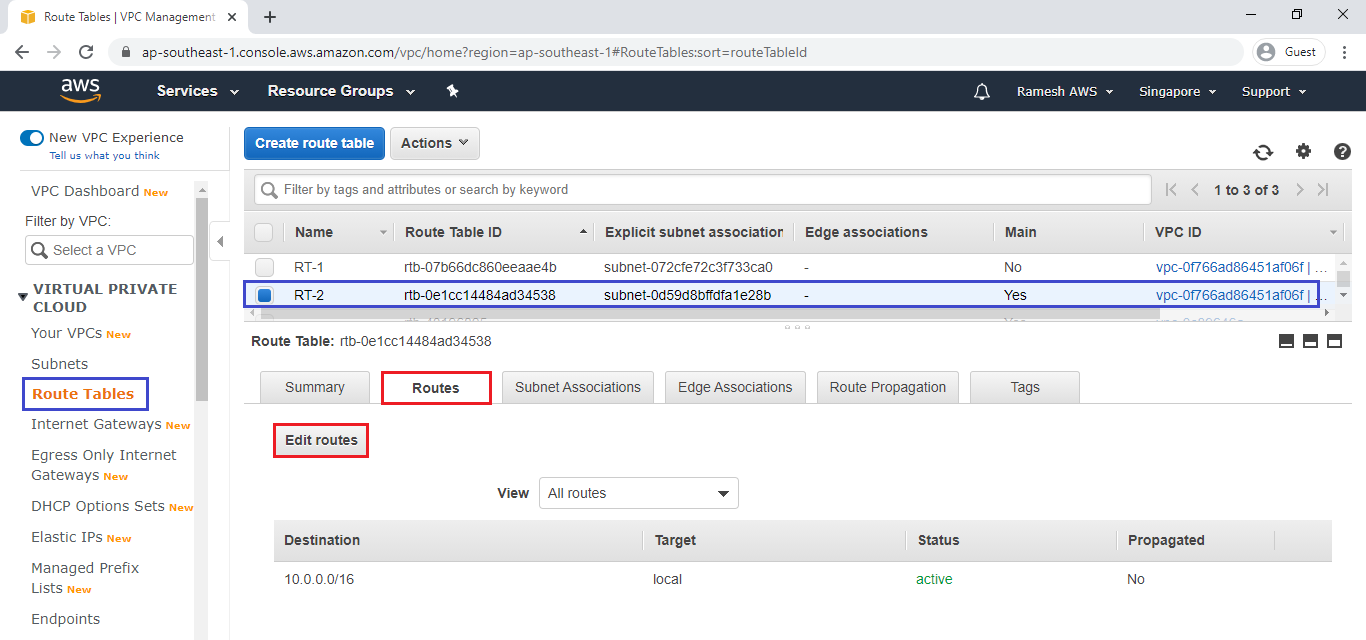
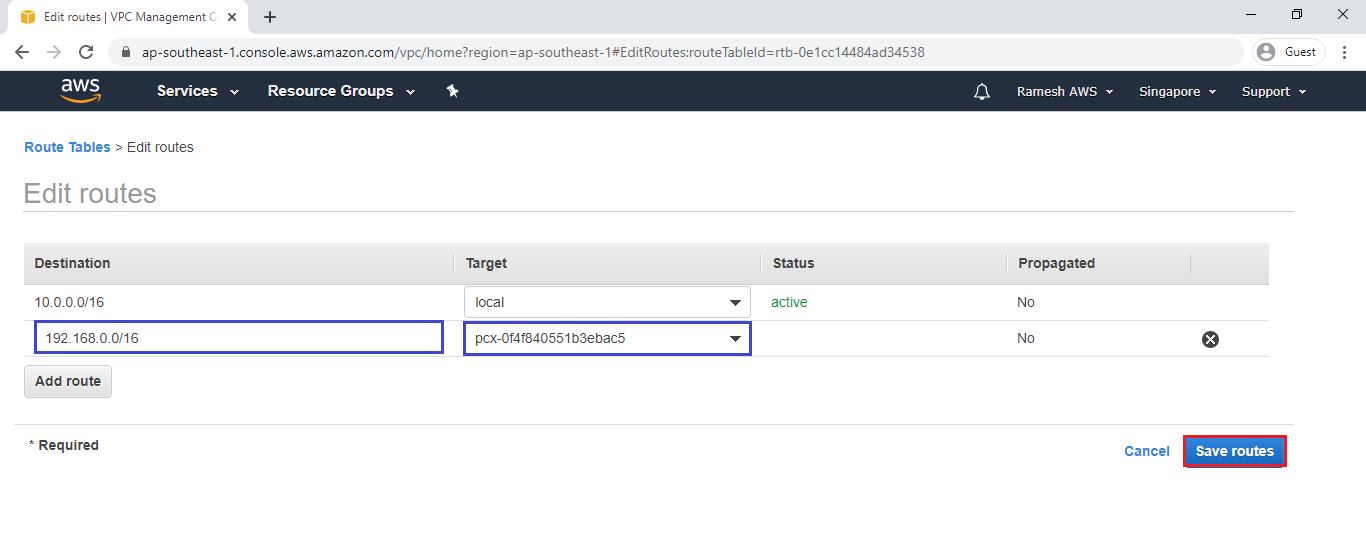
Add Route for Second Route Table
Select second route table and go to Routes and click on Edit routes.
we need to select Peering connection in the target as shown below.
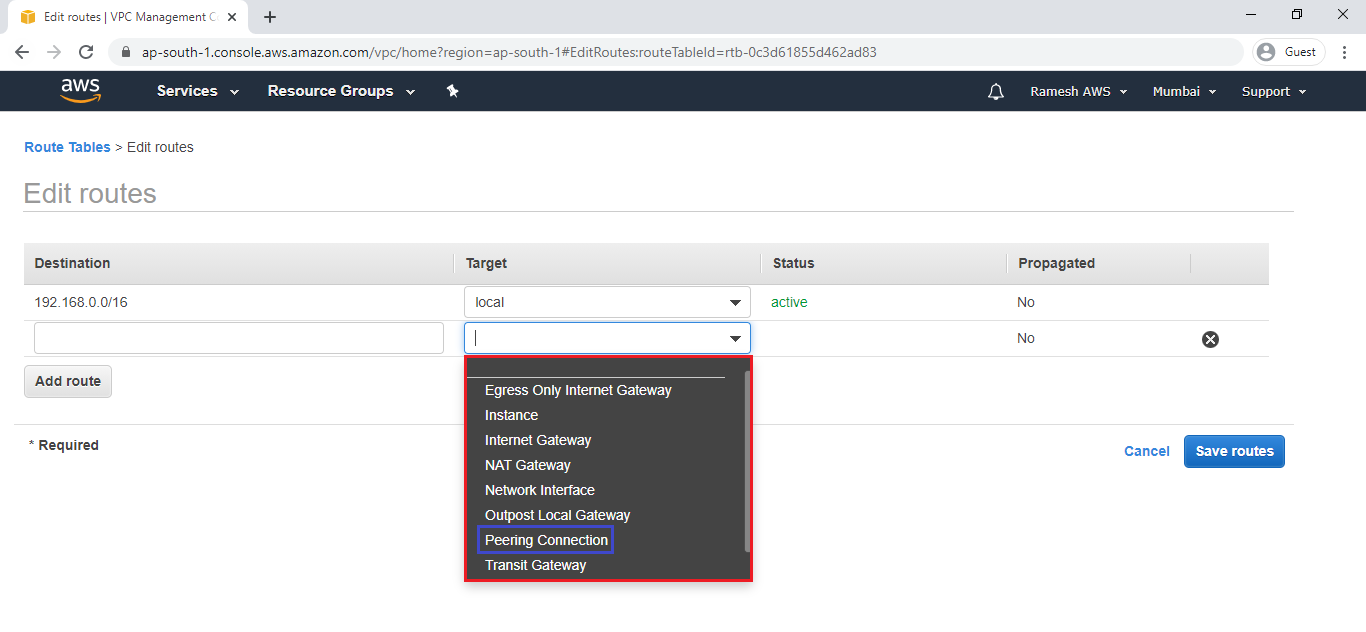
Once click on peering connection it will be shown peering connection id and name, so click on peering connection ID.
We have selected peering connection in the target and specify CIDR of VPC 2 (Singapore Region) and click on save routes.
We can see the route has added for second route table successfully.
7. Add Peering Connection Routes for VPC 2 (Singapore Region)
We need to provide CIDR of VPC 2 (Singapore Region) and target should be Peering Connection.
Add Route for First Route Table
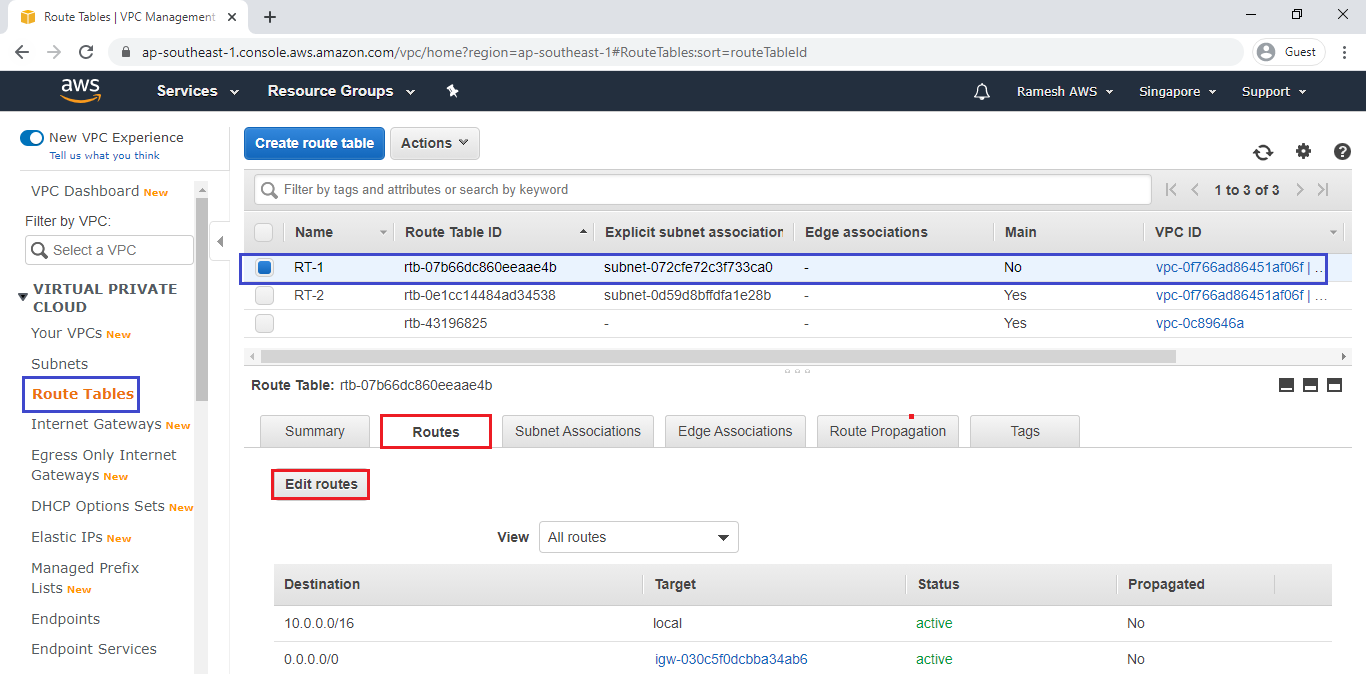
Go inside the Route table of VPC 2 (Singapore Region)
Select first route table and go to Routes and click on Edit routes.
Go to first VPC 1 (Mumbai Region),and copy CIDR.
In the Routes, paste CIDR in the Destination which was copied from VPC 1 (Mumbai Region) and select peering connection in the Target the click on Save Routes.
We can see the route has added for first route table successfully.
Add Route for First Route Table
Select second route table and go to Routes and click on Edit routes.
In the Routes, specify CIDR of VPC 1 (Mumbai Region) in the Destination and select peering connection in the Target the click on Save Routes.
We can see the route has added for second route table successfully.
8. Go inside the Web Server of VPC 1 (Mumbai Region) and Connect to Database Server of VPC 2 (Singapore Region)
Go to Mumbai Region,
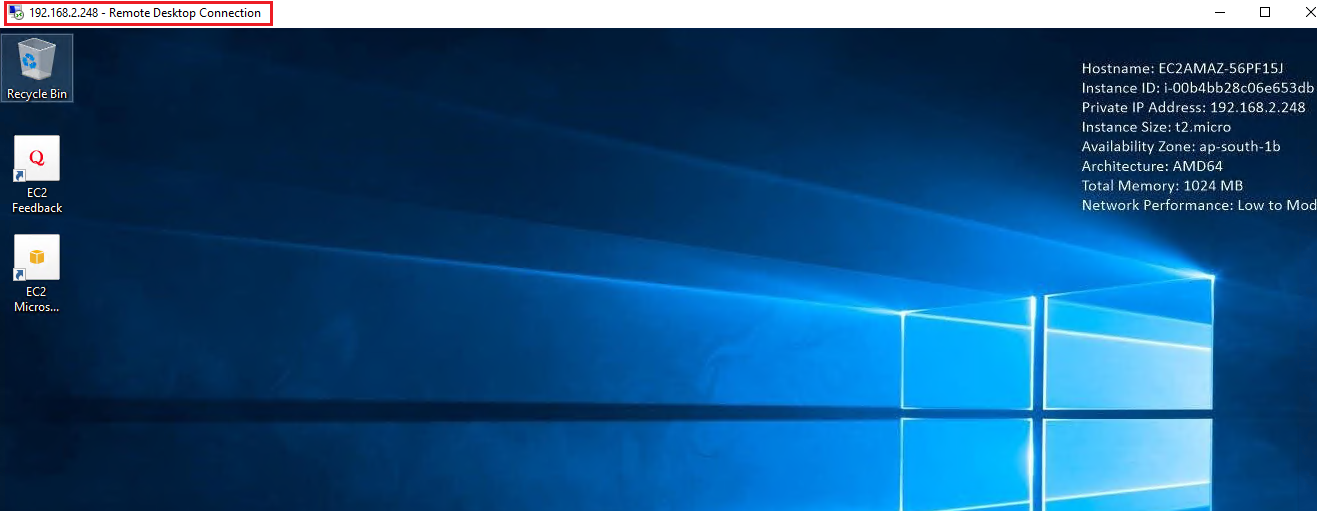
Connect to Web Server by using Remote Desktop Connection.
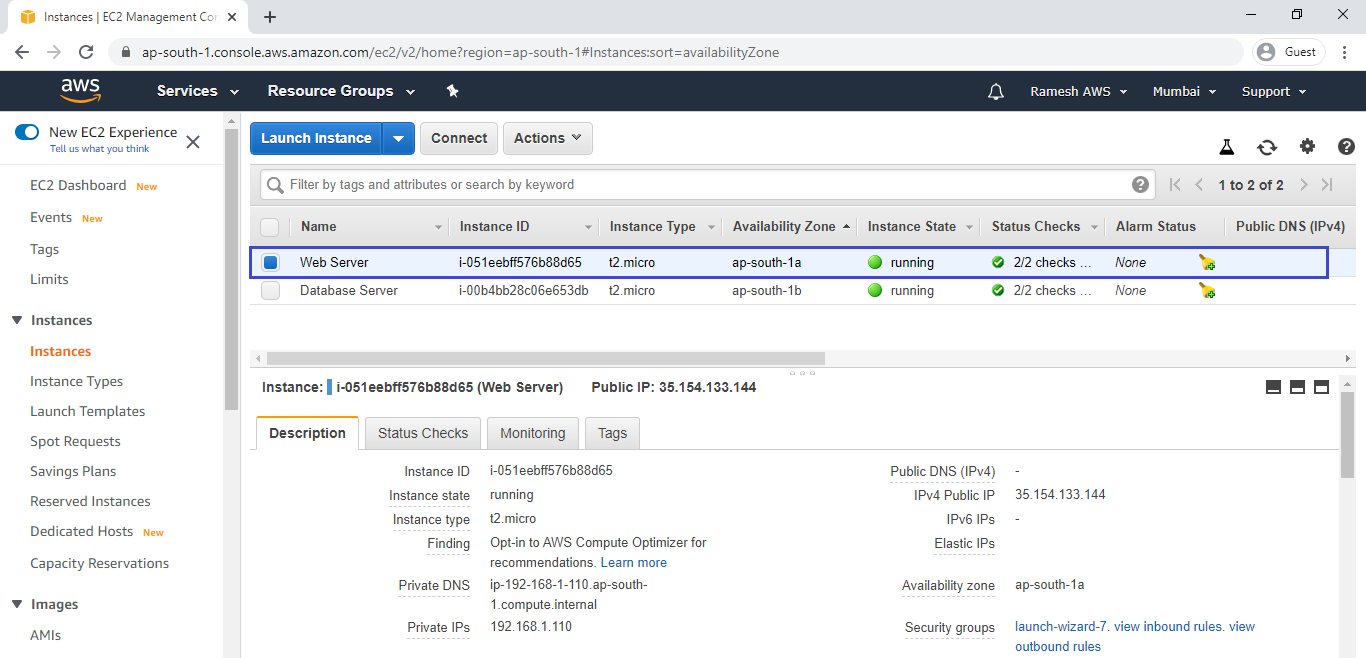
We can see the web server of Mumbai Region.

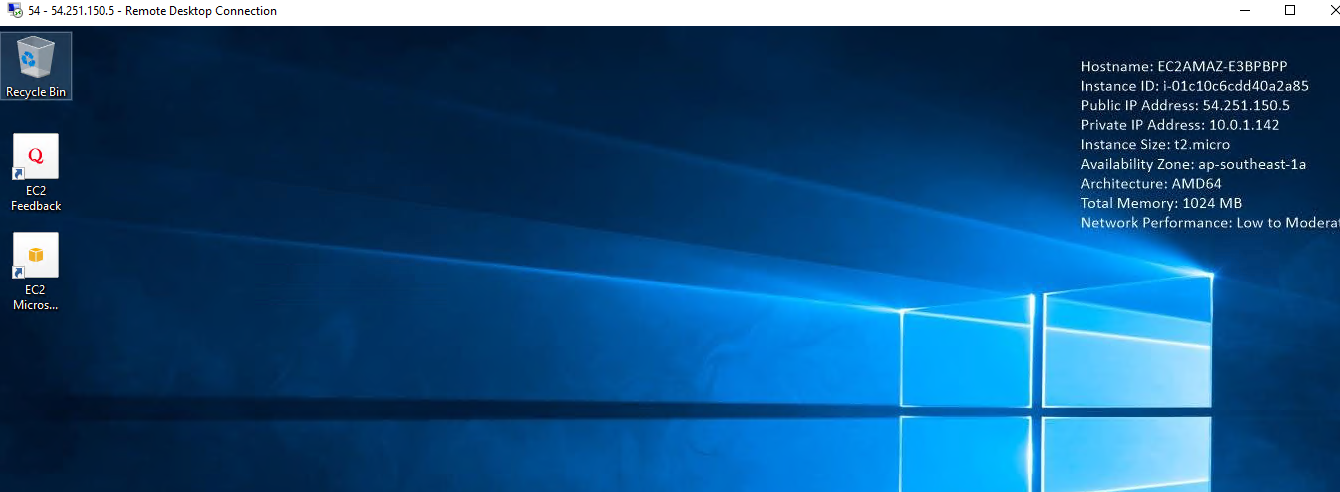
Connect to Database Server of Singapore Region by using Remote Desktop Connection
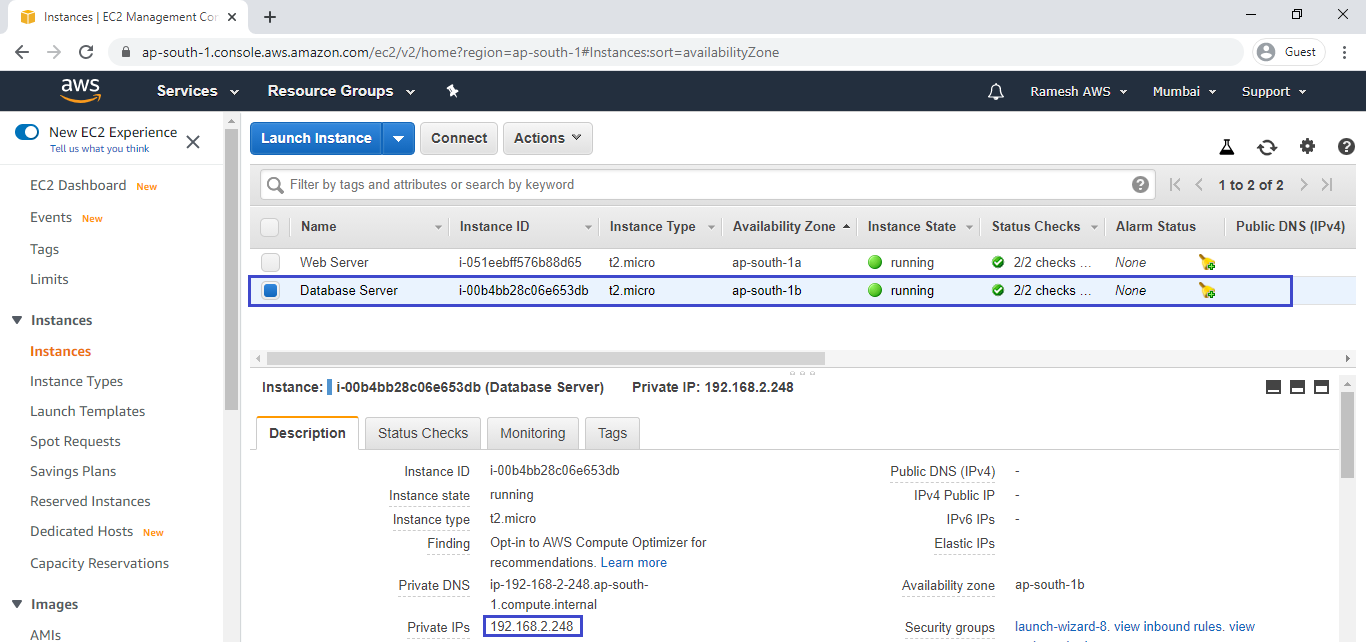
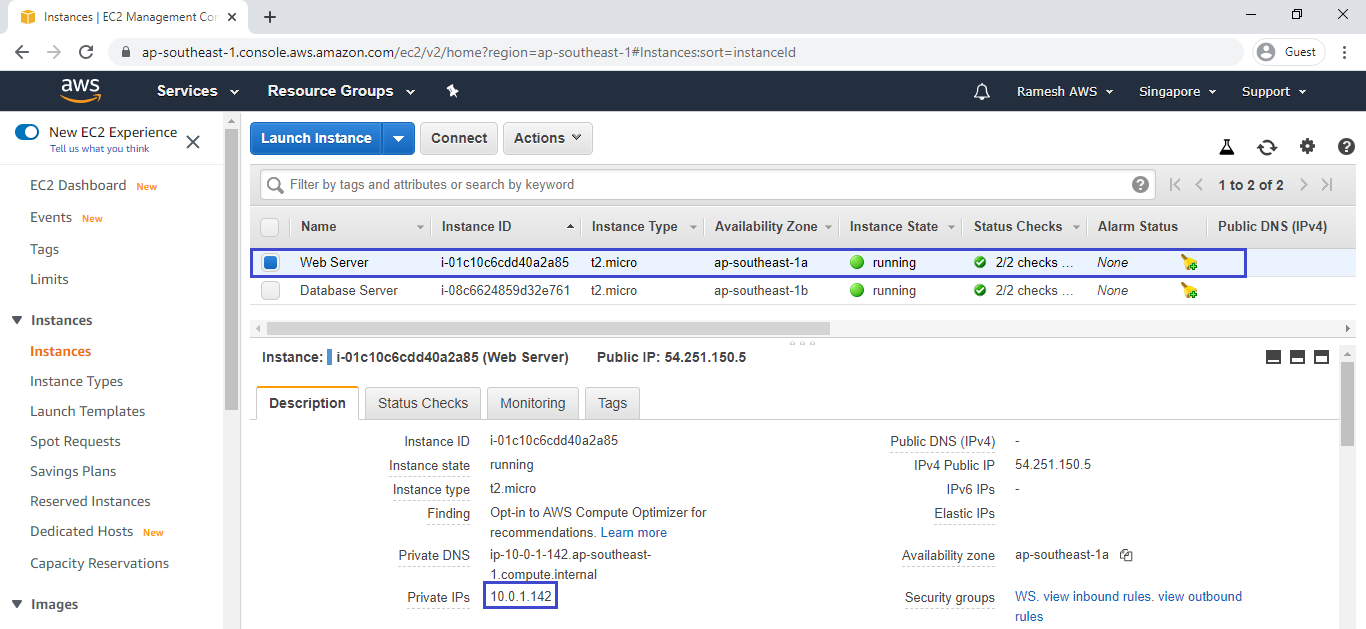
Go to Singapore Region, Select Database Server and copy private IP.

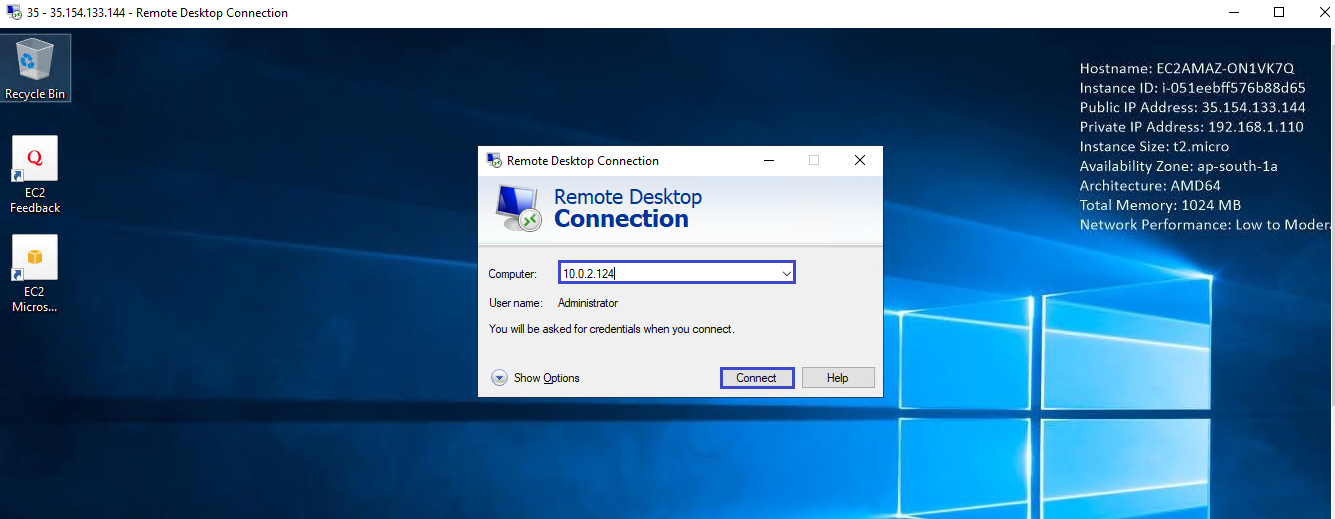
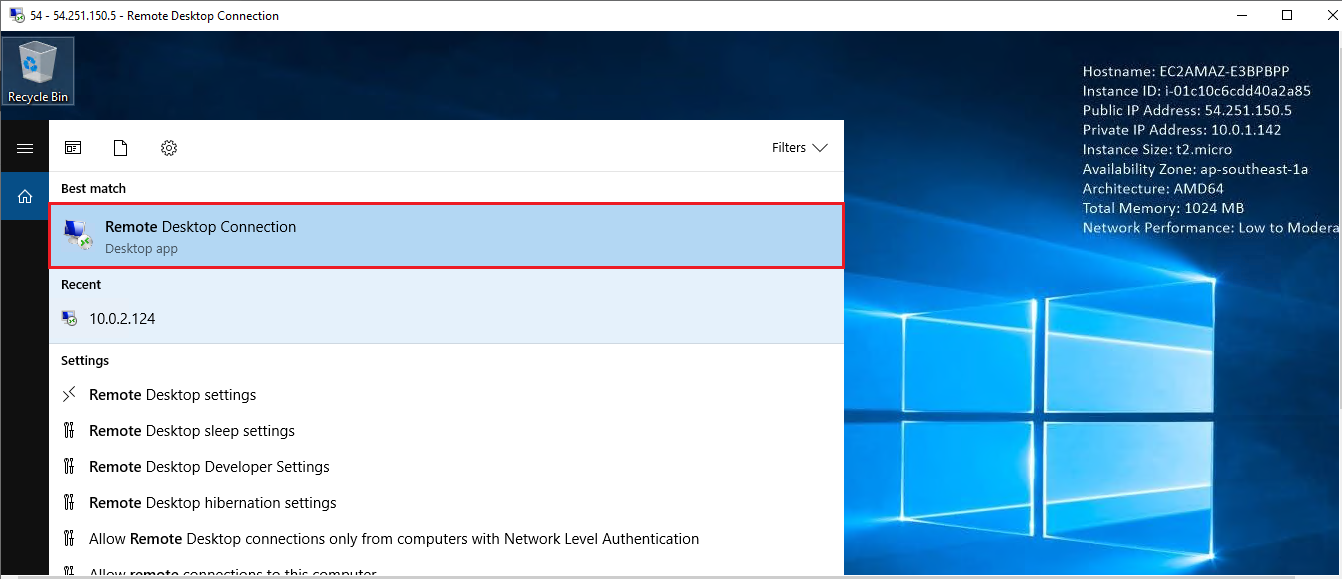
Go inside the Web Server and Search Remote Desktop Connection in Search Bar
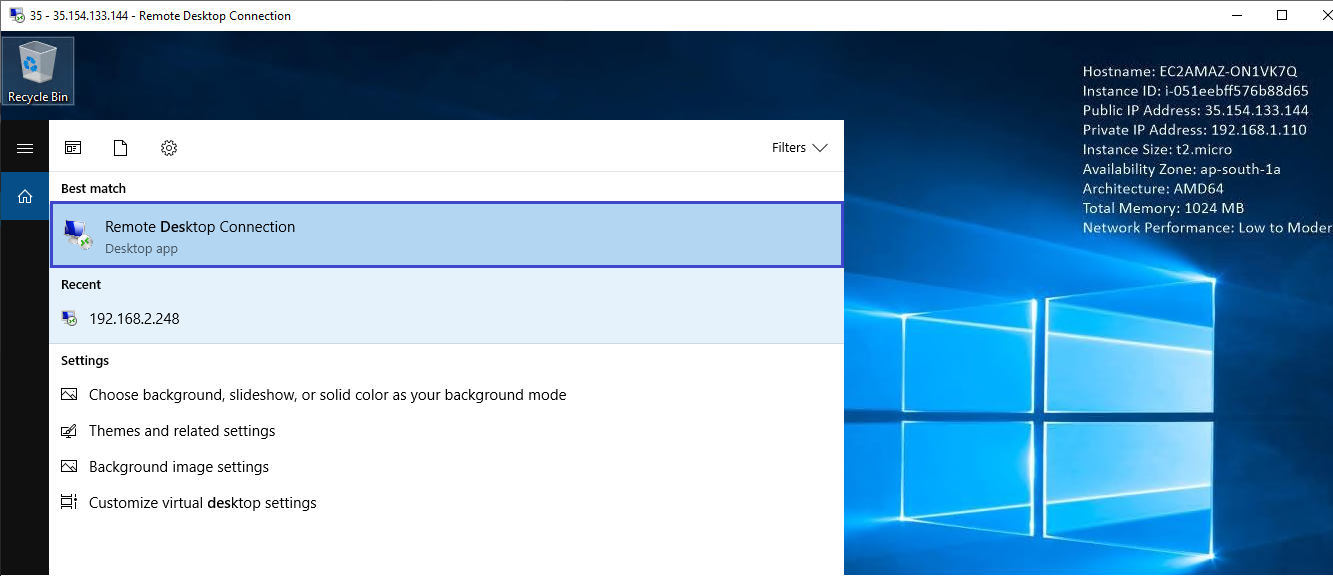
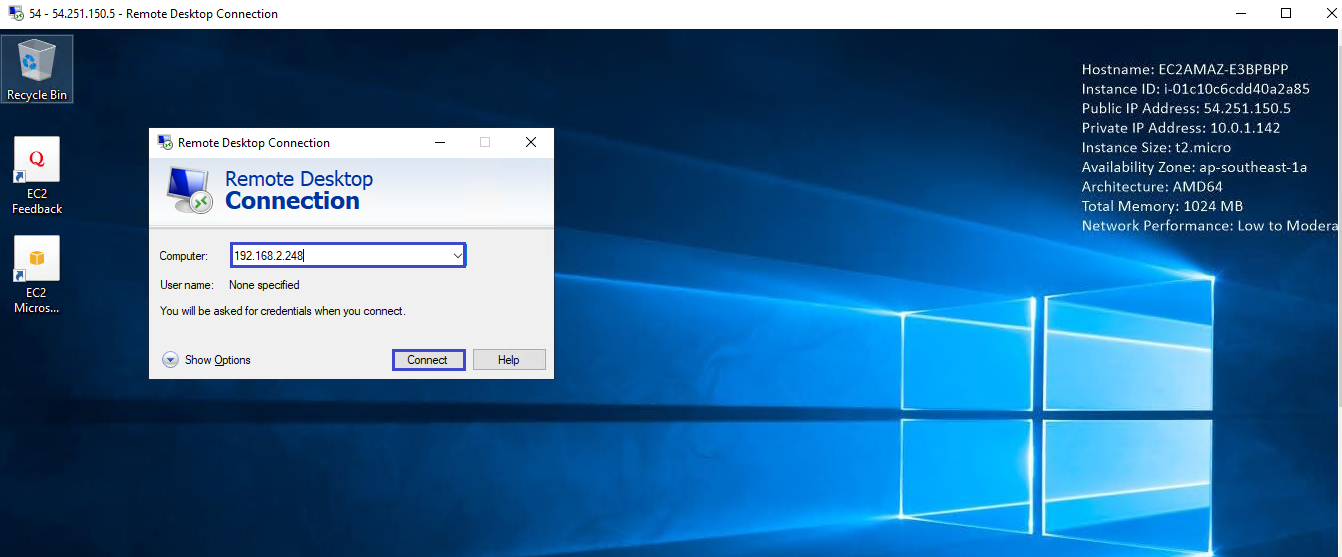
Open Remote Desktop Connection and paste Private IP of Database Server (Singapore Region) and click on Connect.
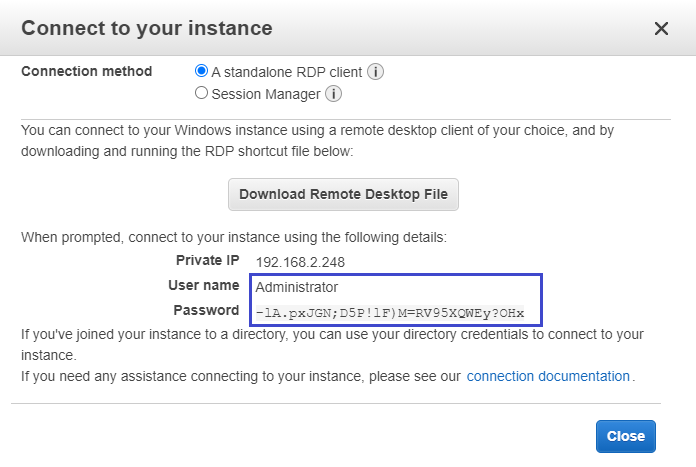
Copy Username and password of database server (Singapore Region).
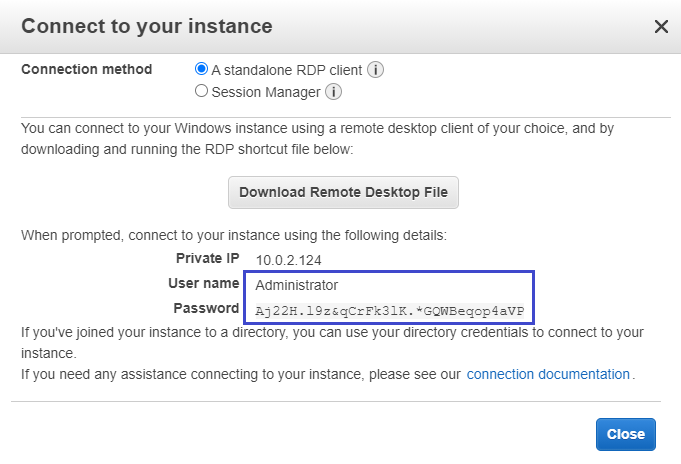
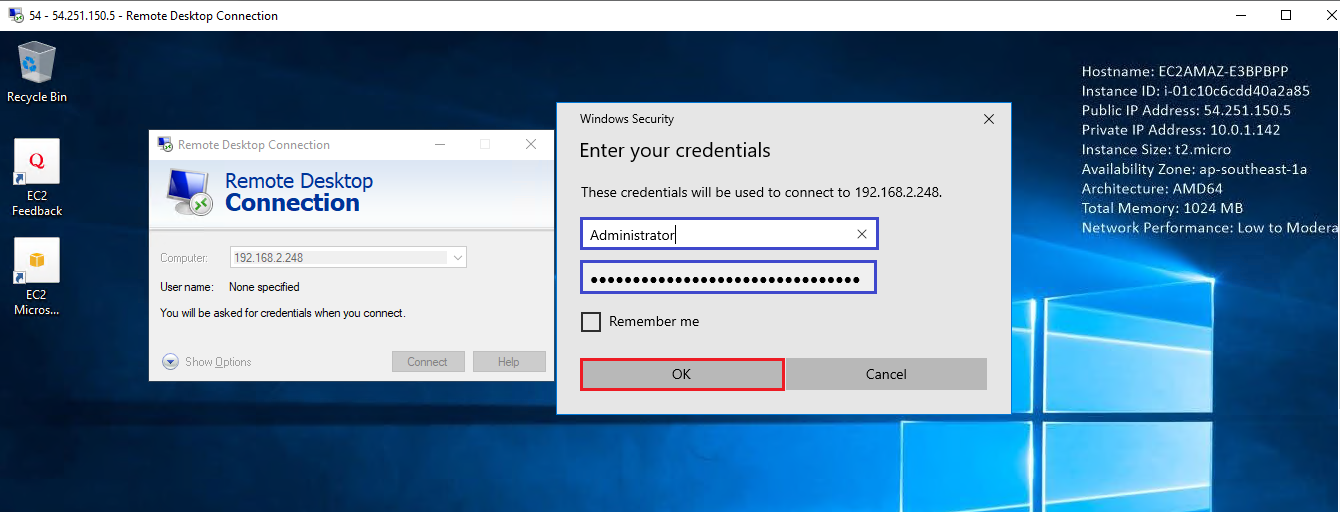
Specify Database Server (Singapore Region) Username and Password and Click on ok.
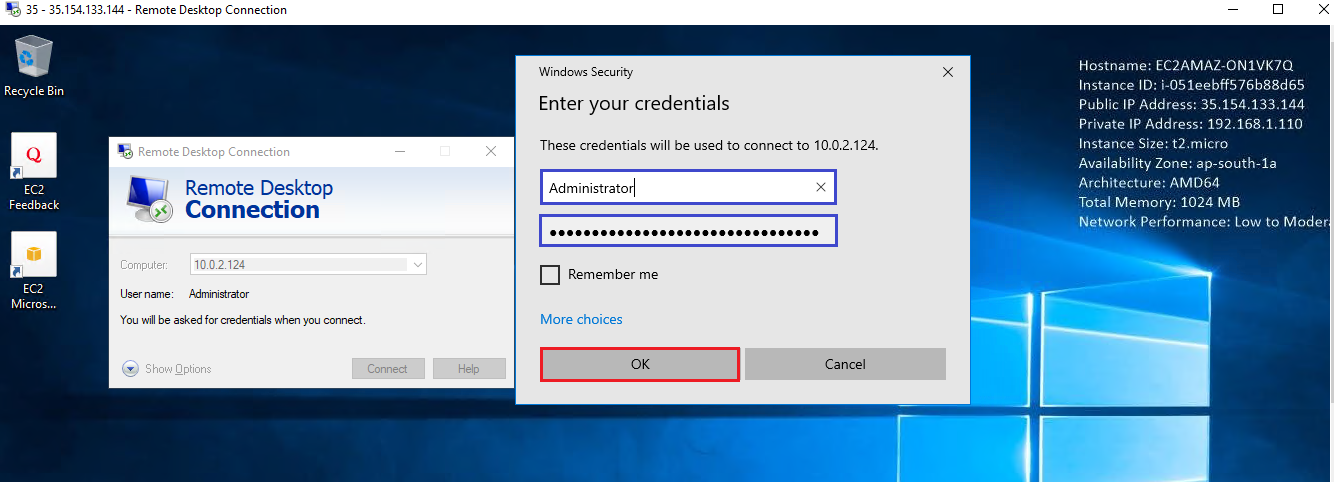
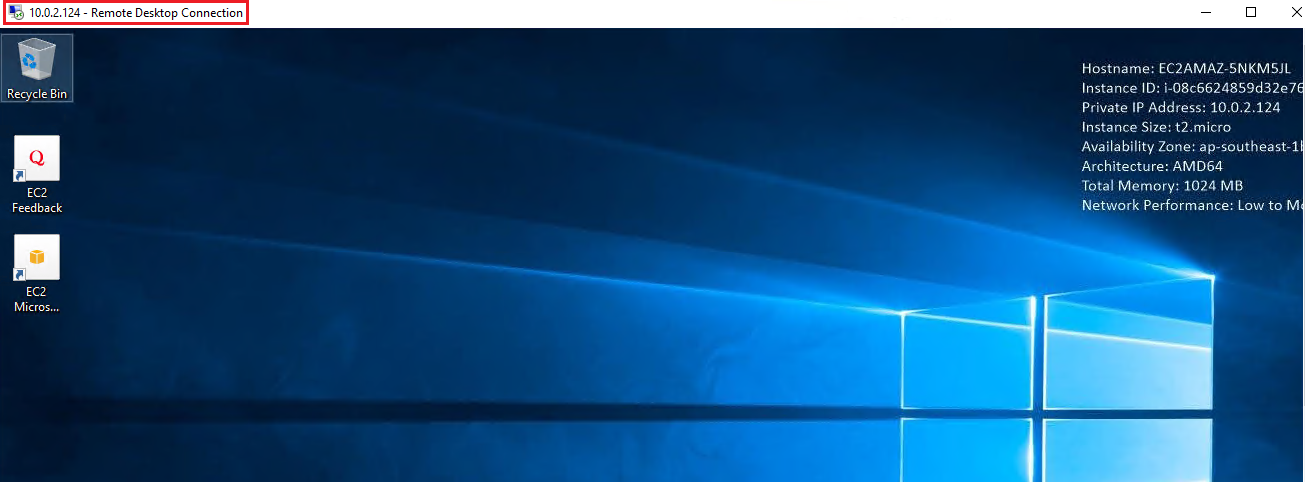
We have connected to database server (Singapore Region) from Webserver (Mumbai Region) successfully.
9. Search web content of Webserver (Mumbai Region) in Database Server (Singapore Region)
Go to Mumbai Region, Select webserver and copy Private IP.
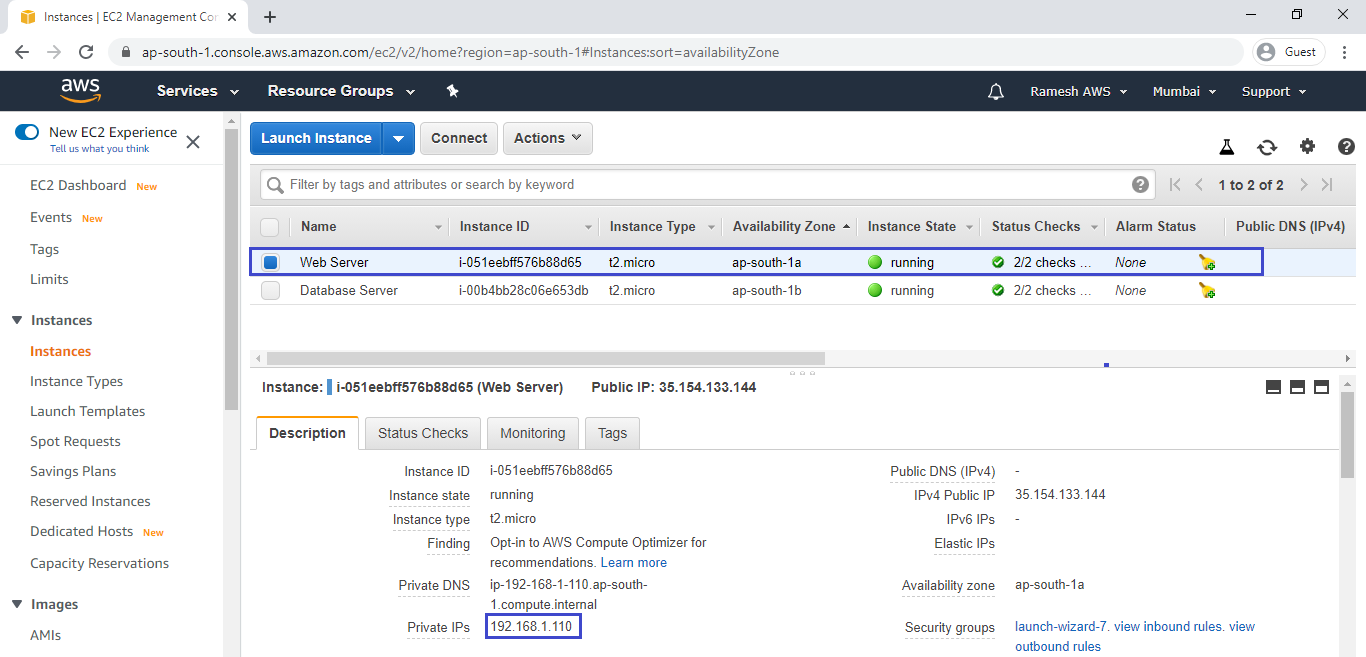
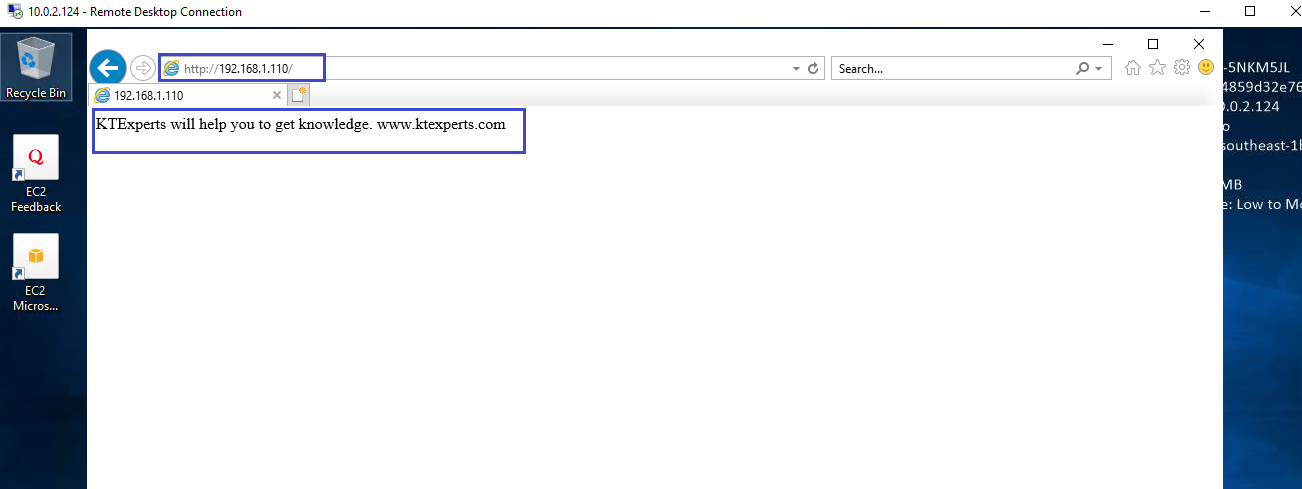
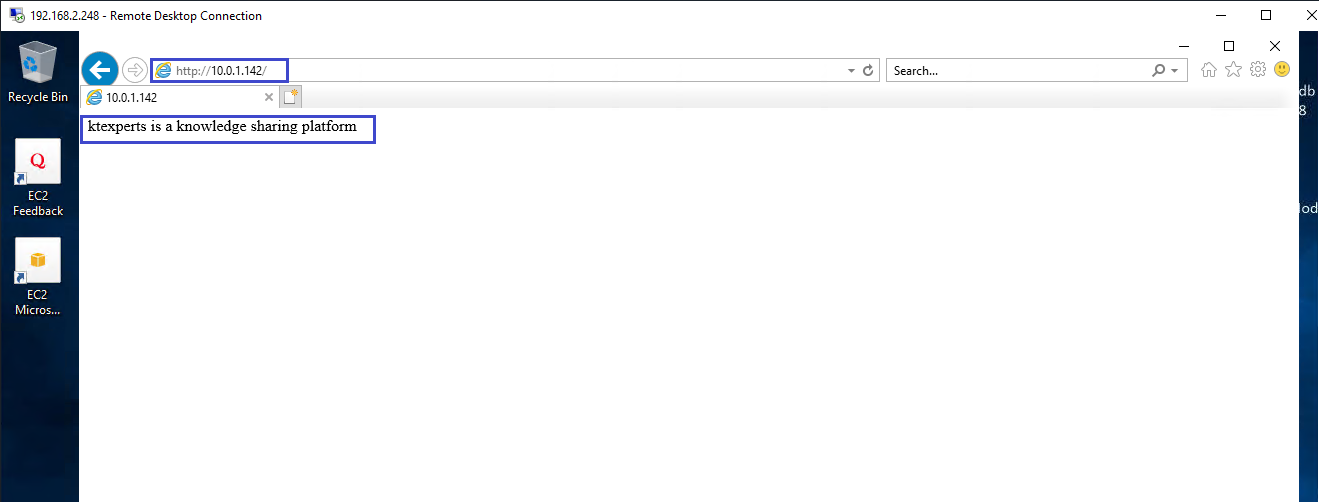
Go to internet explorer and search private IP which was copied from webserver in database server.
we can see the web content of web sever (Mumbai Region).
10. Go inside the Web Server of VPC 2 (Singapore Region) and Connect to Database Server of VPC 1 (Mumbai Region)
Go to Singapore Region,
Connect to Web Server by using Remote Desktop Connection.

We can see the web server of Singapore Region.
Connect to Database Server of Mumbai Region by using Remote Desktop Connection
Go to Mumbai Region, Select Database Server and copy private IP.
Go inside the Web Server and Search Remote Desktop Connection in Search Bar
Open Remote Desktop Connection and paste Private IP of Database Server (Mumbai Region) and click on Connect.
Copy Username and password of database server (Mumbai Region).
Specify Database Server (Mumbai Region) Username and Password and Click on ok.
We have connected to database server (Mumbai Region) from Webserver (Singapore Region) successfully.
11. Search web content of Webserver (Mumbai Region) in Database Server (Singapore Region)
Go to Singapore Region, Select webserver and copy Private IP.
Go to internet explorer and search private IP which was copied from webserver in database server.
we can see the web content of web sever (Singapore Region).
Thank you for giving your valuable time to read the above information.
Follow us on
Website : www.ktexperts.com
Facebook Page : KTexperts
Linkedin Page : KT EXPERTS
Follow Me
Ramesh’s Linkedin : Ramesh Atchala