Dear Readers,
In this article, we will see the following Connect to Amazon EC2 Instance Using Putty.

Steps to Follow :
- Logging to AWS Account
- Launch Linux Server
- Download putty and puttygen tools
- Convert pem file to ppk file by using puttygen
- Connect to Linux Server by Using Putty
1. Logging to AWS Account
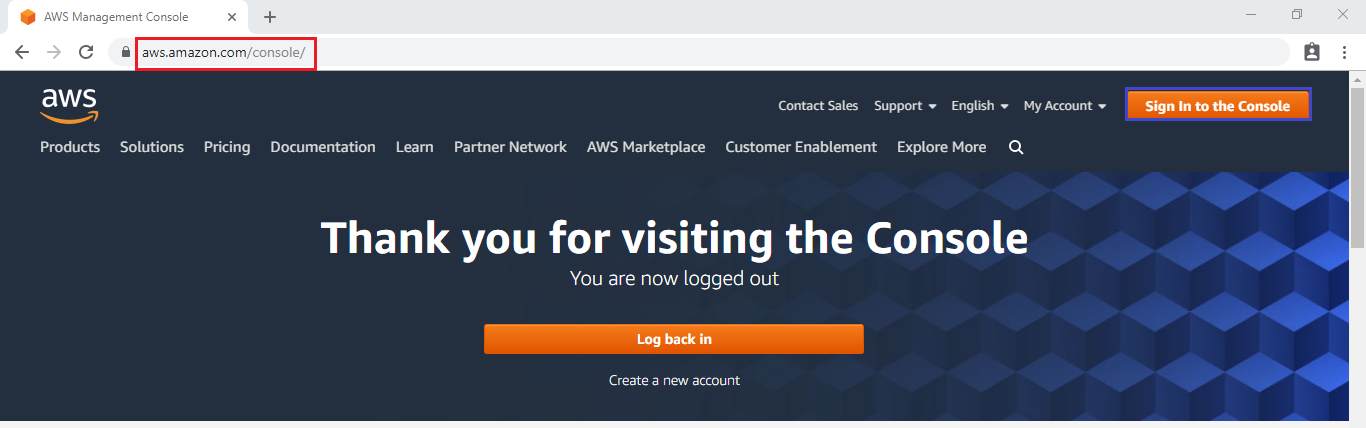
First, we need to AWS Console page by using below link.
https://aws.amazon.com/console/
Click on sign in to Console button.
Logging to aws account
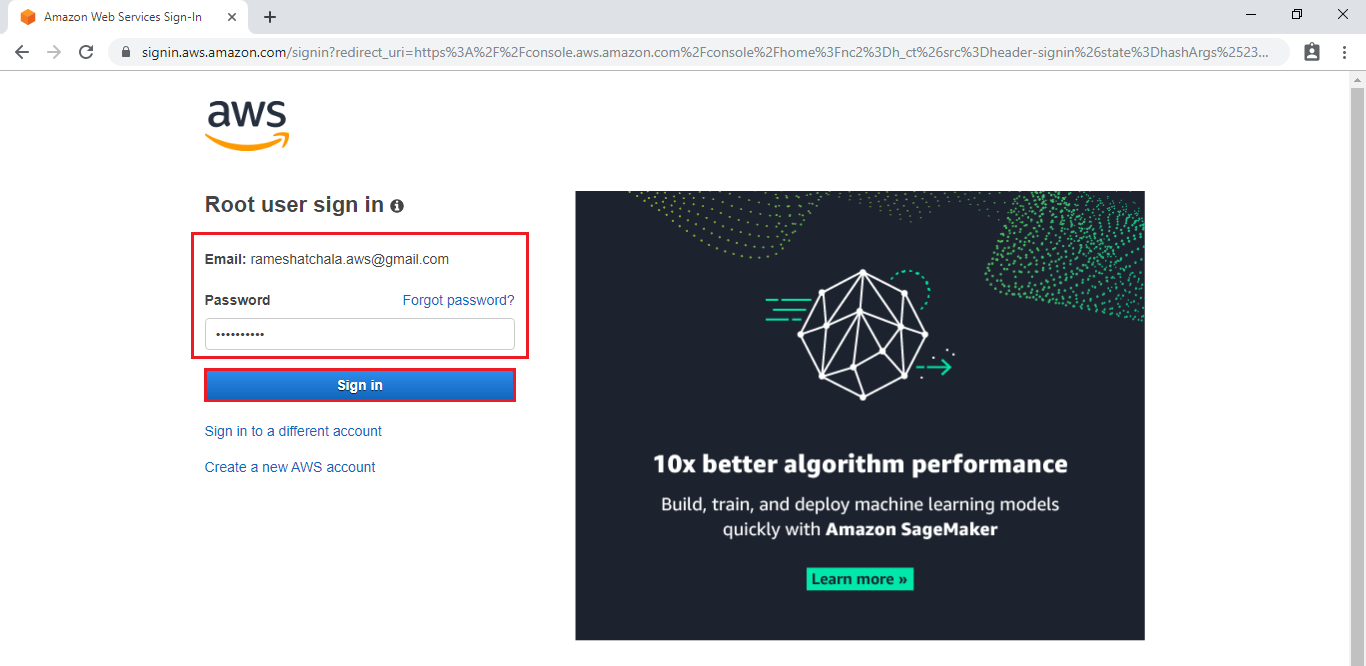
Login using username & password and click on sign in.
Enter to AWS Management Console
We can see the AWS Management Console Dashboard.
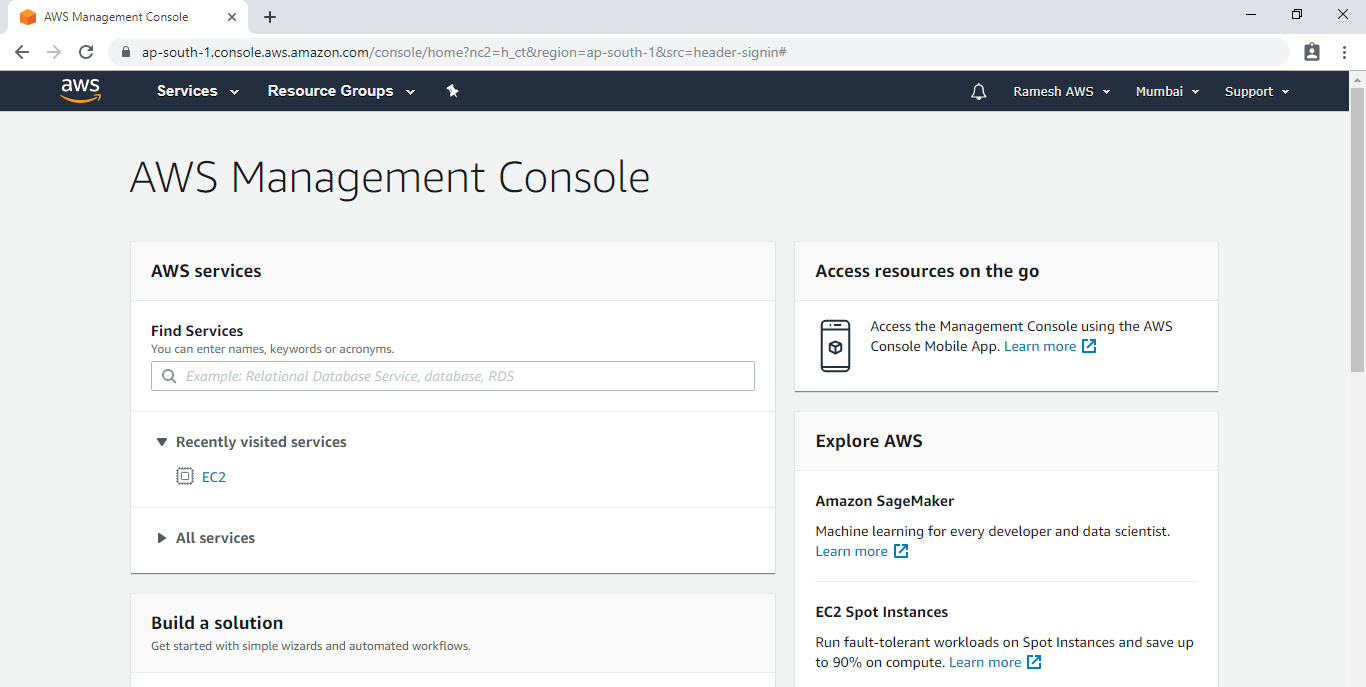
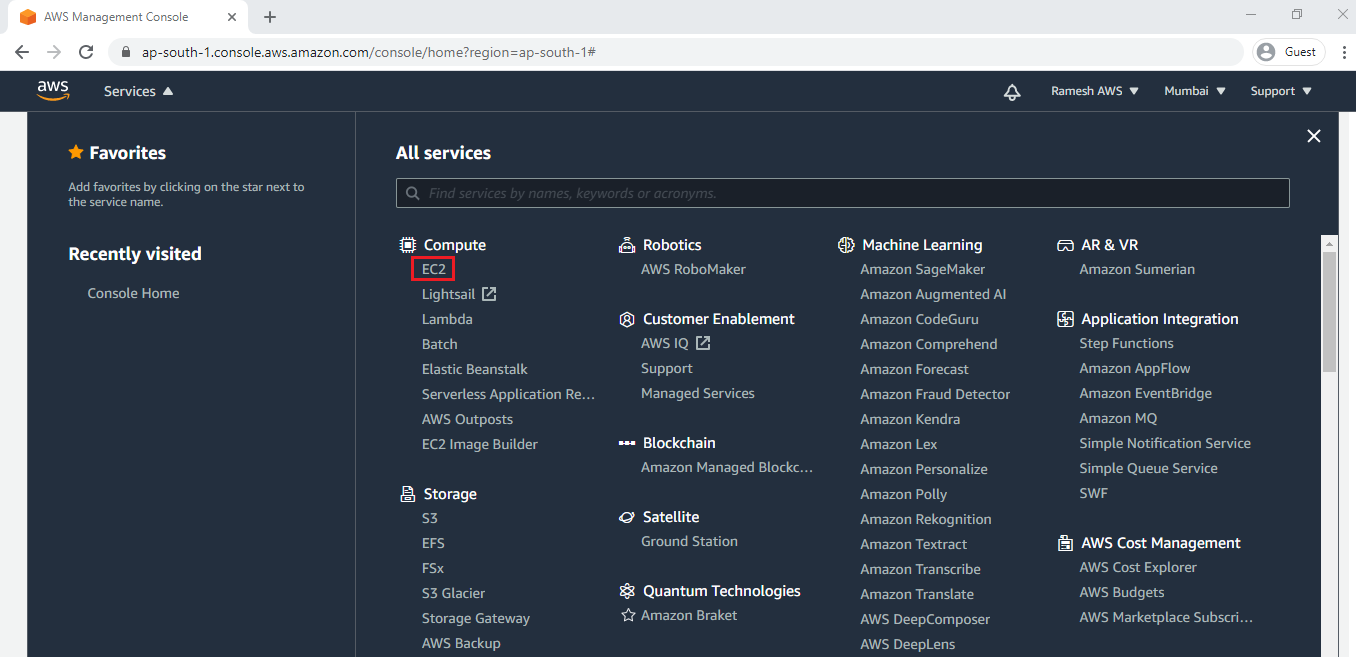
Go to Services, under the compute module click EC2 service to open.
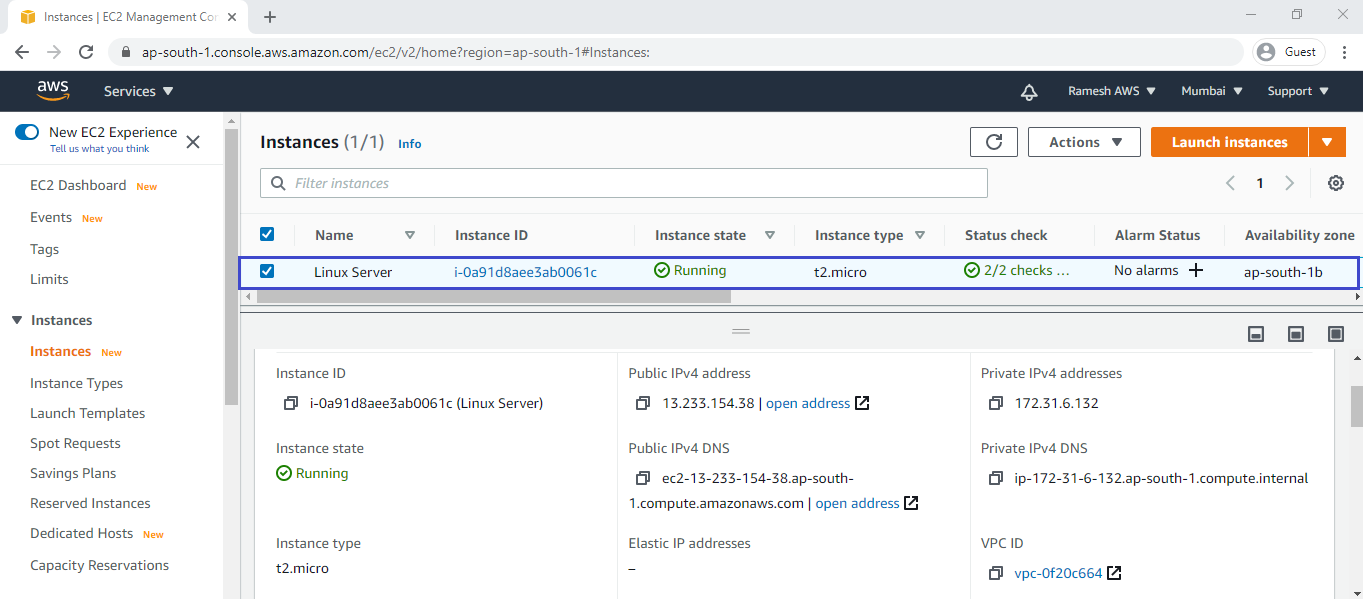
2. Launch Linux Server
Go to Services, under the compute module click EC2 service to open.
We can launch Windows Server by using below link.
How to Launch Linux EC2 Instance
We can see the windows server has been launched successfully.
3. Download putty and puttygen tools
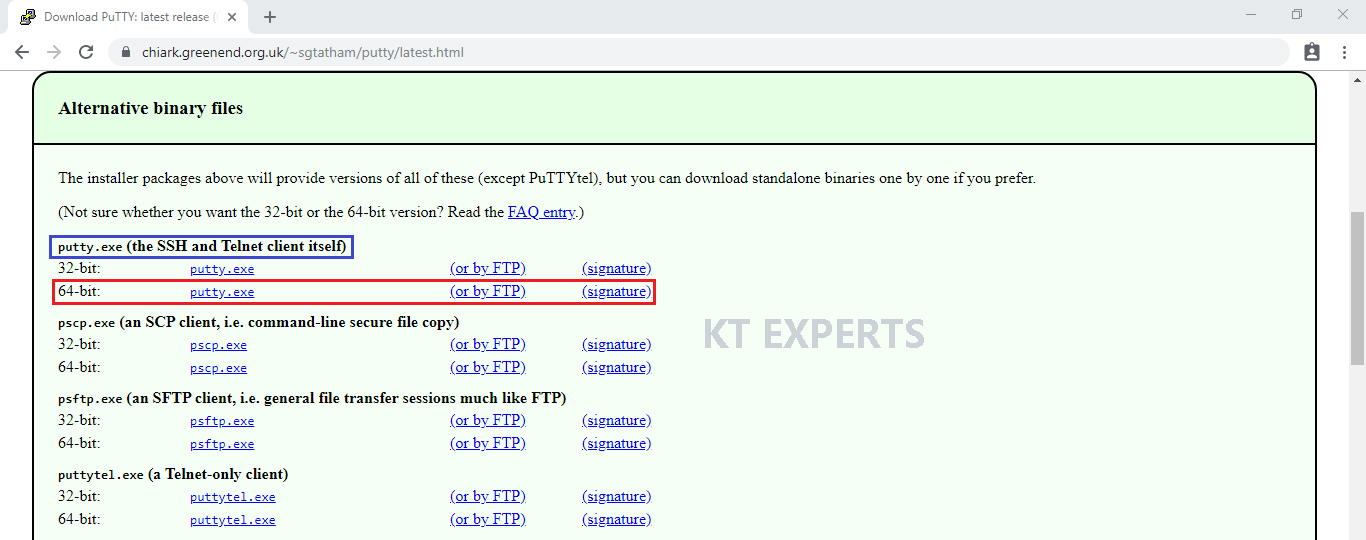
First of all, you need to have puttygen and Putty exe for connecting to the server from Windows (or the SSH command on Linux).
You can download putty by following link. https://www.chiark.greenend.org.uk/~sgtatham/putty/latest.html
Go to putty.exe and click on 64 bit.
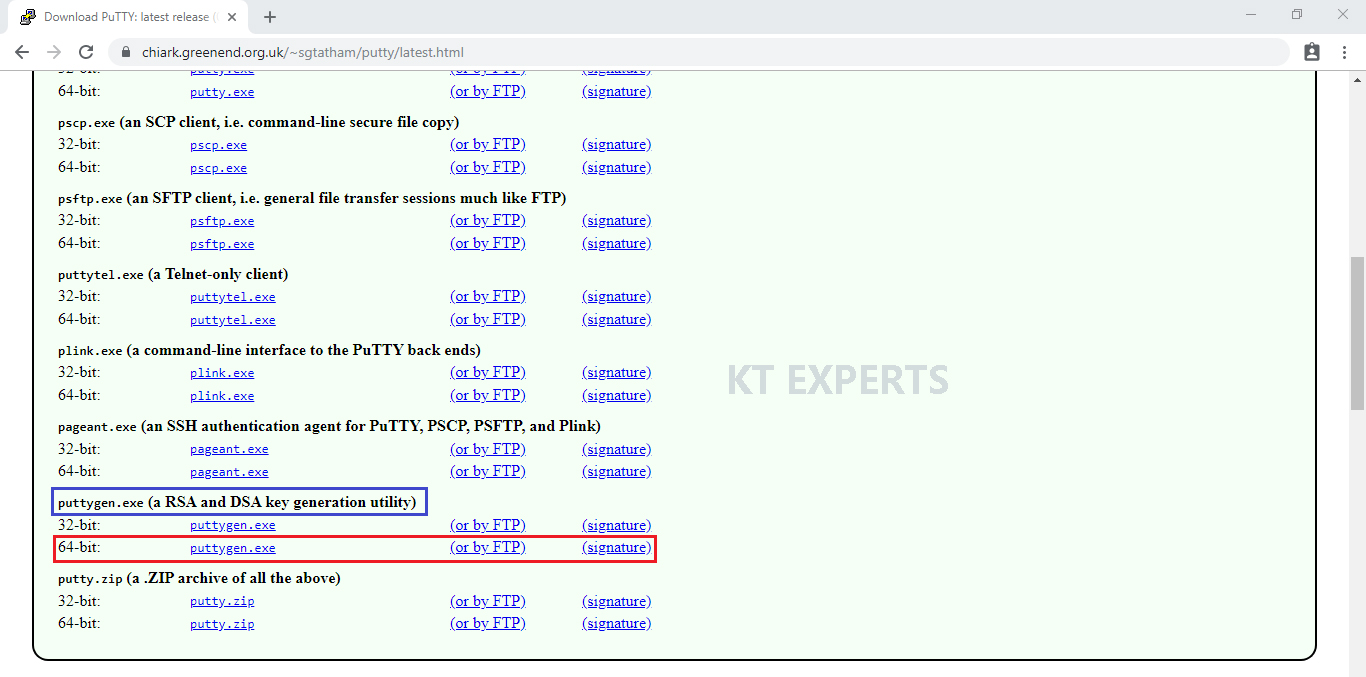
Go to puttygen.exe then click on 64 bit to download the tool.
Go to physical location and check the putty and puttygen tools.

4. Convert pem file to ppk file by using puttygen
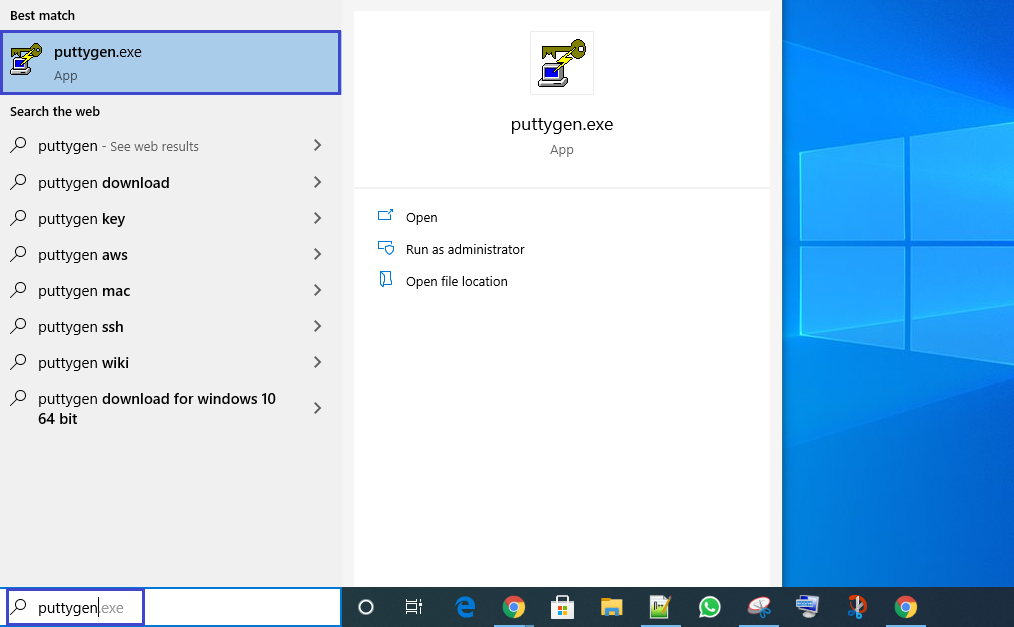
Go to seachbar and open puttygen by typing puttygen on search bar.
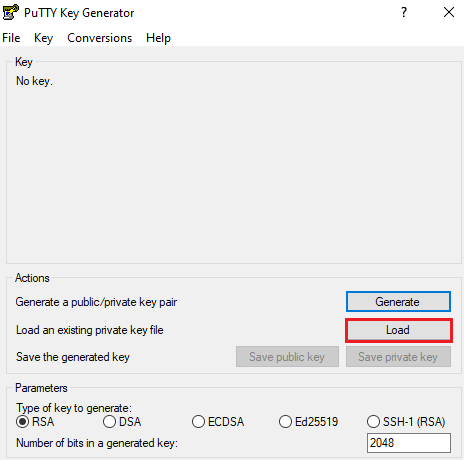
Open puttygen and click on Load.
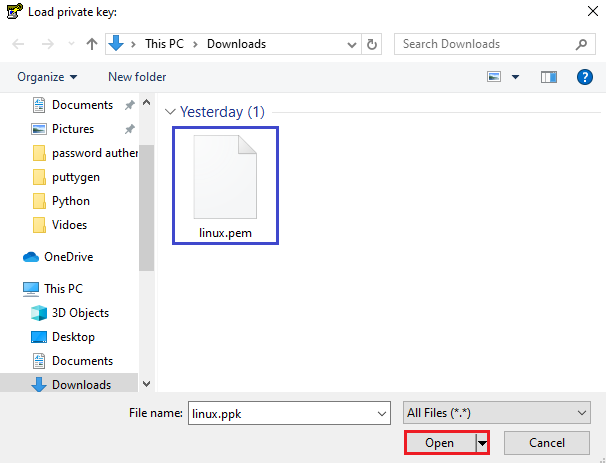
Select your pem file from physical location and click on open.
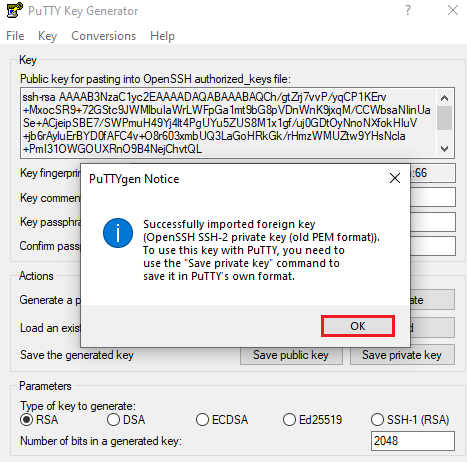
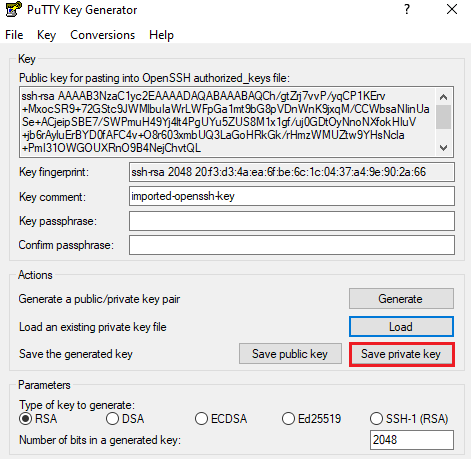
Click on ok.
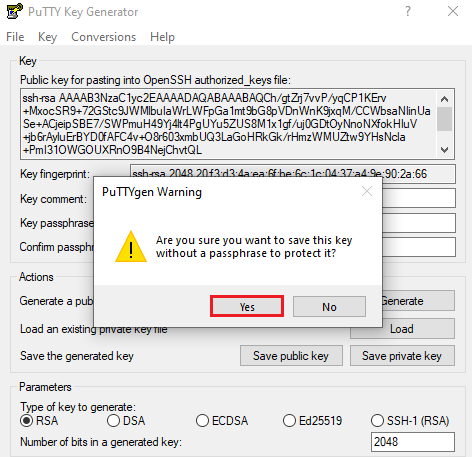
Click on Save private key.
Click on Yes.
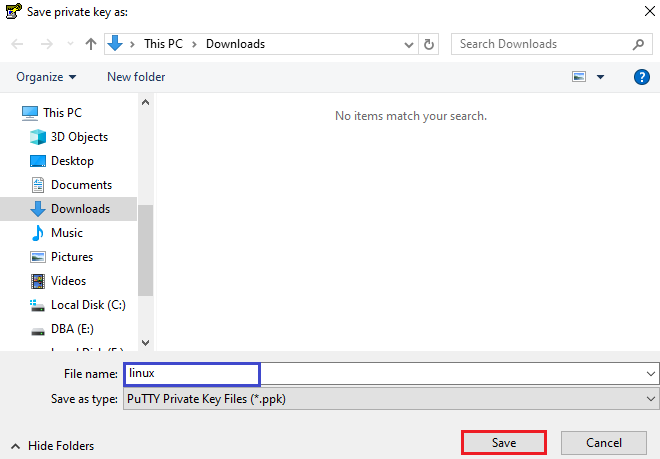
save your ppk file with name of linux.
We can see the ppk file in physical location.
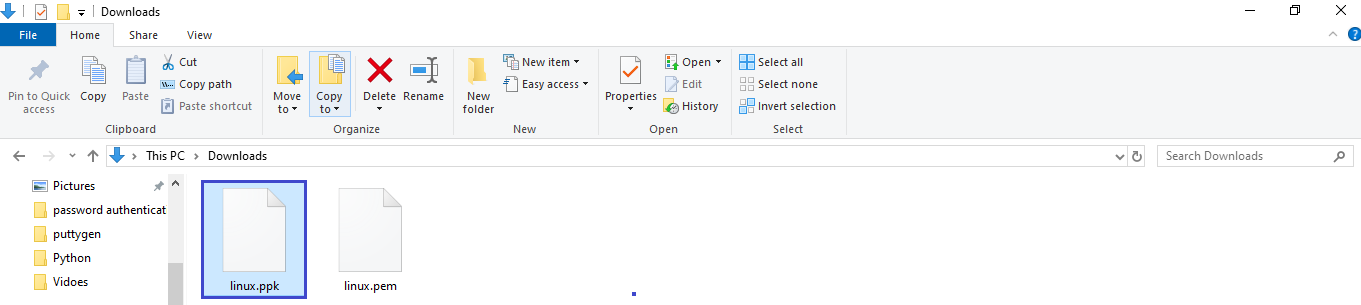
As of now we have converted pem to ppk file, now we can connect to server with help of ppk file by using putty.
5. Connect to Linux Server by Using Putty
In order to connect to your Linux virtual machine instance, you will need a third-party tool like putty.
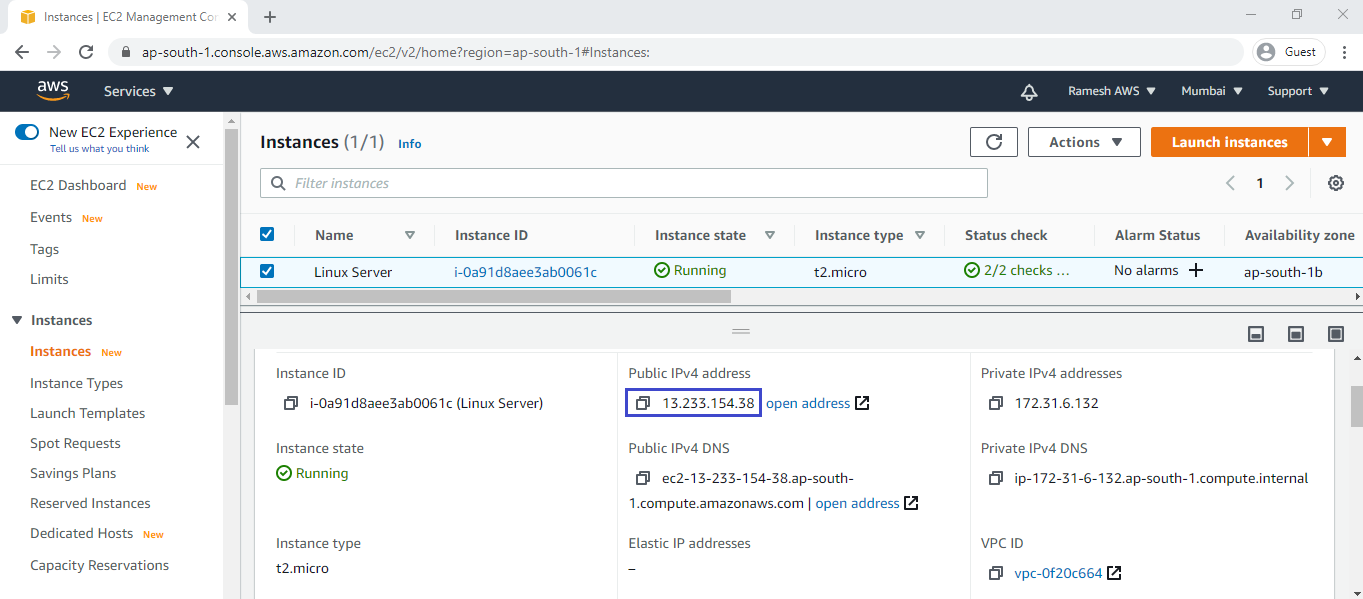
Go to your instance and copy Public IPV4 address.
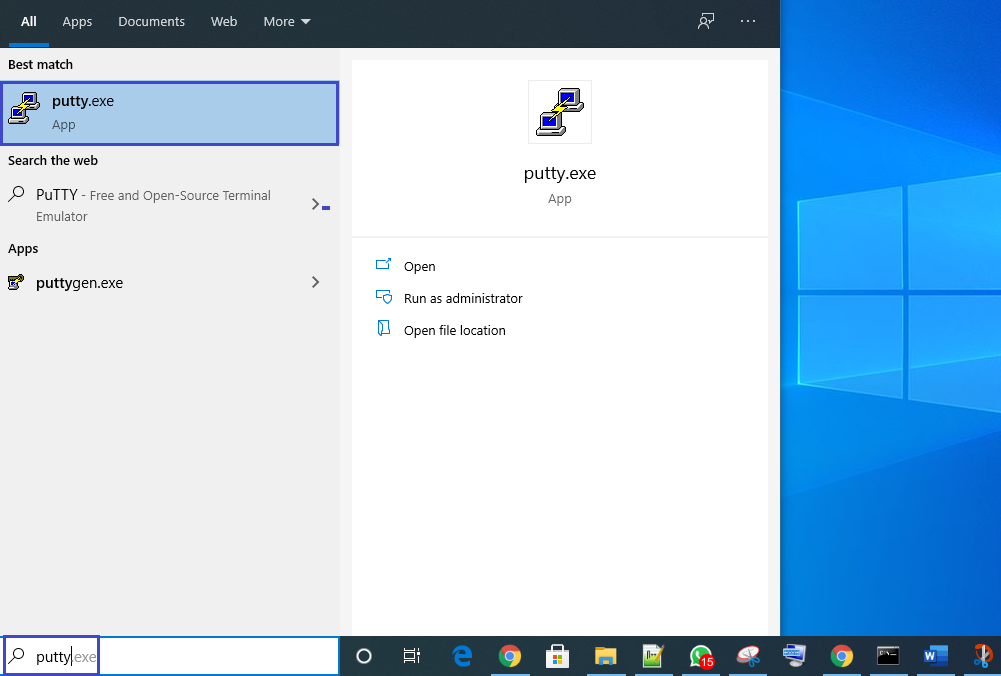
Go to seachbar and open putty by typing putty on search bar.
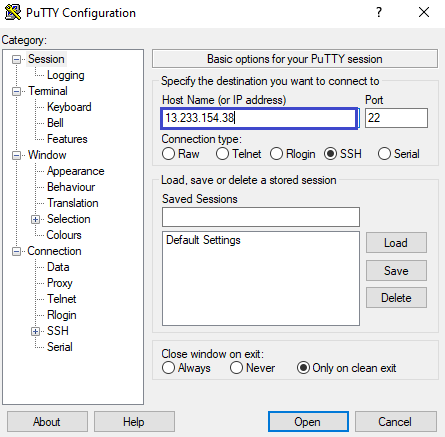
Specify Public IPV4 of your instance which copied.
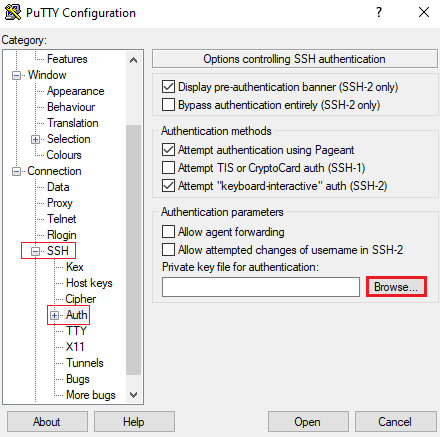
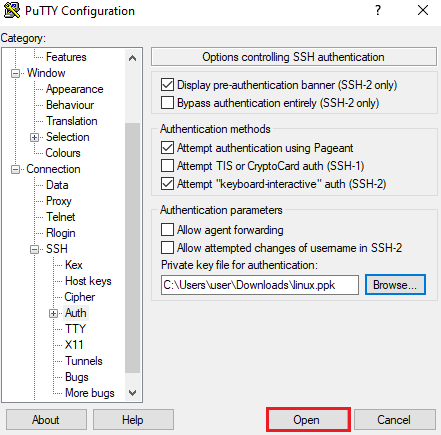
Go to connection at the left side menu then select “SSH” and then select “Auth”. You need to click on the browse .
Select you ppk file from physical location and click on open.
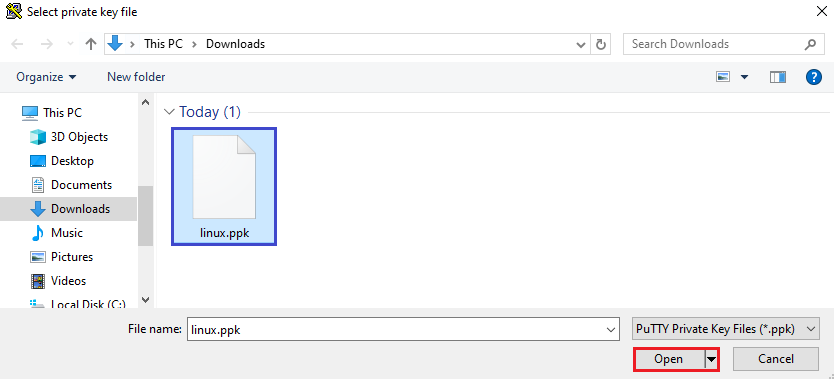
Click on open.
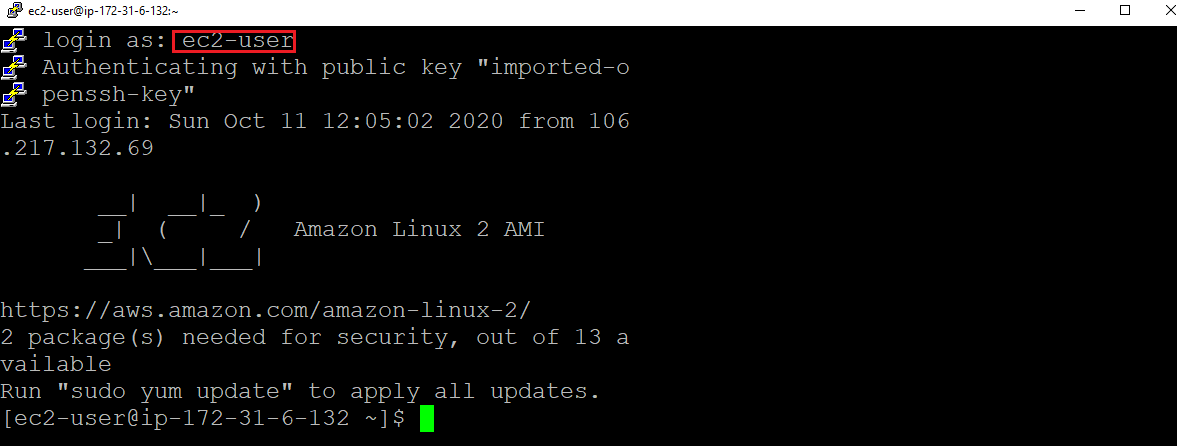
We can see the Linux server terminal means we are successfully connected to instance.
Thank you for giving your valuable time to read the above information.
Follow us on
Website : www.ktexperts.com
Facebook Page : KTexperts
Linkedin Page : KT EXPERTS
Follow Me
Ramesh’s Linkedin : Ramesh Atchala