Dear Readers,
In this article, we will see the following Installation of Oracle Database 19c On Windows.

Step-1: 👉 Download the Oracle Database Software
Download the Oracle Database 19c software (Windows Version) by the below link.
https://www.oracle.com/database/technologies/oracle-database-software-downloads.html#19c
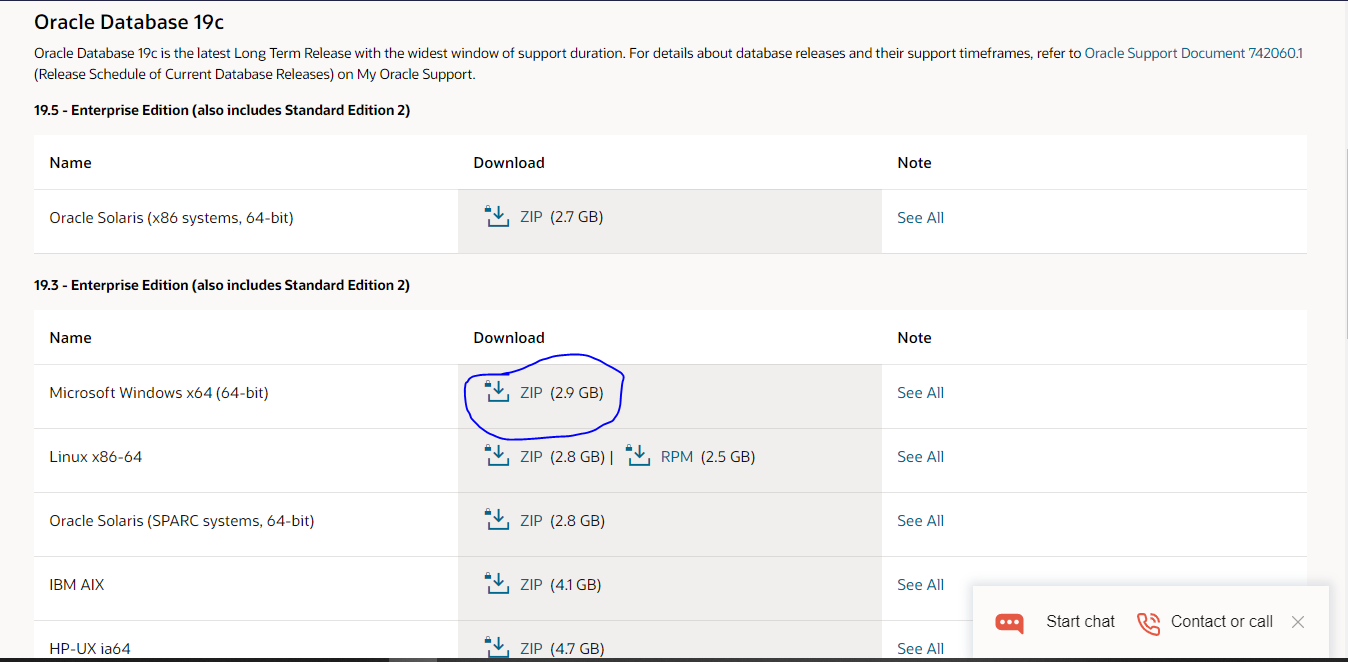
Oracle software will be downloaded in zip format So, unzip the file to a specified folder before proceeding to the installation part.
With the launch of image based installation, Oracle installer sets the db_home location in the folder where we extracted the Oracle database files. So extract the files to the specific folder

Step-2: 👉 Installing Oracle Database
Open the folder which contains the extracted files of Oracle Database 19c Software, Click on setup.exe.

Click yes in the user control window.
After hitting the yes Oracle Database 19c Installer window appears with two options.
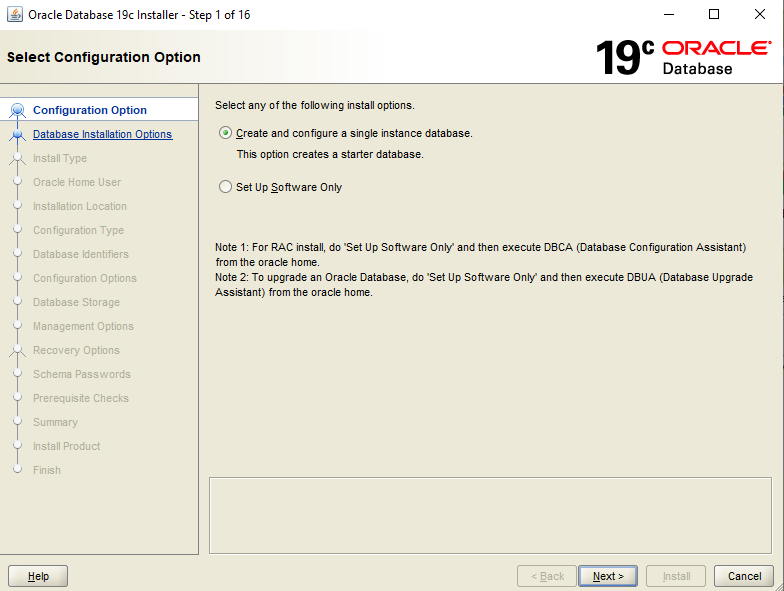
👉 Create and Configure a database.
👉 Setup Software Only.
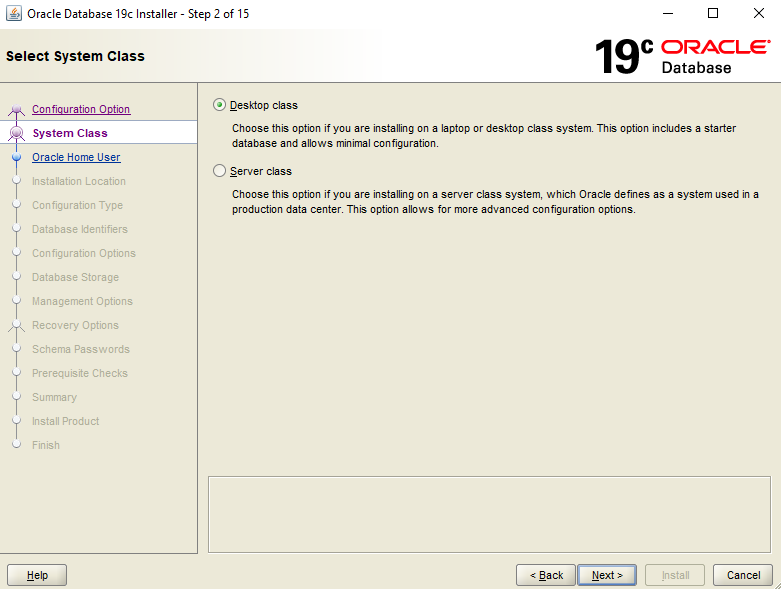
Step-3: 👉 Select system class
In this step we need to select either Desktop class installation/Server class Installation depending on the system we are using. In this part, we are selecting the Desktop class and click next
Step-4: 👉 Specify Oracle Home User Account
Specify Oracle Home User Account window appears with the following options
👉 Use Virtual Account.
👉 Use Existing Windows User.
👉 Create New Windows User.
👉 Use Windows Built-In Account.

Select any one of the options depending upon your requirement
In this case, we are selecting the ‘‘Create New Windows User’’option,
Select ’’Use Windows Built-in-Account’’ if you want use your windows account
If you don’t want to create new user & Windows Built-in-Account ,Select ‘’Use Virtual Account’’option
Step-5: 👉 Typical Install Configuration
A typical install configuration window appears, the installer by default set’s Oracle base, Software location, Database file location, Let it be set on Default and also it creates container database called orclpdb, Enter the global database name & password and click next

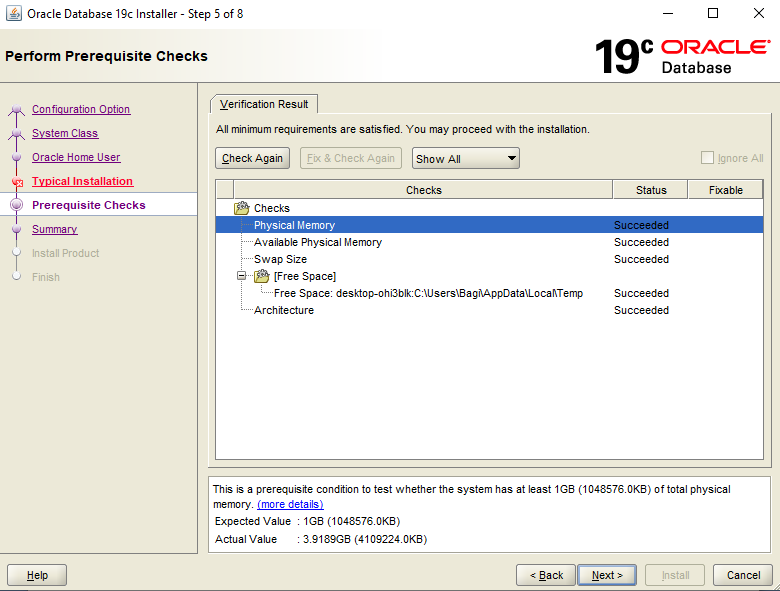
Step-6: 👉 Prerequisite Checks
After completing the database configuration, Prerequisite Checks are performed, If any error it will display here.
Step-7: 👉 Summary
Just click on the install in the summary window So it’ll further proceed to the installation part. You can see the progress of the installation.

If you want to save the above information, Just click on the Save Response File.
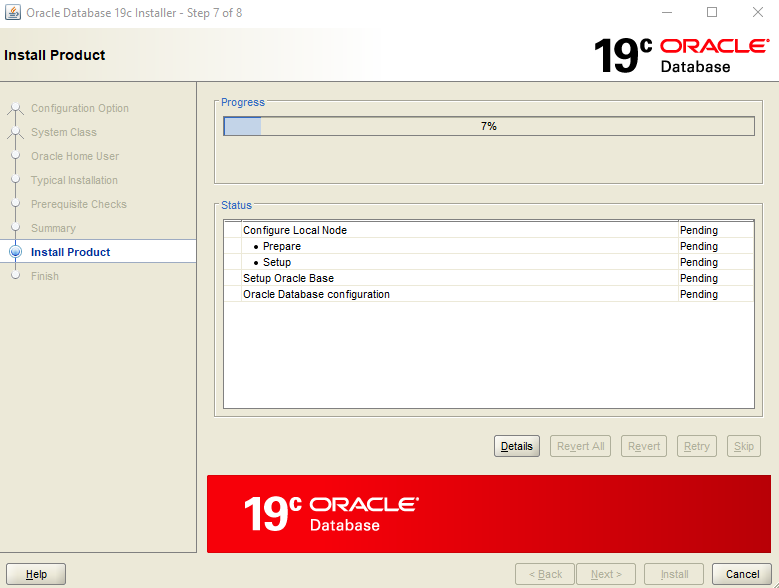
Unlike in the Oracle 12c, In 19c you’ll not get ‘’DATABASE CONFIGURATION ASSISTANT’’ for database configuration
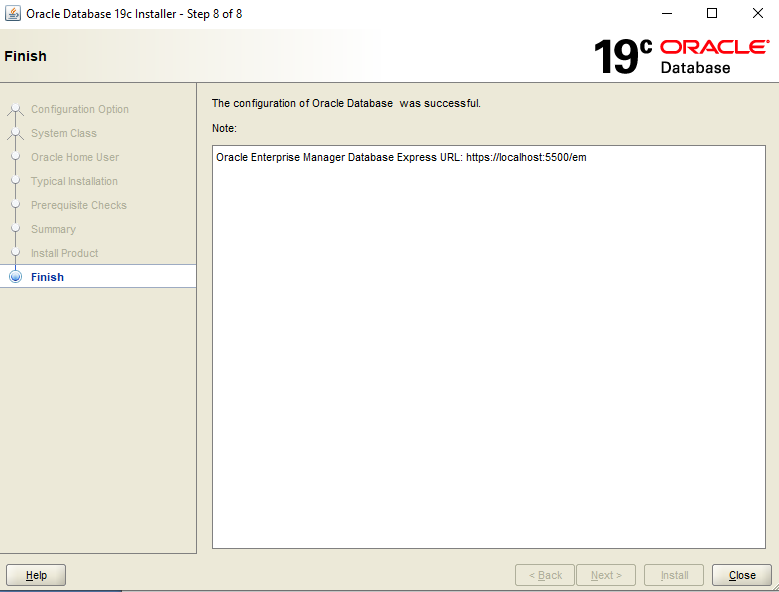
Step-8: 👉 Installation Complete
Once the installation completes without any error, the finish window appears with the URL for Oracle Database 19c Enterprise Manager.
Thank you for giving your valuable time to read the above information.
Follow us on
Website : www.ktexperts.com
Facebook Page : KTexperts
Linkedin Page : KT EXPERTS
Follow Me
Ajay Kumar’s Linkedin : https://www.linkedin.com/in/ajay-kumar90/