Dear Readers,
In this article, we will see the following Installation of MySQL 8.0.21 On RHEL Using Generic Binaries in AWS Cloud .

Steps to Follow :
- Logging to AWS Account
- Launch MySQL EC2 Instance
- Connect to Linux EC2 Instance by Using Putty
- Switch to root user
- Install Server Updates
- Install wget package
- Download MySQL Distribution (tar)
- Install 8.0 Binaries (rpm)
- Install MySQL Server 8.0
- Start the Service of MySQL
- Get the temporary Password
- Setting the root Password
- Connect to MySQL Database
1. Logging to AWS Account
First, we need to AWS Console page by using below link.
https://aws.amazon.com/console/
Click on sign in to Console button.
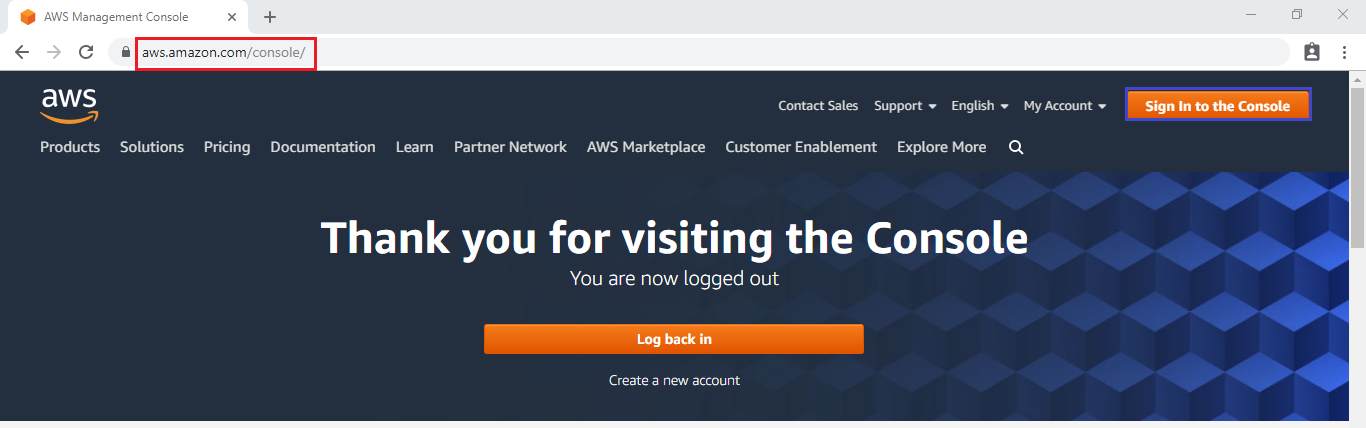
Logging to aws account
Login using username & password and click on sign in.
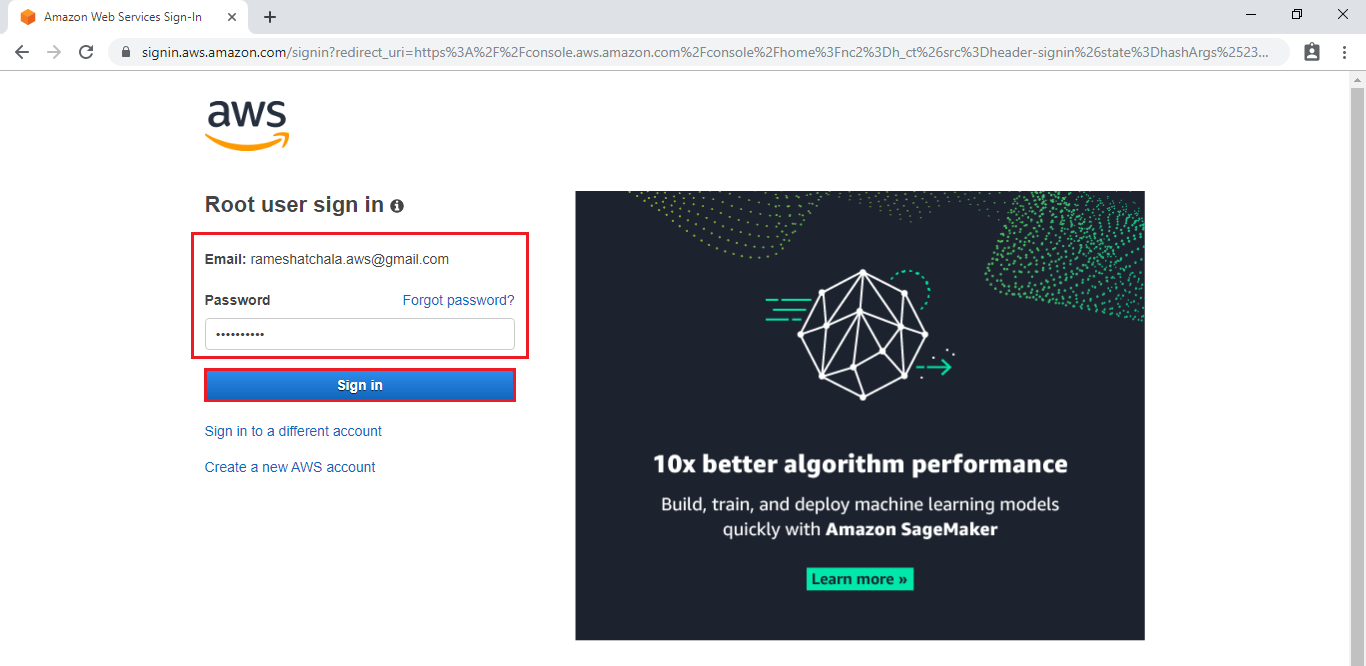
Enter to AWS Management Console
We can see the AWS Management Console Dashboard.
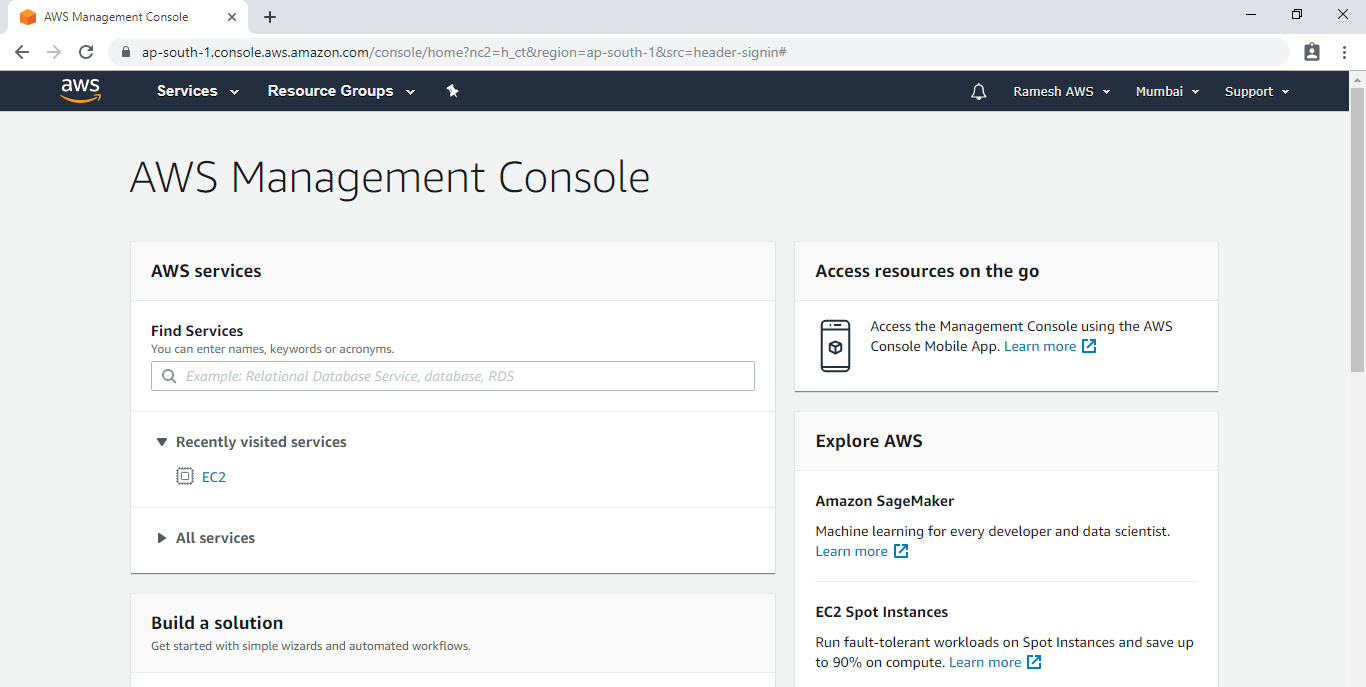
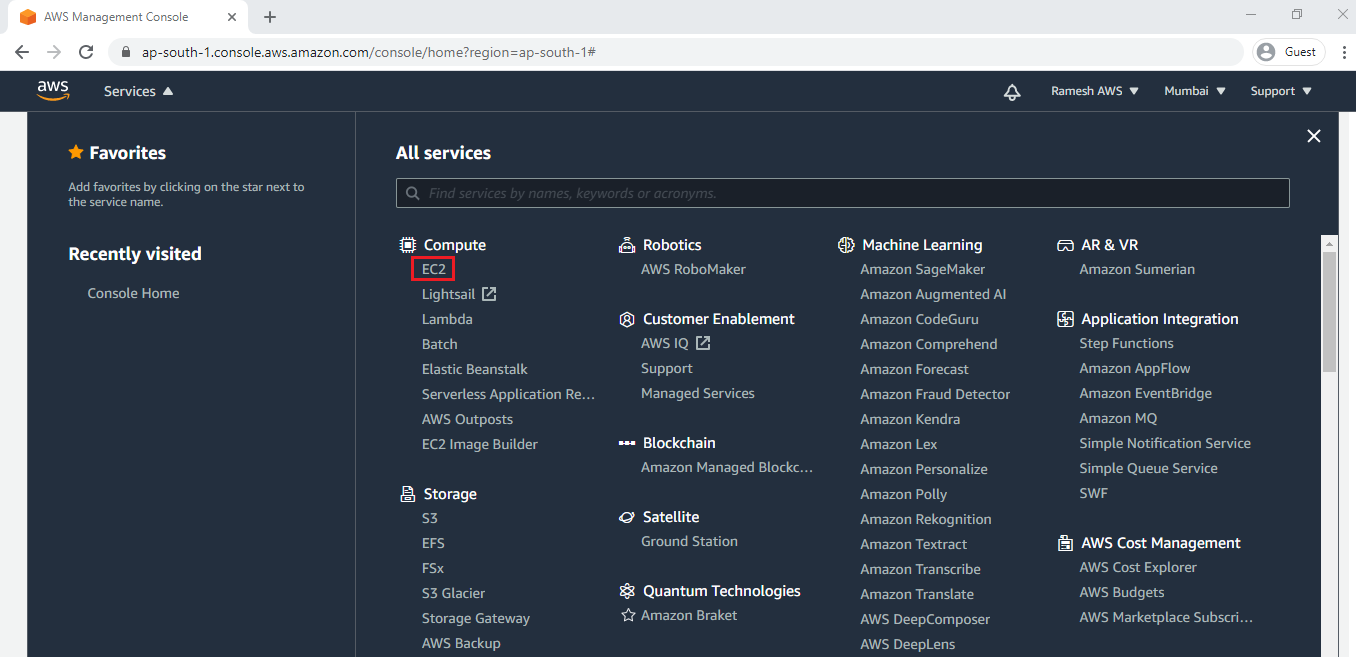
Go to Services, under the compute module click EC2 service to open.
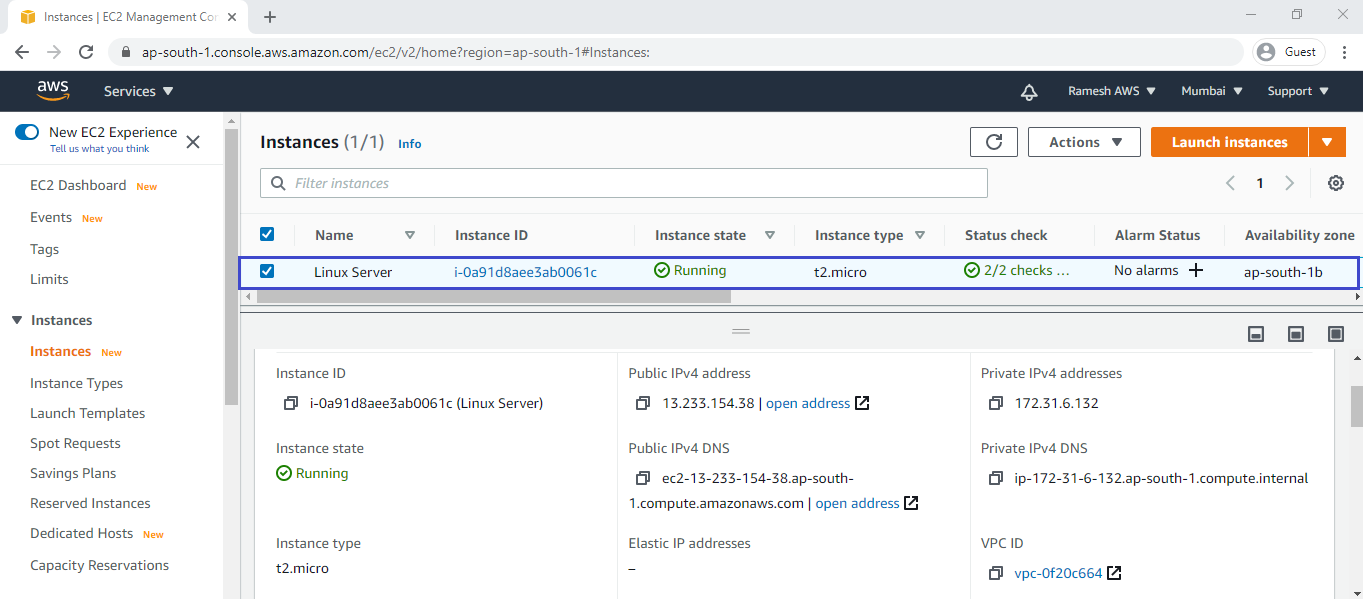
2. Launch MySQL EC2 Instance
Go to Services, under the compute module click EC2 service to open.
We can launch MySQL EC2 Instance by using below link.
We can see the MySQL EC2 Instance has been launched successfully.
3. Connect to Linux EC2 Instance Using Putty
We can connect putty by using below link.
Connect to EC2 Instance Using Putty
Go inside the Linux Server Terminal.
|
1 2 3 4 5 6 7 8 9 10 11 |
login as: ec2-user Authenticating with public key "imported-openssh-key" __| __|_ ) _| ( / Amazon Linux 2 AMI ___|\___|___| https://aws.amazon.com/amazon-linux-2/ 2 package(s) needed for security, out of 13 available Run "sudo yum update" to apply all updates. [ec2-user@ip-172-31-35-98 ~]$ |
4. Switch to root user
|
1 2 |
[ec2-user@ip-172-31-35-98 ~]$ sudo su [root@ip-172-31-35-98 ec2-user]# |
5. Install Server updates
|
1 2 3 4 5 6 7 8 9 10 11 12 13 14 15 16 17 18 19 20 21 22 23 24 25 26 27 28 29 30 31 32 33 34 35 36 37 38 39 40 41 42 43 44 45 46 47 48 49 50 51 52 53 54 55 56 57 58 59 60 61 62 63 64 65 66 67 68 69 70 71 72 73 74 75 76 77 78 79 80 81 82 83 84 85 86 87 88 89 90 91 92 93 94 95 96 97 |
[root@ip-172-31-35-98 ec2-user]# yum update -y Red Hat Update Infrastructure 3 Client Configuration Server 8 14 kB/s | 3.5 kB 00:00 Red Hat Enterprise Linux 8 for x86_64 - AppStream from RHUI (RPMs) 39 MB/s | 25 MB 00:00 Red Hat Enterprise Linux 8 for x86_64 - BaseOS from RHUI (RPMs) 43 MB/s | 26 MB 00:00 Dependencies resolved. ============================================================================================================================================================================================================== Package Architecture Version Repository Size ============================================================================================================================================================================================================== Installing: kernel x86_64 4.18.0-240.8.1.el8_3 rhel-8-baseos-rhui-rpms 4.3 M kernel-core x86_64 4.18.0-240.8.1.el8_3 rhel-8-baseos-rhui-rpms 30 M kernel-modules x86_64 4.18.0-240.8.1.el8_3 rhel-8-baseos-rhui-rpms 26 M Upgrading: NetworkManager x86_64 1:1.26.0-12.el8_3 rhel-8-baseos-rhui-rpms 2.4 M NetworkManager-libnm x86_64 1:1.26.0-12.el8_3 rhel-8-baseos-rhui-rpms 1.8 M NetworkManager-team x86_64 1:1.26.0-12.el8_3 rhel-8-baseos-rhui-rpms 142 k NetworkManager-tui x86_64 1:1.26.0-12.el8_3 rhel-8-baseos-rhui-rpms 320 k cloud-init noarch 19.4-11.el8_3.1 rhel-8-appstream-rhui-rpms 945 k curl x86_64 7.61.1-14.el8_3.1 rhel-8-baseos-rhui-rpms 353 k freetype x86_64 2.9.1-4.el8_3.1 rhel-8-baseos-rhui-rpms 394 k gnutls x86_64 3.6.14-7.el8_3 rhel-8-baseos-rhui-rpms 1.0 M insights-client noarch 3.1.1-1.el8_3 rhel-8-appstream-rhui-rpms 1.0 M iptables-libs x86_64 1.8.4-15.el8_3.3 rhel-8-baseos-rhui-rpms 106 k kernel-tools x86_64 4.18.0-240.8.1.el8_3 rhel-8-baseos-rhui-rpms 4.5 M kernel-tools-libs x86_64 4.18.0-240.8.1.el8_3 rhel-8-baseos-rhui-rpms 4.3 M kexec-tools x86_64 2.0.20-34.el8_3.1 rhel-8-baseos-rhui-rpms 496 k libcurl x86_64 7.61.1-14.el8_3.1 rhel-8-baseos-rhui-rpms 299 k microcode_ctl x86_64 4:20200609-2.20201112.1.el8_3 rhel-8-baseos-rhui-rpms 4.6 M openssl x86_64 1:1.1.1g-12.el8_3 rhel-8-baseos-rhui-rpms 707 k openssl-libs x86_64 1:1.1.1g-12.el8_3 rhel-8-baseos-rhui-rpms 1.5 M python3-perf x86_64 4.18.0-240.8.1.el8_3 rhel-8-baseos-rhui-rpms 4.4 M qemu-guest-agent x86_64 15:4.2.0-34.module+el8.3.0+8829+e7a0a3ea.1 rhel-8-appstream-rhui-rpms 228 k systemd x86_64 239-41.el8_3.1 rhel-8-baseos-rhui-rpms 3.5 M systemd-libs x86_64 239-41.el8_3.1 rhel-8-baseos-rhui-rpms 1.1 M systemd-pam x86_64 239-41.el8_3.1 rhel-8-baseos-rhui-rpms 456 k systemd-udev x86_64 239-41.el8_3.1 rhel-8-baseos-rhui-rpms 1.3 M tuned noarch 2.14.0-3.el8_3.1 rhel-8-baseos-rhui-rpms 292 k Installing dependencies: linux-firmware noarch 20200619-101.git3890db36.el8_3 rhel-8-baseos-rhui-rpms 101 M Transaction Summary ============================================================================================================================================================================================================== Install 4 Packages Upgrade 24 Packages Total download size: 198 M Downloading Packages: (1/28): kernel-4.18.0-240.8.1.el8_3.x86_64.rpm 15 MB/s | 4.3 MB 00:00 (2/28): kernel-core-4.18.0-240.8.1.el8_3.x86_64.rpm 33 MB/s | 30 MB 00:00 (3/28): kernel-modules-4.18.0-240.8.1.el8_3.x86_64.rpm 22 MB/s | 26 MB 00:01 (4/28): cloud-init-19.4-11.el8_3.1.noarch.rpm 3.6 MB/s | 945 kB 00:00 (5/28): qemu-guest-agent-4.2.0-34.module+el8.3.0+8829+e7a0a3ea.1.x86_64.rpm 1.9 MB/s | 228 kB 00:00 (6/28): insights-client-3.1.1-1.el8_3.noarch.rpm 6.8 MB/s | 1.0 MB 00:00 (7/28): NetworkManager-team-1.26.0-12.el8_3.x86_64.rpm 1.3 MB/s | 142 kB 00:00 (8/28): freetype-2.9.1-4.el8_3.1.x86_64.rpm 3.1 MB/s | 394 kB 00:00 -------------------------------------------------------------------------------------------------------------------------------------------------------------------------------------------------------------- Total 64 MB/s | 198 MB 00:03 Running transaction check Transaction check succeeded. Running transaction test Transaction test succeeded. Running transaction Preparing : 1/1 Running scriptlet: systemd-libs-239-41.el8_3.1.x86_64 1/1 Upgrading : systemd-libs-239-41.el8_3.1.x86_64 1/52 Running scriptlet: systemd-libs-239-41.el8_3.1.x86_64 1/52 Upgrading : gnutls-3.6.14-7.el8_3.x86_64 2/52 Upgrading : openssl-libs-1:1.1.1g-12.el8_3.x86_64 3/52 Running scriptlet: openssl-libs-1:1.1.1g-12.el8_3.x86_64 3/52 Upgrading : libcurl-7.61.1-14.el8_3.1.x86_64 4/52 Upgrading : NetworkManager-libnm-1:1.26.0-12.el8_3.x86_64 5/52 Running scriptlet: NetworkManager-libnm-1:1.26.0-12.el8_3.x86_64 5/52 Upgrading : iptables-libs-1.8.4-15.el8_3.3.x86_64 6/52 Running scriptlet: systemd-239-41.el8_3.1.x86_64 7/52 Upgrading : systemd-239-41.el8_3.1.x86_64 7/52 Running scriptlet: systemd-239-41.el8_3.1.x86_64 7/52 Upgrading : systemd-pam-239-41.el8_3.1.x86_64 8/52 Verifying : kernel-modules-4.18.0-240.8.1.el8_3.x86_64 1/52 Verifying : kernel-core-4.18.0-240.8.1.el8_3.x86_64 2/52 Verifying : kernel-4.18.0-240.8.1.el8_3.x86_64 3/52 Verifying : linux-firmware-20200619-101.git3890db36.el8_3.noarch 4/52 Verifying : cloud-init-19.4-11.el8_3.1.noarch 5/52 Verifying : cloud-init-19.4-11.el8.noarch 6/52 Verifying : insights-client-3.1.1-1.el8_3.noarch 7/52 Verifying : insights-client-3.1.0-3.el8.noarch 8/52 Upgraded: NetworkManager-1:1.26.0-12.el8_3.x86_64 NetworkManager-libnm-1:1.26.0-12.el8_3.x86_64 NetworkManager-team-1:1.26.0-12.el8_3.x86_64 NetworkManager-tui-1:1.26.0-12.el8_3.x86_64 cloud-init-19.4-11.el8_3.1.noarch curl-7.61.1-14.el8_3.1.x86_64 freetype-2.9.1-4.el8_3.1.x86_64 gnutls-3.6.14-7.el8_3.x86_64 insights-client-3.1.1-1.el8_3.noarch iptables-libs-1.8.4-15.el8_3.3.x86_64 kernel-tools-4.18.0-240.8.1.el8_3.x86_64 kernel-tools-libs-4.18.0-240.8.1.el8_3.x86_64 kexec-tools-2.0.20-34.el8_3.1.x86_64 libcurl-7.61.1-14.el8_3.1.x86_64 microcode_ctl-4:20200609-2.20201112.1.el8_3.x86_64 openssl-1:1.1.1g-12.el8_3.x86_64 openssl-libs-1:1.1.1g-12.el8_3.x86_64 python3-perf-4.18.0-240.8.1.el8_3.x86_64 qemu-guest-agent-15:4.2.0-34.module+el8.3.0+8829+e7a0a3ea.1.x86_64 systemd-239-41.el8_3.1.x86_64 systemd-libs-239-41.el8_3.1.x86_64 systemd-pam-239-41.el8_3.1.x86_64 systemd-udev-239-41.el8_3.1.x86_64 tuned-2.14.0-3.el8_3.1.noarch Installed: kernel-4.18.0-240.8.1.el8_3.x86_64 kernel-core-4.18.0-240.8.1.el8_3.x86_64 kernel-modules-4.18.0-240.8.1.el8_3.x86_64 linux-firmware-20200619-101.git3890db36.el8_3.noarch Complete! |
6. Install wget package
|
1 2 3 4 5 6 7 8 9 10 11 12 13 14 15 16 17 18 19 20 21 22 23 24 25 26 27 28 29 30 31 32 33 |
[root@ip-172-31-35-98 ec2-user]# yum install wget -y Last metadata expiration check: 2:16:56 ago on Tue 29 Dec 2020 11:44:48 AM UTC. Dependencies resolved. ============================================================================================================================================================================================================== Package Architecture Version Repository Size ============================================================================================================================================================================================================== Installing: wget x86_64 1.19.5-10.el8 rhel-8-appstream-rhui-rpms 734 k Transaction Summary ============================================================================================================================================================================================================== Install 1 Package Total download size: 734 k Installed size: 2.8 M Downloading Packages: wget-1.19.5-10.el8.x86_64.rpm 4.6 MB/s | 734 kB 00:00 -------------------------------------------------------------------------------------------------------------------------------------------------------------------------------------------------------------- Total 3.6 MB/s | 734 kB 00:00 Running transaction check Transaction check succeeded. Running transaction test Transaction test succeeded. Running transaction Preparing : 1/1 Installing : wget-1.19.5-10.el8.x86_64 1/1 Running scriptlet: wget-1.19.5-10.el8.x86_64 1/1 Verifying : wget-1.19.5-10.el8.x86_64 1/1 Installed: wget-1.19.5-10.el8.x86_64 Complete! |
7. Download MySQL Distribution (Tar)
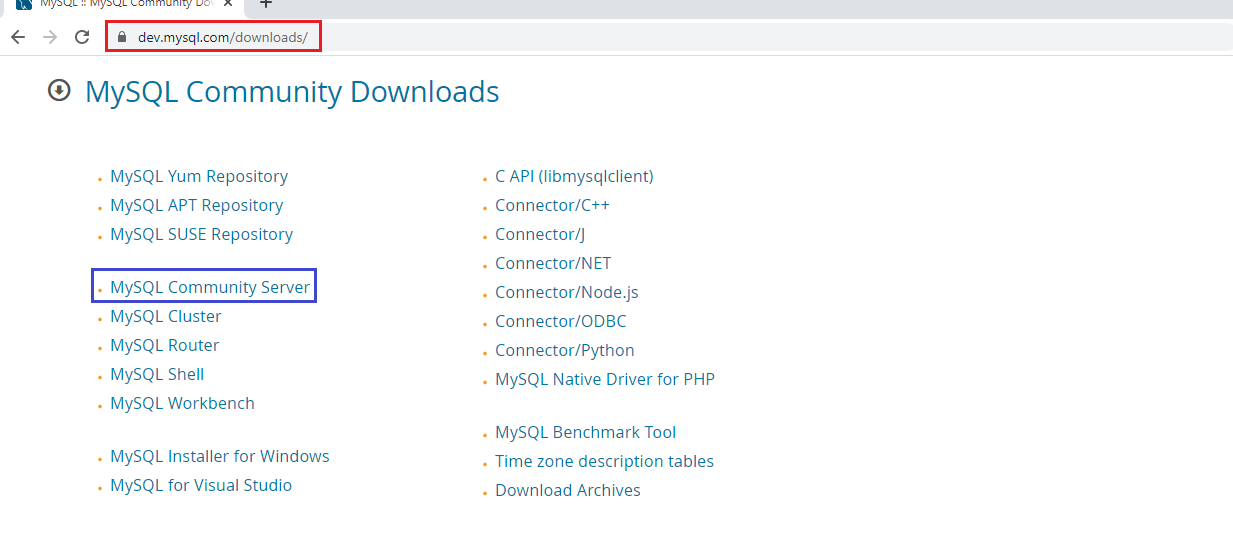
Go to MySQL official website by using below link.
https://dev.mysql.com/downloads/mysql/
Go to MySQL Community Downloads and click on MySQL Community Server.
Click on Archives.
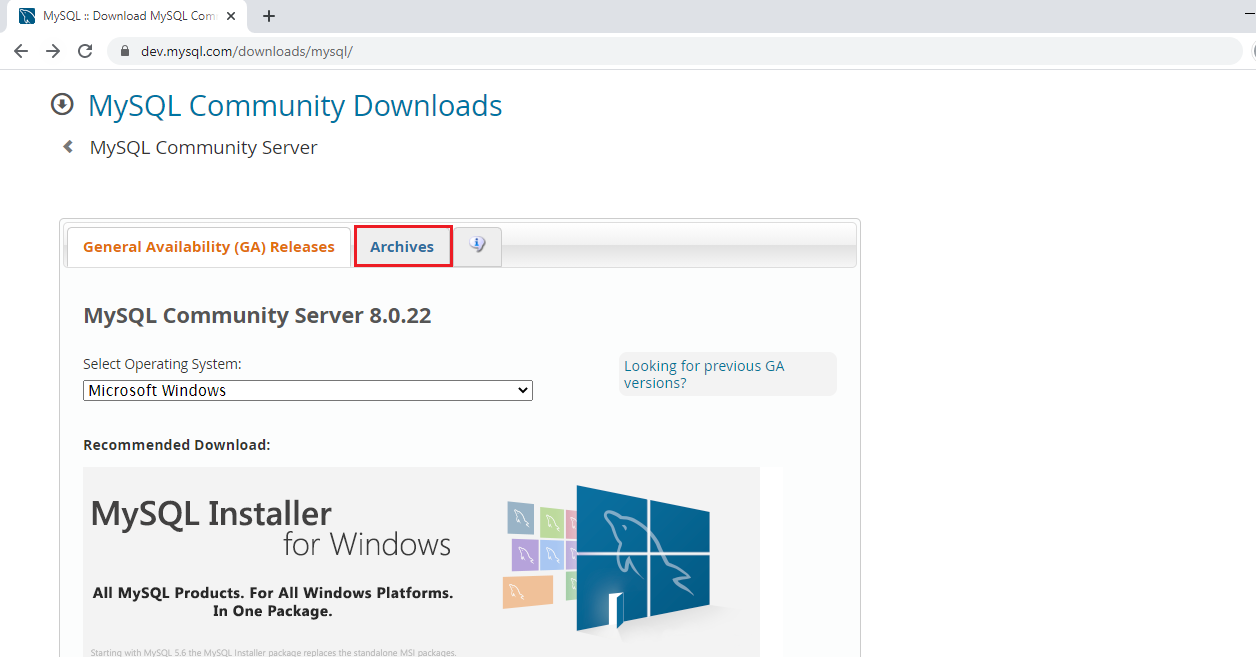
Select Product Version, Operating System and Operating System Version.
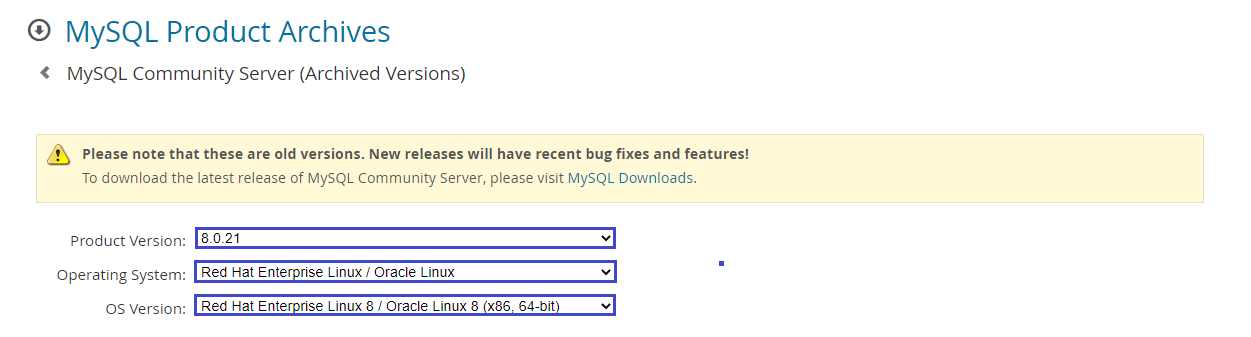
Select TAR file and copy the link address by giving the right click.
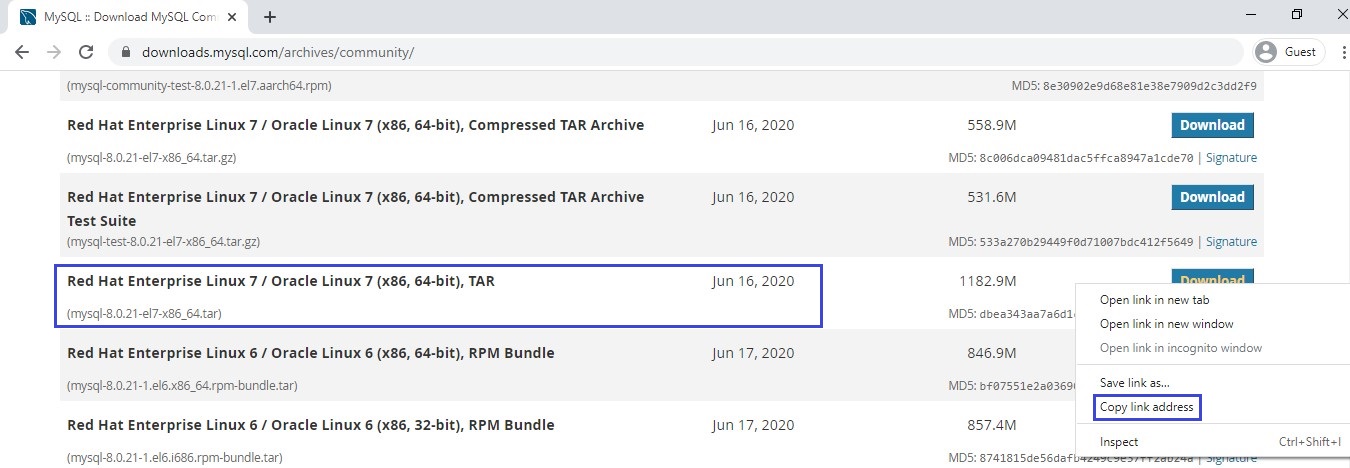
Go to server terminal and download the MySQL Distribution
|
1 2 3 4 5 6 7 8 9 10 11 12 13 14 15 16 17 18 19 20 |
[root@ip-172-31-35-98 ec2-user]# wget https://downloads.mysql.com/archives/get/p/23/file/mysql-8.0.21-el7-x86_64.tar --2021-01-07 10:22:21-- https://downloads.mysql.com/archives/get/p/23/file/mysql-8.0.21-el7-x86_64.tar Resolving downloads.mysql.com (downloads.mysql.com)... 137.254.60.14 Connecting to downloads.mysql.com (downloads.mysql.com)|137.254.60.14|:443... connected. HTTP request sent, awaiting response... 302 Found Location: https://cdn.mysql.com/archives/mysql-8.0/mysql-8.0.21-el7-x86_64.tar [following] --2021-01-07 10:22:22-- https://cdn.mysql.com/archives/mysql-8.0/mysql-8.0.21-el7-x86_64.tar Resolving cdn.mysql.com (cdn.mysql.com)... 23.50.245.17 Connecting to cdn.mysql.com (cdn.mysql.com)|23.50.245.17|:443... connected. HTTP request sent, awaiting response... 200 OK Length: 1240358400 (1.2G) [application/x-tar] Saving to: ‘mysql-8.0.21-el7-x86_64.tar’ mysql-8.0.21-el7-x86_64.tar 100%[=================================================================================================================>] 1.15G 61.7MB/s in 17s 2021-01-07 10:22:39 (70.9 MB/s) - ‘mysql-8.0.21-el7-x86_64.tar’ saved [1240358400/1240358400] [root@ip-172-31-35-98 ec2-user]# ll total 1211288 -rw-r--r--. 1 root root 1240358400 Jun 16 2020 mysql-8.0.21-el7-x86_64.tar |
8. Exract the Distribution (TAR)
|
1 2 3 4 5 6 7 8 9 10 11 |
[root@ip-172-31-35-98 ec2-user]# tar -xvf mysql-8.0.21-el7-x86_64.tar mysql-test-8.0.21-el7-x86_64.tar.gz mysql-8.0.21-el7-x86_64.tar.gz mysql-router-8.0.21-el7-x86_64.tar.gz [root@ip-172-31-35-98 ec2-user]# ll total 2422576 -rw-r--r--. 1 root root 1240358400 Jun 16 2020 mysql-8.0.21-el7-x86_64.tar -rw-r--r--. 1 7161 31415 586026623 Jun 16 2020 mysql-8.0.21-el7-x86_64.tar.gz -rw-r--r--. 1 7161 31415 96957276 Jun 16 2020 mysql-router-8.0.21-el7-x86_64.tar.gz -rw-r--r--. 1 7161 31415 557371024 Jun 16 2020 mysql-test-8.0.21-el7-x86_64.tar.gz |
Copy the Extracted distribution (tar.gz) to “/usr/local”
|
1 |
[root@ip-172-31-35-98 ec2-user]# cp mysql-8.0.21-el7-x86_64.tar.gz /usr/local/ |
Go inside the directory “/usr/local” and check the distribution
|
1 2 3 4 5 6 7 8 9 10 11 12 13 14 |
[root@ip-172-31-35-98 ec2-user]# cd /usr/local/ [root@ip-172-31-35-98 local]# ll total 572292 drwxr-xr-x. 2 root root 6 Apr 23 2020 bin drwxr-xr-x. 2 root root 6 Apr 23 2020 etc drwxr-xr-x. 2 root root 6 Apr 23 2020 games drwxr-xr-x. 2 root root 6 Apr 23 2020 include drwxr-xr-x. 2 root root 6 Apr 23 2020 lib drwxr-xr-x. 3 root root 17 Oct 31 05:01 lib64 drwxr-xr-x. 2 root root 6 Apr 23 2020 libexec -rw-r--r--. 1 root root 586026623 Jan 7 10:29 mysql-8.0.21-el7-x86_64.tar.gz drwxr-xr-x. 2 root root 6 Apr 23 2020 sbin drwxr-xr-x. 5 root root 49 Oct 31 05:01 share drwxr-xr-x. 2 root root 6 Apr 23 2020 src |
8. Extract the Distrobuton (tar.gz)
The tar command creates a directory named mysql-8.0.21-el7-x86_64.
|
1 2 3 4 5 6 7 8 9 10 11 12 13 14 15 16 17 18 19 20 21 22 23 24 25 26 27 28 29 30 31 32 33 34 35 36 37 38 39 40 41 42 43 44 45 46 |
[root@ip-172-31-35-98 local]# tar -zxvf mysql-8.0.21-el7-x86_64.tar.gz mysql-8.0.21-el7-x86_64/ mysql-8.0.21-el7-x86_64/bin/ mysql-8.0.21-el7-x86_64/bin/myisam_ftdump mysql-8.0.21-el7-x86_64/bin/myisamchk mysql-8.0.21-el7-x86_64/bin/myisamlog mysql-8.0.21-el7-x86_64/bin/myisampack mysql-8.0.21-el7-x86_64/bin/mysql mysql-8.0.21-el7-x86_64/bin/mysql_config_editor mysql-8.0.21-el7-x86_64/bin/mysql_secure_installation mysql-8.0.21-el7-x86_64/lib/private/libcrypto.so.1.1 mysql-8.0.21-el7-x86_64/share/french/errmsg.sys mysql-8.0.21-el7-x86_64/share/german/ mysql-8.0.21-el7-x86_64/share/german/errmsg.sys mysql-8.0.21-el7-x86_64/share/greek/ mysql-8.0.21-el7-x86_64/share/greek/errmsg.sys mysql-8.0.21-el7-x86_64/share/hungarian/ mysql-8.0.21-el7-x86_64/share/hungarian/errmsg.sys mysql-8.0.21-el7-x86_64/share/innodb_memcached_config.sql mysql-8.0.21-el7-x86_64/docs/ChangeLog mysql-8.0.21-el7-x86_64/docs/INFO_BIN mysql-8.0.21-el7-x86_64/docs/INFO_SRC mysql-8.0.21-el7-x86_64/man/ mysql-8.0.21-el7-x86_64/man/man1/ mysql-8.0.21-el7-x86_64/man/man1/comp_err.1 mysql-8.0.21-el7-x86_64/man/man1/ibd2sdi.1 mysql-8.0.21-el7-x86_64/man/man1/innochecksum.1 mysql-8.0.21-el7-x86_64/man/man1/lz4_decompress.1 mysql-8.0.21-el7-x86_64/man/man1/my_print_defaults.1 mysql-8.0.21-el7-x86_64/support-files/mysql-log-rotate mysql-8.0.21-el7-x86_64/support-files/mysql.server mysql-8.0.21-el7-x86_64/support-files/mysqld_multi.server [root@ip-172-31-35-98 local]# ll total 572292 drwxr-xr-x. 2 root root 6 Apr 23 2020 bin drwxr-xr-x. 2 root root 6 Apr 23 2020 etc drwxr-xr-x. 2 root root 6 Apr 23 2020 games drwxr-xr-x. 2 root root 6 Apr 23 2020 include drwxr-xr-x. 2 root root 6 Apr 23 2020 lib drwxr-xr-x. 3 root root 17 Oct 31 05:01 lib64 drwxr-xr-x. 2 root root 6 Apr 23 2020 libexec drwxr-xr-x. 9 7161 31415 129 Jun 16 2020 mysql-8.0.21-el7-x86_64 -rw-r--r--. 1 root root 586026623 Jan 7 10:29 mysql-8.0.21-el7-x86_64.tar.gz drwxr-xr-x. 2 root root 6 Apr 23 2020 sbin drwxr-xr-x. 5 root root 49 Oct 31 05:01 share drwxr-xr-x. 2 root root 6 Apr 23 2020 src |
9. Install MySQL Dependencies
Search libaio
|
1 2 3 4 5 6 7 8 |
[root@ip-172-31-35-98 local]# yum search libaio Last metadata expiration check: 0:29:05 ago on Thu 07 Jan 2021 10:03:48 AM UTC. ======================================================================================== Name Exactly Matched: libaio ======================================================================================== libaio.i686 : Linux-native asynchronous I/O access library libaio.x86_64 : Linux-native asynchronous I/O access library ============================================================================================ Name Matched: libaio ============================================================================================ libaio-devel.i686 : Development files for Linux-native asynchronous I/O access libaio-devel.x86_64 : Development files for Linux-native asynchronous I/O access |
Install libaio
|
1 2 3 4 5 6 7 8 9 10 11 12 13 14 15 16 17 18 19 20 21 22 23 24 25 26 27 28 29 30 31 32 33 |
[root@ip-172-31-35-98 local]# yum install libaio -y Last metadata expiration check: 0:30:47 ago on Thu 07 Jan 2021 10:03:48 AM UTC. Dependencies resolved. ============================================================================================================================================================================================================== Package Architecture Version Repository Size ============================================================================================================================================================================================================== Installing: libaio x86_64 0.3.112-1.el8 rhel-8-baseos-rhui-rpms 33 k Transaction Summary ============================================================================================================================================================================================================== Install 1 Package Total download size: 33 k Installed size: 93 k Downloading Packages: libaio-0.3.112-1.el8.x86_64.rpm 279 kB/s | 33 kB 00:00 -------------------------------------------------------------------------------------------------------------------------------------------------------------------------------------------------------------- Total 161 kB/s | 33 kB 00:00 Running transaction check Transaction check succeeded. Running transaction test Transaction test succeeded. Running transaction Preparing : 1/1 Installing : libaio-0.3.112-1.el8.x86_64 1/1 Running scriptlet: libaio-0.3.112-1.el8.x86_64 1/1 Verifying : libaio-0.3.112-1.el8.x86_64 1/1 Installed: libaio-0.3.112-1.el8.x86_64 Complete! |
Install ncurses-compat-libs
|
1 2 3 4 5 6 7 8 9 10 11 12 13 14 15 16 17 18 19 20 21 22 23 24 25 26 27 28 29 30 31 32 33 |
[root@ip-172-31-35-98 local]# yum install ncurses-compat-libs -y Last metadata expiration check: 0:32:01 ago on Thu 07 Jan 2021 10:03:48 AM UTC. Dependencies resolved. ============================================================================================================================================================================================================== Package Architecture Version Repository Size ============================================================================================================================================================================================================== Installing: ncurses-compat-libs x86_64 6.1-7.20180224.el8 rhel-8-baseos-rhui-rpms 331 k Transaction Summary ============================================================================================================================================================================================================== Install 1 Package Total download size: 331 k Installed size: 1.2 M Downloading Packages: ncurses-compat-libs-6.1-7.20180224.el8.x86_64.rpm 2.5 MB/s | 331 kB 00:00 -------------------------------------------------------------------------------------------------------------------------------------------------------------------------------------------------------------- Total 1.9 MB/s | 331 kB 00:00 Running transaction check Transaction check succeeded. Running transaction test Transaction test succeeded. Running transaction Preparing : 1/1 Installing : ncurses-compat-libs-6.1-7.20180224.el8.x86_64 1/1 Running scriptlet: ncurses-compat-libs-6.1-7.20180224.el8.x86_64 1/1 Verifying : ncurses-compat-libs-6.1-7.20180224.el8.x86_64 1/1 Installed: ncurses-compat-libs-6.1-7.20180224.el8.x86_64 Complete! |
10. Create a mysql User and Group
Create a Group “mysql”
|
1 2 3 4 |
[root@ip-172-31-35-98 local]# groupadd mysql [root@ip-172-31-35-98 ec2-user]# tail -1 /etc/group mysql:x:1001: |
Create a User “mysql”
|
1 2 3 |
[root@ip-172-31-35-98 local]# useradd -r -g mysql -s /bin/false mysql [root@ip-172-31-35-98 local]# tail -1 /etc/passwd mysql:x:993:1001::/home/mysql:/bin/false |
11. Create soft link to the installation directory
|
1 2 3 4 5 6 7 8 9 10 11 12 13 14 15 16 |
[root@ip-172-31-35-98 local]# ln -s mysql-8.0.21-el7-x86_64 mysql [root@ip-172-31-35-98 local]# ll total 572292 drwxr-xr-x. 2 root root 6 Apr 23 2020 bin drwxr-xr-x. 2 root root 6 Apr 23 2020 etc drwxr-xr-x. 2 root root 6 Apr 23 2020 games drwxr-xr-x. 2 root root 6 Apr 23 2020 include drwxr-xr-x. 2 root root 6 Apr 23 2020 lib drwxr-xr-x. 3 root root 17 Oct 31 05:01 lib64 drwxr-xr-x. 2 root root 6 Apr 23 2020 libexec lrwxrwxrwx. 1 root root 23 Jan 7 10:59 mysql -> mysql-8.0.21-el7-x86_64 drwxr-xr-x. 9 7161 31415 129 Jun 16 2020 mysql-8.0.21-el7-x86_64 -rw-r--r--. 1 root root 586026623 Jan 7 10:29 mysql-8.0.21-el7-x86_64.tar.gz drwxr-xr-x. 2 root root 6 Apr 23 2020 sbin drwxr-xr-x. 5 root root 49 Oct 31 05:01 share drwxr-xr-x. 2 root root 6 Apr 23 2020 src |
12. Go inside the mysql directory and initialize the MySQL
|
1 |
cd mysql |
Make Directory “mysql-files”
|
1 2 3 4 5 6 7 8 9 10 11 12 13 14 |
[root@ip-172-31-35-98 mysql]# mkdir mysql-files [root@ip-172-31-35-98 mysql]# ll total 408 drwxr-xr-x. 2 7161 31415 4096 Jun 16 2020 bin drwxr-xr-x. 2 7161 31415 55 Jun 16 2020 docs drwxr-xr-x. 3 7161 31415 282 Jun 16 2020 include drwxr-xr-x. 6 7161 31415 201 Jun 16 2020 lib -rw-r--r--. 1 7161 31415 404759 Jun 16 2020 LICENSE drwxr-xr-x. 4 7161 31415 30 Jun 16 2020 man drwxr-xr-x. 2 root root 6 Jan 7 13:05 mysql-files -rw-r--r--. 1 7161 31415 687 Jun 16 2020 README drwxr-xr-x. 28 7161 31415 4096 Jun 16 2020 share drwxr-xr-x. 2 7161 31415 77 Jun 16 2020 support-files |
Change Ownership for the directory “mysql-files”
|
1 2 3 4 5 6 7 8 9 10 11 12 13 14 |
[root@ip-172-31-35-98 mysql]# chown mysql:mysql mysql-files [root@ip-172-31-35-98 mysql]# ll total 408 drwxr-xr-x. 2 7161 31415 4096 Jun 16 2020 bin drwxr-xr-x. 2 7161 31415 55 Jun 16 2020 docs drwxr-xr-x. 3 7161 31415 282 Jun 16 2020 include drwxr-xr-x. 6 7161 31415 201 Jun 16 2020 lib -rw-r--r--. 1 7161 31415 404759 Jun 16 2020 LICENSE drwxr-xr-x. 4 7161 31415 30 Jun 16 2020 man drwxr-xr-x. 2 mysql mysql 6 Jan 7 13:05 mysql-files -rw-r--r--. 1 7161 31415 687 Jun 16 2020 README drwxr-xr-x. 28 7161 31415 4096 Jun 16 2020 share drwxr-xr-x. 2 7161 31415 77 Jun 16 2020 support-files |
Change the permission for the diretory “mysql-files”
|
1 2 3 4 5 6 7 8 9 10 11 12 13 14 |
[root@ip-172-31-35-98 mysql]# chmod 750 mysql-files [root@ip-172-31-35-98 mysql]# ll total 408 drwxr-xr-x. 2 7161 31415 4096 Jun 16 2020 bin drwxr-xr-x. 2 7161 31415 55 Jun 16 2020 docs drwxr-xr-x. 3 7161 31415 282 Jun 16 2020 include drwxr-xr-x. 6 7161 31415 201 Jun 16 2020 lib -rw-r--r--. 1 7161 31415 404759 Jun 16 2020 LICENSE drwxr-xr-x. 4 7161 31415 30 Jun 16 2020 man drwxr-x---. 2 mysql mysql 6 Jan 7 13:05 mysql-files -rw-r--r--. 1 7161 31415 687 Jun 16 2020 README drwxr-xr-x. 28 7161 31415 4096 Jun 16 2020 share drwxr-xr-x. 2 7161 31415 77 Jun 16 2020 support-files |
Initialize MySQL
The command also creates a temporary root password.
|
1 2 3 4 5 |
[root@ip-172-31-35-98 mysql]# bin/mysqld --initialize --user=mysql 2021-01-07T13:08:57.395728Z 0 [System] [MY-013169] [Server] /usr/local/mysql-8.0.21-el7-x86_64/bin/mysqld (mysqld 8.0.21) initializing of server in progress as process 56812 2021-01-07T13:08:57.410878Z 1 [System] [MY-013576] [InnoDB] InnoDB initialization has started. 2021-01-07T13:08:58.858728Z 1 [System] [MY-013577] [InnoDB] InnoDB initialization has ended. 2021-01-07T13:09:00.397044Z 6 [Note] [MY-010454] [Server] A temporary password is generated for root@localhost: q2X#GnJkfkhh |
13. Create SSL certificate and key files and RSA key-pair files
|
1 |
[root@ip-172-31-35-98 mysql]# bin/mysql_ssl_rsa_setup |
14. Start the MySQL Server Using mysqld_safe
|
1 2 3 4 |
[root@ip-172-31-35-98 mysql]# bin/mysqld_safe --user=mysql & [1] 56863 [root@ip-172-31-35-98 mysql]# Logging to '/usr/local/mysql/data/ip-172-31-35-98.ap-south-1.compute.internal.err'. 2021-01-07T13:14:25.269158Z mysqld_safe Starting mysqld daemon with databases from /usr/local/mysql/data |
Copy the init script from support-files to /etc/init.d
|
1 |
[root@ip-172-31-35-98 mysql]# cp support-files/mysql.server /etc/init.d/mysql.server |
15. Export the path
|
1 |
[root@ip-172-31-35-98 mysql]# export PATH=$PATH:/usr/local/mysql/bin |
Check the Version of MySQL
|
1 2 |
[root@ip-172-31-35-98 mysql]# mysql -V mysql Ver 8.0.21 for Linux on x86_64 (MySQL Community Server - GPL) |
Start and stop the MySQL server
Stop the MySQL Server
|
1 2 |
[root@ip-172-31-35-98 ec2-user]# /usr/local/mysql/support-files/mysql.server stop Shutting down MySQL.. SUCCESS! |
Check the status of MySQL Server
|
1 2 |
[root@ip-172-31-35-98 ec2-user]# /usr/local/mysql/support-files/mysql.server status ERROR! MySQL is not running |
Start the MySQL Server
|
1 2 |
[root@ip-172-31-35-98 ec2-user]# /usr/local/mysql/support-files/mysql.server start Starting MySQL.. SUCCESS! |
16. Setting the root Password
This command enables you to improve the security of your MySQL installation in the following ways:
👉 You can set a password for root accounts.
👉 You can remove root accounts that are accessible from outside the local host.
👉 You can remove anonymous-user accounts.
👉 You can remove the test database, which by default can be accessed by anonymous users.
|
1 2 3 4 5 6 7 8 9 10 11 12 13 14 15 16 17 18 19 20 21 22 23 24 25 26 27 28 29 30 31 32 33 34 35 36 37 38 39 40 41 42 43 44 45 46 47 48 49 50 51 52 53 54 55 56 57 58 59 60 |
[root@ip-172-31-35-98 mysql]# mysql_secure_installation Securing the MySQL server deployment. Enter password for user root: The existing password for the user account root has expired. Please set a new password. New password: Re-enter new password: VALIDATE PASSWORD COMPONENT can be used to test passwords and improve security. It checks the strength of password and allows the users to set only those passwords which are secure enough. Would you like to setup VALIDATE PASSWORD component? Press y|Y for Yes, any other key for No: Using existing password for root. Change the password for root ? ((Press y|Y for Yes, any other key for No) : ... skipping. By default, a MySQL installation has an anonymous user, allowing anyone to log into MySQL without having to have a user account created for them. This is intended only for testing, and to make the installation go a bit smoother. You should remove them before moving into a production environment. Remove anonymous users? (Press y|Y for Yes, any other key for No) : y Success. Normally, root should only be allowed to connect from 'localhost'. This ensures that someone cannot guess at the root password from the network. Disallow root login remotely? (Press y|Y for Yes, any other key for No) : y Success. By default, MySQL comes with a database named 'test' that anyone can access. This is also intended only for testing, and should be removed before moving into a production environment. Remove test database and access to it? (Press y|Y for Yes, any other key for No) : y - Dropping test database... Success. - Removing privileges on test database... Success. Reloading the privilege tables will ensure that all changes made so far will take effect immediately. Reload privilege tables now? (Press y|Y for Yes, any other key for No) : y Success. All done! |
17. Connect to MySQL Database
|
1 2 3 4 5 6 7 8 9 10 11 12 13 14 15 |
[root@ip-172-31-35-98 mysql]# mysql -u root -p Enter password: Welcome to the MySQL monitor. Commands end with ; or \g. Your MySQL connection id is 12 Server version: 8.0.21 MySQL Community Server - GPL Copyright (c) 2000, 2020, Oracle and/or its affiliates. All rights reserved. Oracle is a registered trademark of Oracle Corporation and/or its affiliates. Other names may be trademarks of their respective owners. Type 'help;' or '\h' for help. Type '\c' to clear the current input statement. mysql> |
Check the version of MySQL
|
1 2 3 4 5 6 7 8 9 |
mysql> select @@version; +-----------+ | @@version | +-----------+ | 8.0.21 | +-----------+ 1 row in set (0.00 sec) mysql> |
Thank you for giving your valuable time to read the above information. Please click here to subscribe for further updates
KTEXPERTS is always active on below social media platforms.
Facebook : https://www.facebook.com/ktexperts/
LinkedIn : https://www.linkedin.com/company/ktexperts/
Twitter : https://twitter.com/ktexpertsadmin
YouTube : https://www.youtube.com/c/ktexperts
Instagram : https://www.instagram.com/knowledgesharingplatform
Follow Me
Ramesh’s Linkedin : Ramesh Atchala