Dear Readers,
In this article, we will see the Upgradation and Data Migration in SQL Server.

Version upgradation 2014 to 2016
SQL 2014 evaluation edition….. Enterprise edition.
In SQL server 2014 standard edition to enterprise edition
The upgrading the version in SQL server 2014 it appears the SQL server 2012
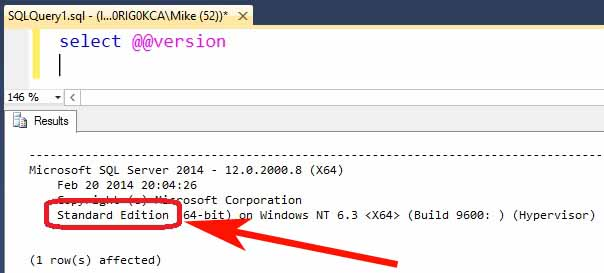
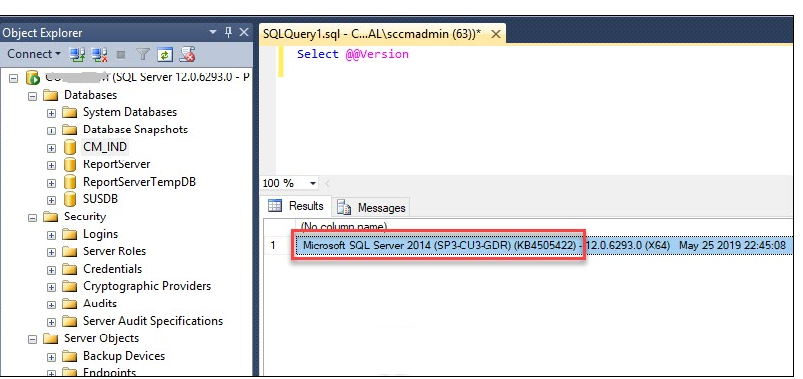
First we should verify that which edition of SQL server you are running SELECT @@VERSION in query window.
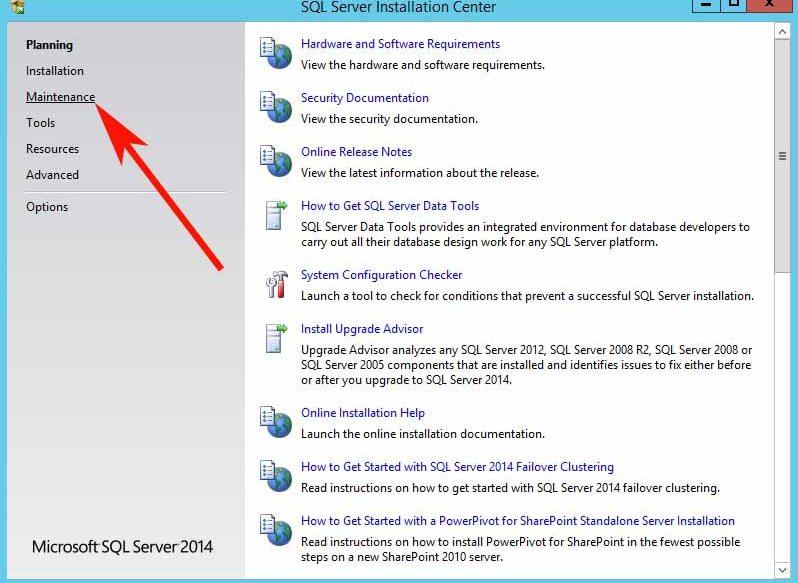
Next start the SQL server 2014 enterprise (DVD/ISCO) when the SQL server installation centre app appears click on the maintain.
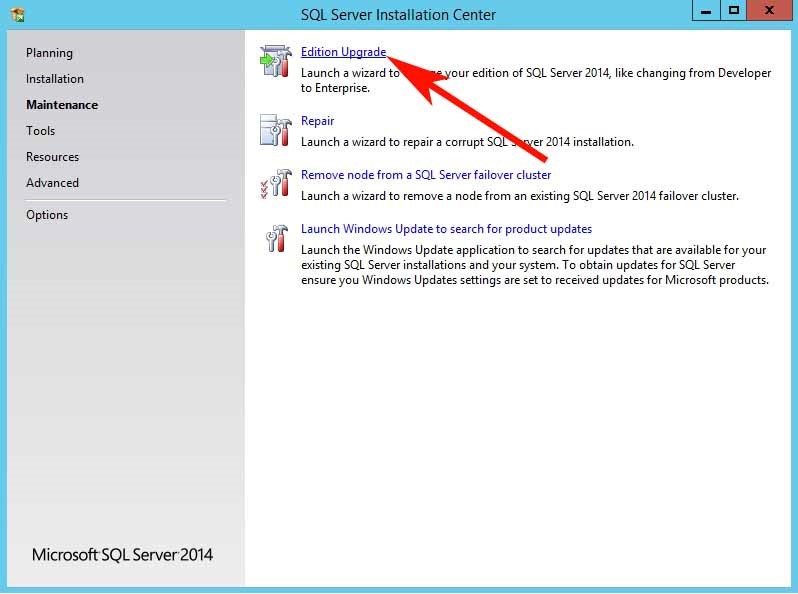
Next SQL server installation centre app click on the edition up grade link.
Next set up process.
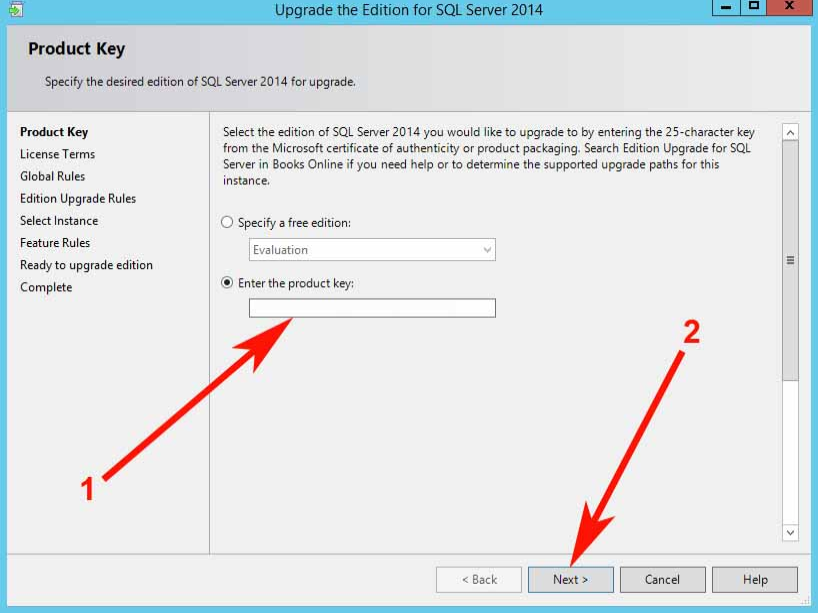
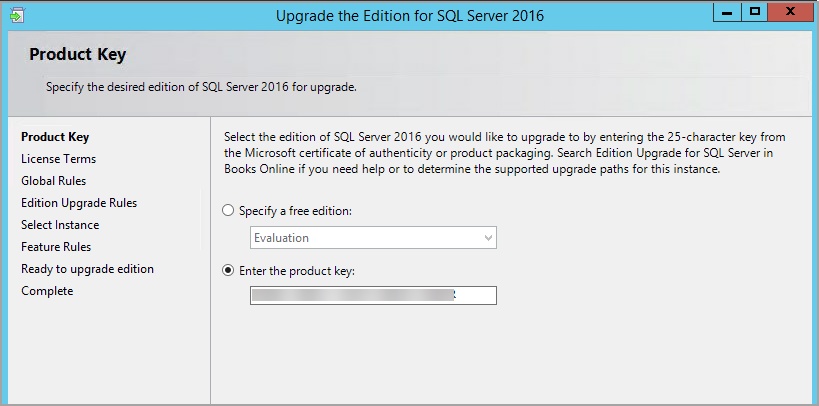
The next screen the product key enter the product key or if it does not auto fill the enter product key (text box) then click next button.
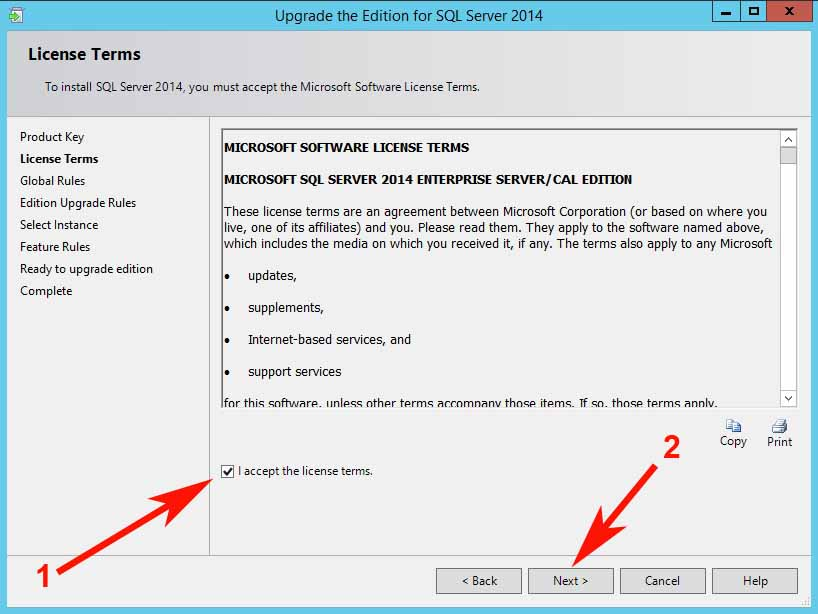
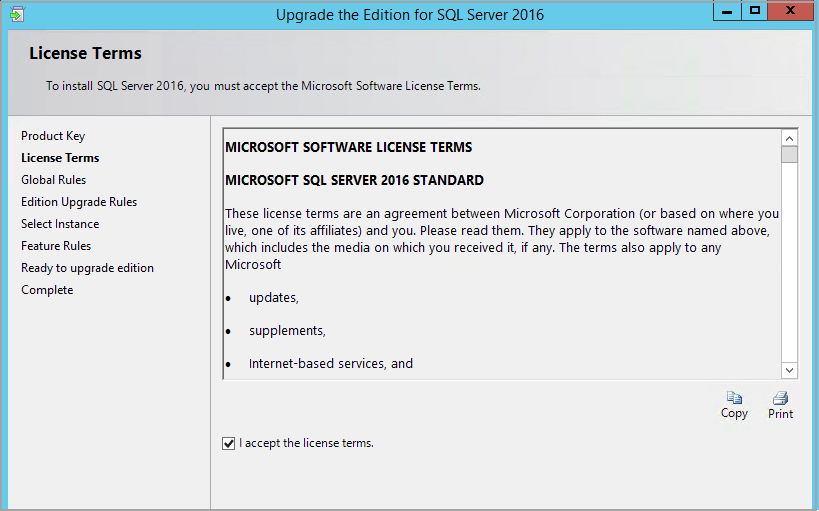
Next license term screen.
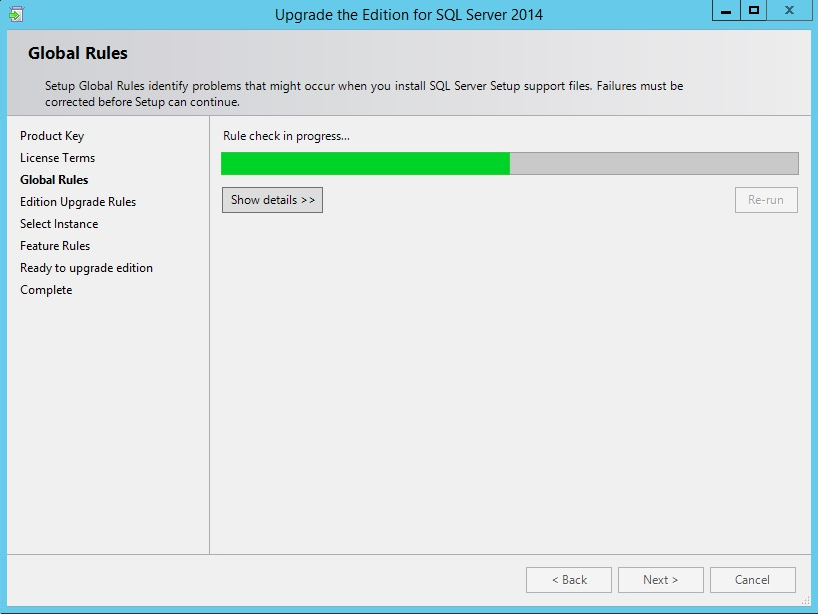
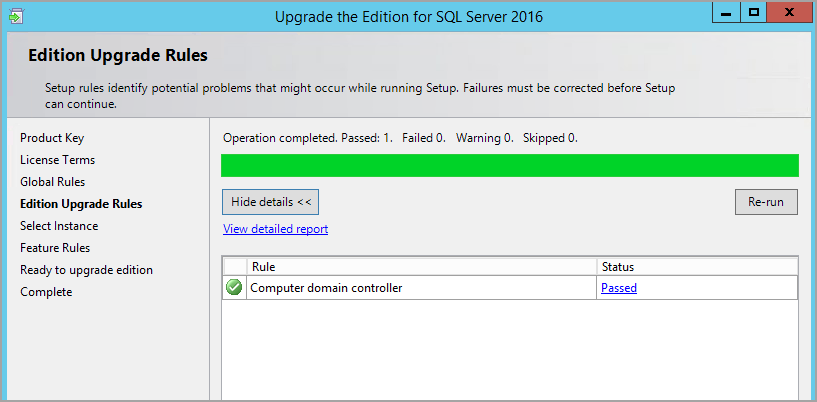
Next scan for SETUP GLOBAL RULES if scan succeed then automatically proceeds the next screen.
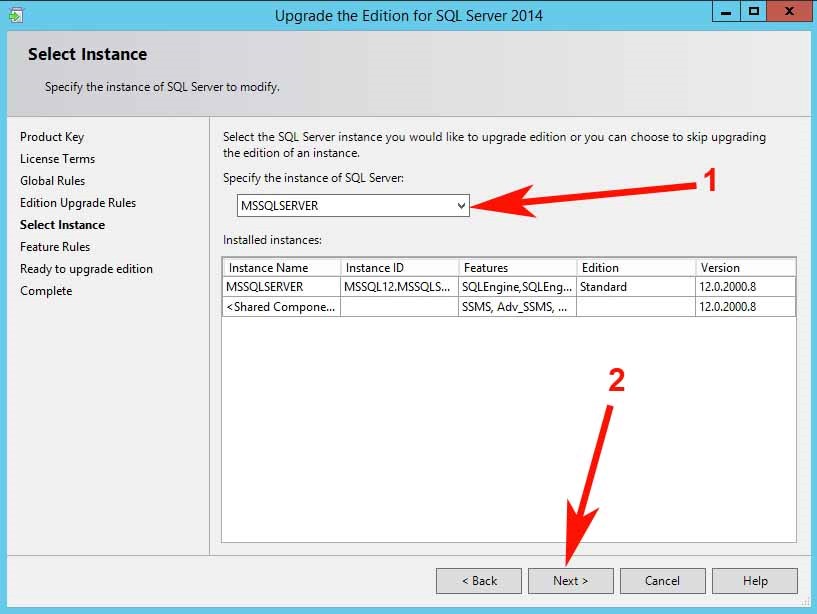
Next select instance
In select instance you wish to upgrade. A list recognized instances will be listed in installed instances grid box. Then click next button.
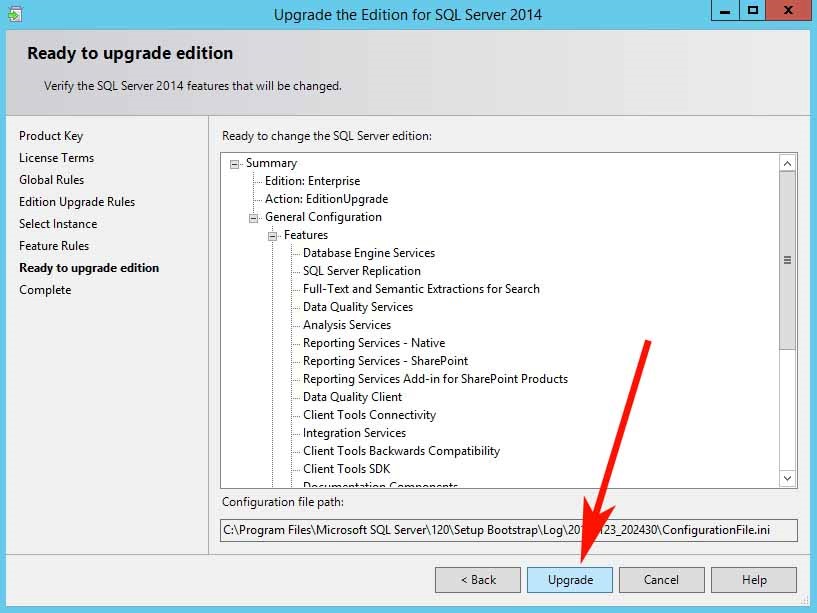
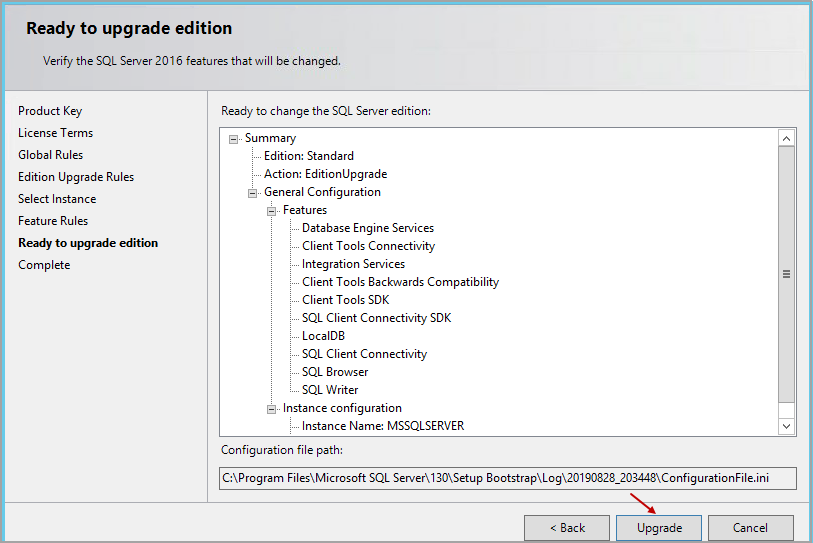
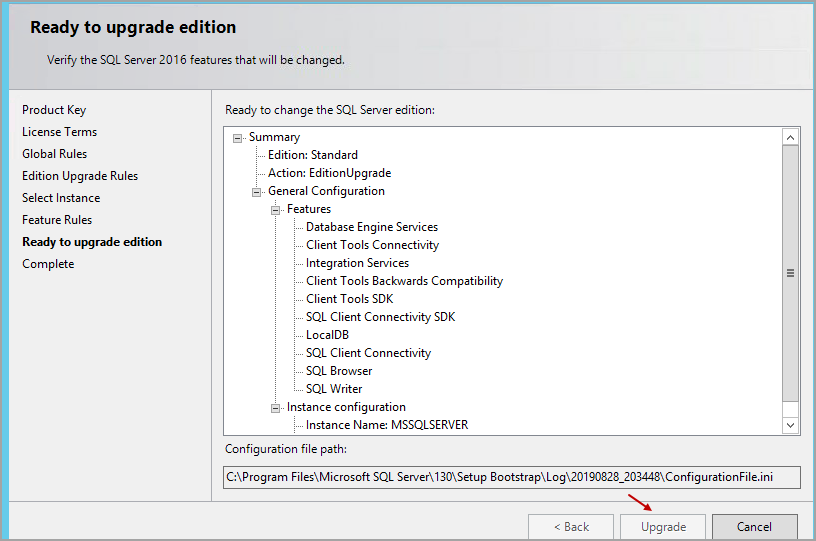
Next ready to upgrade edition
In text box we can see a list of items are going to upgraded. After reviewing list click on upgrade button.
It will shows how to upgrade the SQL server 2014 to 2017 on the SSCM
SQL Server Upgrade from 2014 to 2017
👉 Step 1 – Before you upgrade your SQL Server
👉 Step 2 – Uninstall Reporting Services Point role
👉 Step 3 – Uninstall SQL Reporting services
👉 Step 4 – Delete Report Server Database and Log files
👉 Step 5 – Stop Configuration Manager Services
👉 Step 6 – Upgrade SQL Server 2014 to 2017
SQL Server Upgrade from 2014 to 2017
The high level steps for upgrading the SQL Server include
Before you upgrade we need to Uninstall Reporting Services
Uninstall SQL Reporting services
👉 Delete Report server Database and Log files
👉 Stop Configuration Manager Services
👉 Upgrade SQL 2014 to 2017
👉 Re-Install the SQL Reporting Services
👉 Configure the SQL Reporting Services
👉 Re-install Reporting Services Point role
👉 Start SCCM services.
Step 1 – Before you upgrade your SQL Server
1. First of all before upgrading the SQL server in your production environment, it is advised that you test the upgrade on a test environment.
2. Make sure you backup your CM database and your SSRS database before you begin this process. Ensure you also backup your custom reports.
3. Before upgrading from one edition of SQL Server to another, verify that the functionality you are currently using is supported in the edition to which you are moving. For example, I am upgrading SQL server 2014 to 2017 which is supported by Configuration Manager 1910. Where as SQL Server 2019 is not supported by ConfigMgr 1910 yet.
4. The operating system should be compatible on which you are performing an SQL upgrade. Verify the hardware and software requirements before installing SQL Server 2017.
5. Note that SQL Server 2017 is only available for 64-bit platforms. Hence cross-version instances of SQL Server 2017 are not supported.
6. Before you Upgrade SQL Server 2014 to 2017, enable Windows Authentication for SQL Server Agent.
7. If you are running evaluation edition of SQL server then upgrade to SQL 2017 is not possible.
Step 2 – Uninstall Reporting Services Point role
To uninstall Reporting Service Point role from Configuration Manager
• Open the Configuration Manager console.
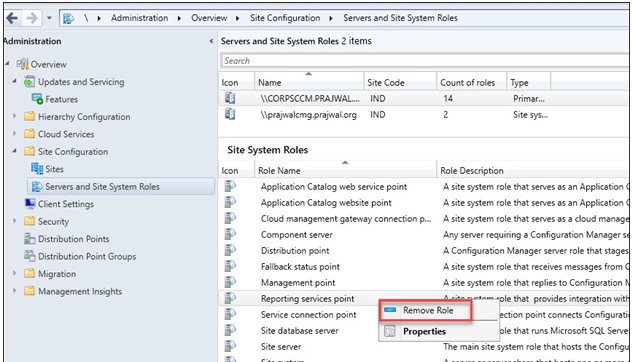
• Go to Administration > Site Configuration > Servers and Site System Roles.
• Select the server that has the Reporting services point role. Right click and choose Remove Role.
Open the srsrpsetup.log file and wait until the role is uninstalled.
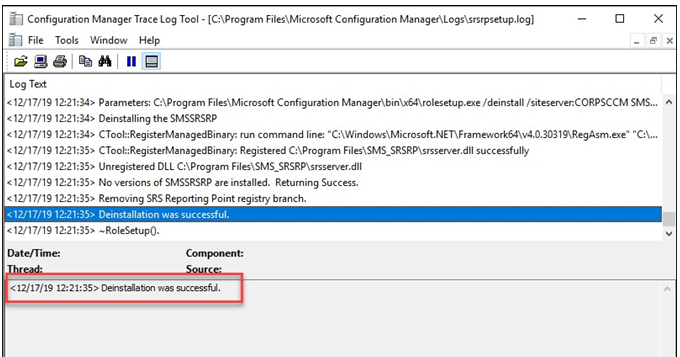
Here is what your log file should look like post removing reporting services point role.
|
1 2 3 4 5 6 7 8 9 10 |
SMSSRSRP Setup Started.... Parameters: C:\Program Files\Microsoft Configuration Manager\bin\x64\rolesetup.exe /deinstall /siteserver:CORPSCCM SMSSRSRP 0 Deinstalling the SMSSRSRP CTool::RegisterManagedBinary: run command line: "C:\Windows\Microsoft.NET\Framework64\v4.0.30319\RegAsm.exe" "C:\Program Files\SMS_SRSRP\srsserver.dll" /unregister CTool::RegisterManagedBinary: Registered C:\Program Files\SMS_SRSRP\srsserver.dll successfully Unregistered DLL C:\Program Files\SMS_SRSRP\srsserver.dll No versions of SMSSRSRP are installed. Returning Success. Removing SRS Reporting Point registry branch. Deinstallation was successful. ~RoleSetup(). |
Step 3 – Uninstall SQL Reporting services
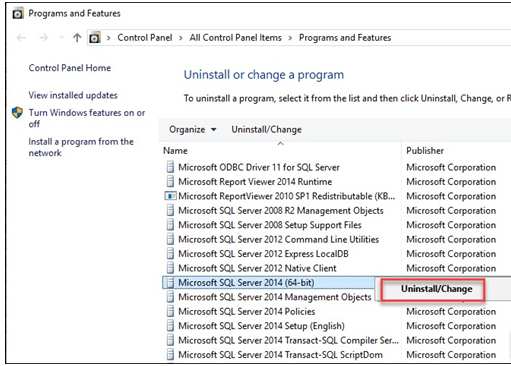
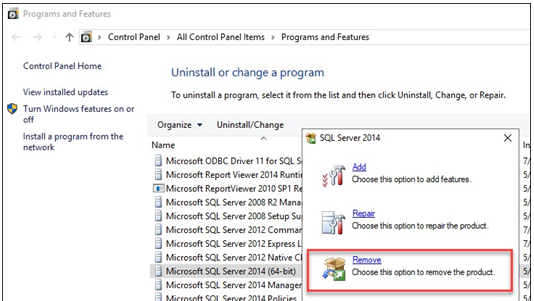
In this step, we will uninstall the SQL Reporting services. On Server with the SQL Reporting Services installed, open the Control Panel.
• Navigate to Programs and Features. Select Microsoft SQL Server 2014 (64-bit).
• Click the Uninstall/Change option.
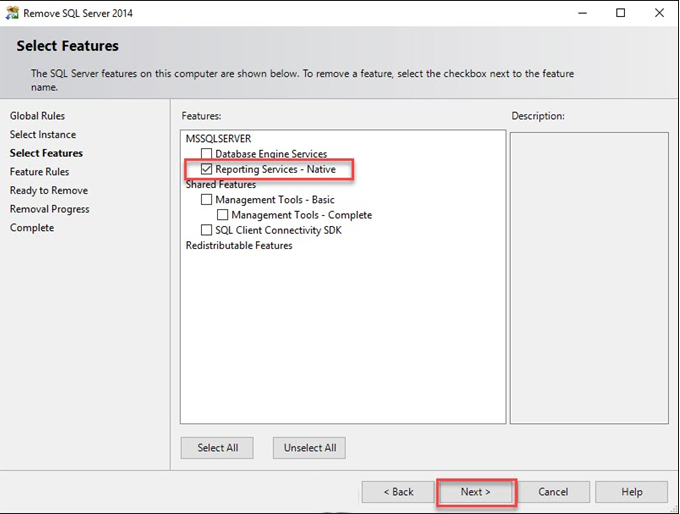
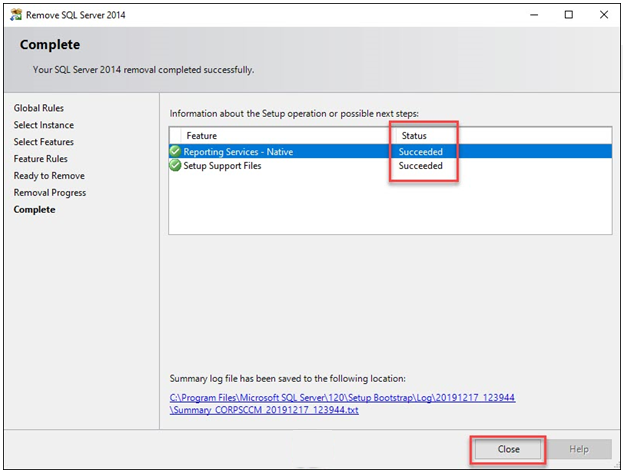
From the list of options, click Remove.
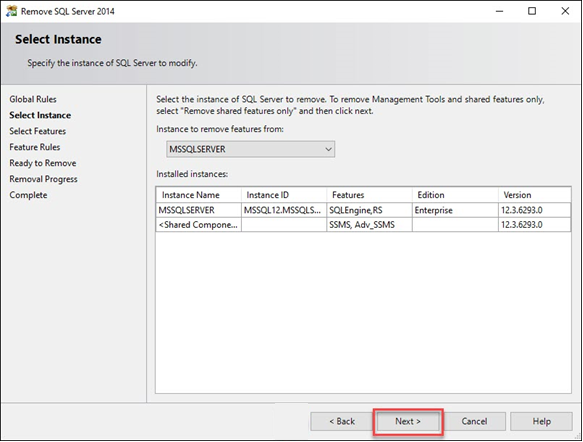
Click on Next.
Step 4 – Delete Report Server Database and Log files
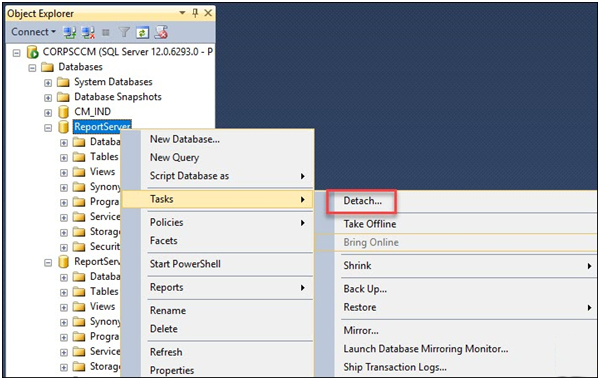
Connect to the SQL server using SQL Server Management Studio. You will find two databases that you need to delete – ReportServer and ReportServerTempDB.
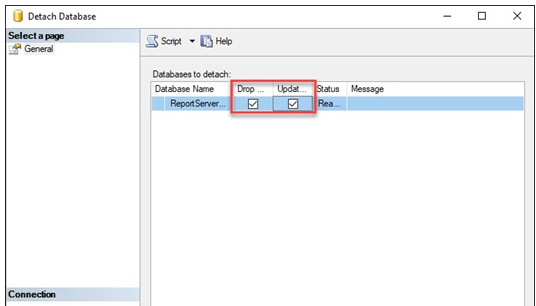
Right click ReportServer and click Tasks > Detach.
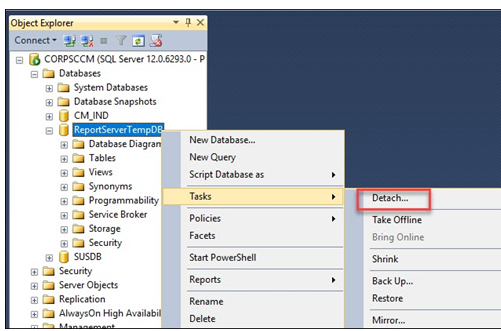
Next, detach the ReportServerTempDB using the same steps as above.
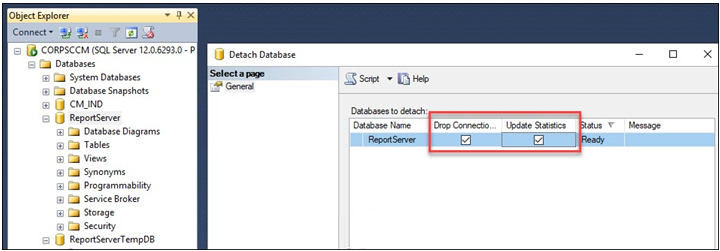
Select Drop Connections and Update Statistics. Click OK. Close the SQL management studio.
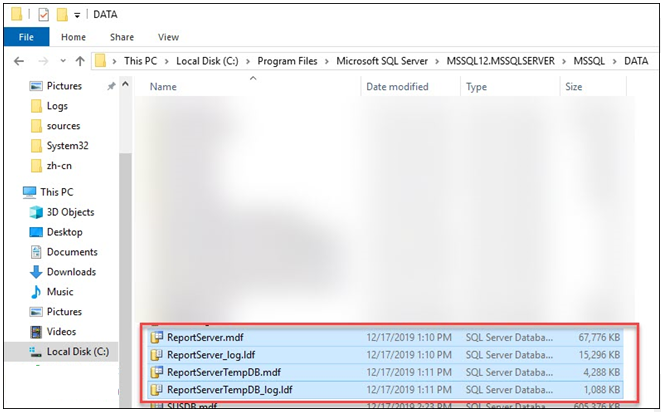
After performing the above steps, you must delete Report Server and Report Server TempDB DB files and log files.
To do that go to C:\Program Files\Microsoft SQL Server\MSSQL12.MSSQLSERVER\MSSQL\DATA.
Select ReportServer or ReportServerTempDB files and log files, delete them.
Step 5 – Stop Configuration Manager Services
Before you upgrade the SQL server, you must stop the Configuration Manager services.
Go to Services console and stop the below services.

Step 6 – Upgrade SQL Server 2014 to 2017
To upgrade or perform in-place upgrade of SQL Server 2014 to SQL Server 2017.
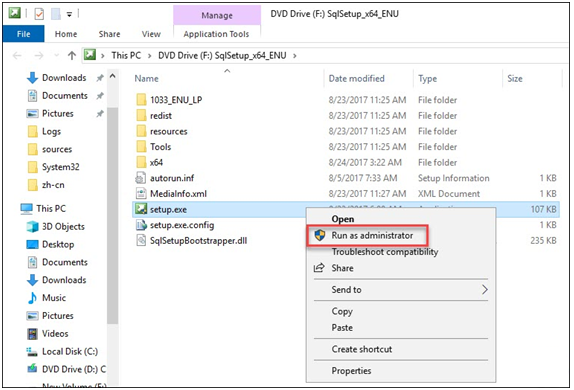
• Copy over the SQL Server 2017 media to the server.
• You can either mount the media or extract the SQL 2017 setup files to a folder.
• Right click Setup.exe and Run as administrator.
On the SQL Server Installation Centre, click Installation. From the right pane, select Upgrade from a previous version of SQL server
Edition Upgrade in SQL Server set up
Let’s try to change the edition from developer to standard edition.
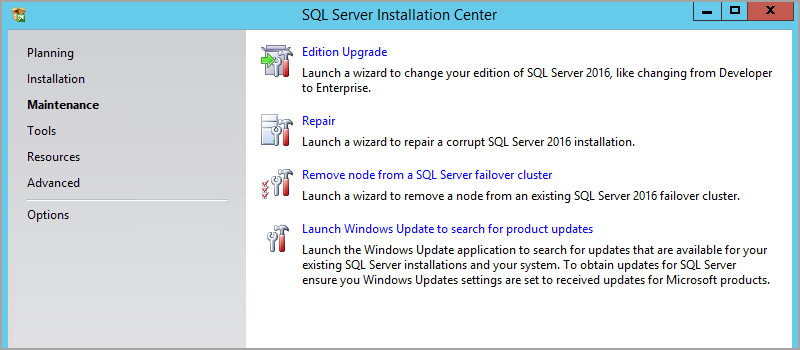
• Open SQL Server installation media and launch the setup.exe. It opens the SQL Server installation centre, and you get options in the left-hand side such as Planning, installation, Maintenance, Tools, Resources
• Click on the Maintenance and in the top, and you can see Edition Upgrade. In the description, you can see that it launches a wizard to change your edition of SQL Server.
In the upgrade edition wizard, you can specify the product key of SQL Server Standard edition. We can hide the product key.
In the next page, we get the Microsoft software license terms. Accept the license terms and move to the next page.
In the next it checks for edition upgrade rules. You can see the status of the rule as Passed or Failed. You should have rules status passed to proceed with edition upgrade.
Click on Warning and it displays the following message.
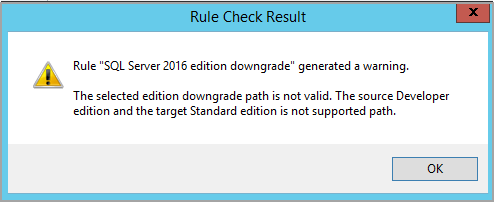
You get a message that selected edition downgrade path is not valid.
We cannot change the developer edition to target standard edition, as it is not a supported path.
We already checked in the Microsoft docs that it is a supported path.
As highlighted earlier, we cannot change SQL Server Edition from developer to standard edition if we are using an enterprise-level feature in connected SQL Server instance.
We already verified that no such feature is in use for my instance. Click on Ok and move to next page.
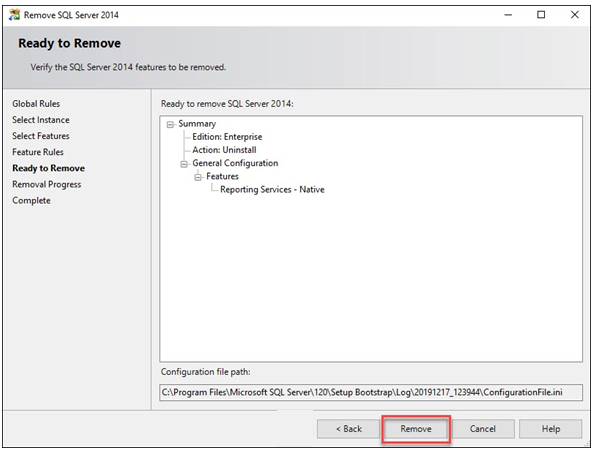
We are now ready to upgrade edition. Verify the summary of SQL Server edition.
We can also note down that configuration file path.
Click on Upgrade as highlighted in the following image.
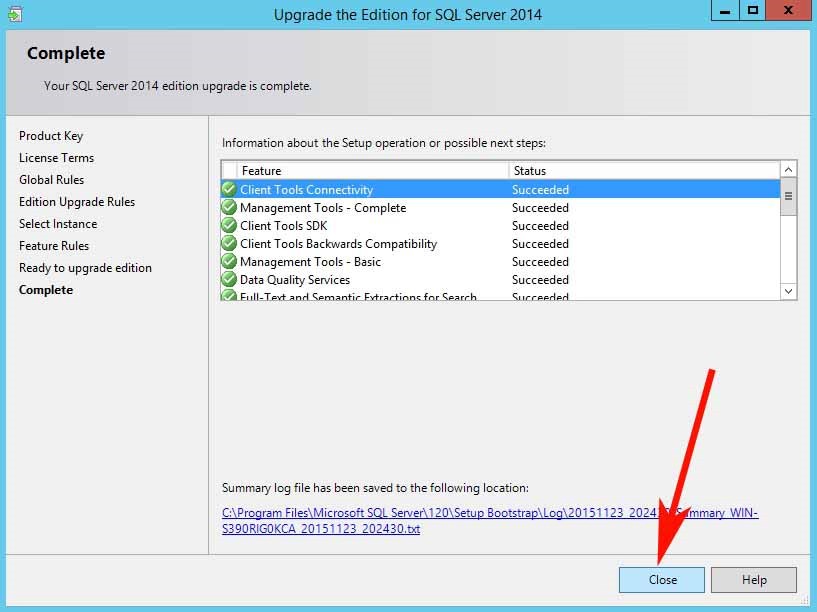
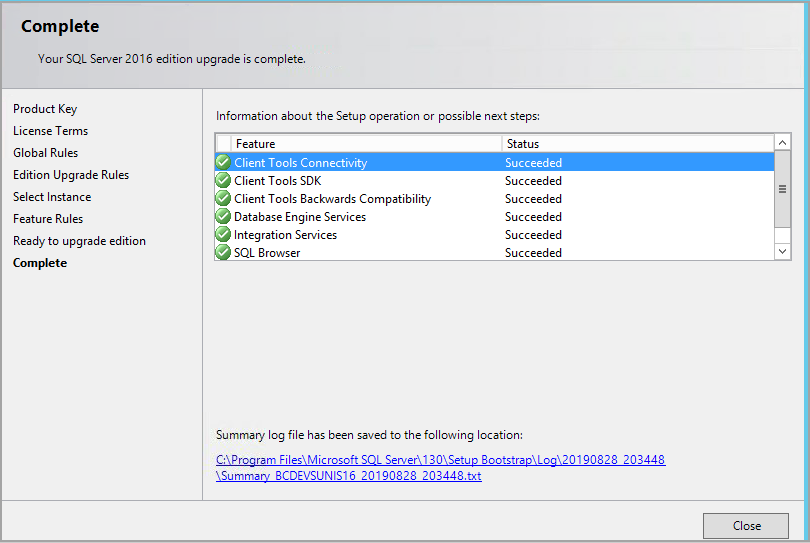
Upgradation
We do not get any progress bar. It stays in the stage for a few minutes and later, you get the following successful edition upgrade message.
You can also go to summary log file from the link mentioned on the page.
Although it does not asks you to reboot Server hosting SQL Server instance. I would recommend you to do so.
Once a server is up, connect to SQL Server instance in SSMS and execute the following query.
It uses SERVERPROPERTY function to get product version, edition and product level.
|
1 2 3 4 5 6 7 8 9 10 11 12 13 |
DECLARE @Version NVARCHAR(128) SET @Version = CONVERT(NVARCHAR(128),SERVERPROPERTY ('ProductVersion')) SELECT CASE WHEN @Version like '11%' THEN 'SQL SERVER 2012' WHEN @Version like '12%' THEN 'SQL SERVER 2014' WHEN @Version like '13%' THEN 'SQL SERVER 2016' ELSE 'Unknown' END AS 'Sql Server Version Name', SERVERPROPERTY('ProductVersion') AS ProductVersion, SERVERPROPERTY('Edition') AS Edition, SERVERPROPERTY('ProductLevel') AS ProductLevel |
You can see that SQL Server Edition changed from the developer to standard.
You can also verify that product version is similar after the upgrade as well.
We did not perform any service pack or Cumulative pack upgrade. Therefore, the product version is similar in developer edition as well.

You can follow the same method to perform other supported SQL Server Edition upgrade paths.
If you are doing it in a production environment, I would recommend taking a backup of all databases, logins, jobs before doing it.
The edition upgrade might not create any issues, but it is better to take precautions keeping production system in mind.
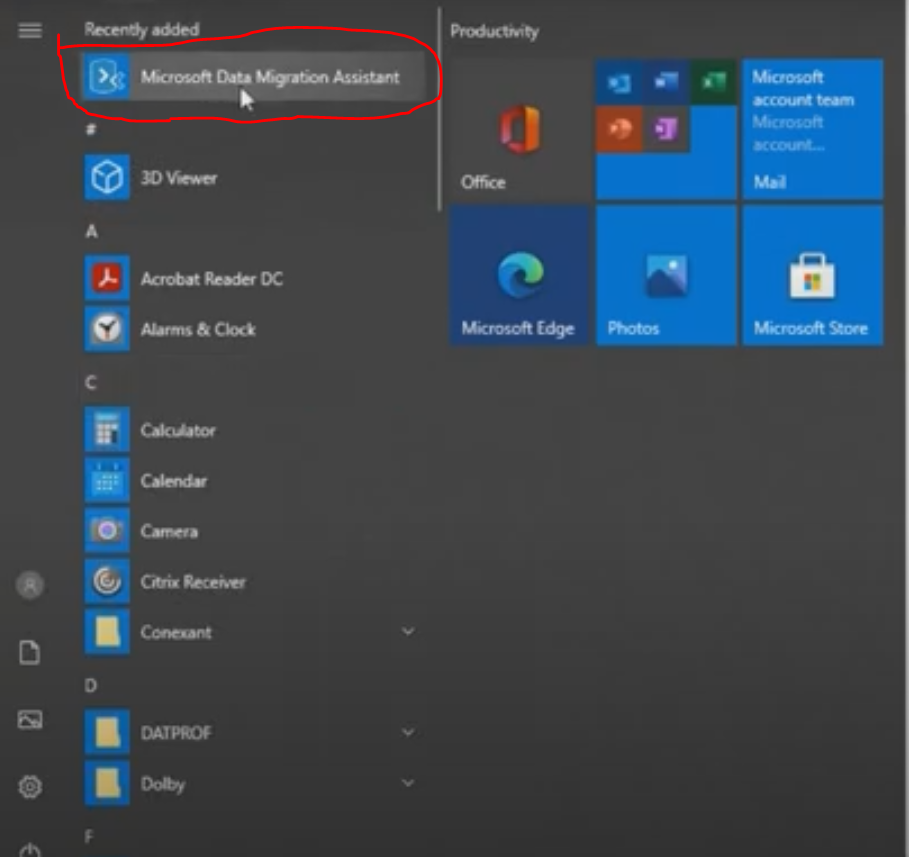
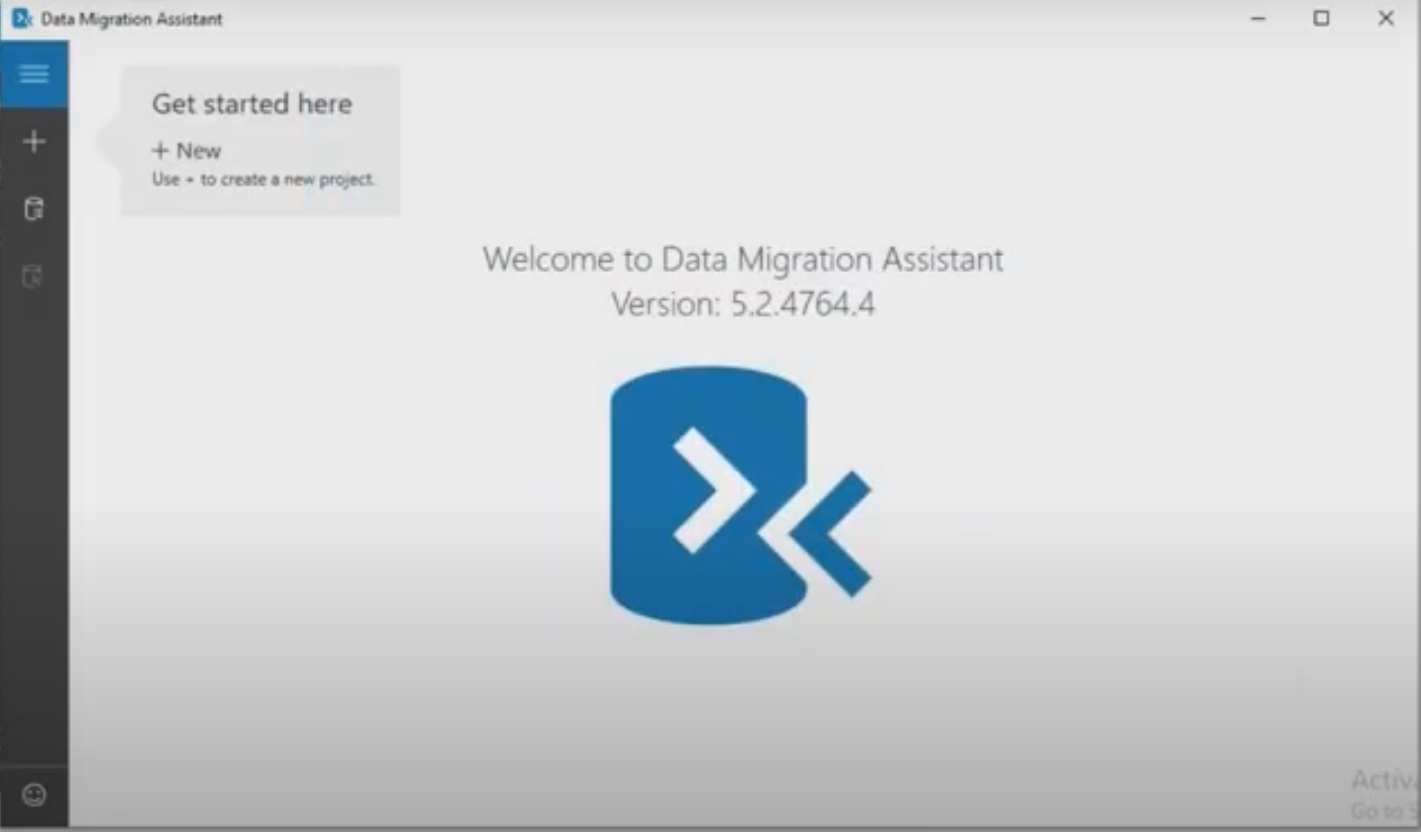
Data Migration Assistant
The Data Migration Assistant (DMA) helps you upgrade to a modern data platform by detecting compatibility issues that can impact database functionality in your new version of SQL Server or Azure SQL Database.
DMA recommends performance and reliability improvements for your target environment and allows you to move your schema, data, and uncontained objects from your source server to your target server.
Note :
For large migrations (in terms of number and size of databases), we recommend that you use the Azure Database Migration Service, which can migrate databases at scale.
Supported source and target versions
DMA replaces all previous versions of SQL Server Upgrade Advisor and should be used for upgrades for most SQL Server versions. Supported source and target versions are:
Sources
• SQL Server 2005
• SQL Server 2008
• SQL Server 2008 R2
• SQL Server 2012
• SQL Server 2014
• SQL Server 2016
• SQL Server 2017 on Windows
Targets
• SQL Server 2012
• SQL Server 2014
• SQL Server 2016
• SQL Server 2017 on Windows and Linux
• SQL Server 2019
• Azure SQL Database single database
• Azure SQL Managed Instance
• SQL server running on an Azure Virtual Machine
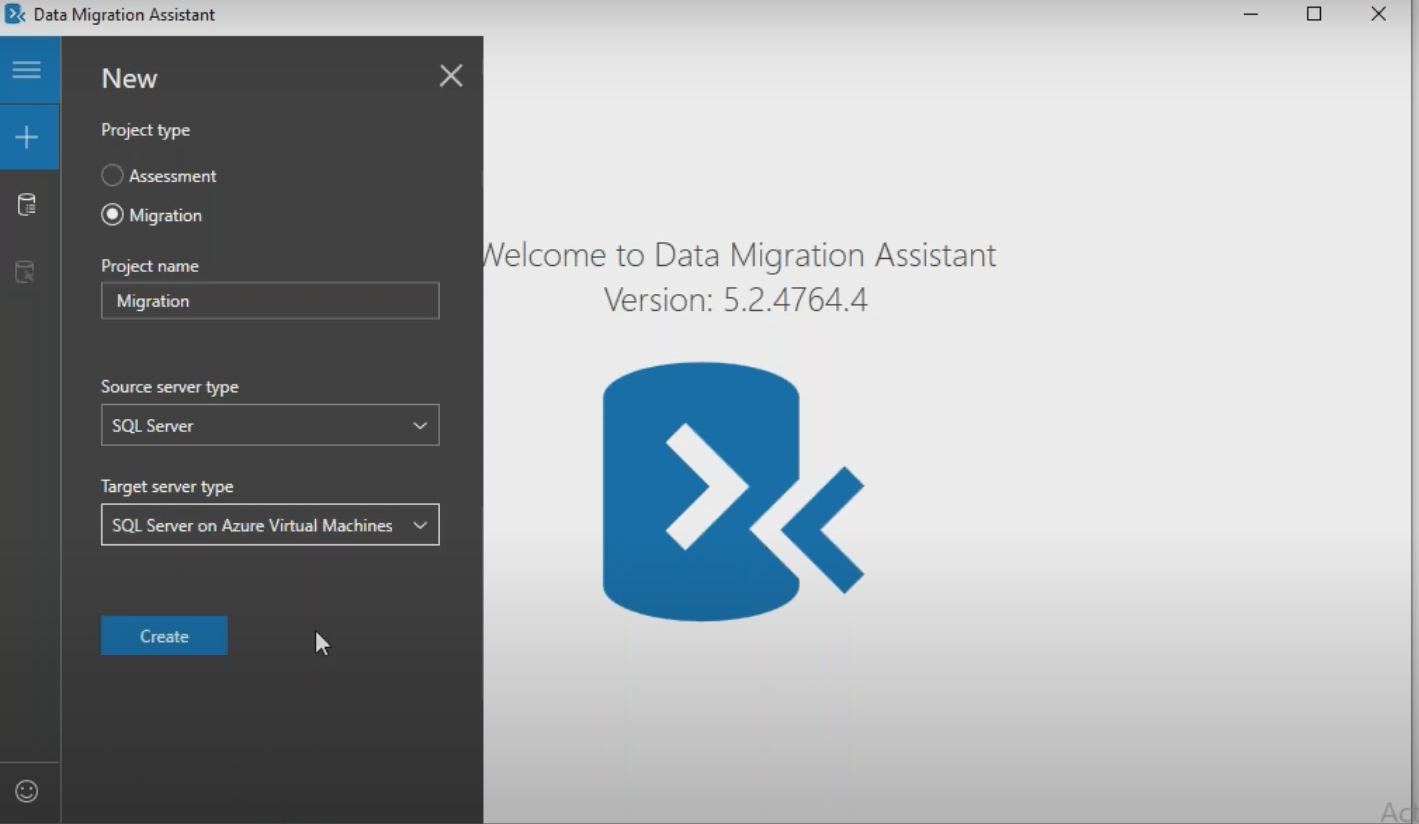
Click on New + symbol and select the Project type as Assessment
Source server type and Target server type Based on our Project
Next Click on create Button.

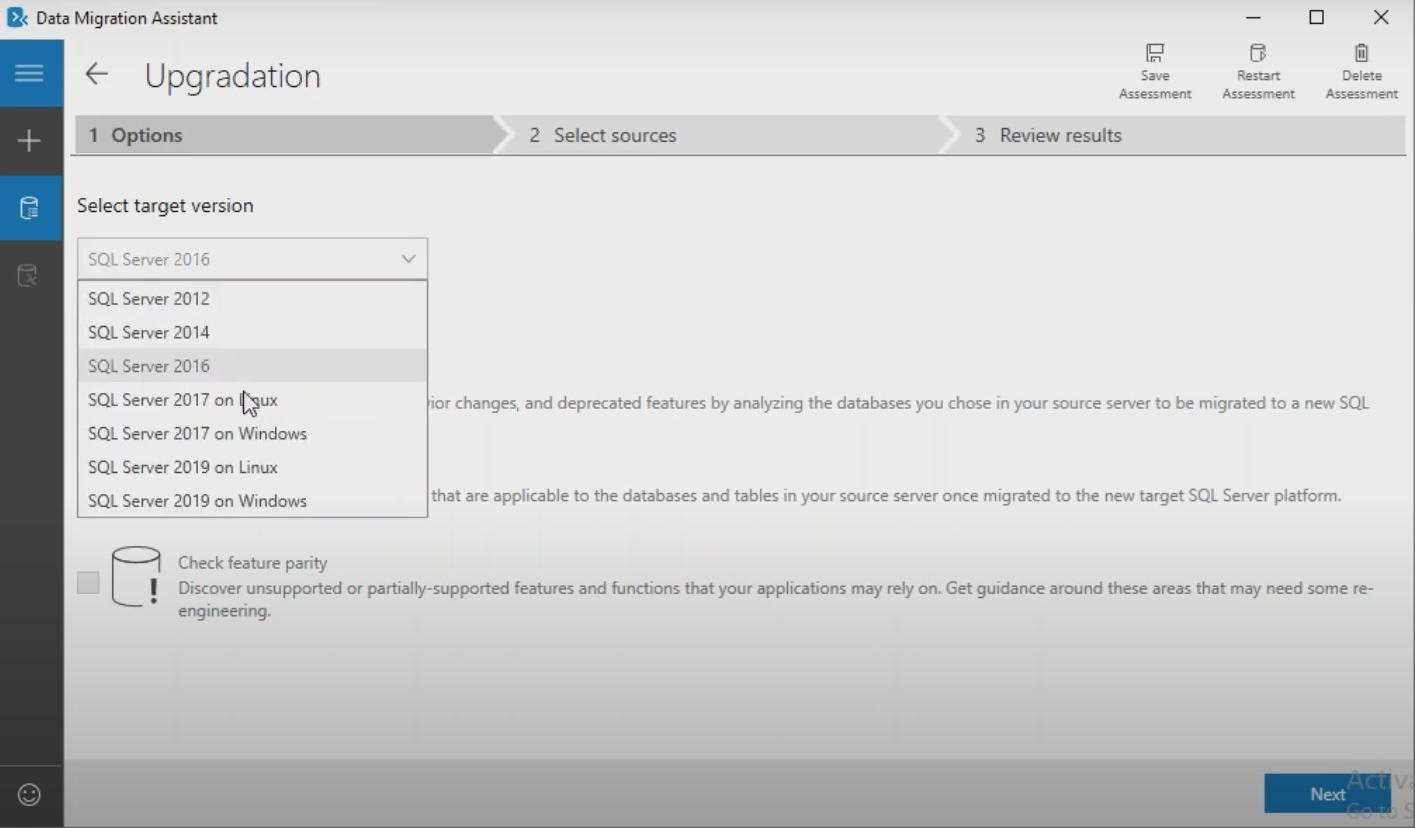
Next we have to Select the TARGET Version Based on our Project.
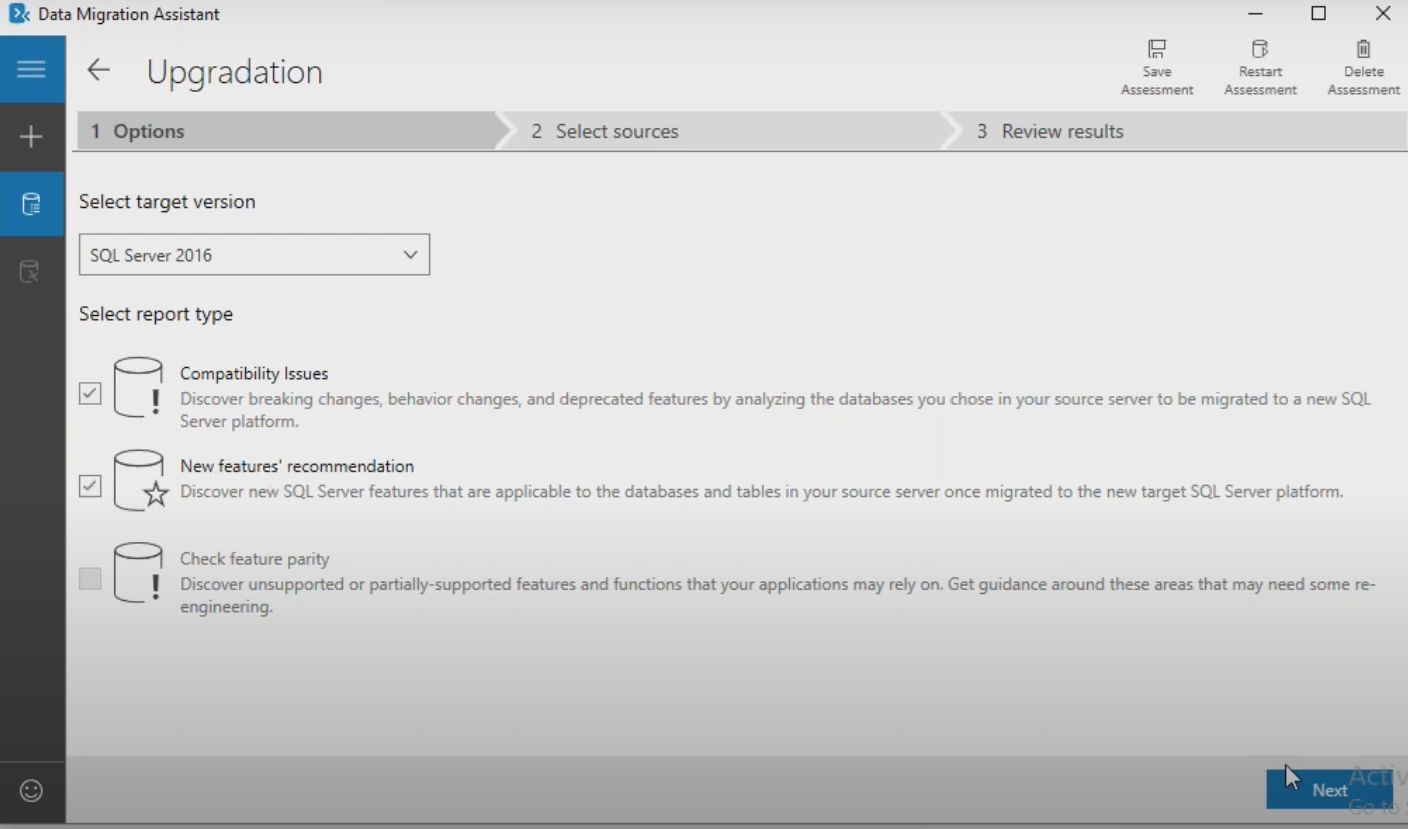
Select Compatibility issues and New features recommendation
Click on Next Button.
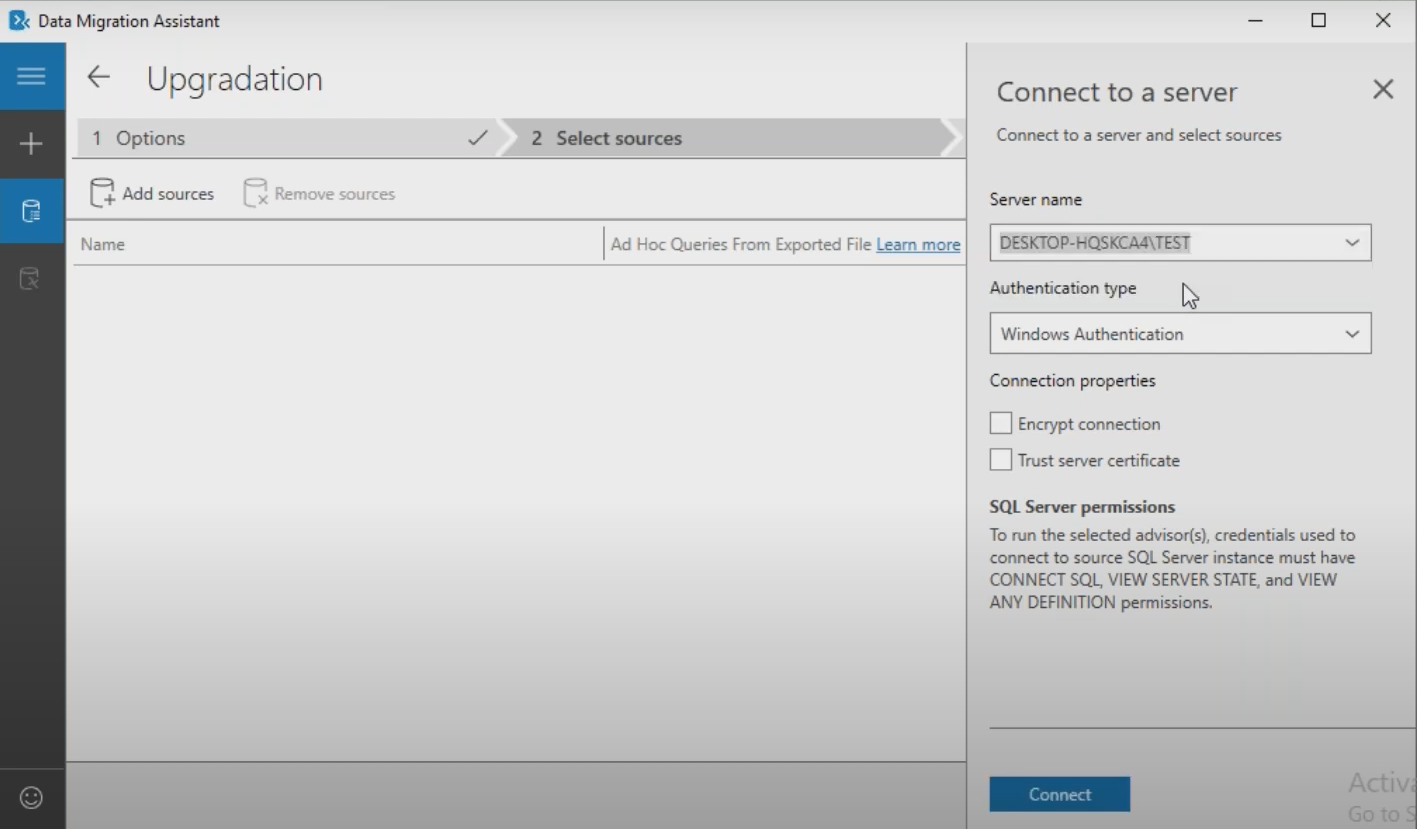
Click on Connect Button.
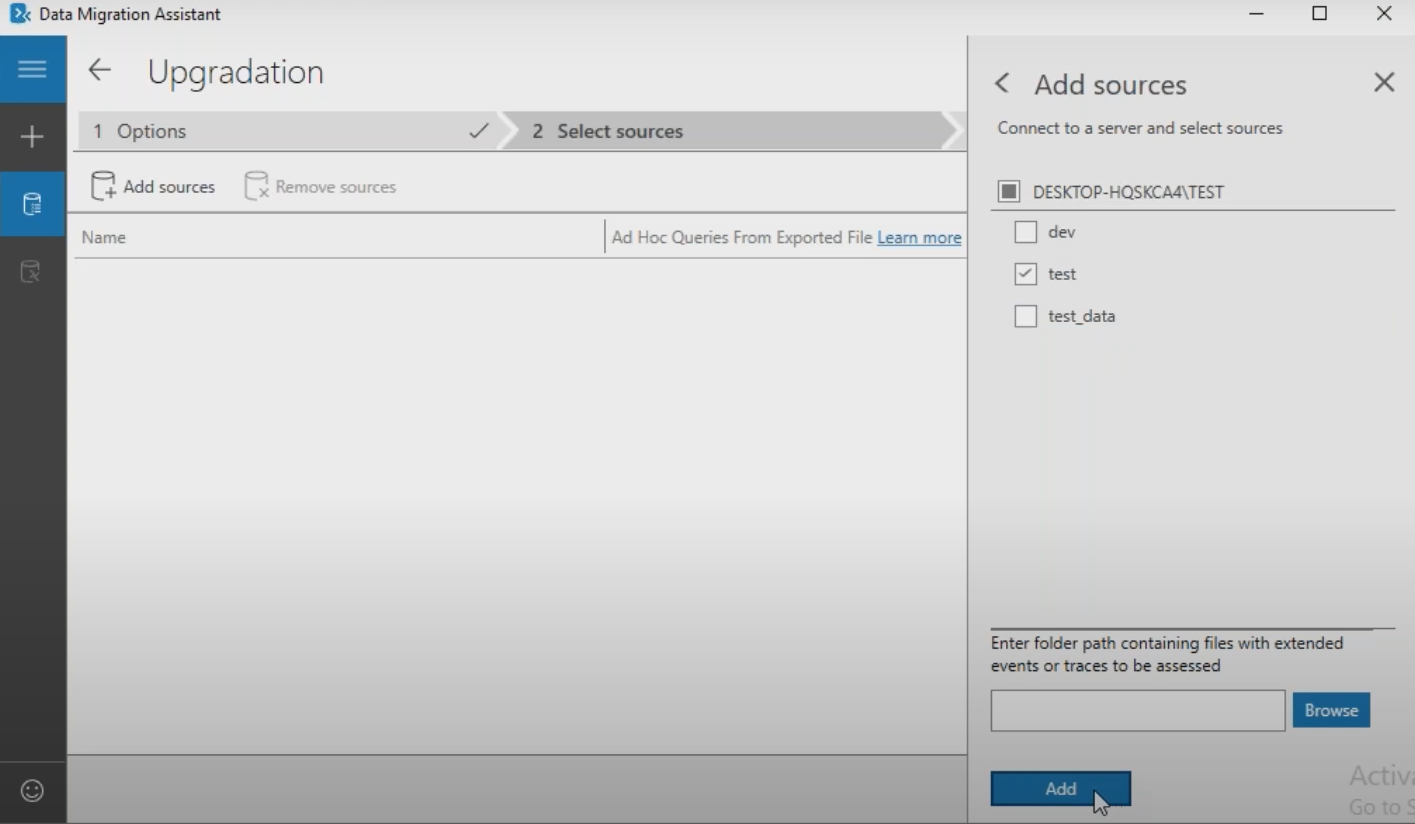
Select the Content databases
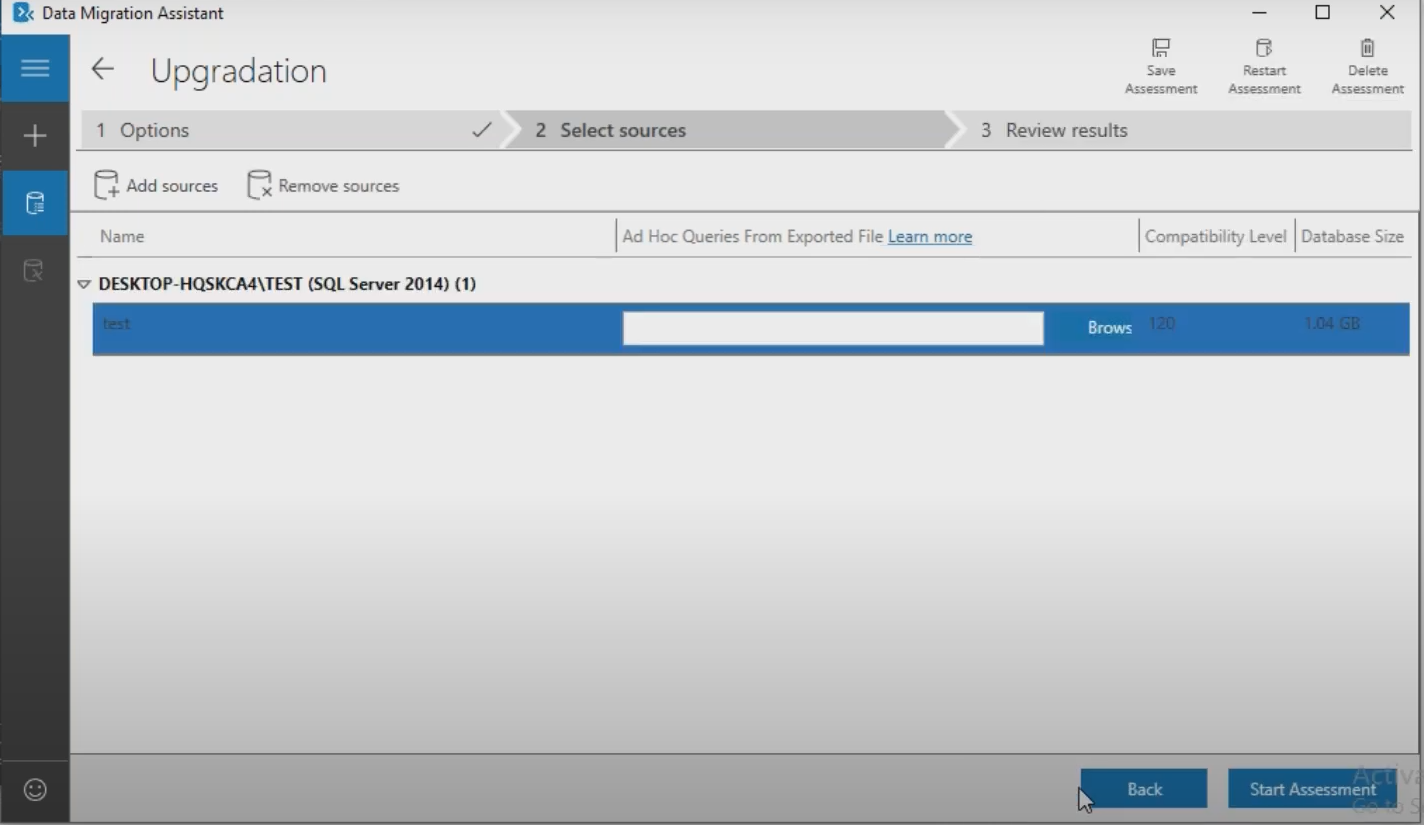
Click on Add Button
And select the Start Assessment.
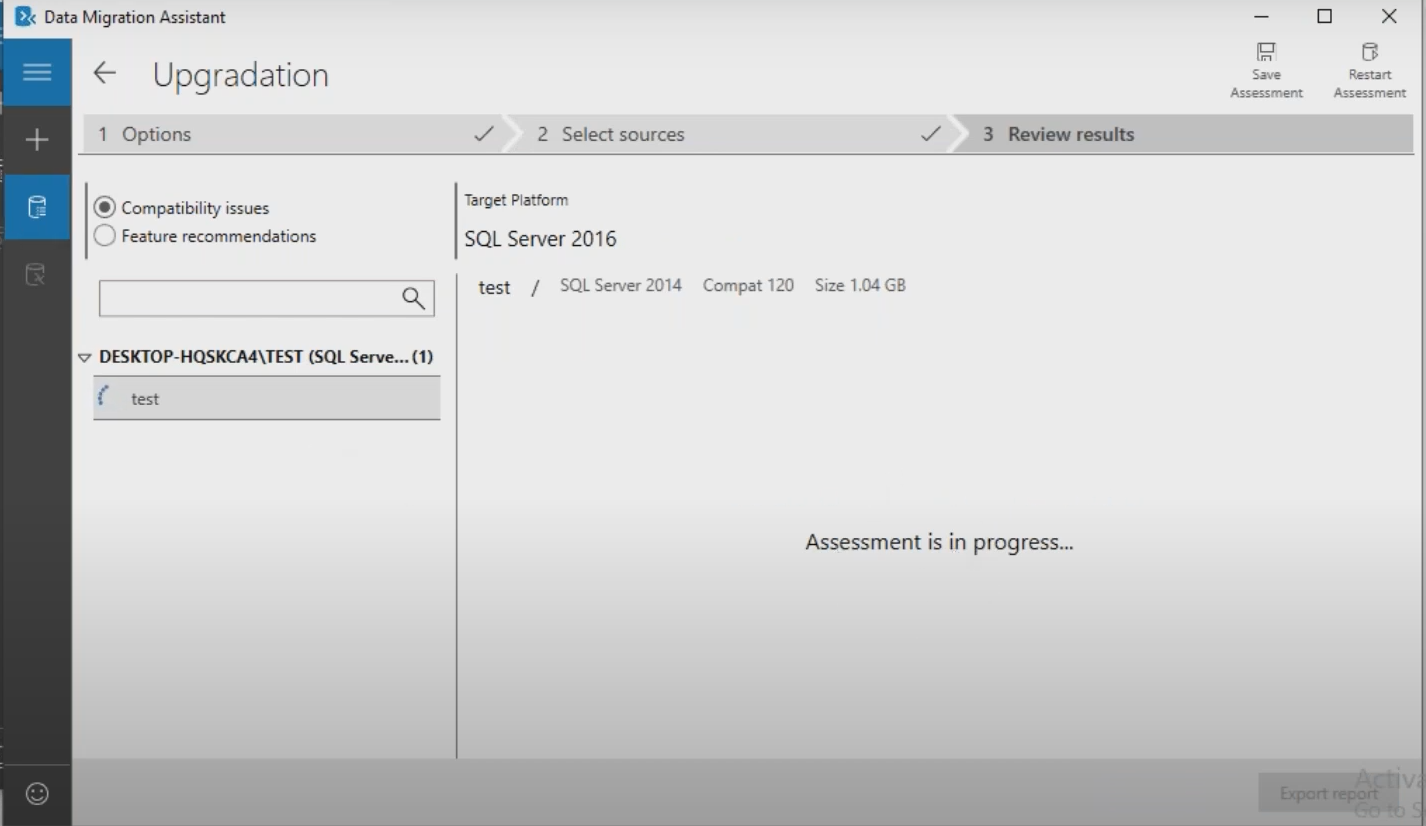
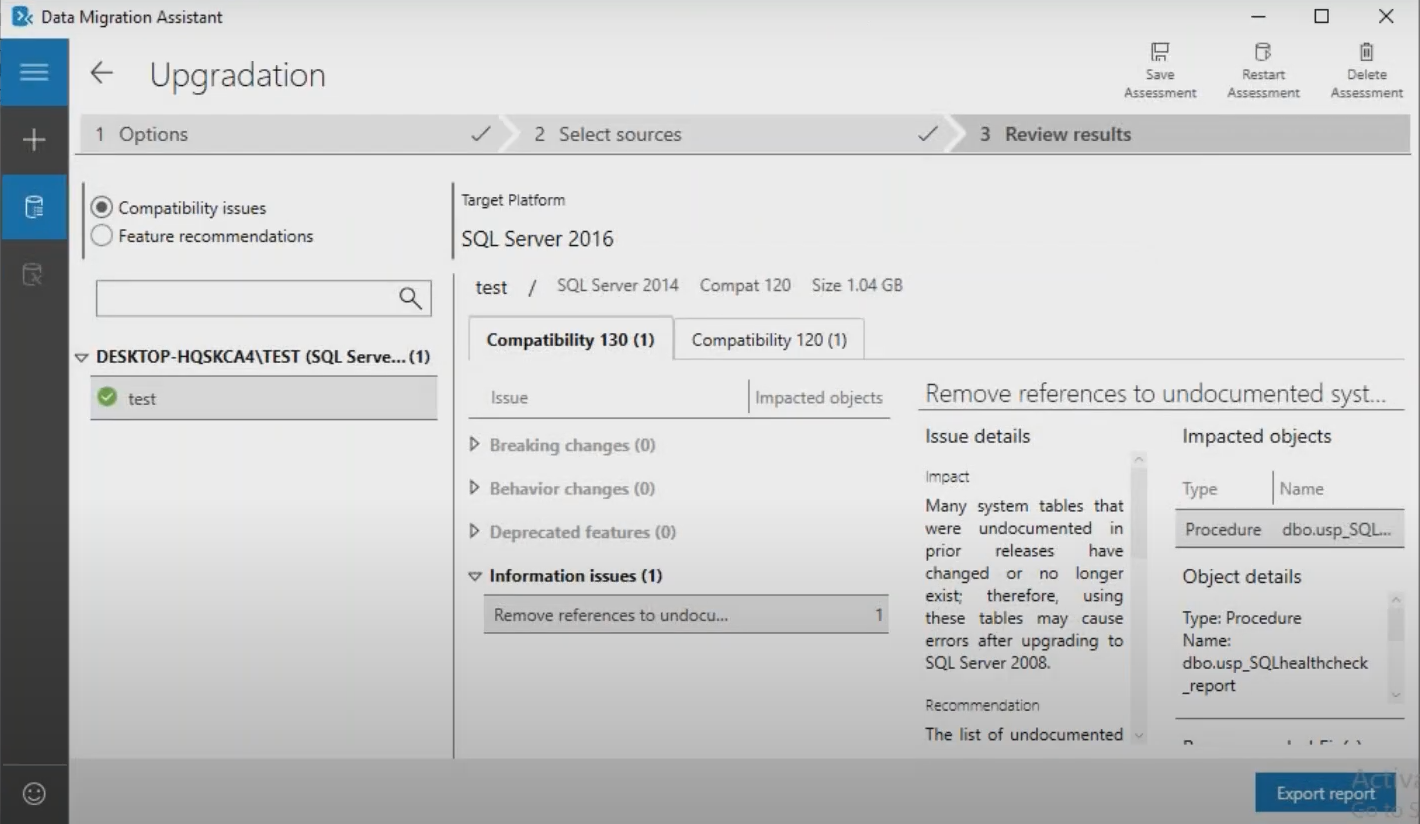
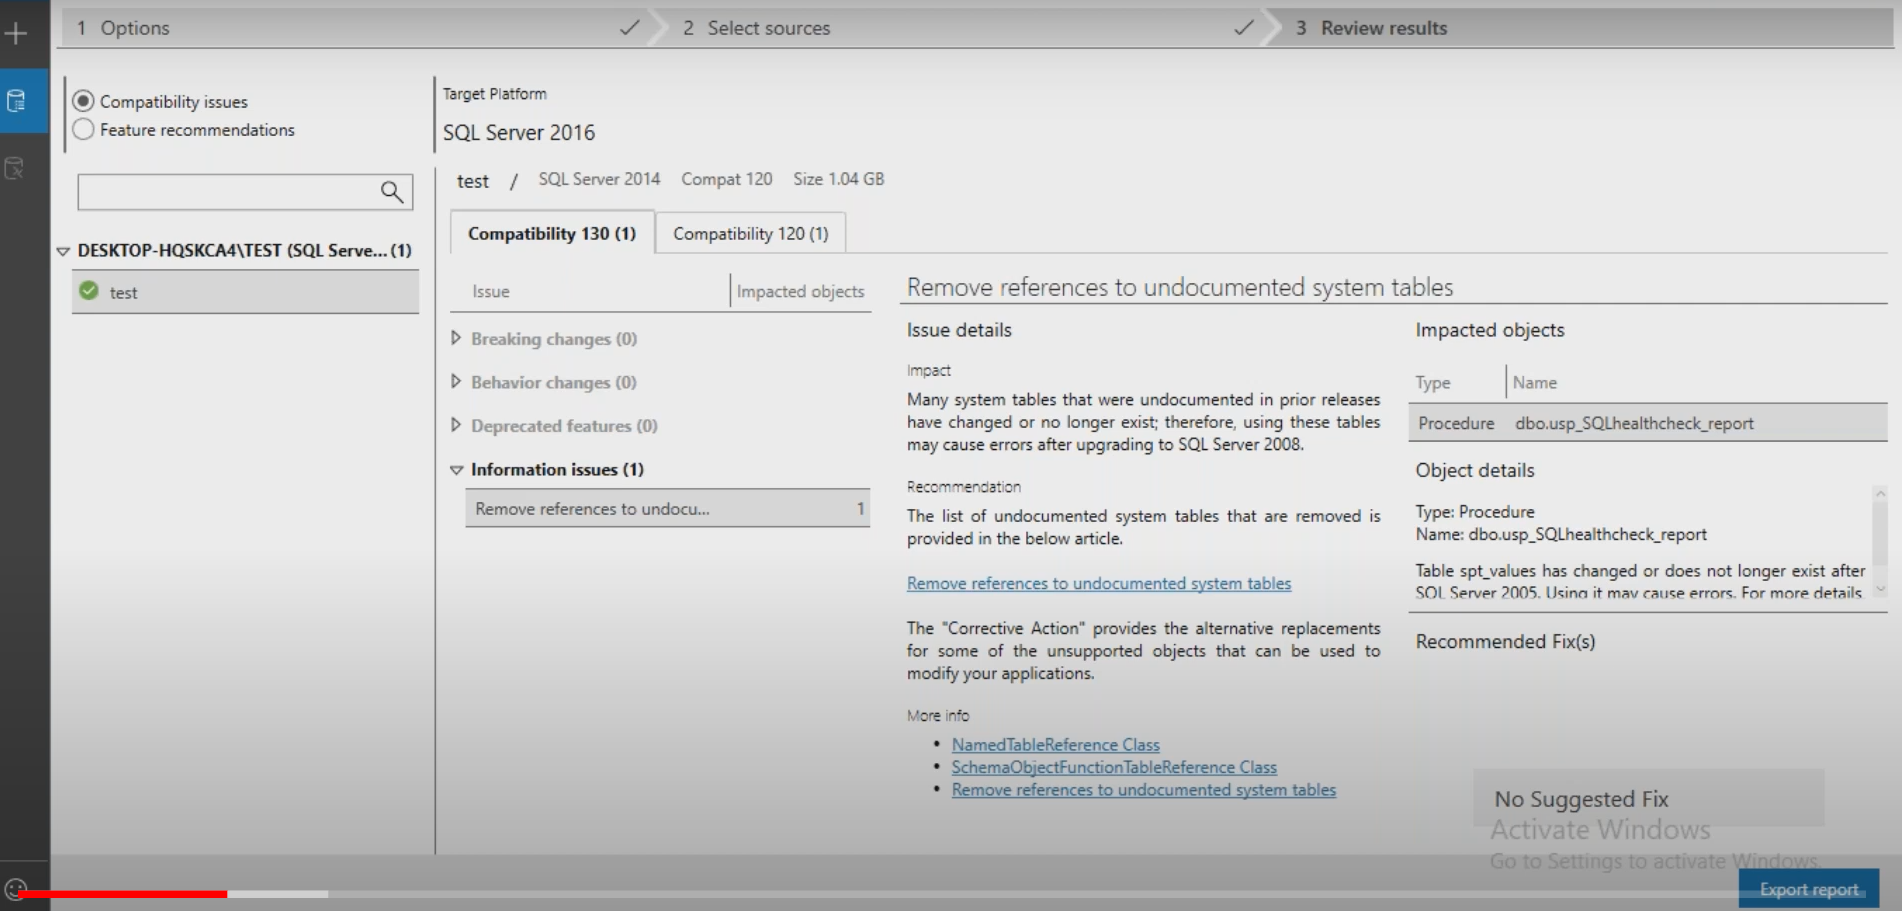
Based on Compatibility report we can find the Compatibility issues and recommendations checks
For Migration Below steps
Select the Target server and Click on Create.

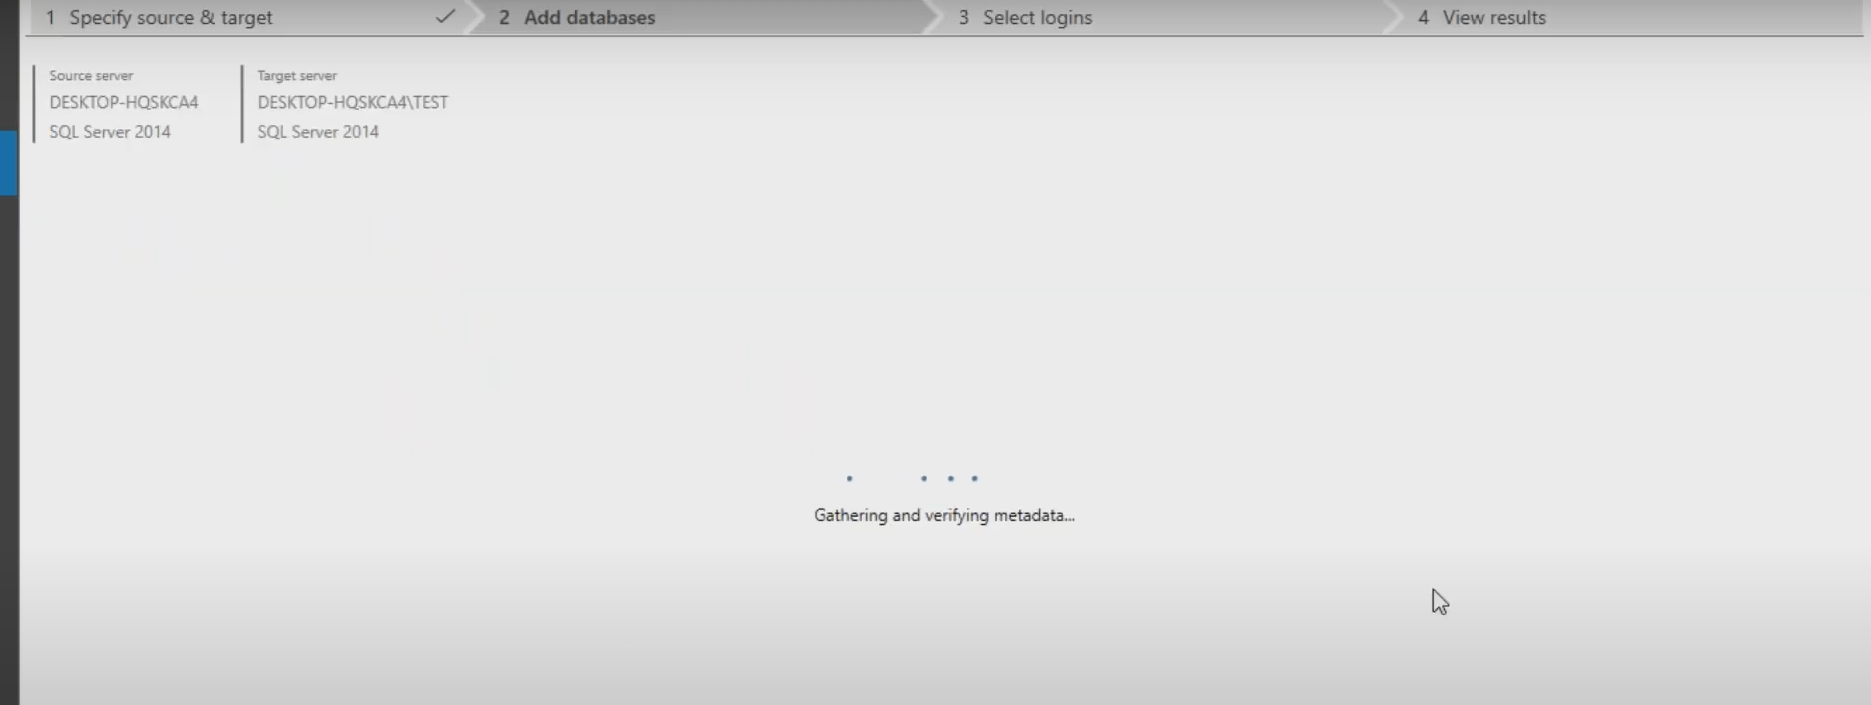
Select the Source server details and Target server details
And Next click on Next Button.
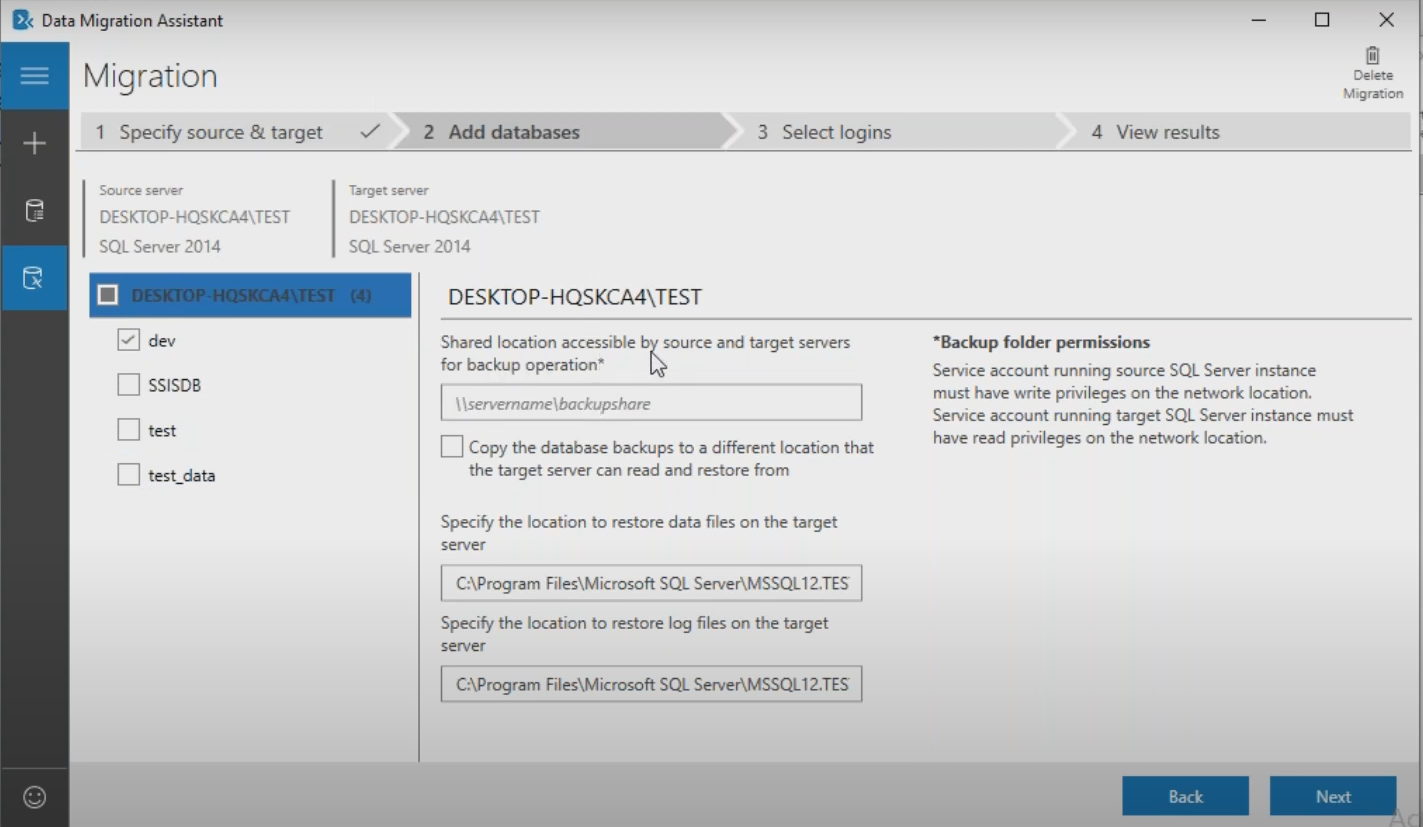
Using Backups also we can migrate ( copy the database backups to a different location that target server can read and restore from)
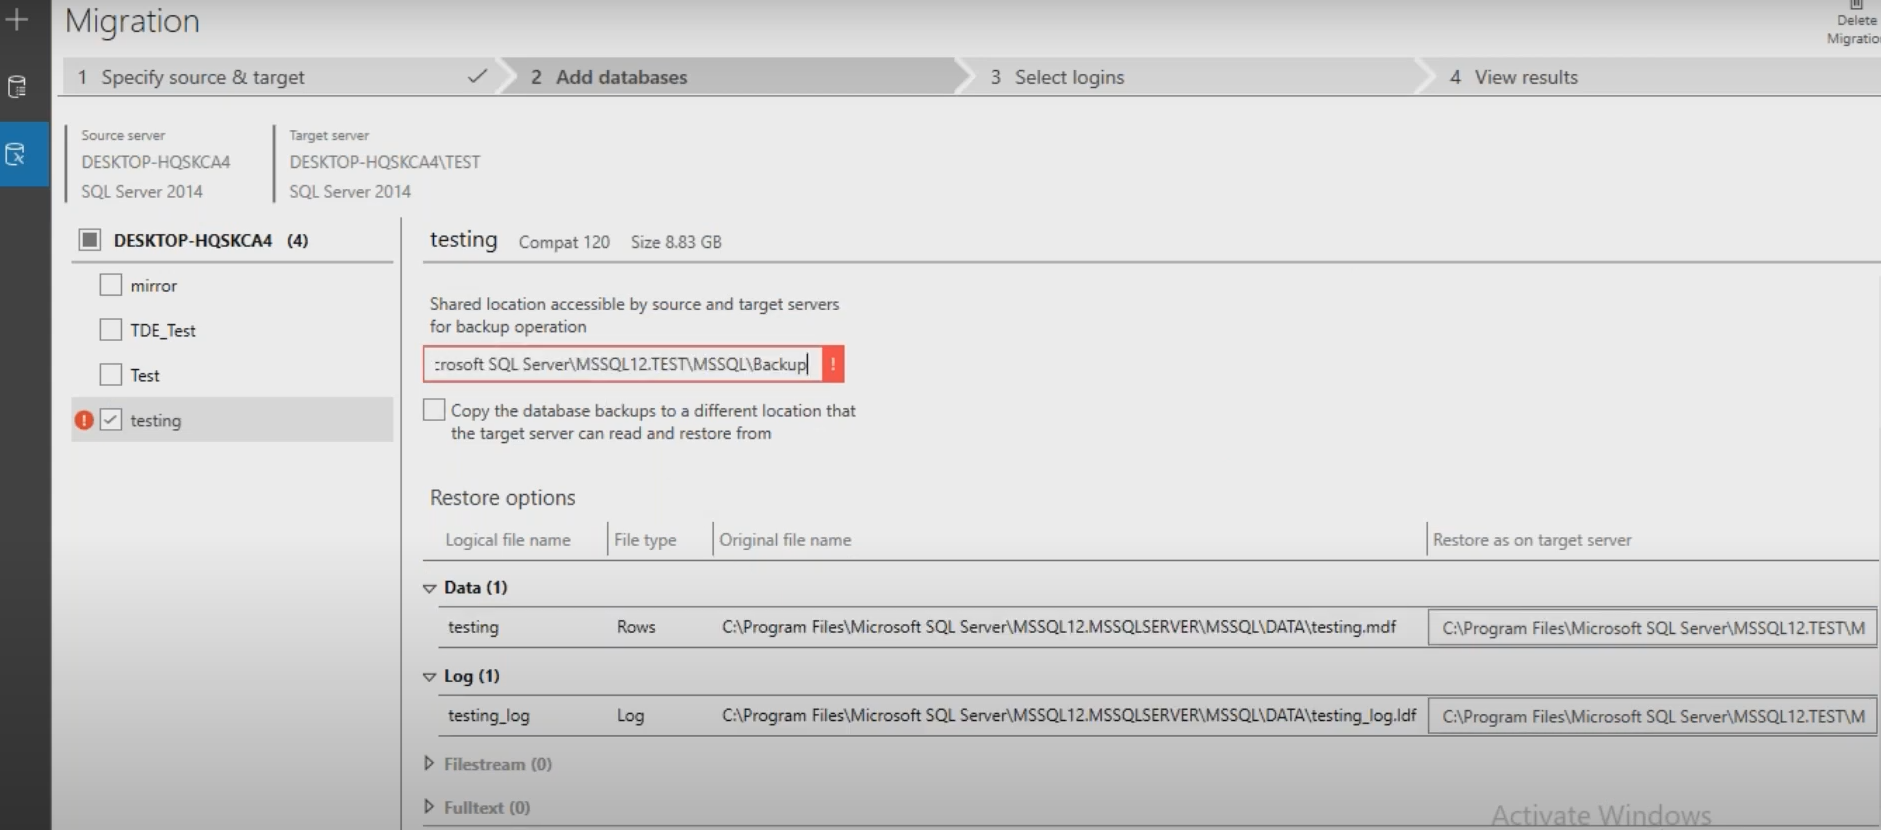
After Entering the Backup location click on Next Button.
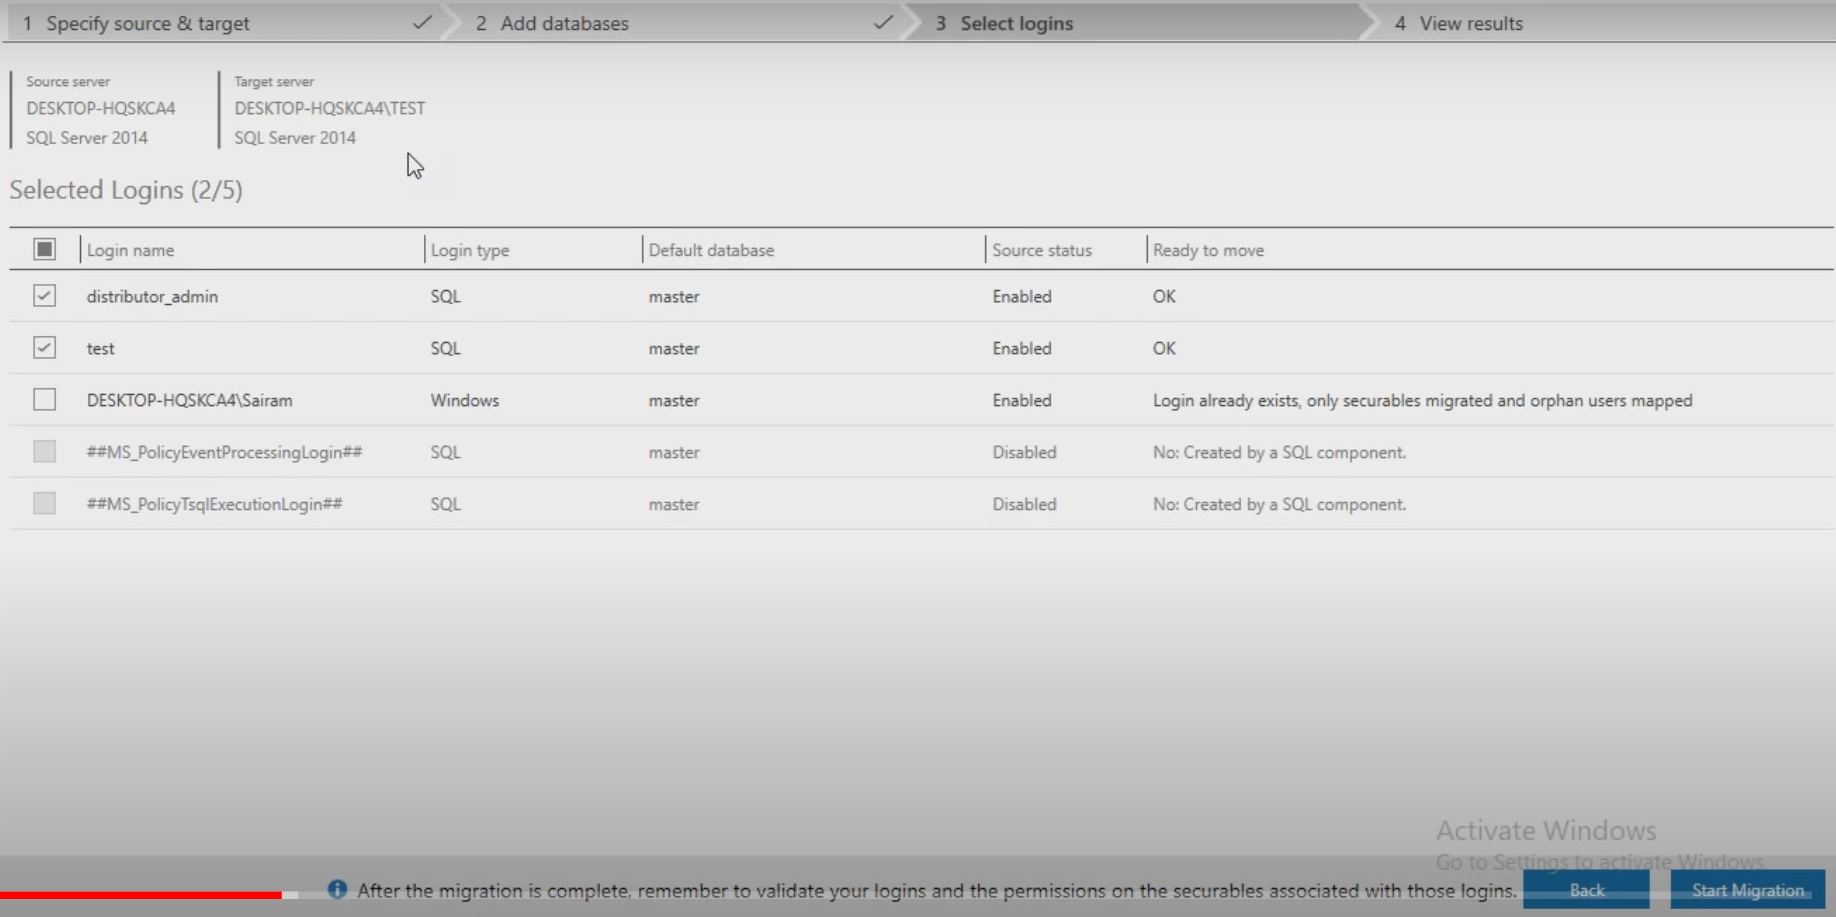
Next click on start migration.
Note :
Once upgradation is done. we cannot rollback to older version.
Because we are over righting the versions from 2014 to 2016.
But in Migration we can do the roll back
Thank you for giving your valuable time to read the above information.
Follow us on
Website : www.ktexperts.com
Facebook Page : KTexperts
Linkedin Page : KT EXPERTS