Autonomous Transaction Processing
In this article, we will know about “ATP”

Oracle Autonomous Transaction Processing delivers a self-driving, self-securing, self-repairing database service that can instantly scale to meet the demands of a variety of applications: mission-critical transaction processing, mixed transactions and analytics, IoT, JSON documents, and so on.
When you create an Autonomous Transaction Processing database, you can deploy it to one of two kinds of Exadata infrastructure:
Shared, a simple and elastic choice. Oracle autonomously operates all aspects of the database life cycle from database placement to backup and updates.
Dedicated on Public Cloud, a private cloud in public cloud choice. A completely dedicated compute, storage, network, and database service for only a single tenant, providing for the highest levels of security isolation and governance.
Dedicated on Cloud@Customer, Autonomous Database on dedicated infrastructure running on Exadata Database Machine system in your data center, together with the networking configuration that connects it to Oracle Cloud.
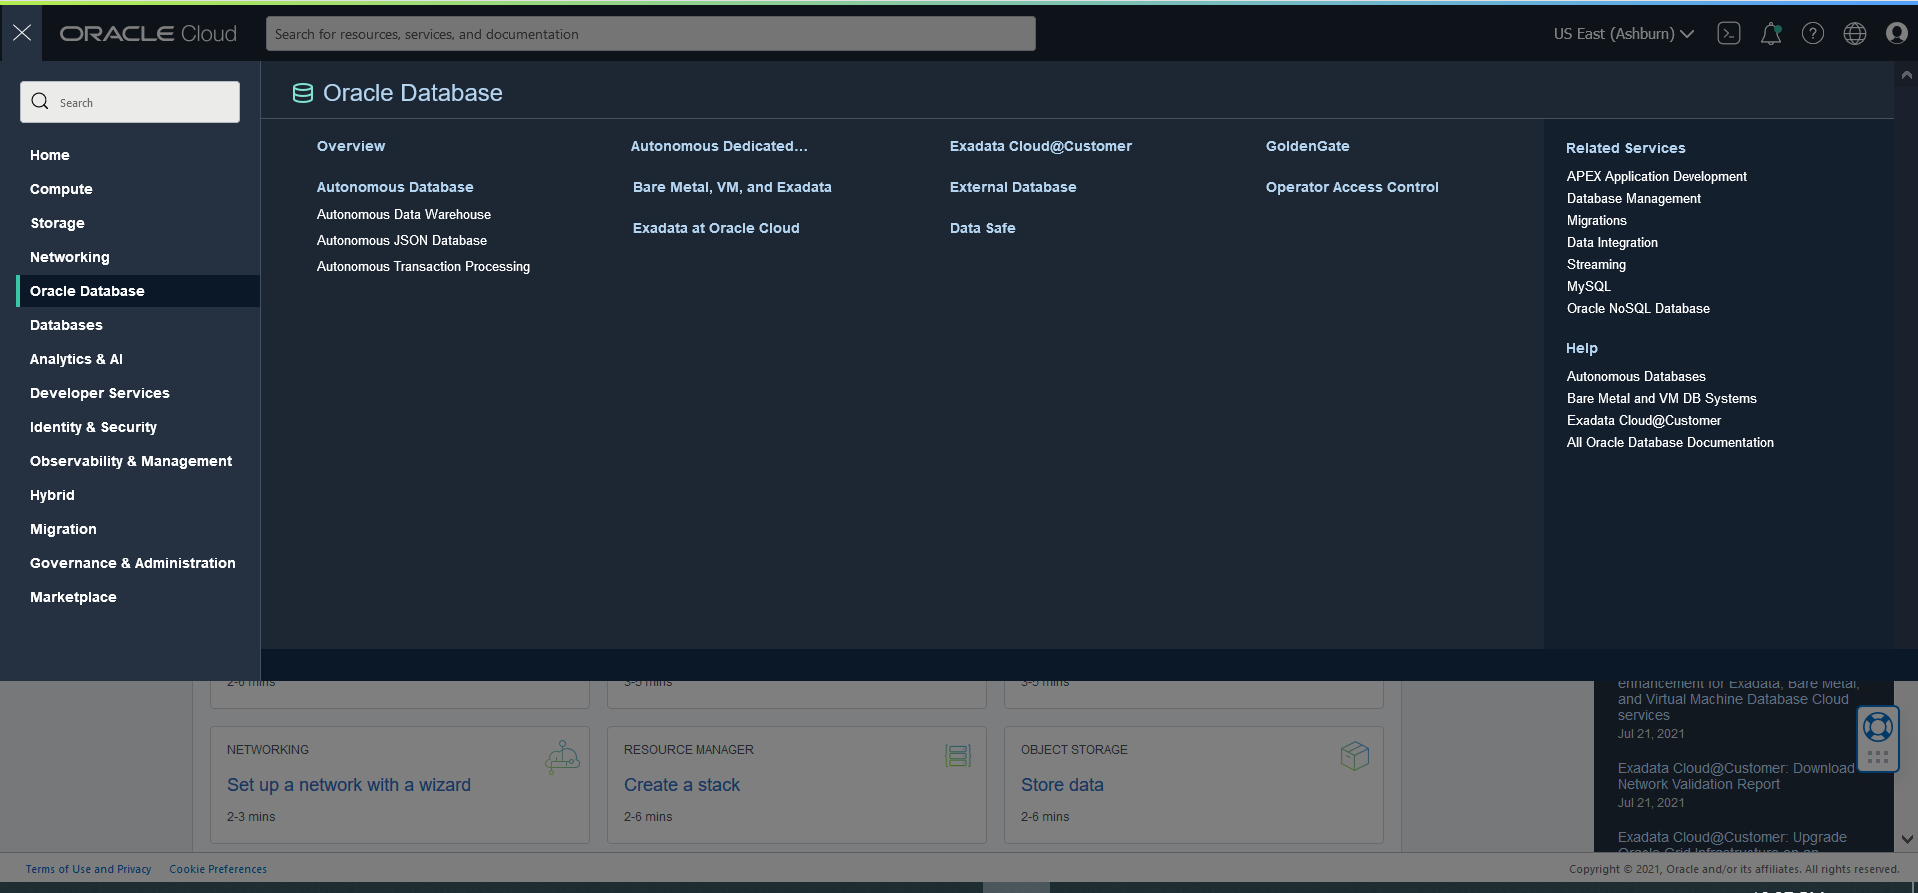
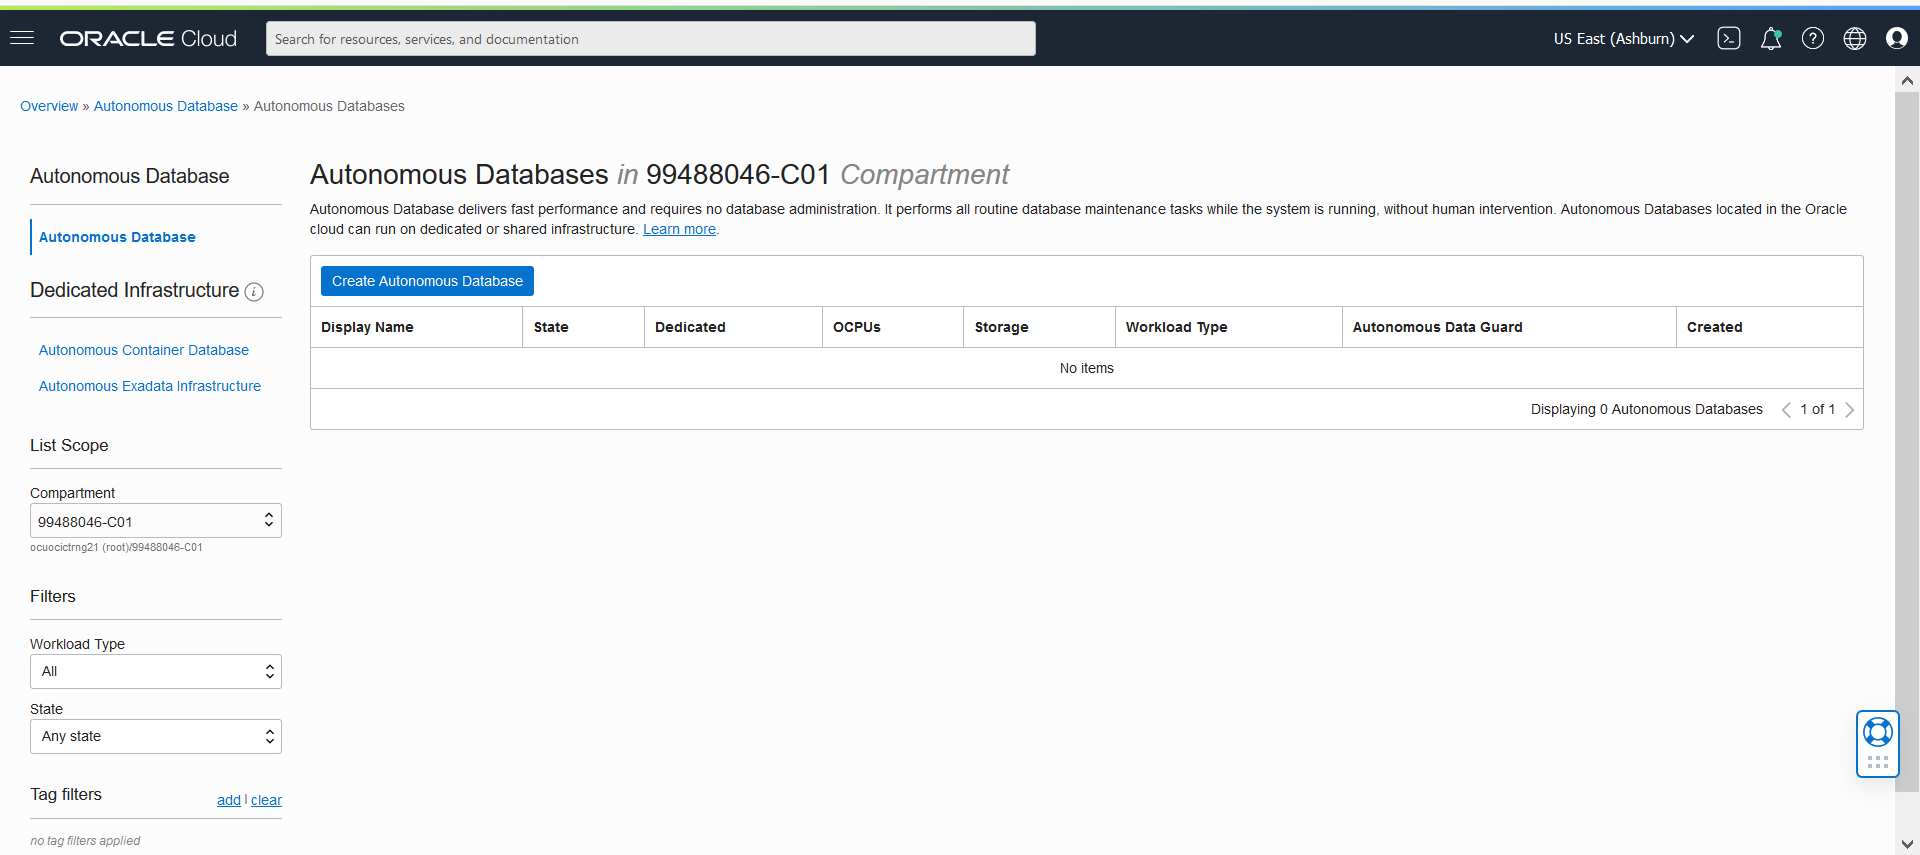
1 – Login to OCI console either with SSO credentials or specific user_id & password, Once login select the specific region you want to deploy resources, Select Hamburger menu at top left corner, we can see Autonomous database option from Oracle database.
2 – Select a specific compartment where to deploy resources, then click on create an autonomous database.
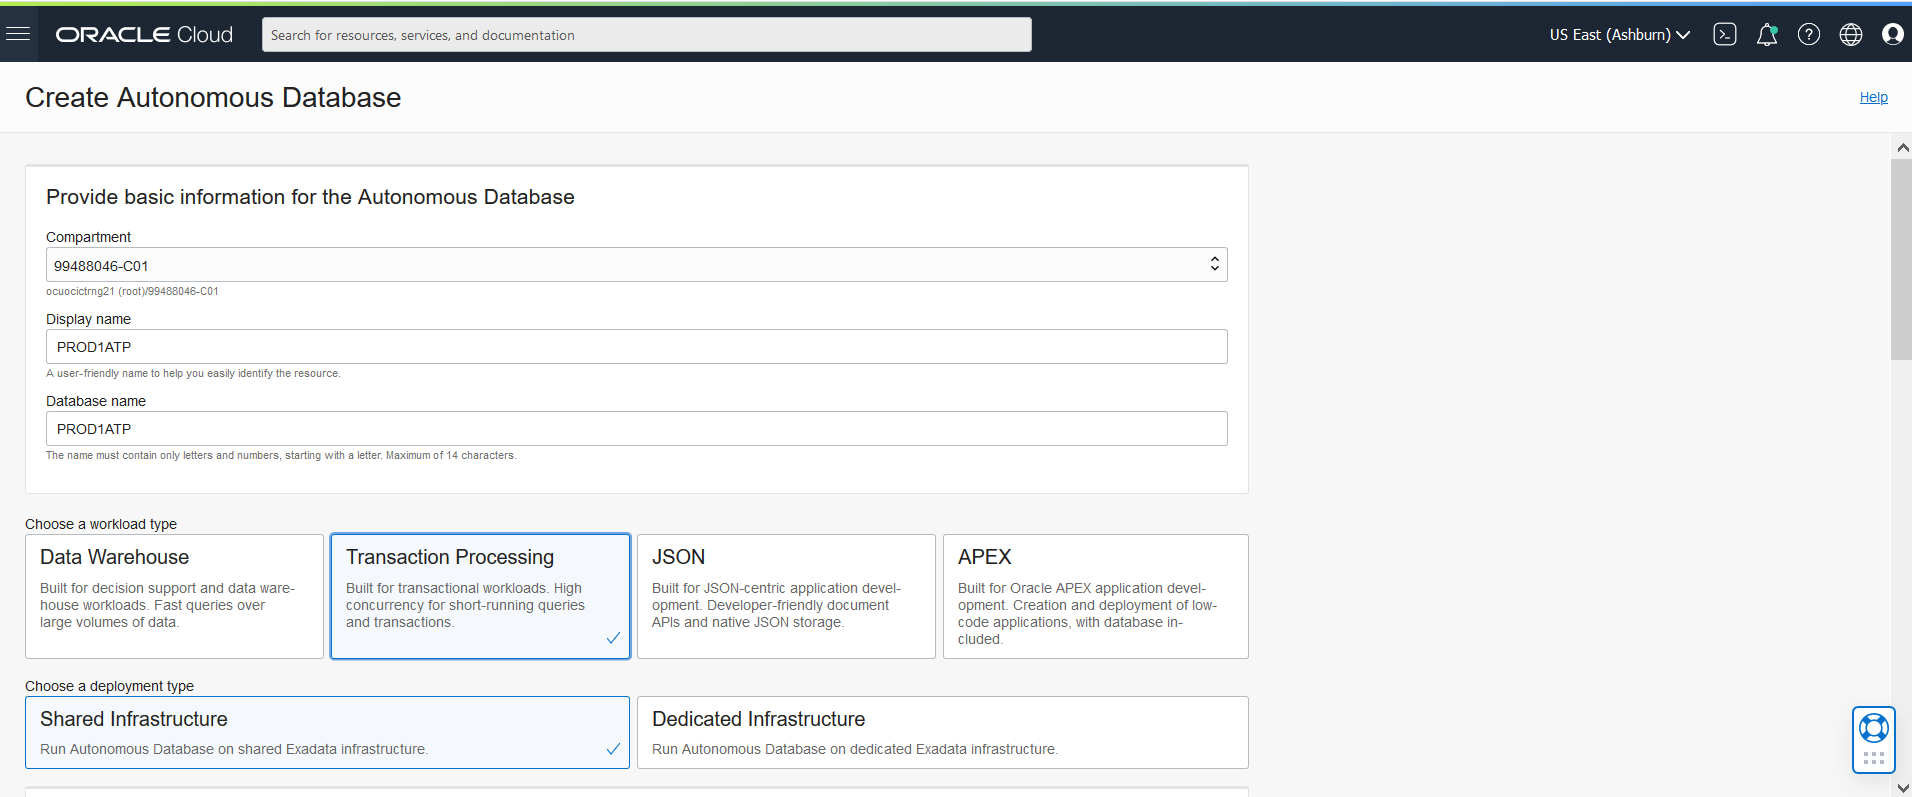
3 – Fill columns Display name, Database name as specific to environment or customer
4 – Choose a workload type
- we have Data Warehouse
- Transaction Processing
- JSON
- APEX
5 – Choose a deployment type:-
- Shared Infrastructure (Runs database on shared EXADATA infrastructure)
- Dedicated Infrastructure(Runs database on dedicated EXADATA infrastructure)
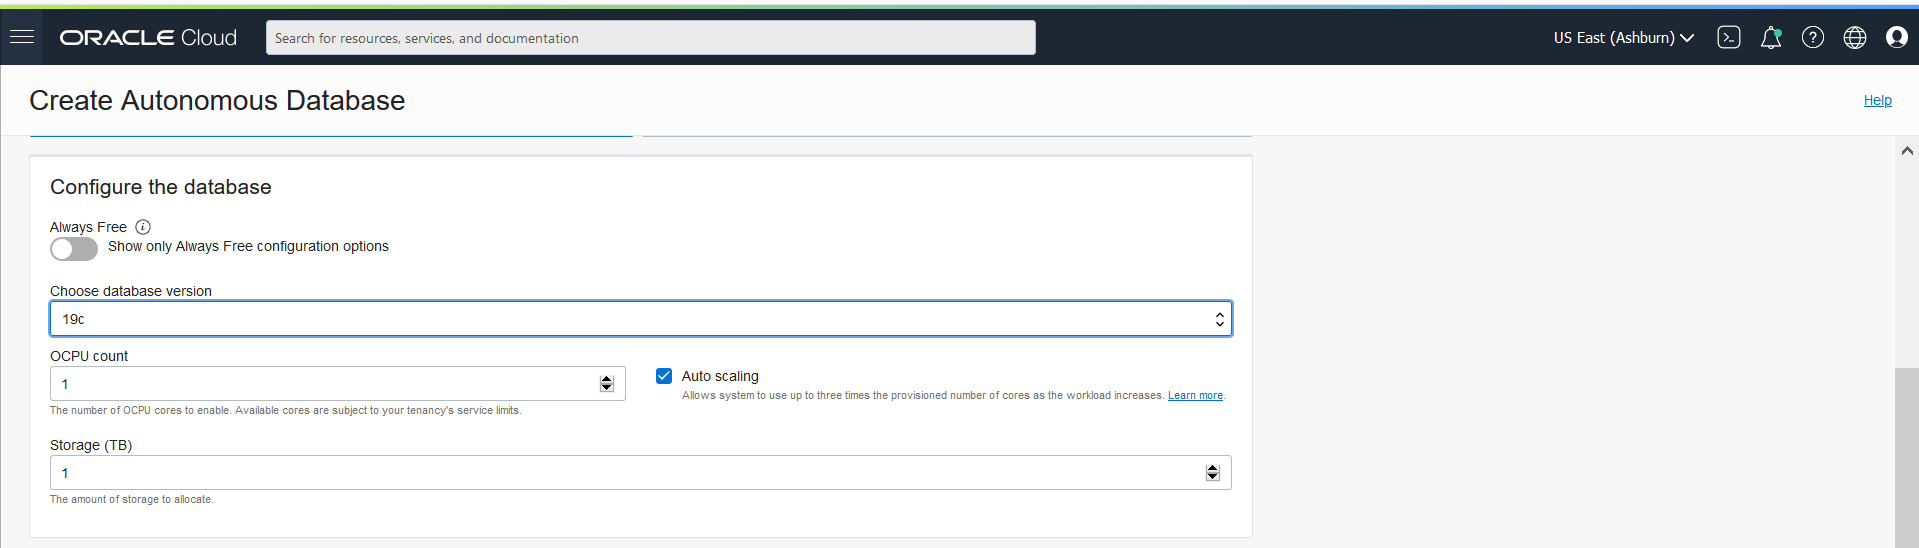
6 – Configure the database:-
- Choose database version
- OCPU count
- Storage (1TB default)
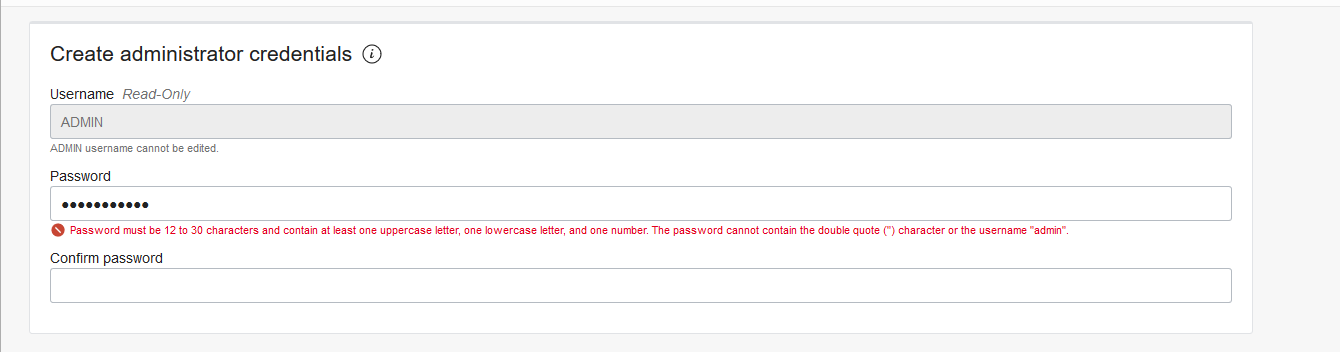
7 – Create administrator credentials, Password should be between 12 to 30 characters
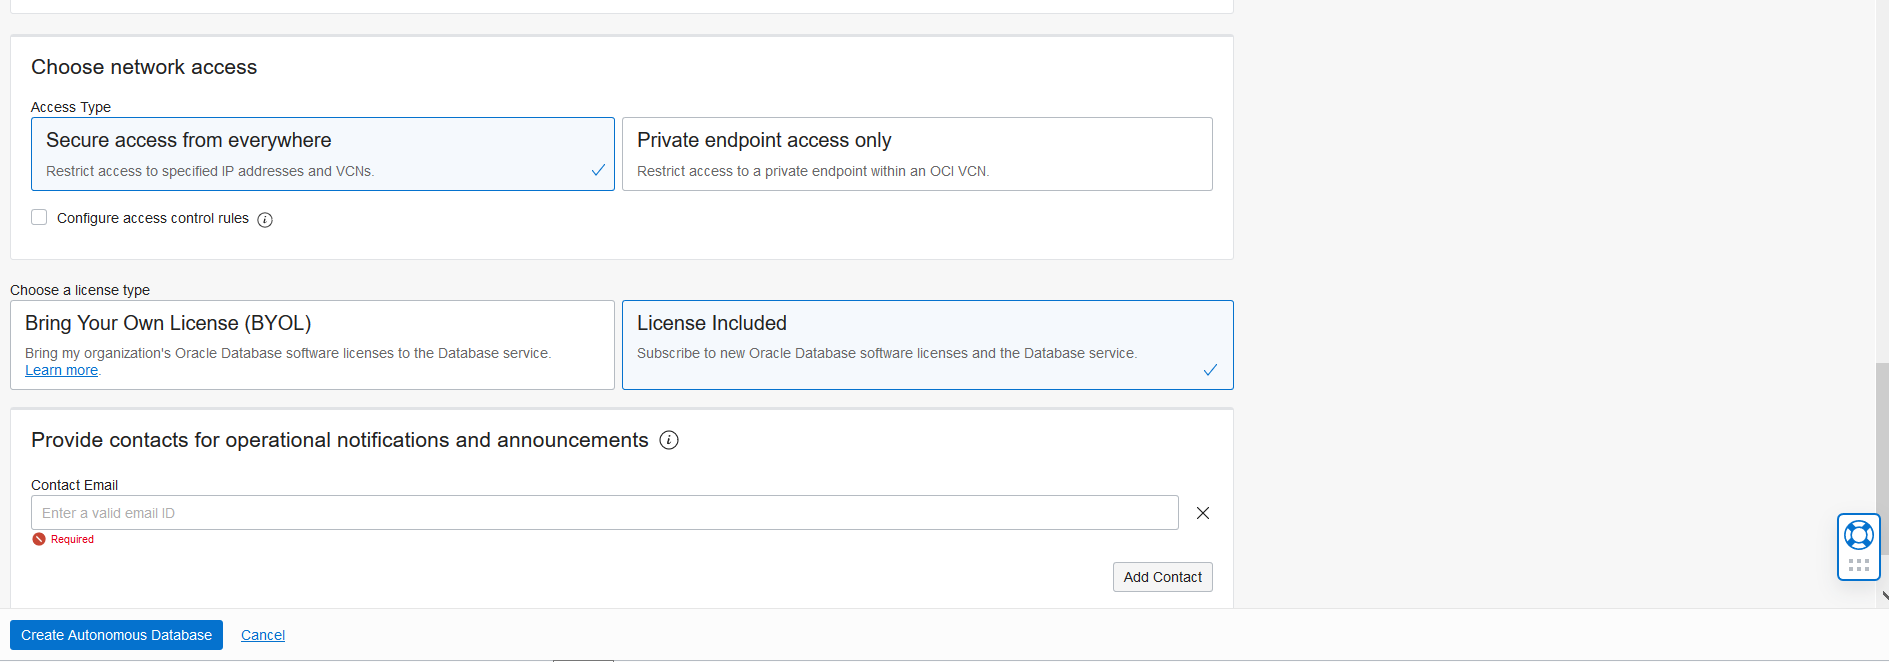
8 – Choose network access, Configure rules to control specific IPs
9 – License type, BYOL & License included
10- Notification mail
Once every field is filled then click on create option
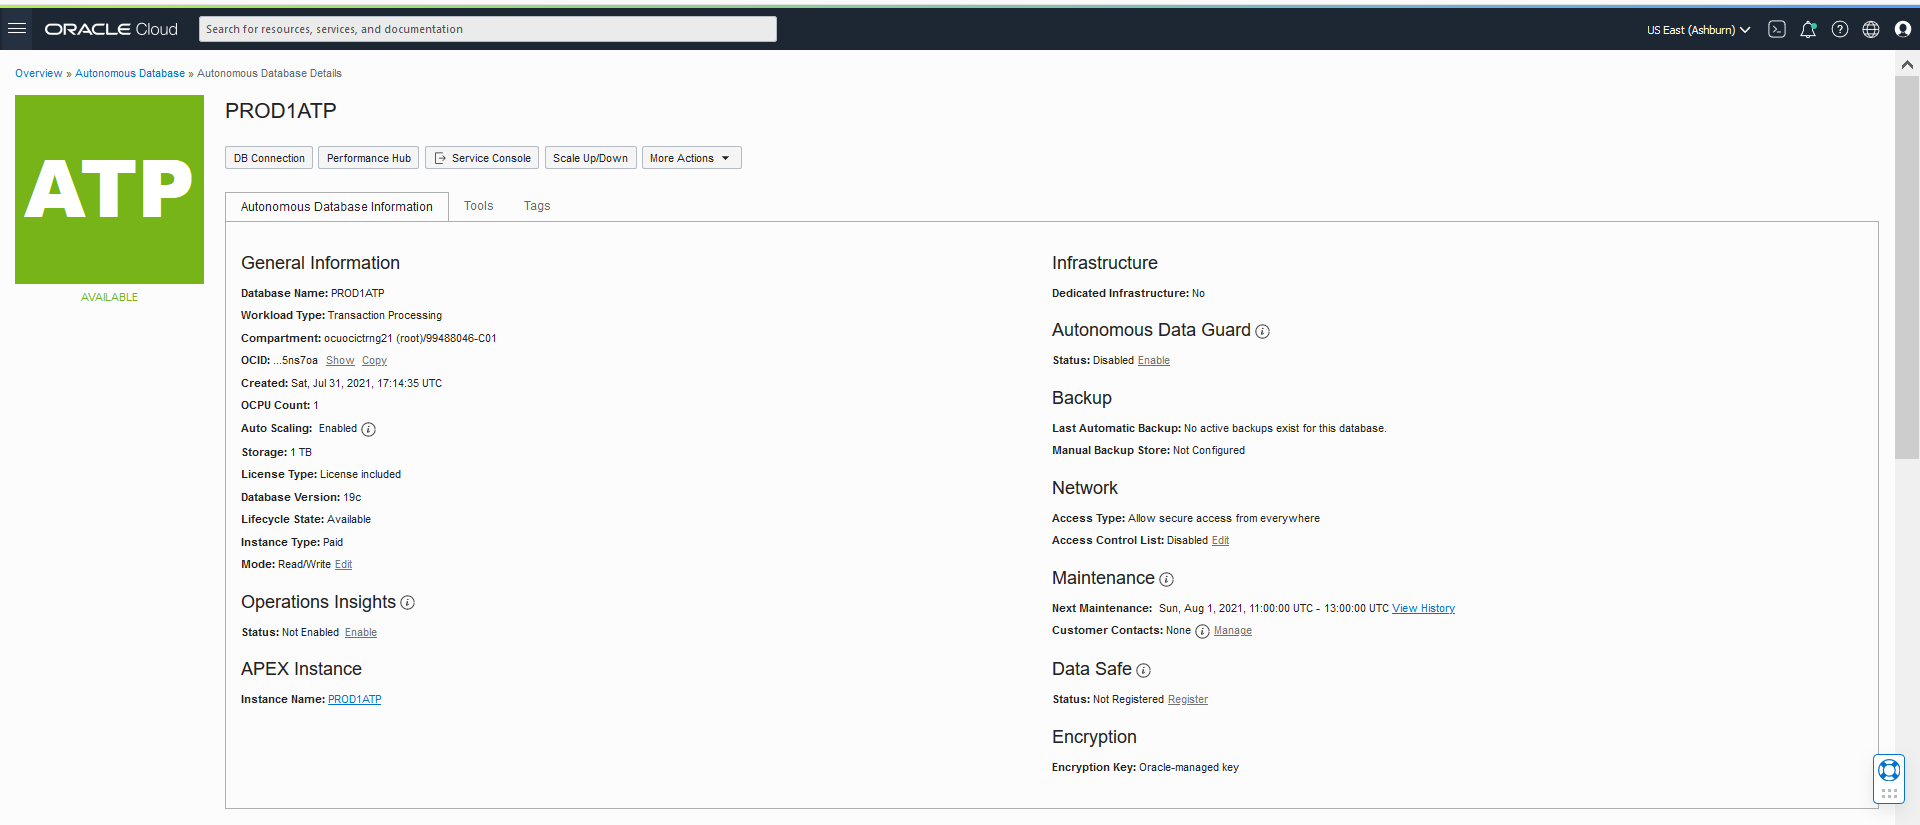
Once the ATP database got created we can verify all fields from the below window
Thank you for giving your valuable time to read the above information. Please click here to subscribe for further updates
KTEXPERTS is always active on below social media platforms.
Facebook : https://www.facebook.com/ktexperts/
LinkedIn : https://www.linkedin.com/company/ktexperts/
Twitter : https://twitter.com/ktexpertsadmin
YouTube : https://www.youtube.com/c/ktexperts