What is Azure Key vault and creation of key vault in Azure?
What is Azure Key vault:
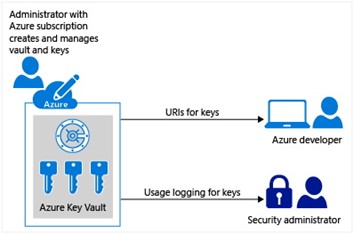
Microsoft Azure key vault is a cloud-based security service for storing and mange sensitive data like keywords, passwords, API Keys, Certificates, and cryptographic keys. These are stored in centralized storage.
Access to key vault needs proper authentication and authorization.
Usages of Key vault:
• Key vault for Secrets Management: It will store and manage secrets, such as API, connection strings, keys and passwords.
• Key Management: Managed identity to authenticate keys and secrets by using Azure key vault service instead of shared access signature (SAS)
• Soft delete process: It enables soft delete to recover keys and passwords within a specific time period.
• Encryption: It will protect the data by using encryption in transit and at rest.
• Rotate keys and secrets: Regularly maintains the secrets and keys.
• Auditing: It will track who has accessed the secrets and keys
• Access Policies: it will give access control for specific groups, individuals.
Creation of Key vault in Azure:
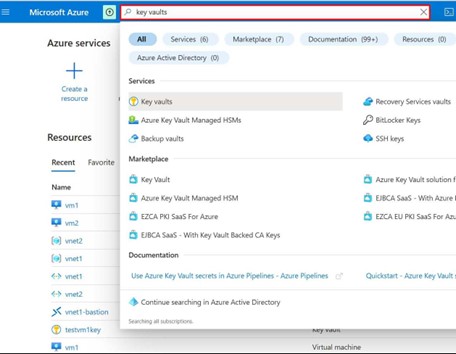
Step-1: Login into the Azure portal and search for Key vaults, you will see yellow color with a lock symbol as the icon. click on it.
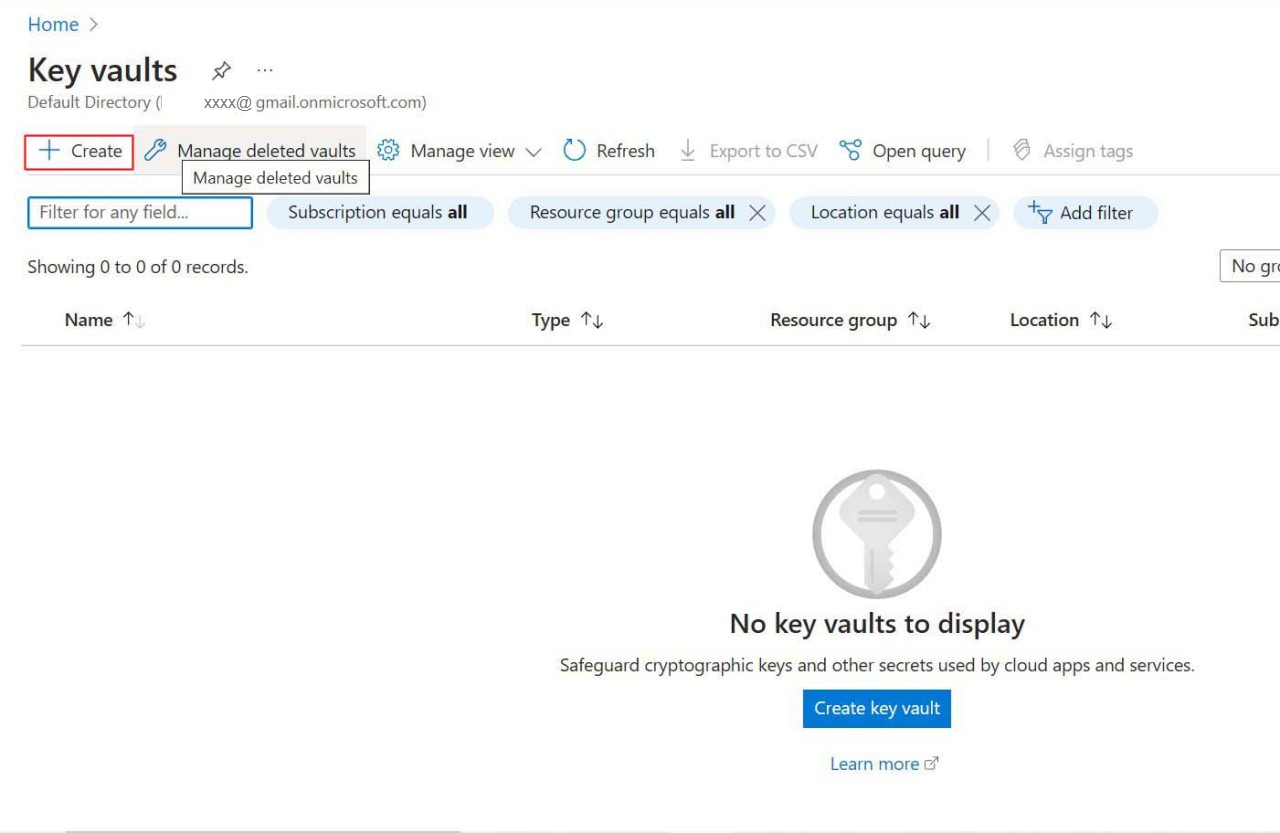
Step-2: Click on create button, to create a new key vault.
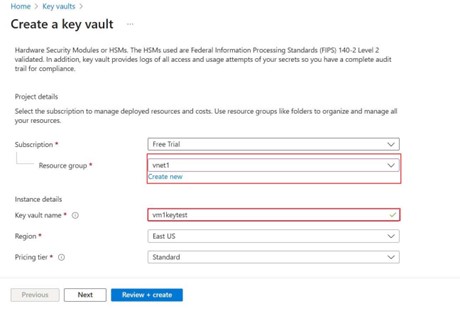
Step-3: Select your Resource group name, then provide key vault name as unique name and choose the region and pricing tier in according to your requirements.
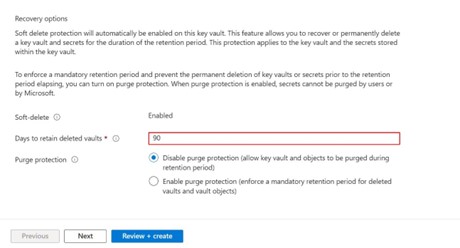
Step-4: Now scroll down below you will see recovery options in that there is soft delete Enabled, which means keys and secrets will be stored from 1 to 90 days retention period even after the deleted key vault objects (keys, secrets, certificates). you can change your key vault retention period from 1 to 90 if you need to change.
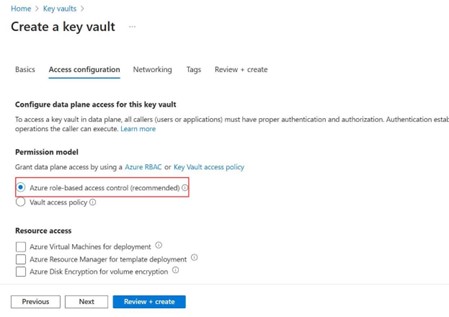
Step-5: Click on next, it goes to access configuration tab, in that by default it will select Azure role-based access control. It is an authorization system built on Azure resource manages that provides fine access management of Azure resources.
Azure RBAC allows user to manage key, secrets, and certificate permissions across all key vaults in one place.
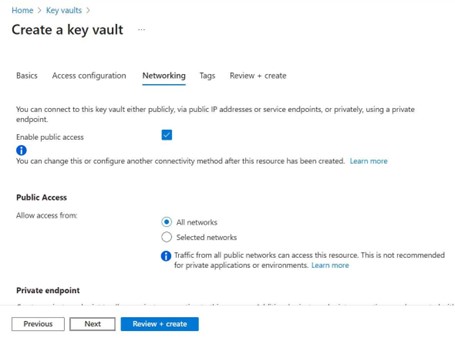
Step-6: Click on next it goes to the Networking tab, here you will configure the Azure Key vault networking settings to work with other applications.
If you want to give access to public then choose all networks, if you want to give access from specific network then click on it and add the network that you need to provide access.
Step-7: If you want to create a private endpoint point, click on create a private endpoint and add it.
Step-8: Add the tags and move on to review and create then click on create which will create a new key vault, wait for few minutes to deploy it.

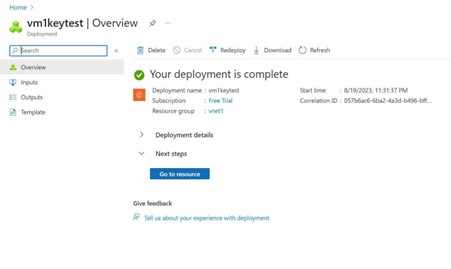
Step-9: Once you see the deployment is complete, now click on Go to resource then it will go to key vault service.
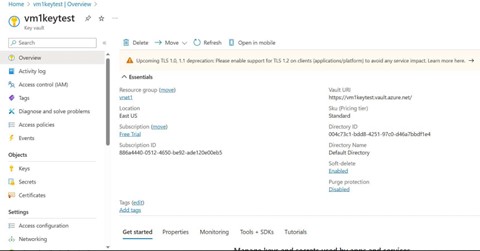
Step-10: Click on overview to show the key vault information. Scroll down to see IAM Access control.
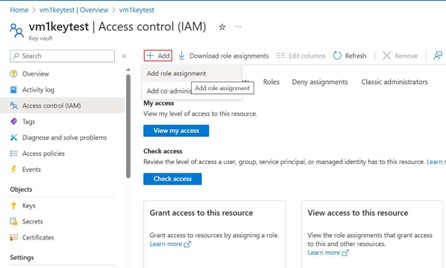
Step-11: Click on Access control (IAM), IAM is used to assign roles to grant access to Azure resources. In that click on add menu button, in that select Add role assignment.
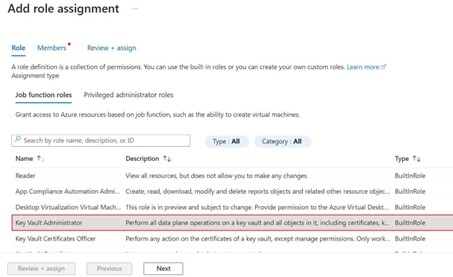
Step-12: In the role assignment – job function role, select the role that you want to provide then click on next.
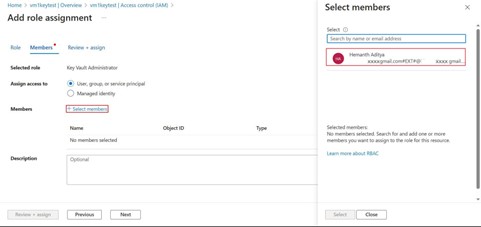
Step-13: In the Members tab, assign access to user, group or service principal, beside select members click on plus symbol then you will get a tab on the right-side tab it will ask for members email id, provide the mail id’s that you want.
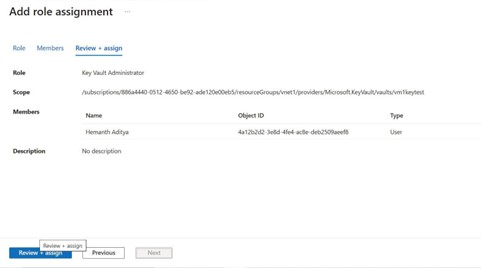
Step-14: Click on Review and create to create a role.
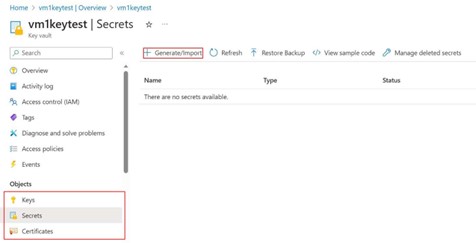
Step-15: From the objects section choose secrets, secrets are azure passwords stored, while the private key is stored as azure key and certificates can roll over with notifications before these operations happen. Then click on generate/import to generate username and password.
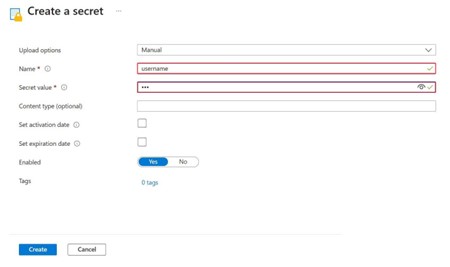
Step-16: By default, it will show empty fields, fill all the fields which are mandatory.
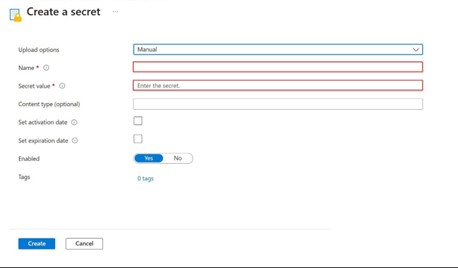
Step-17: Enter the username in the name field and give the secret value. Then click on create, the username has been created in the key vault.
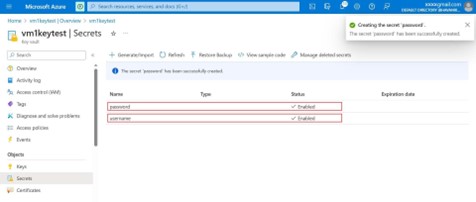
Step-18: Like above now click the generate button to add values for password also.

Step-19: The username and password have been created in the key vault.
Step-20: Click on password it goes secret keys version page and check for the status of it.
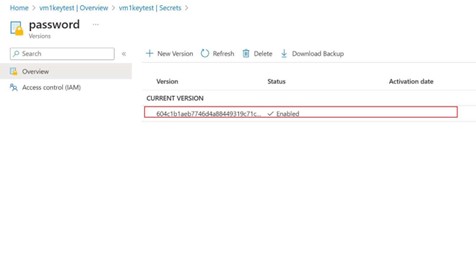
In this way you can store keys, passwords and certificates in the azure key vault.
Author : Chandra Shekar |
LinkedIn : https://www.linkedin.com/in/chandra-sekhar-4488435/
Thank you for giving your valuable time to read the above information. Please click here to subscribe for further updates
KTExperts is always active on social media platforms.
Facebook : https://www.facebook.com/ktexperts/
LinkedIn : https://www.linkedin.com/company/ktexperts/
Twitter : https://twitter.com/ktexpertsadmin
YouTube : https://www.youtube.com/c/ktexperts
Instagram : https://www.instagram.com/knowledgesharingplatform
Note: Please test scripts in Non Prod before trying in Production.