Creation of Azure Bastion and Connect to VM using Azure Bastion
What is Azure Bastion?
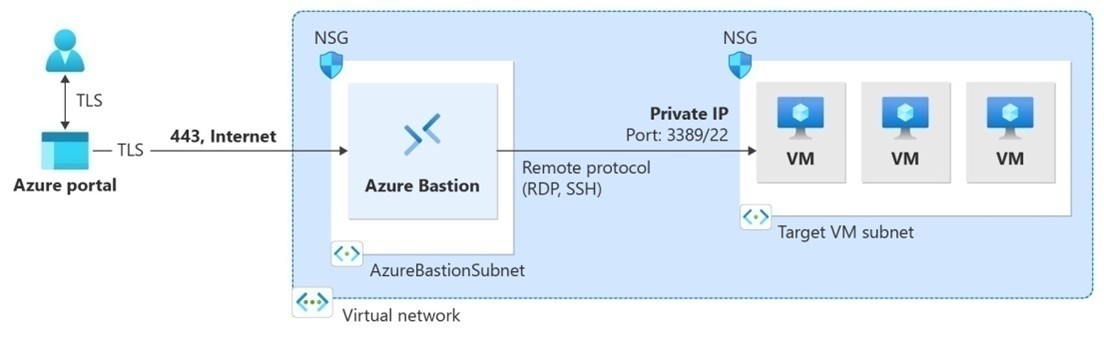
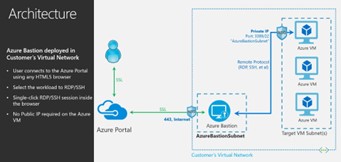
Microsoft Azure Bastion is a service that provides secure RDP/SSH connectivity to your virtual machines directly in the Azure portal over the SSL.
Azure Bastion Architecture
Benefits of Azure Bastion:
• You can access RDP and SSH directly through Azure portal.
• Not required of public IP address on Azure VM by using Azure Bastion.
• You configure the Network security Groups (NSGs) from Azure Bastion.
• Bastions host provide private access to private networks from external network by SSH proxy servers to support system administration.
How the Bastion Host work:
Azure Bastion will be configured under the same Virtual networks where all the VM’s reside. Bastion having its own protected NSG subnet with unique name called “AzureBastionSubnet” with minimum 26/27 prefix.
Creation of Bastion in Azure:
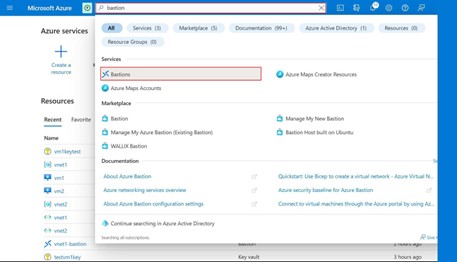
Step -1: Login into your Azure portal and search for Bastions, you will see blue X Logo as the icon. Click on it.
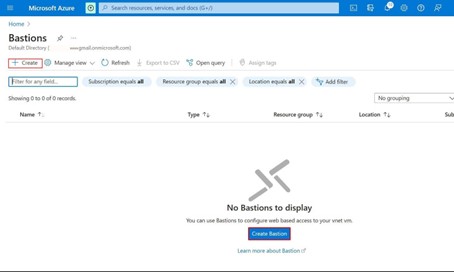
Step -2: You will be directed to this page, click on create.
Step -3: Basics tab
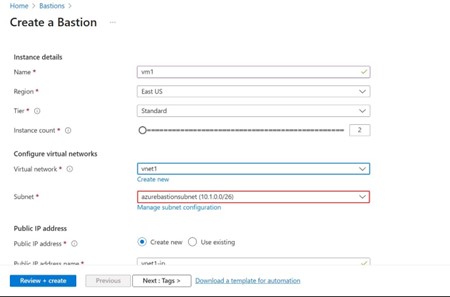
Choose the Resource group and provide the name for Baston, region where you want to deploy. For the Bastion service you have to select existing virtual network which you already created in the virtual network.
Choose the instance count from 2 to 50 according to your requirements.
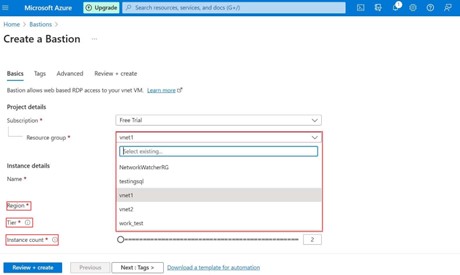
Tiers are the Azure sku’s, Basic and standard, where standard meets all the requirements of the networks and Instance count is the processing count to manage Azure resources on scalable.
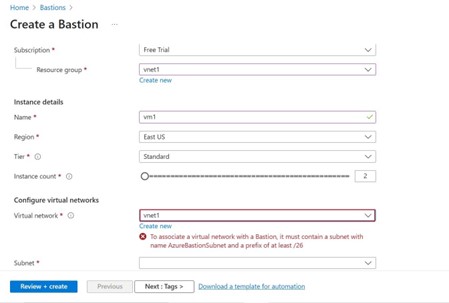
Step -4: Configure Networks
Virtual networks select existing virtual network like I choose vnet1. If it is showing error like shown below it must contain a subnet with name Azurebastionsubnet with at least prefix 26/, that means Azure Bastion requires dedicated AzureBastionSubnet you have to add as subnet name with subnet prefix 26 in the subnet to enable virtual network.
Step -5: In order to add AzureBastionsubnet with prefix 26, you have to go to virtual networks service and choose any virtual network.

Step -6: Now go to existing first virtual network vnet1.In settings select Subnets, in that you will see already created exiting subnet with does not have the prefix of 26, click on add subnet.
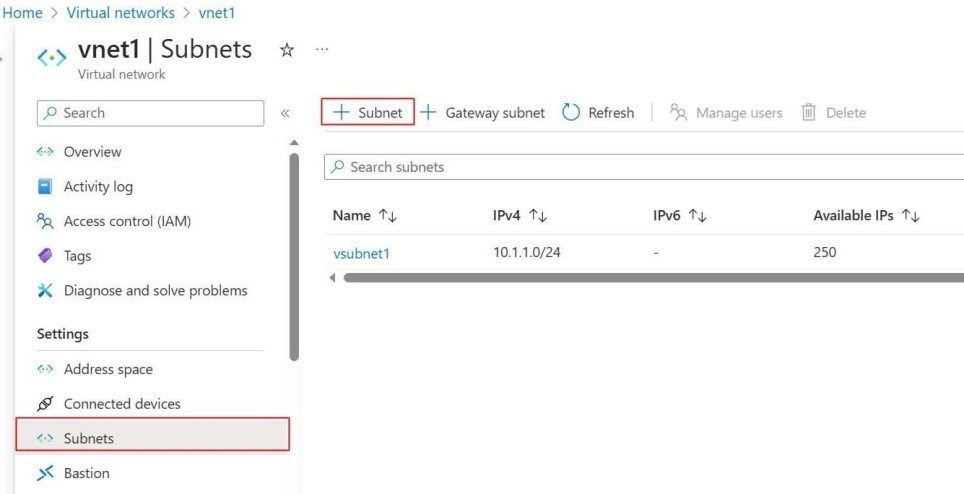
Step -7: In the Subnet page, in the name field enter the name AzureBastionSubnet for the Bastion Host to add and add subnet address range should be by prefix 26 like 10.1.0.0/26 instead of 24 which is given for Vsubnet1 and click on save to add. It will successfully add and get updated.

Step -8: Now again go to Bastion page again, in the create page once again add existing resource, name, region. This time in the Subnet it will automatically take azurebastionsubnet with IP address prefix of 26 that you have assign in the virtual network subnet field. Then click on Tags.
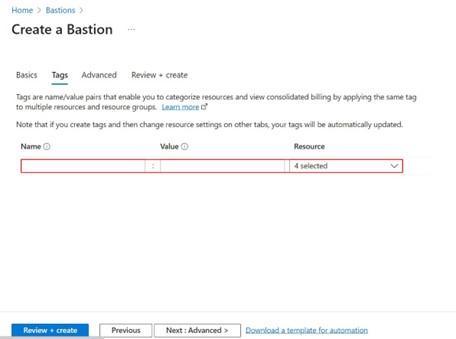
Step -9: Tags are used for the categorization of the resources that you create.
Enter the tag name and its value for the resource.
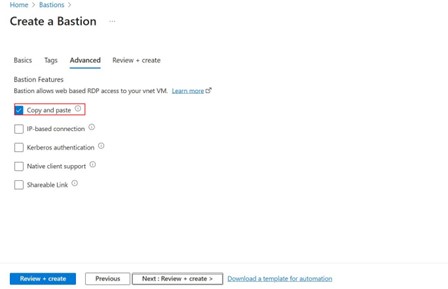
Step -10: In the Advanced tab by default, it will select copy and paste.
• Copy and paste: Browsers that support copy between local machine to remote machine.
• IP-based connection: It let you connect between Azure and Non-Azure by using Azure Bastion without accessing the Azure portal.
• Kerberos authentication: It is an authentication protocol used for identifying the user or host.
• Native client support: Used to configure bastion deployment to accept connection from the native client.
• Shareable link: It is used to connect VM with using Azure Bastion without using Azure portal.
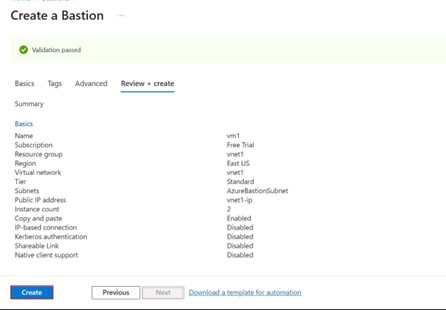
Step -11: Once you reviewed it click on the create button. Then it will start deployment of the Bastion.
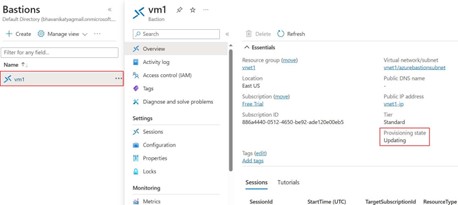
Step -12: Once if you go to Bastion’s service and click on VM1, if it shows Provisioning state is Updating it will take 10 to 20 min for bastion to create it.
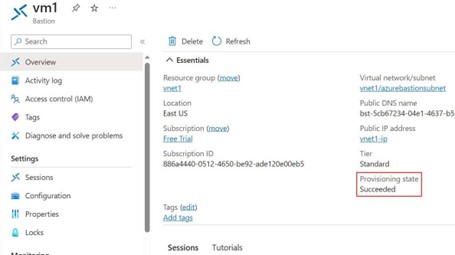
Step -13: Once it completes it shows the Provisioning state is goes to succeed. This indicates Bastion has created successfully.
Accessing of Virtual Machine (VM) by using Bastion:
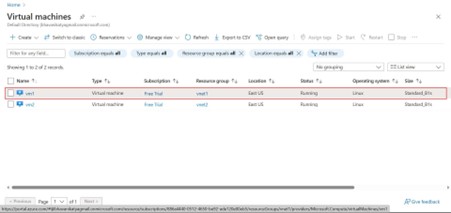
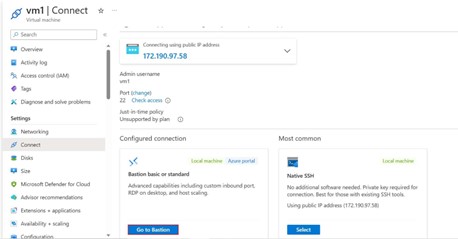
Step -14: Go to virtual machines service and select one of the existing VM in virtual machines which you have already linked subnet address of prefix 26 to it.
Step -15: In the VM page click on the connect, it will show public Ip address along with Goto Bastion, Native SSH tabs, in that select Goto Bastion.
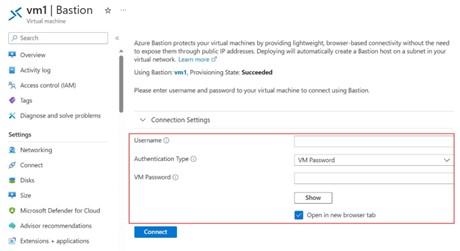
Step -16: When you click on Go to Bastion, it will ask the username and password for VM accessing as authentication.
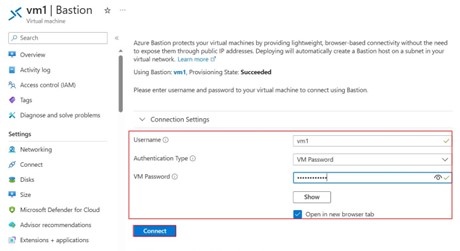
Step -17: Once enter the username and password then click on connect button.
Step -18: In the other tab of the internet page, before going to launch VM it will ask to allow blocked pages, when you say yes on it, Azure VM is launched without giving the public IP address and other third-party software.
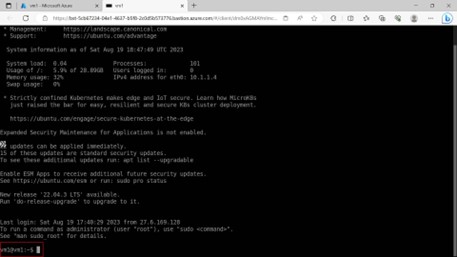
In this way using Bastion service you can login to VM in Azure portal without assigning to public IP addresses and third-party software’s like MobaXterm and putty to connect.
Author : Chandra Shekar |
LinkedIn : https://www.linkedin.com/in/chandra-sekhar-4488435/
Thank you for giving your valuable time to read the above information. Please click here to subscribe for further updates
KTExperts is always active on social media platforms.
Facebook : https://www.facebook.com/ktexperts/
LinkedIn : https://www.linkedin.com/company/ktexperts/
Twitter : https://twitter.com/ktexpertsadmin
YouTube : https://www.youtube.com/c/ktexperts
Instagram : https://www.instagram.com/knowledgesharingplatform
Note: Please test scripts in Non Prod before trying in Production.