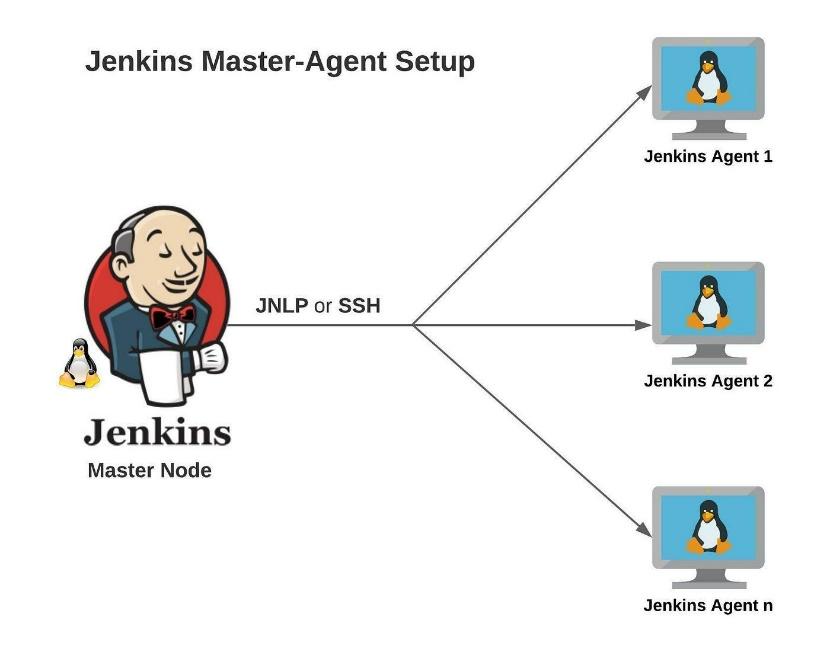
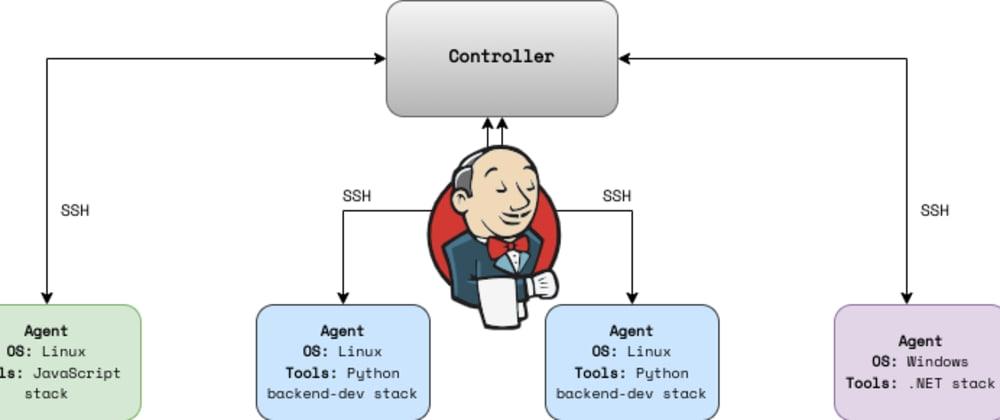
Configure Agent (Linux-slave) machine with Jenkins Master using SSH key file connection – as Oracle OS user.
▪️ The Linux (slave) agent machine to be configured using SSH key file as Oracle OS user.
▪️ We have earlier successfully configured Agent using SSH key file as Jenkins user under /home/jenkins/jenkins-agent.
▪️ The same process is followed for Oracle user as well, but the JDK files have to be copied to /home/oracle/Jenkins-agent.
▪️ The purpose of Agent connection as Oracle user, in our case is to perform Oracle database activities in Database server through Jenkins jobs.
👉 What is SSH key based connection?
▪️ SSH key pairs are two cryptographically secure keys that is used to authenticate client machine to Server.
▪️ SSH keys provide an extremely secure way of logging into your server
▪️ The password based SSH connection should be avoided to authenticate as it is not secure to do so.
▪️ The SSH key based connection is safe and secure to connect between the client and the server.
▪️ Each key pair consists of a public key and a private key.
▪️ The private key is retained by the slave machine and should be kept absolutely secret.
▪️ The associated public key can be shared freely without any negative consequences.
▪️ The public key is uploaded to a Server that you want to be able to log into with SSH.
▪️ The public key is added to a special file within the user account you will be logging into called ~/.ssh/authorized_keys.
👉 Step 1: Create user oracle in /home directory of slave machine and create password as well.
▪️ Create oracle OS account/user in slave machine.
▪️ Create new password as well for the oracle account.

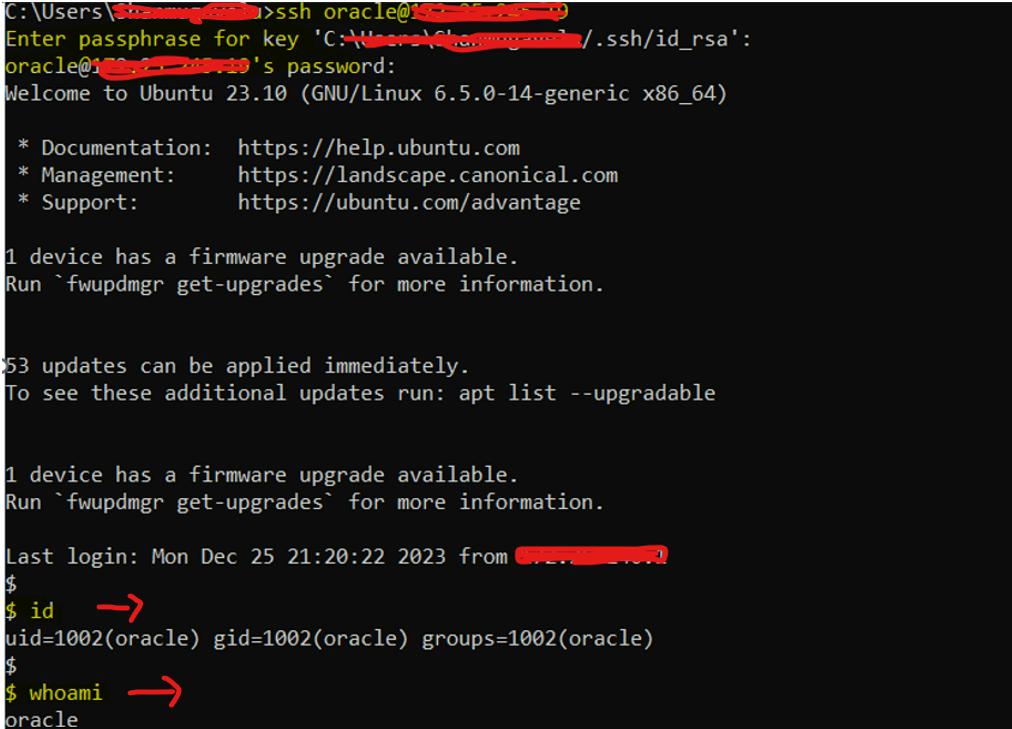
👉 Step 2: Test the SSH password authentication using oracle user.
▪️ Test SSH connection using oracle user/password to slave machine from the master node.
▪️ If the SSH connection is successful by username/password authentication, we are good to create SSH key for the oracle account in Slave machine.
👉 Step 3: Make directory .ssh under /home/oracle
▪️ Make the .ssh directory under oracle home (/home/oracle).

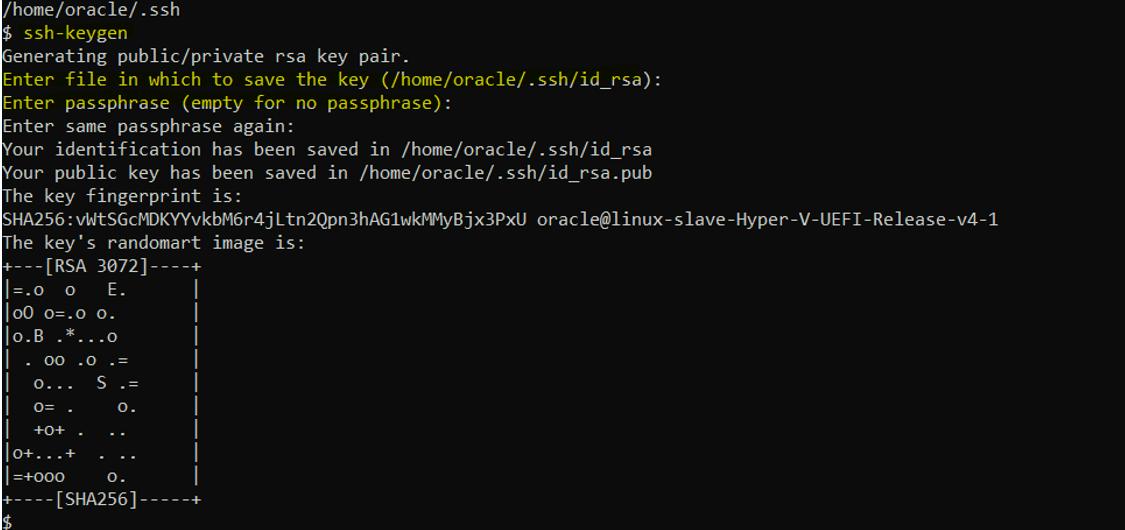
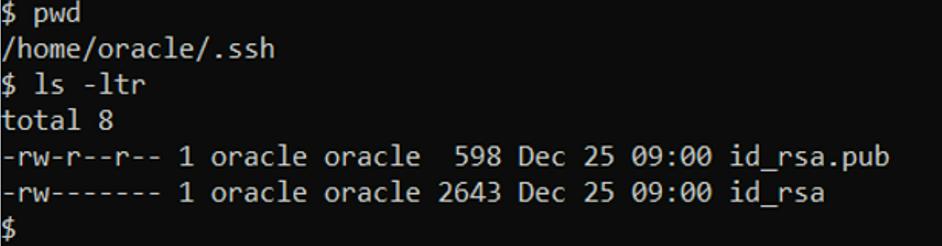
Step 4: create an SSH key for Oracle user in /home/oracle/.ssh
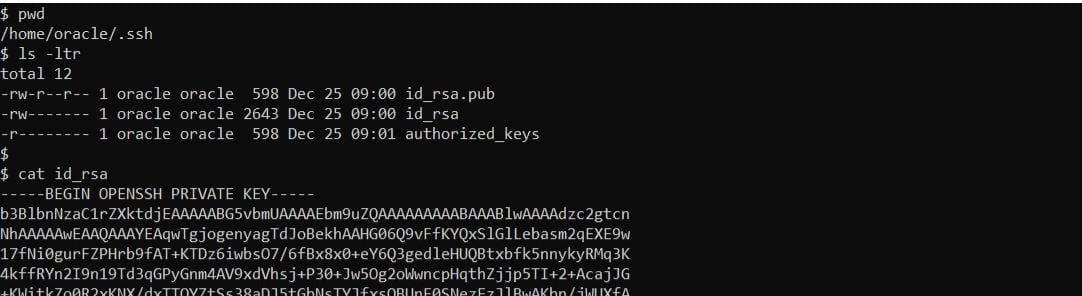
▪️ Create the SSH key pair (private and public key) as in below screenshot under the directory /home/oracle/.ssh as oracle user.
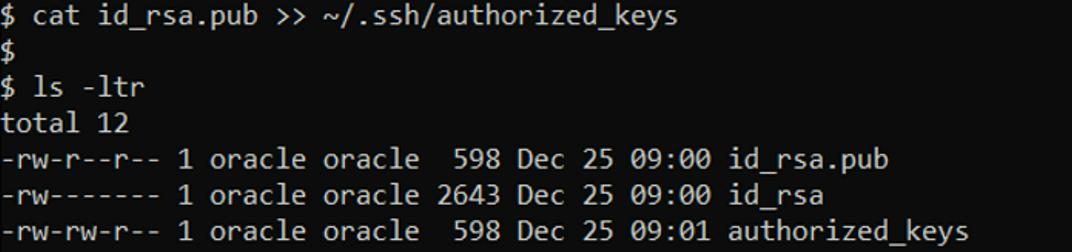
👉 Step 5: Create authorized_keys file and copy the entry from public key file.
▪️ Create authorized_keys file and add entries from public key file.
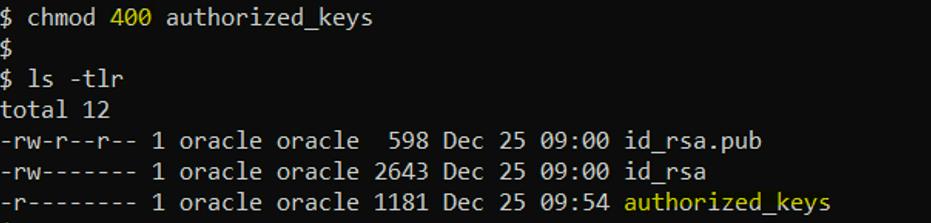
▪️ Provide 400 permission to authorized_keys file.
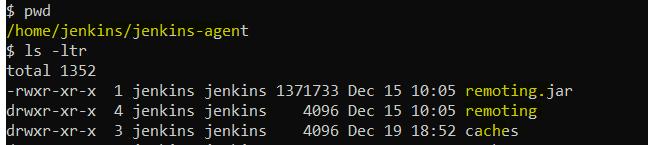
👉 STEP 6: Copy the java (JDK) files from /home/jenkins/jenkins-agent to the oracle directory /home/oracle/jenkins-agent.
▪️ JDK (java) has to be installed in order to configure the Agent (slave) in Jenkins.
▪️ Java has been installed already and the required files exist for agent registration as Jenkins user under directory /home/jenkins/jenkins-agent.
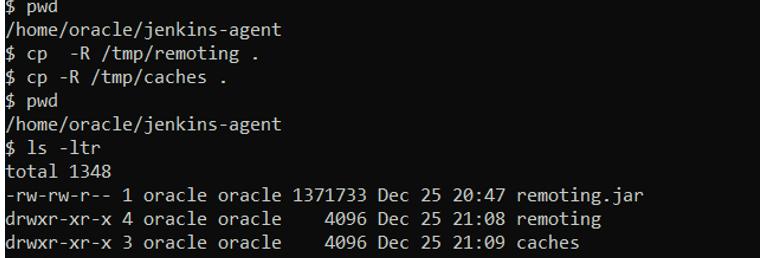
▪️ We will make use of the same files by copying to /home/oracle/jenkins-agent.
▪️ We will change the ownership of the files/directories to Oracle owner.
—owner and group à oracle: oracle
—copying the files from /tmp will directly convert the ownership to oracle.
-
Note: Copy all the files and directories using -R option (recursive)
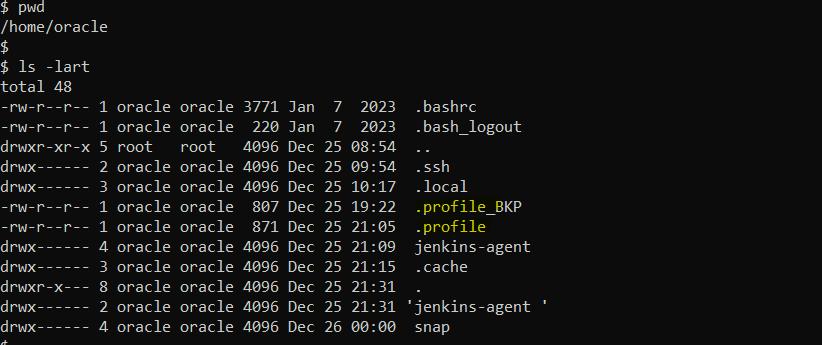
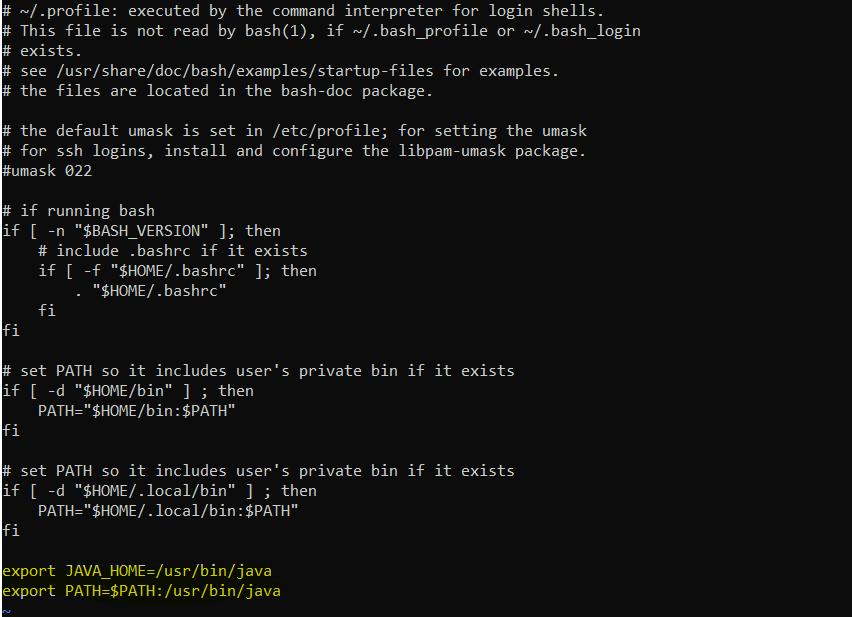
👉 Step 7: Add the environment variables JAVA_HOME and PATH variable at the end of .profile file of oracle user.
▪️ Add the environment variable for JAVA_HOME and PATH at the end of .profile file (as Oracle user).
▪️ Check the environment variable with fresh login to oracle (commands: echo $JAVA_HOME and echo $PATH).

👉 Step 8: Check the Pre-requisites are met before configuring Agent.
▪️ Jenkins Server (Master node) installed and up and Ready.
▪️ Another server for configuring slave (In this article, we are taking Linux with 2GB memory)
▪️ Both the Jenkins server and slave server are in the same network.
👉 STEP 9: Configure the Master node in Jenkins console.
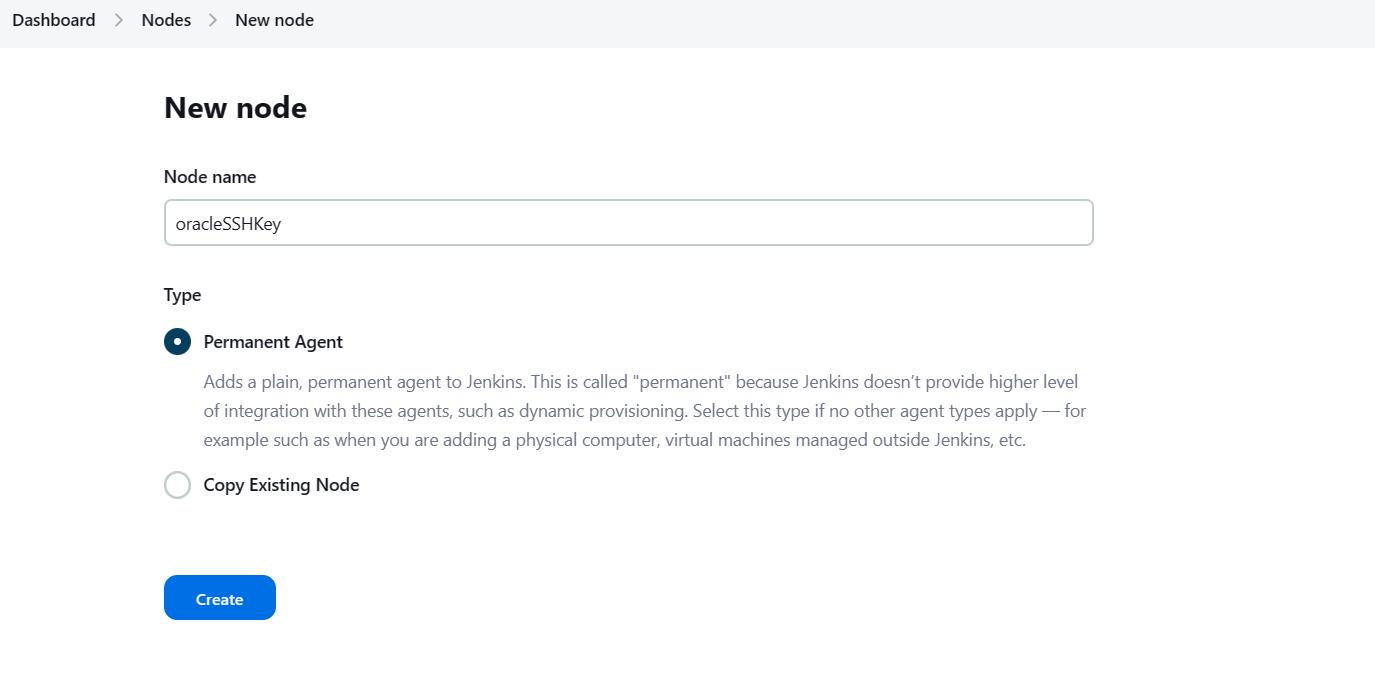
▪️ Go to Manage Jenkins-> Manage Nodes -> New Node
▪️ Enter the Node Name (slave name as oracle SSH Key) and select Permanent Agent then click OK.
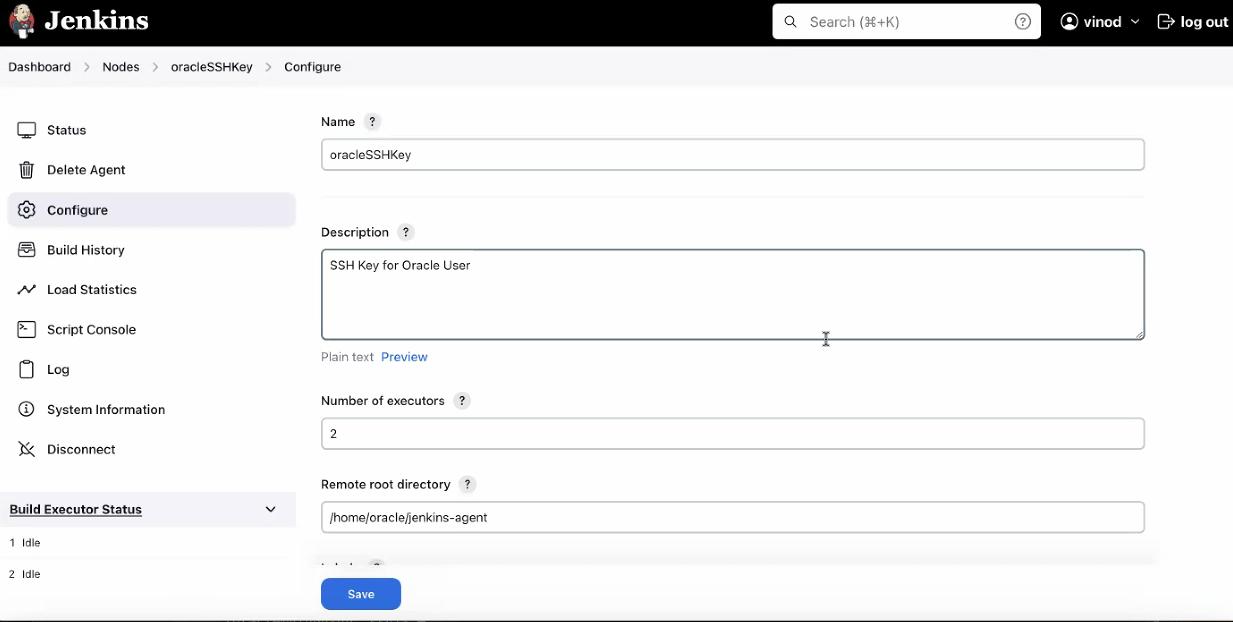
▪️ Then a new form will open and enter the details one by one as follows.
-
-
Edit the Description (Optional).
-
Enter the # of Executor (2 Executors).
-
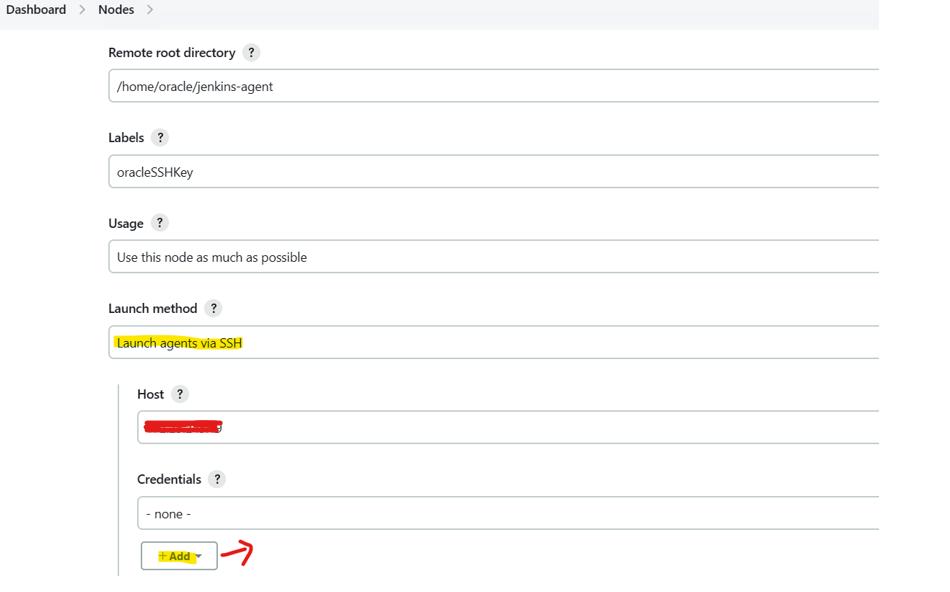
Then enter the Remote FS Root which is going to be the root directory of the Jenkins slave from the master. (/home/oracle/jenkins-slave).
-
Select the launch, Method. (Launch Agent via SSH).
-
Enter the Host IP address.
-
Add credential – by clicking the +Add button.
-
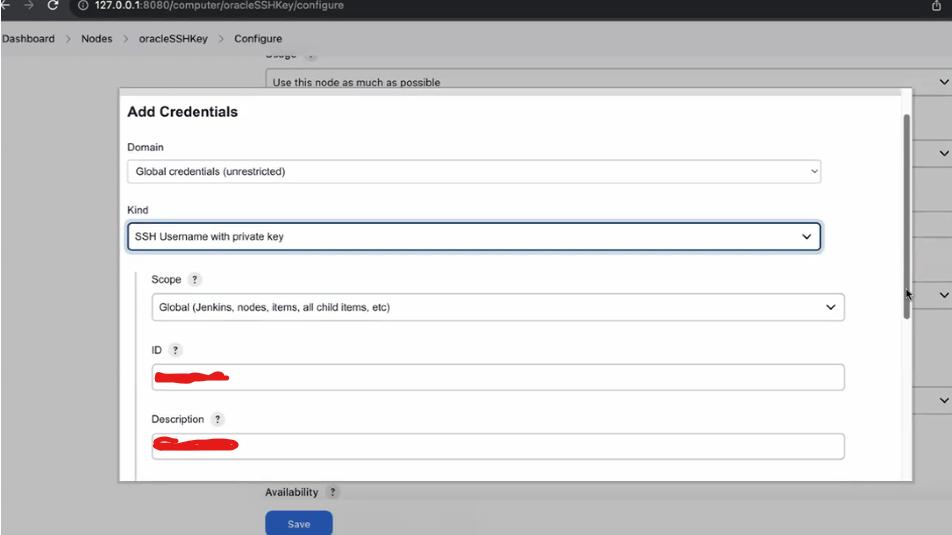
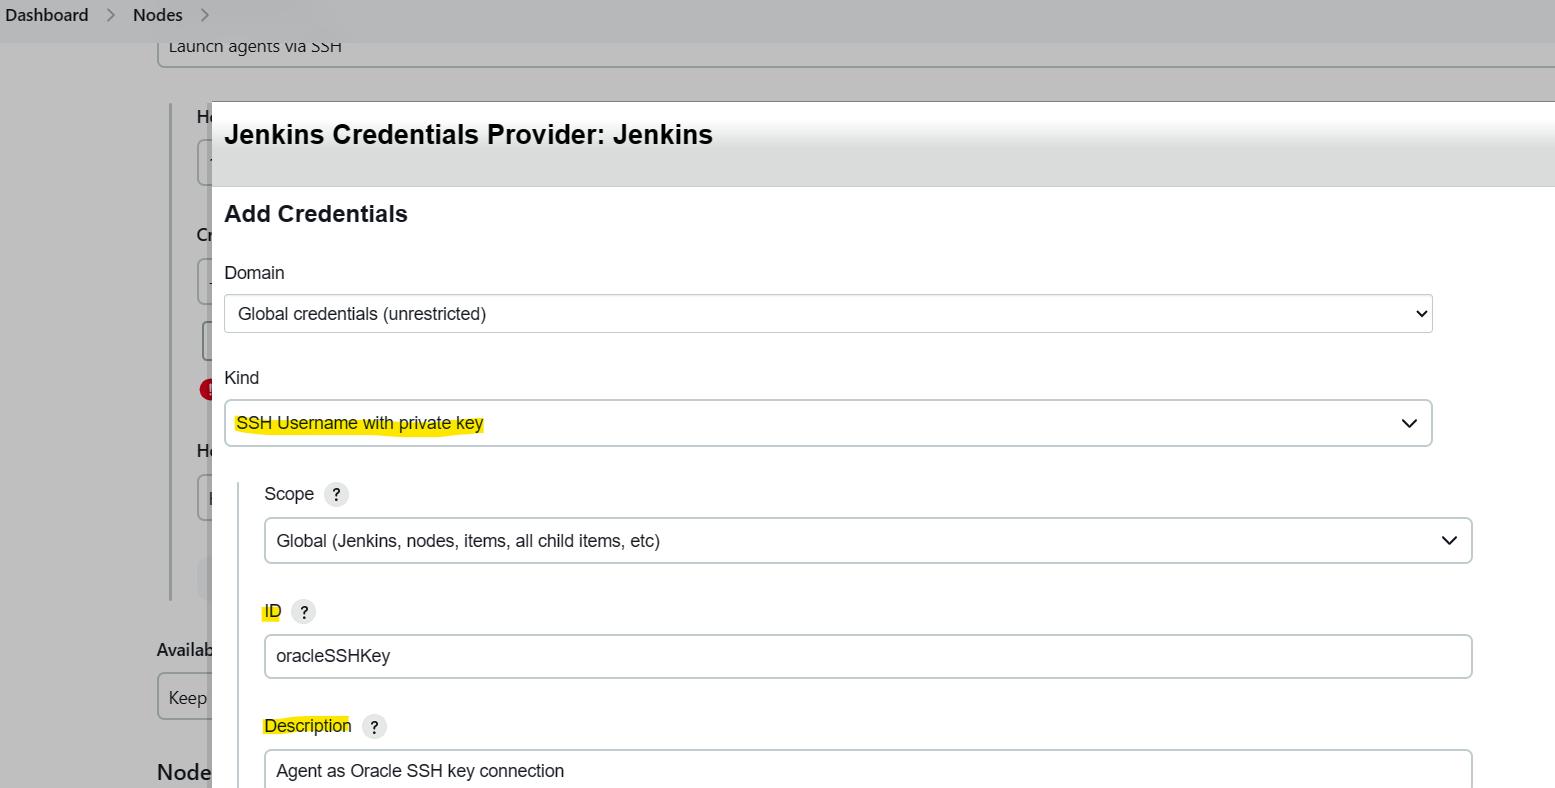
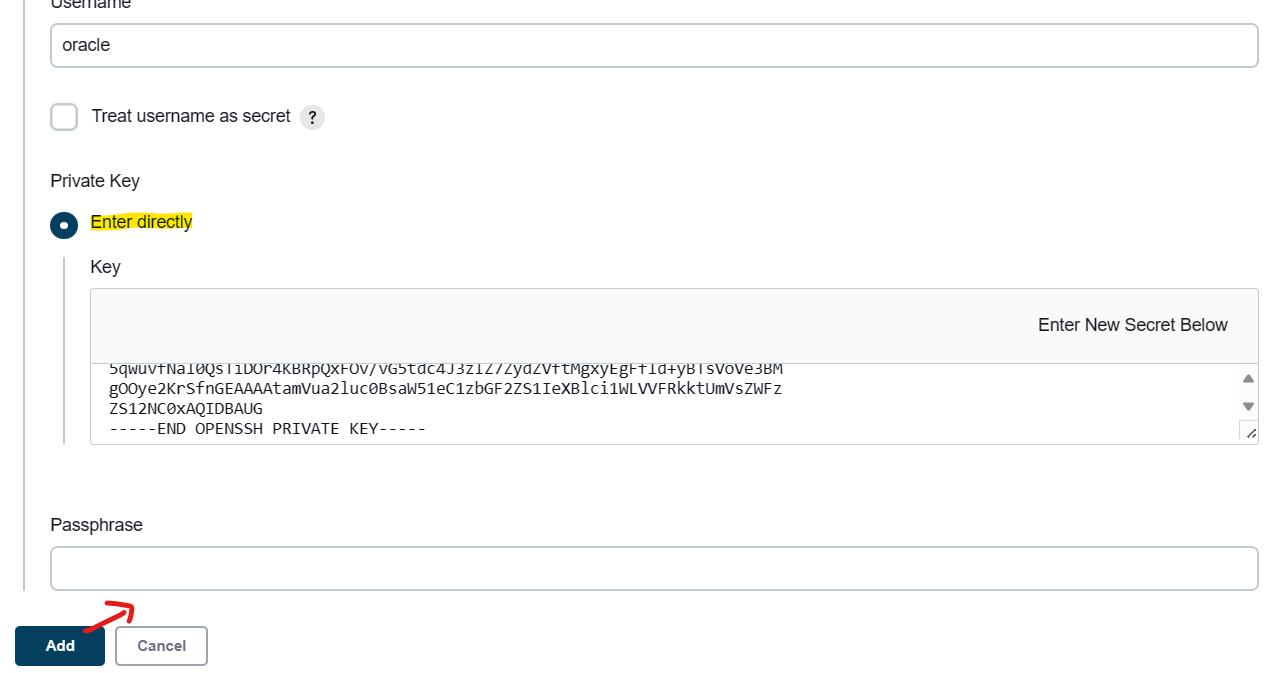
Select the Credentials Kind as – SSH username with private key.
-
Enter the ID and description.
-
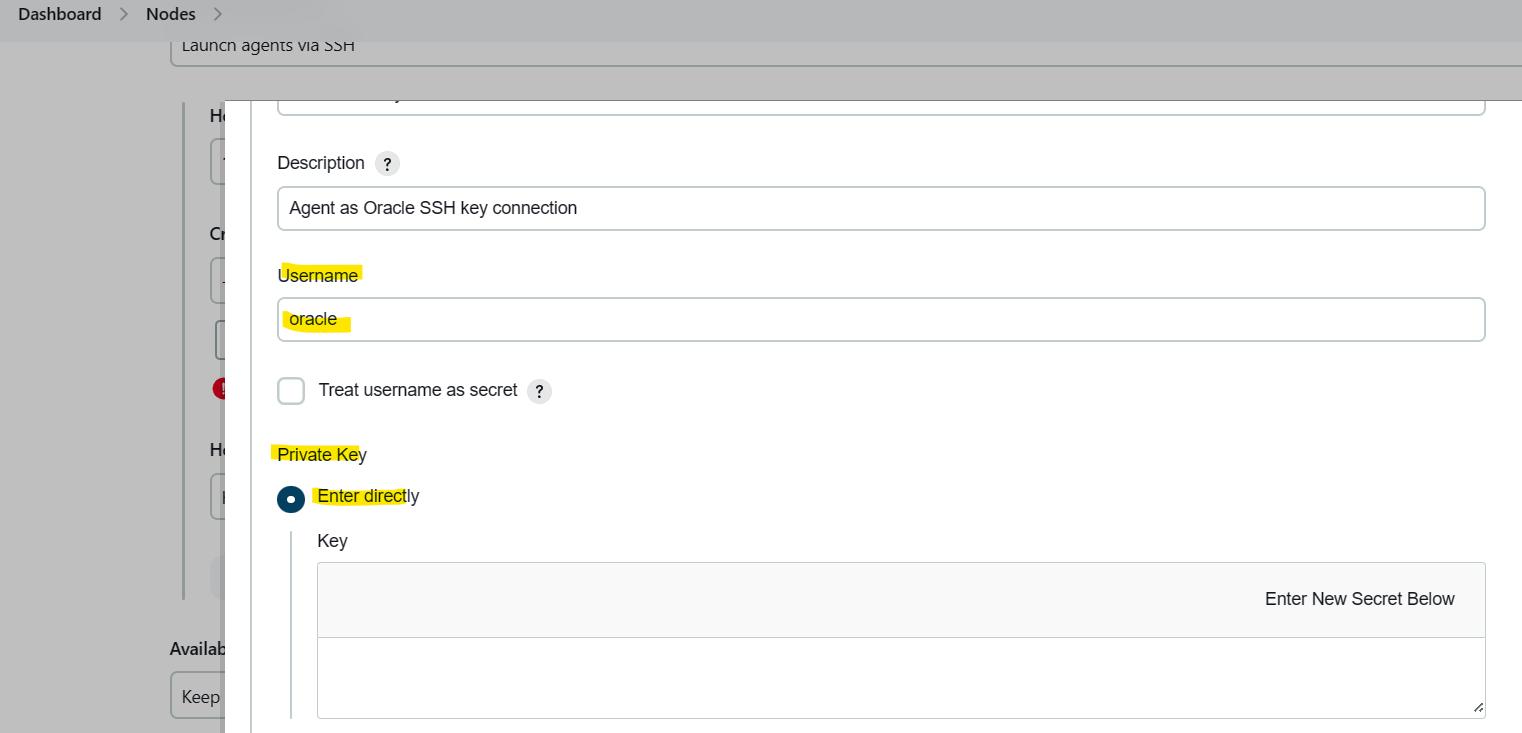
Paste the Private key copying from server – click the Private key- Enter directly option (text box) and save.
-
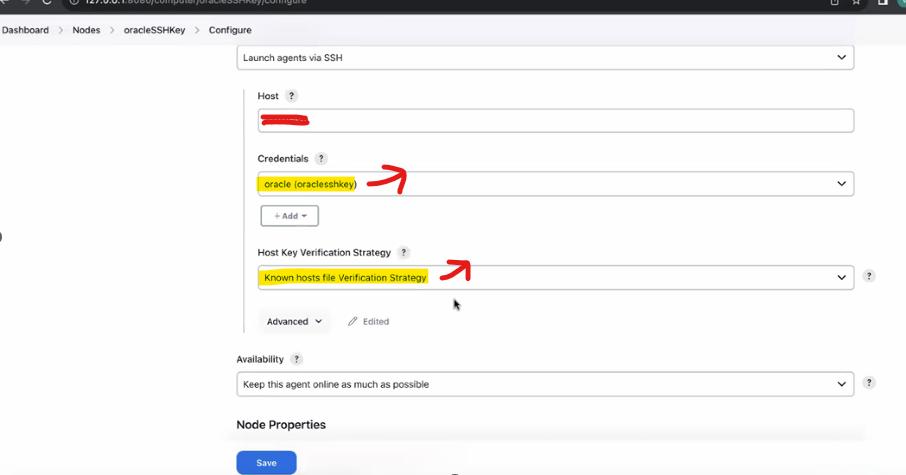
Select the credentials saved in previous step which we created “oracle(oraclesshkey)”
-
Select “Non verifying Verification Strategy” for Host key Verification Strategy.
-
Others keep default values.
-
Click Save.
-
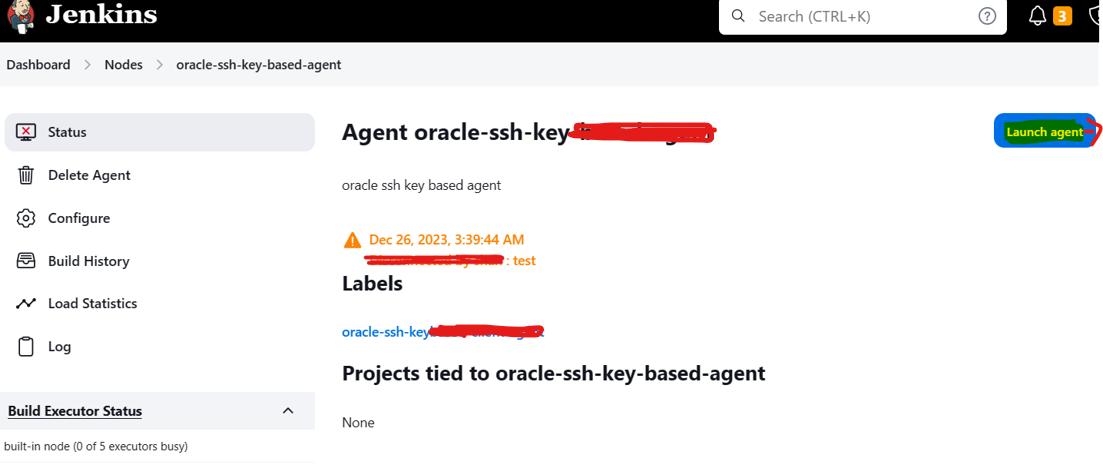
👉 STEP 10: Configure the slave node by clicking Launch Agent via SSH
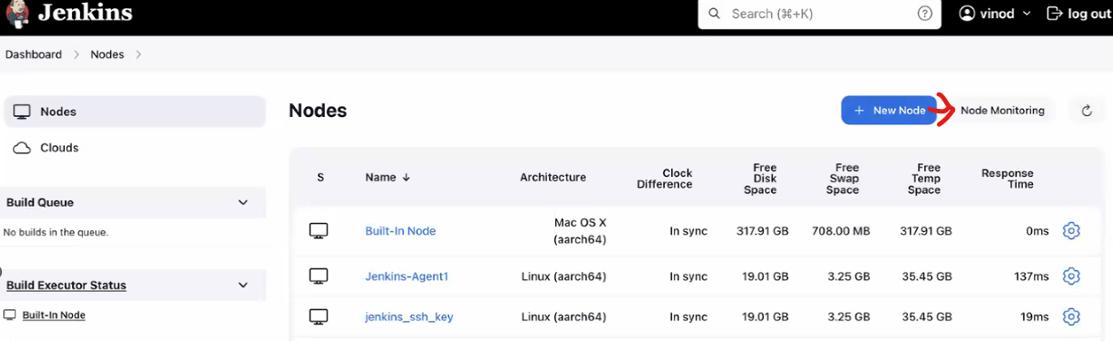
▪️ Go to Dashboard -> Nodes-> Agent_name.
▪️ Click the Agent_name and click Launch Agent
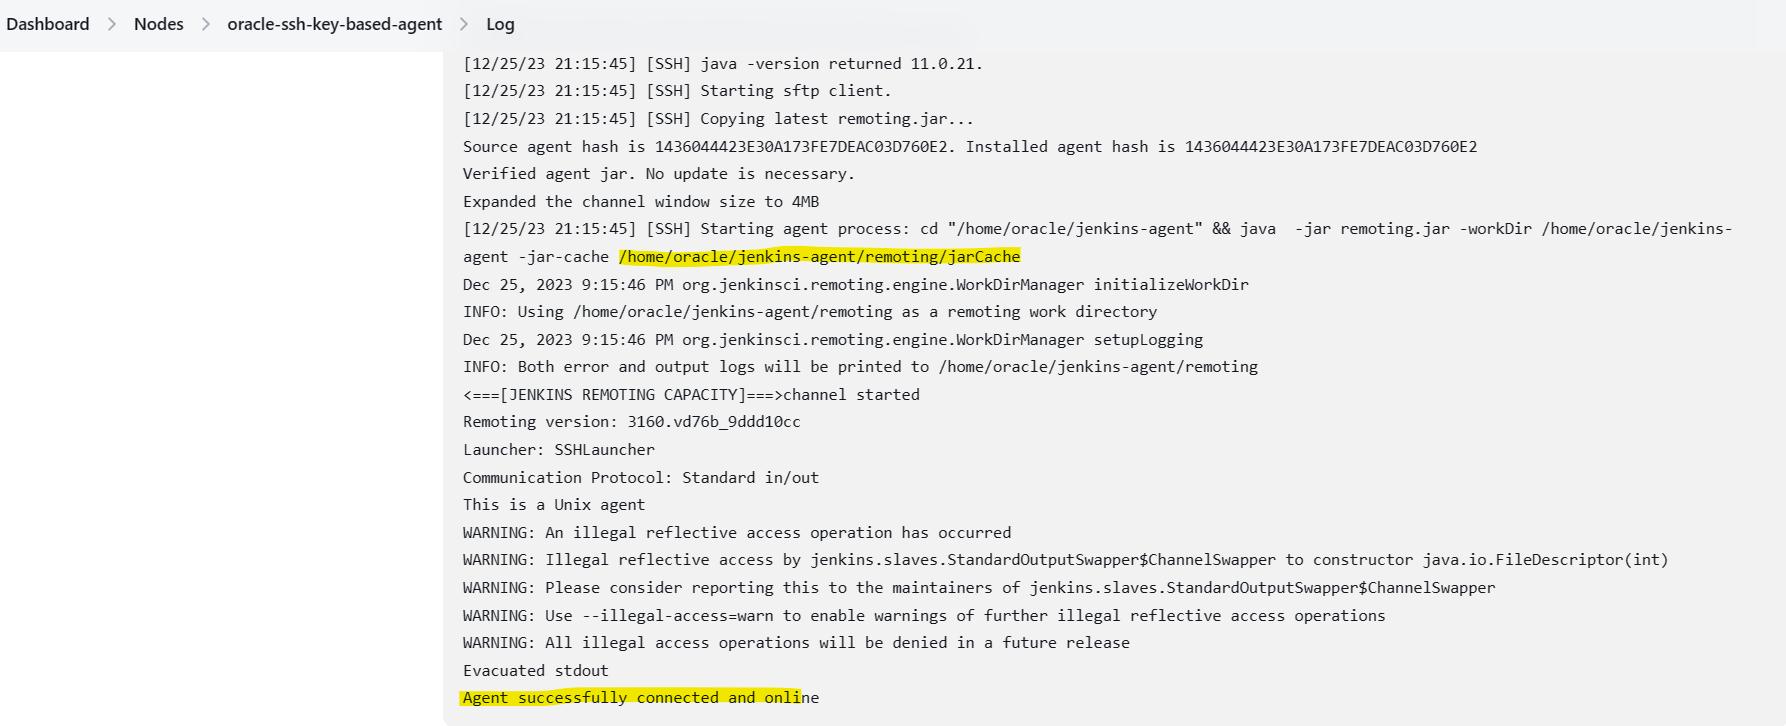
▪️ Check the log for the successful launch of the Agent.
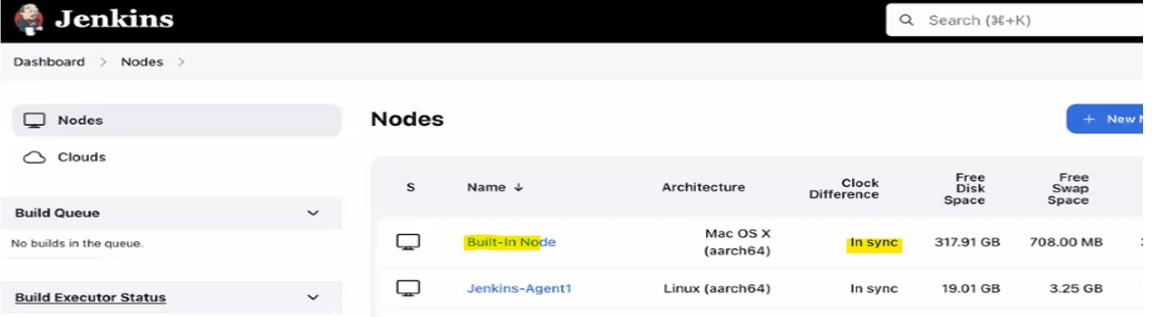
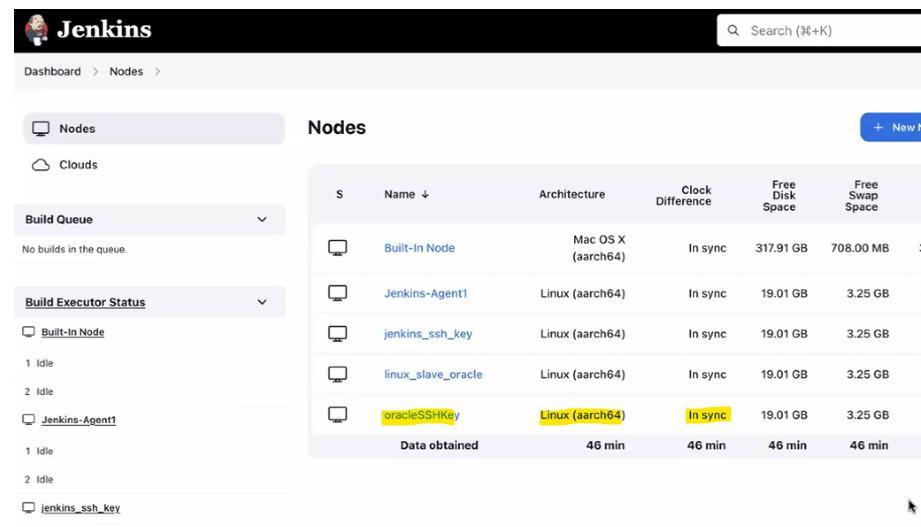
▪️ Check the Dashboard – node section which should list the newly added agent with status -In sync.
Author : Venkat Vinod Kumar Siram
LinkedIn : https://www.linkedin.com/in/vinodsiram/
Assisted by Shanmugavel
Thank you for giving your valuable time to read the above information. Please click here to subscribe for further updates.
KTExperts is always active on social media platforms.
Facebook : https://www.facebook.com/ktexperts
LinkedIn : https://www.linkedin.com/company/ktexperts/
Twitter : https://twitter.com/ktexpertsadmin
YouTube : https://www.youtube.com/c/ktexperts
Instagram : https://www.instagram.com/knowledgesharingplatform
Note: Please test scripts in Non Prod before trying in Production.